If you want to create a composing in Photoshop, the right color tone is crucial for the overall picture. It’s not just about combining images but also giving them a cohesive atmosphere. In this guide, I will show you how to effectively define the color tone and make shadow corrections to optimally integrate your cloud background into the image.
Main Insights
- The definition of the color look influences the entire composing.
- Color layers allow for easy adjustment of the color palette.
- Blending modes can be used to give the colors and brightness of the clouds a harmonious appearance.
- Clipping masks help apply color adjustments precisely to specific areas.
- With tonal corrections, brightness can be adjusted and contrast enhanced.
Step-by-Step Guide
To achieve a bluish color tone for your composing and correct the shadows, follow these steps:
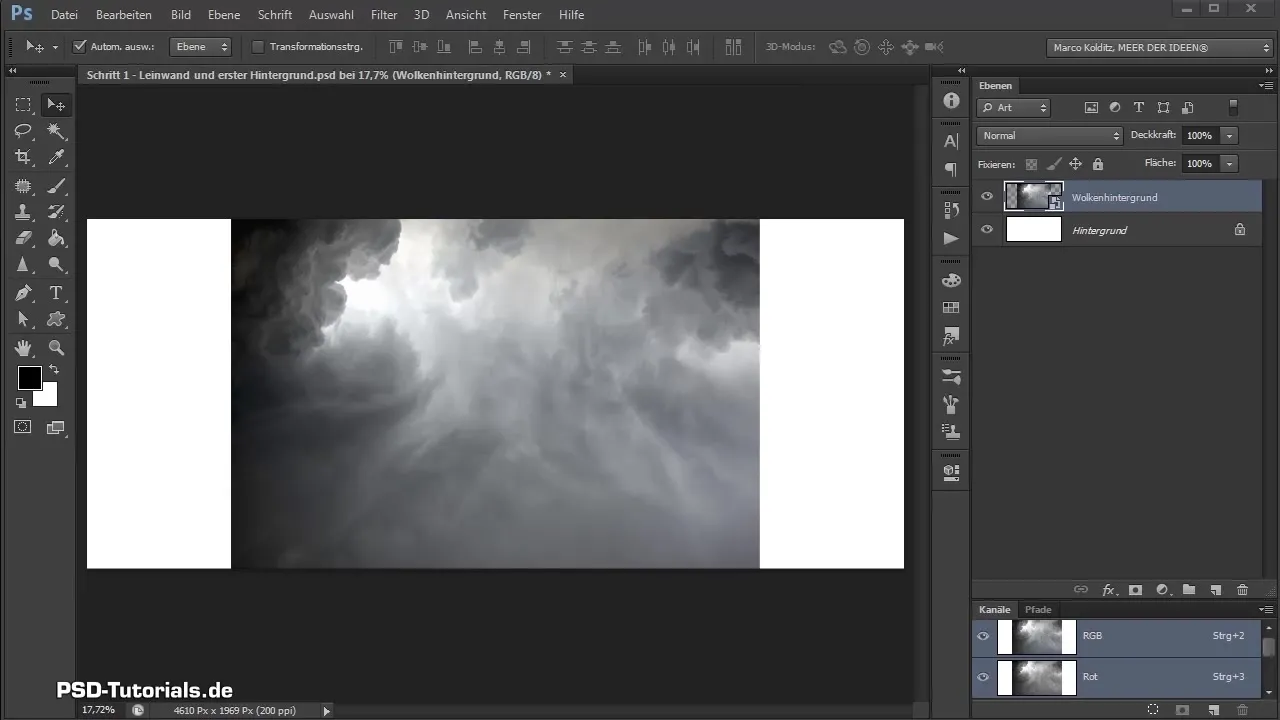
Create a color tone group First, you should group your cloud layer. This helps you stay organized. Select the cloud layer and press Ctrl + G to create a group. You can now name the group, for example, "Background Clouds."
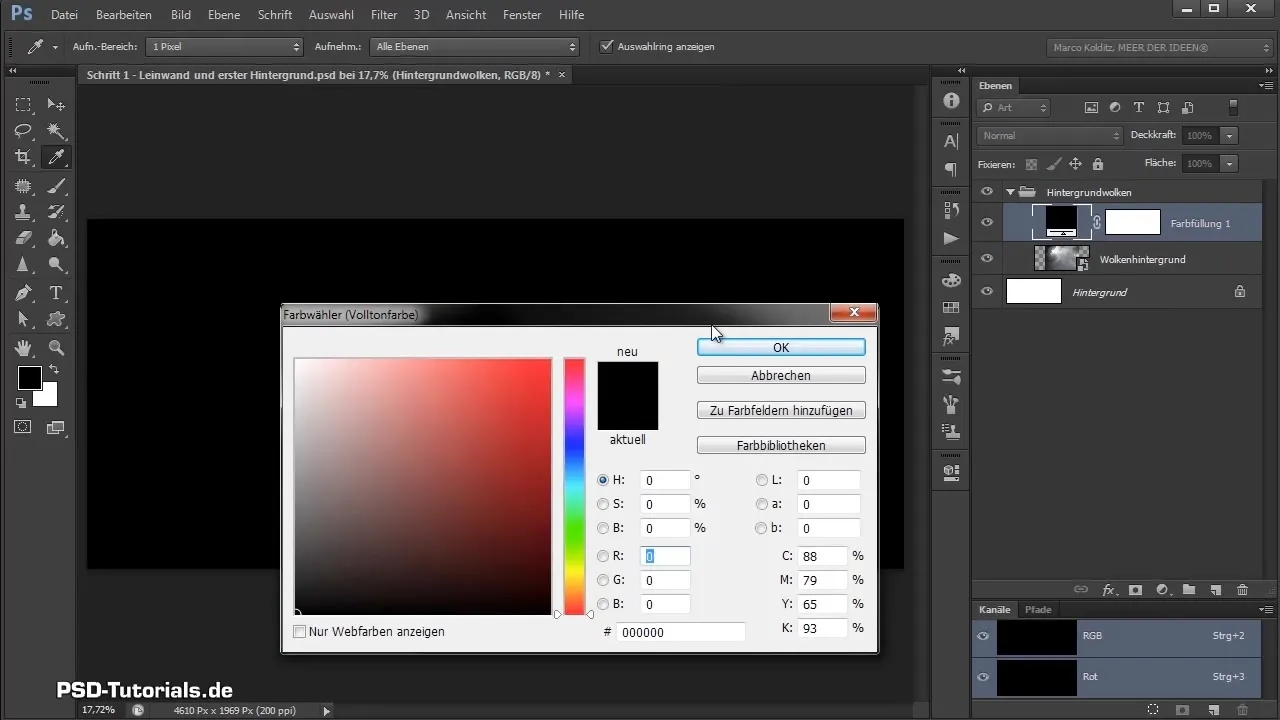
Add a color layer Now we create a new color layer that has the desired blue tone. Click on the color layer icon and select "Color Fill." Currently, it is black; pull the slider to the right until you achieve the desired blue tone.
Rename color layer To maintain clarity, rename the new color layer to "Color Tone." We can adjust the color later at any time since this is an adjustment layer.
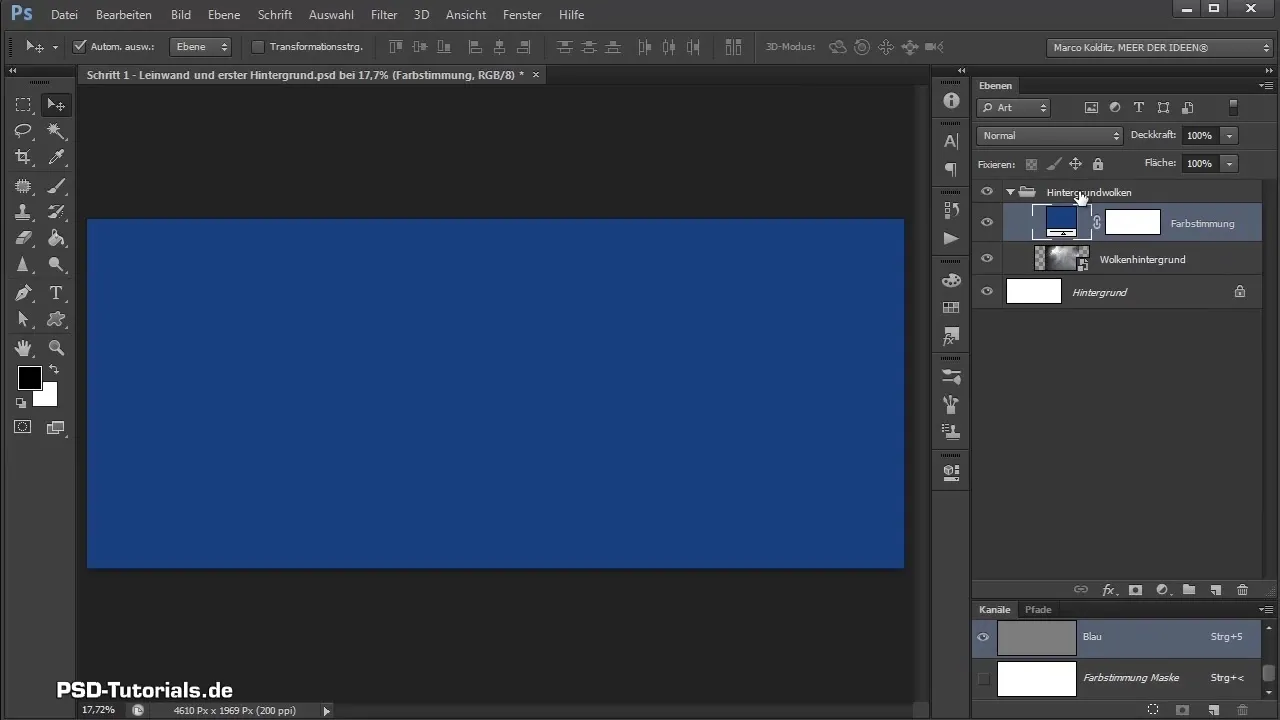
Arrange layer Now pull the color tone layer above the group of background clouds. This way, the blue tone will directly affect the background. Check that you have arranged the layer correctly by ensuring that it is above the group, not within it.
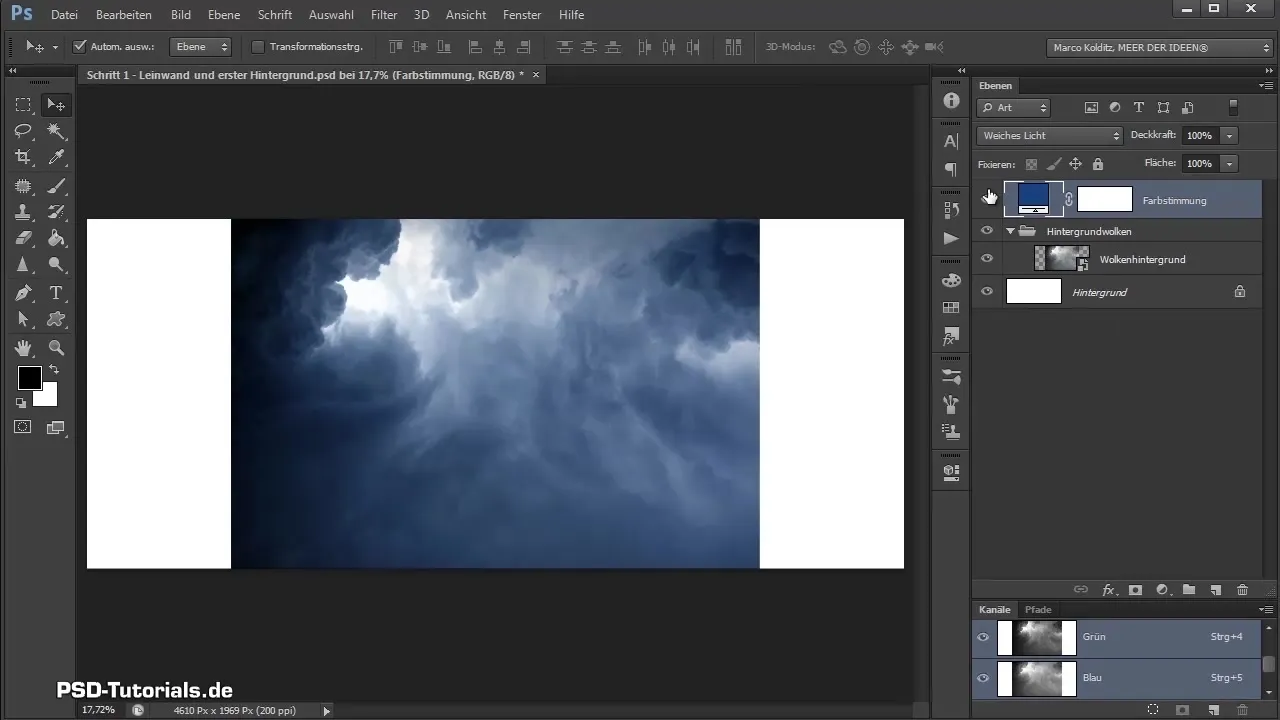
Set blending mode To transfer the color effect to the clouds, select the color layer and change the blending mode. Go to the blending mode menu and select "Soft Light." This will cause the clouds to appear bluish without overlaying the other image elements.
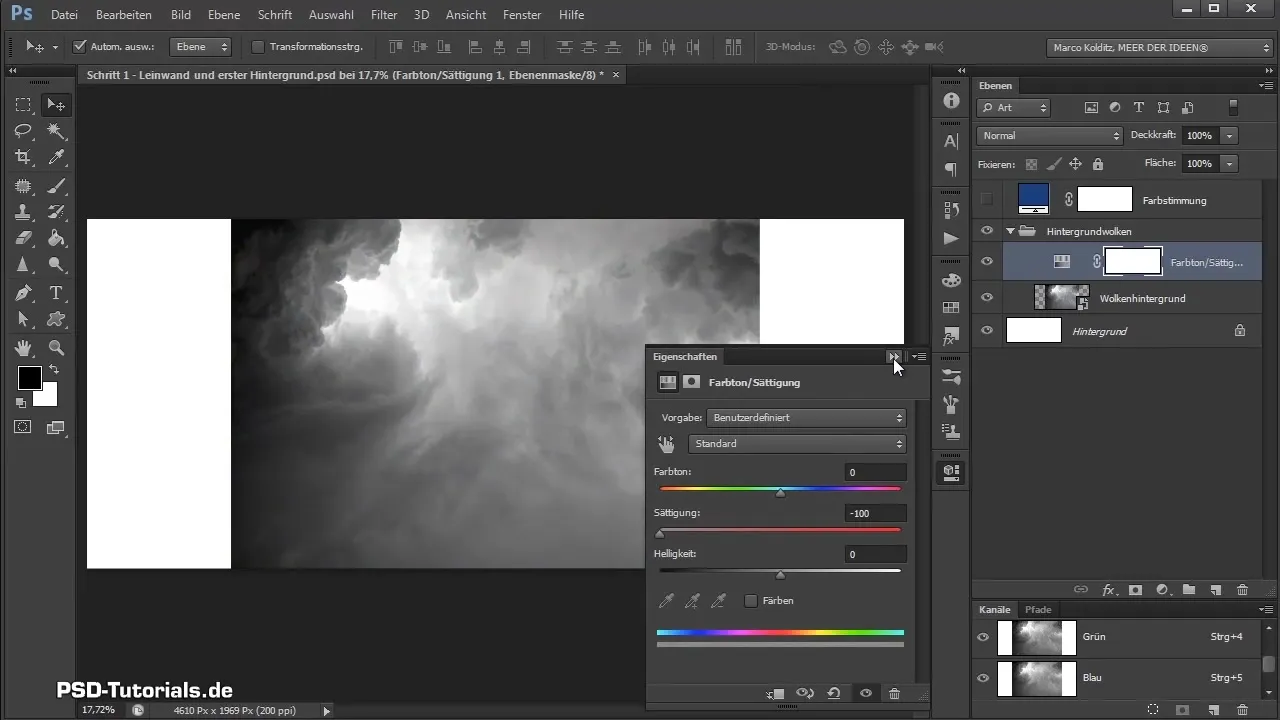
Adjust hue/saturation To ensure that the background clouds have the right color intensity, create a hue/saturation adjustment layer. Pull the saturation slider to the left to desaturate the colors of the cloud image.
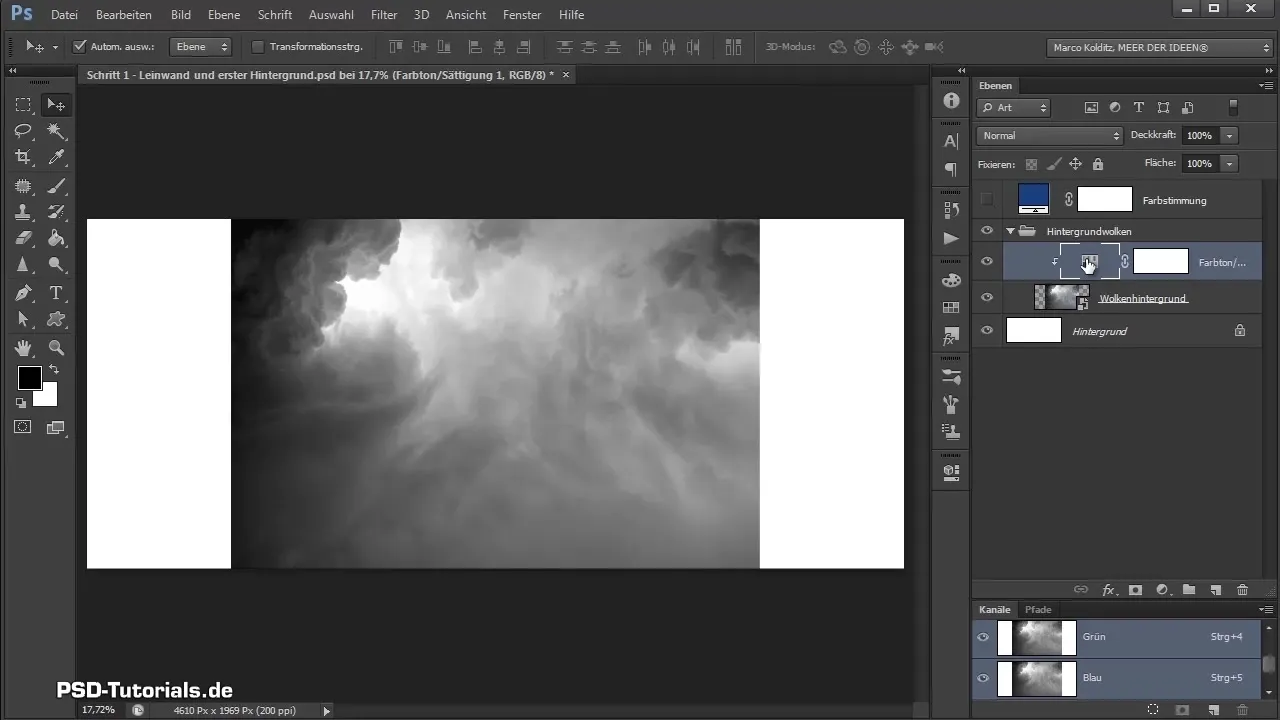
Apply clipping mask To apply the changes only to the cloud layer, create a clipping mask. Hold the ALT key and click between the two layers to create the clipping mask. This way, the saturation adjustment remains limited to the clouds.
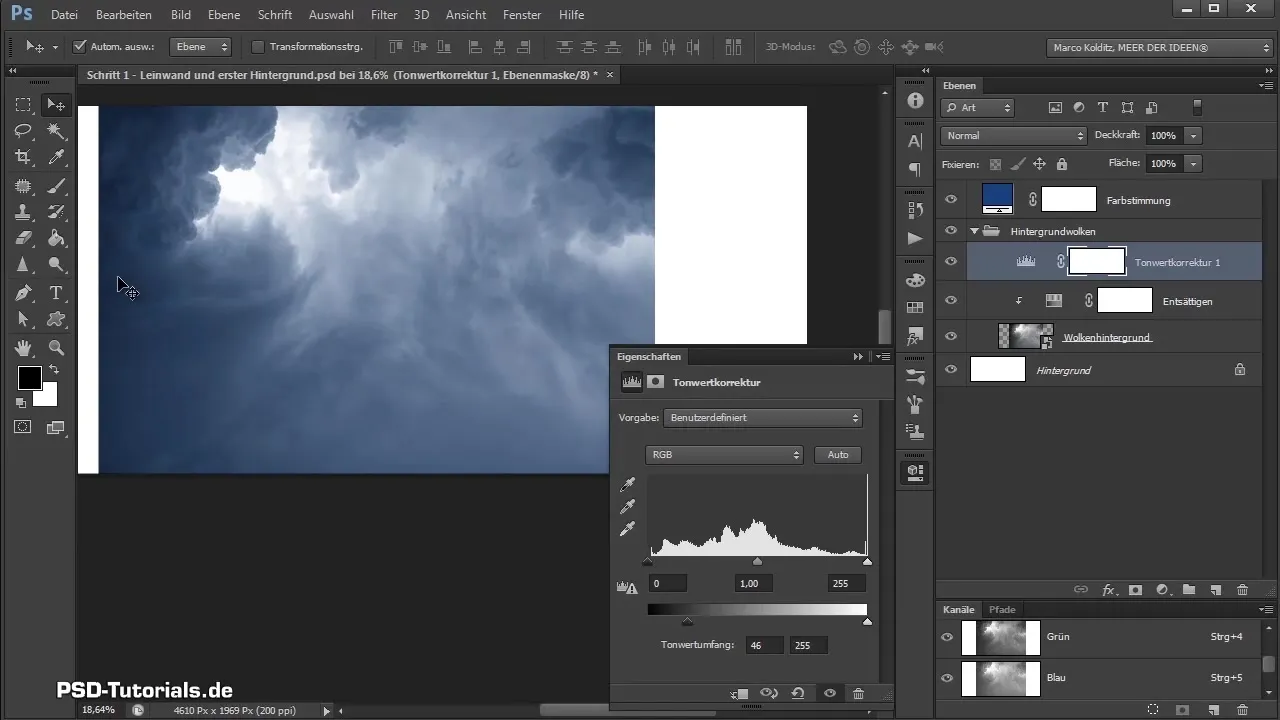
Tonal correction To correct the darkness of the clouds, create a new tonal correction layer. Here you can adjust the sliders for black and white to make the image clearer and more harmonious. Pull the black slider to the right to define black pixels, and make sure the image does not become too bright.
Edit mask Use the tonal correction mask to hide unwanted changes. Select a brush with a black foreground color to lighten the areas you want to keep. You can adjust the brush size by holding the ALT key and dragging with the right mouse button.
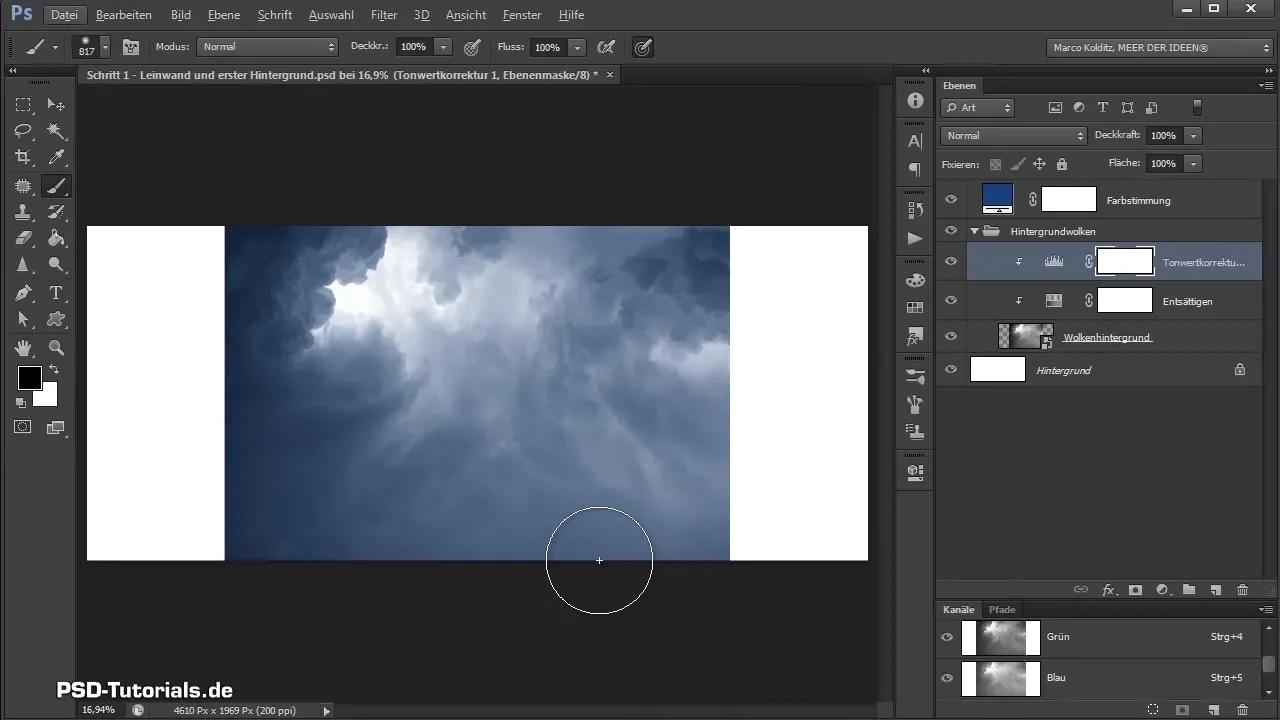
Work with opacity If you want a more precise edit, you can adjust the opacity of the brush. This way, you can fine-tune the changes by reducing the opacity and bringing more nuances into your image.
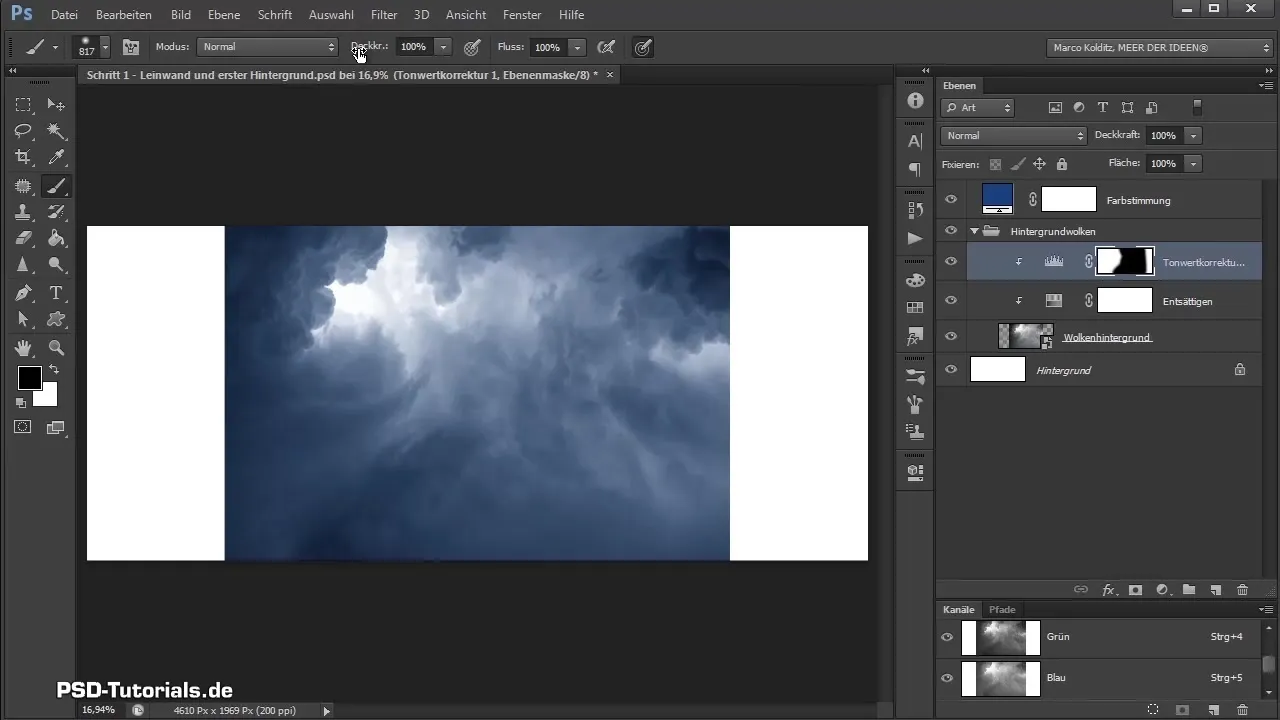
Review the result Compare the image before and after the adjustments and make sure the clouds are now harmoniously integrated into the overall concept. If everything looks good, your composing is on a promising path.
Summary - Photoshop Composing: Color Look and Shadow Correction for Your Background
In this guide, you learned how to effectively define the color tone and correct shadows to optimally integrate your cloud background into your composing. Using color layers, blending modes, and adjustment layers, especially clipping masks and tonal corrections, allows you to make precise adjustments and ensures that your image looks harmonious.
Frequently Asked Questions
How can I adjust the colors in my composing?Use color layers and blending modes to achieve the desired effect.
What are clipping masks?Clipping masks allow adjustments to be applied only to a specific layer.
How do I find the right blue tone?You can use color layers and adjust the color by double-clicking on the layer.
How do I check the result of my edits?Compare the image before and after the adjustments.
Can I undo my changes?Yes, with Ctrl + Z you can undo the last changes.


