
Do you want to add more drama to your storm composite? In this tutorial, I'll show you how to prepare lightning photos cleanly, place them in your composition, and warp them so that they look convincingly embedded in the clouds.
The video is only loaded from YouTube when you play it – data (including your IP address) is then transmitted to YouTube/Google. More in the privacy policy
Introduction
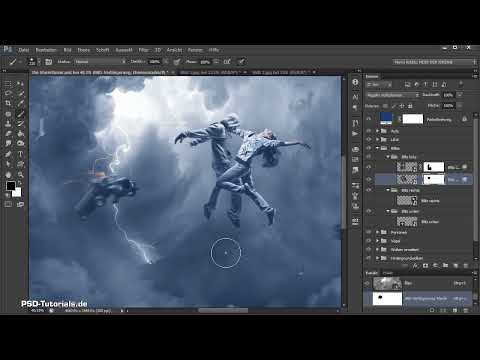
A storm without lightning quickly looks flat. In the composite from Part 15 of the "Storm Dancers" series, you add three lightning bolts, each with its own function: a main bolt on the right, a bolt in the bottom corner, and a bolt on the left, which you extend with an addition. You work with real lightning photos, Smart Objects, blending modes, masks, and warps. The result should look as if nature had sent exactly these bolts into exactly these clouds.
Key Takeaways
Organize the lightning bolts in their own group and in subgroups for each bolt so you keep an overview.
Prepare each lightning photo by cropping, desaturating, and adjusting the contrast before you drag it into the composite.
Convert the lightning layers into Smart Objects so you can freely warp them later.
Set the blending mode to "Screen" so that the dark areas of the photo disappear and only the bright lightning bolts remain visible.
Use the layer styles to soften hard edges with the "This Layer" and "Underlying Layer" sliders.
Use masks with soft brushes to let lightning bolts fade out gently in the clouds.
Step-by-Step Guide
Creating the Lightning Group
Start with organization, because with many layers you will otherwise quickly lose track. Select the group of people and click the folder icon to create a new group above it. Name it "Blitze". Within this group, create three subgroups and name them "Blitz links", "Blitz rechts", and "Blitz unten". That way you will later know exactly which layer belongs to which bolt.

Opening and Cropping the Lightning Photos
Open the lightning photos via "File > Open". Hold down the Shift key, select both images, and confirm with "Open". Then choose the Crop tool and crop the images so that distracting elements such as the city in the lower area disappear. In this photo, I also cropped the right side until the composition looked balanced.


Desaturating the Photo and Increasing the Contrast
Desaturate the image with the keyboard shortcut Ctrl, Shift, and U. Then increase the contrast using Levels with Ctrl and L. Drag the black slider to the right so that the background becomes darker, and move the gray slider slightly until the lightning bolts stand out clearly. Leave the white slider untouched in this step, as it would make the lightning bolts blow out too much. Here you deliberately work not with an adjustment layer, but destructively. That is fine if you know exactly what you want to achieve.


Placing the First Lightning Bolt in the Composite
Drag the edited photo onto your canvas. For the bolt on the right, convert the layer into a Smart Object and name it accordingly. For the bottom bolt, hold down the Alt key and drag the layer to duplicate it into the "Blitz unten" folder. With Ctrl and T you can scale the layer and place it in the bottom corner. Hide the other bolts in between so you can better judge the position.

Preparing the Left Lightning Bolt
For the left bolt, take a second photo and crop it so that the landscape at the bottom is removed. In this case, I find the clouds at the top particularly fitting, so the upper area is kept. Desaturate the image again with Ctrl, Shift, and U and increase the contrast in Levels. Feel free to take your time here and adjust until you like the lightning bolt. Then place the image in the composite and also convert it into a Smart Object so you can warp it later.


Extending the Lightning Bolt
The left lightning bolt should not only strike but also get an extension. Duplicate the layer within the same group and name it "Lightning Extension". Scale it and place it in the area where the lightning should continue. Then confirm with Enter.
Setting the Layer Mode to "Screen"
Now comes the decisive trick. Set the layers of all lightning bolts to the "Screen" mode. The dark areas of the photo disappear as a result, and only the bright lightning bolts remain visible. Your lightning now really strikes in the clouds. If white haze is still visible, we'll take care of that in the next step.

Using Layer Styles for Soft Transitions
To soften the hard edges, open the layer styles by double-clicking to the right of the layer name. Make sure not to click on the name or the icon. The sliders at the bottom are crucial here. The "This Layer" slider hides bright areas of the lightning when you drag it to the left. The "Underlying Layer" slider hides dark areas of the layers below. Hold down the Alt key and click on one of the arrows to split the slider. This creates a softer transition. The remaining glow can stay, because it looks natural.

Applying Masks and Removing Unwanted Areas
Create a layer mask for the lightning bolts. Set the foreground color to black, paint over the areas you don't like with full opacity, and then confirm. For the lightning bolt in the corner, mask the upper area so that only the desired part remains. With lower opacity and a soft brush, you create a softer transition in the clouds.

Flipping and Rotating the Lightning Extension
For the extension lightning bolt, choose flipping or rotating via "Edit" and "Transform" so that it runs around the corner. Confirm with Enter and set the mode to "Screen" again. Here too, you can take out a little of the black in the layer styles and clean up the edges with a mask.

Warping the Lightning and Unlinking the Mask
Now it gets a bit tricky. If you warp a layer with a mask, Photoshop can cause problems. Therefore, before warping, unlink the image from the mask by clicking on the chain icon. After that, you can adjust the image via "Transform" and "Warp". If the mask no longer fits afterwards, fill it with white and mask the areas again. This detour is annoying, but it keeps the result clean.

Opacity and Fine-Tuning the Lightning Bolts
With the layer's opacity, you can generally weaken the lightning. Make sure the effect remains coherent in the overall image, and refine the mask again if needed. A lightning bolt can safely disappear a little into the clouds so that it doesn't look pasted on.

Warping and Placing the Right Lightning Bolt
The right lightning bolt is first set to the "Screen" mode. Then you flip it vertically so that it runs upward and plays around the clouds. Before you create a mask, you warp it directly so that the problem with the linked mask doesn't arise in the first place. Drag the corner points so that the lightning begins in the dark area and runs gently upward. You can ignore the bright secondary lightning if it seems too strong to you.

Fine-tuning the lightning with layer styles and levels adjustment
Using the layer styles, you trim the black area a little more. Then you completely mask the right area with low opacity and a soft brush. If you also want to control the brightness, place a levels adjustment as a clipping mask over the layer. This way you can make the lightning brighter or still adjust the result at the end.


Enhancing the glow with Gaussian Blur
To make the lightning glow more strongly, you convert the lightning layer into a Smart Object and apply the "Gaussian Blur" filter. You can find it via "Filter", "Blur" and "Gaussian Blur". With a value of around 7, the lightning already looks very nice. You can increase or decrease the value as you like.

Adding the shimmer in the clouds
Finally, you add a certain shimmer. To do this, create an empty layer, set it to "Screen", and paint light strokes into the clouds with a soft brush, for example on the right side. This way the clouds look slightly brightened overall and more coherent.

Summary ??? Placing lightning in clouds: Photoshop tutorial for realistic storm lightning
You have learned how to incorporate lightning into a storm composite, prepare the photos, blend them using the "Screen" layer mode, and integrate them convincingly with layer styles, masks, and distortions. With groups, Smart Objects, and a targeted glow, you achieve a coherent result that you can refine even further in additional steps.
FAQ
Why should I organize lightning in its own group?A dedicated group with subgroups for each lightning bolt keeps things organized, especially when many layers accumulate.
Why do I convert the lightning photos into Smart Objects?Smart Objects can be distorted, scaled, and blurred at any time later without any loss of quality.
What does the "Screen" mode do?It blends the layer with the background so that dark areas of the photo disappear and only the bright lightning remains visible.
What do I do if the mask causes problems when distorting?Unlink the image and mask via the chain icon before distorting. If necessary, fill the mask again afterwards.
How do I remove hard edges on the lightning?Open the layer styles and split the sliders by holding down the Alt key. This creates softer transitions.
How do I make the lightning glow?After converting the lightning layer into a Smart Object, apply the Gaussian Blur to it. A value of around 7 is a good starting point.


