

A rocket launch without the typical cloud of explosion at the ground quickly looks lifeless. This is exactly where you add a white cloud that credibly accompanies the launch. Before it moves over to the church tower, however, you need to cleanly separate it from the blue background. In this tutorial, you use the Color Range and a layer mask for this. You will learn to take the lighting situation into account, to adjust the tolerance step by step, and to refine the edges so that in the end nothing looks like a photo composite.
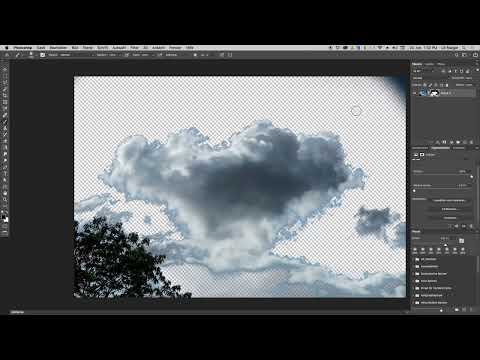
The video is only loaded from YouTube when you play it – data (including your IP address) is then transmitted to YouTube/Google. More in the privacy policy
Key Takeaways
- With a solid-colored background, selecting via Color Range is quick and precise.
- The tolerance determines how many shades of blue end up in the selection. You lower it step by step until the cloud is clearly recognizable.
- By holding down the Shift key, you extend the selection with additional blue values around the cloud.
- Problem areas such as corners and the base where the cloud meets the cloud bank are edited specifically with the brush.
- Soft transitions are created in the brush mode Soft Light/Overlay-like "Ineinanderkopieren" (Blend/Overlay), not by hard cuts.
Step 1: Assess the lighting situation of the cloud
Before you select anything, take a close look at the cloud. The light comes from the left, and the sun is behind the cloud. So it is a backlit situation. As a result, the cloud looks slightly transparent in some places. You can use this effect later when you place the cloud to the left of the church tower. Keep it in mind while masking, because bright, translucent areas must not be lost by accident.

Step 2: Create a layer mask and open the tool
First, create a layer mask for the cloud layer. Then look in the Properties panel for the option "Select and Mask". If it does not appear there, you will find it in the menu under "Window". Open the "Select and Mask" area there and choose Color Range as the selection method. The Color Range remembers the last value used. In this example, it was 44. If you want to work with the same settings as in the video, you can therefore adopt this value.
Step 3: Sample the color range and increase the tolerance
Make sure the "Invert" checkbox is not ticked. This ensures that Photoshop selects the blue areas and not the cloud. Then move the tolerance to 200. Afterwards, click once in one of the blue areas. The location does not matter. At the moment, the selection probably still looks imprecise. That is intentional, though, because you want all learners to have the same starting point.

Step 4: Lower the tolerance step by step
Now comes the actual fine-tuning. Reduce the tolerance slowly. In doing so, the cloud first becomes darker, because more and more shades of blue drop out of the selection and the cloud itself is marked as part of the background. Work your way down to about 44 or 43, or even lower if necessary. Orient yourself solely by the image and not by your feeling for the value. In the end, the cloud must stand out clearly from the blue surroundings.

Step 5: Sample blue values around the cloud with Shift
Now hold down the Shift key and click on the blue values that surround the cloud. Go around it as completely as possible so that all transition areas are included in the selection. You do not have to hit every point, because you will correct the mask later anyway. What matters is that the cloud itself is no longer black after this sampling. If the selection is too weak in certain places, you can add individual blue values specifically.

Step 6: Identify problem areas and invert the mask
After extending the selection, two typical problem spots remain. The first is the corners of the image. There is dark blue there that gets included in the selection. These corners can easily be masked out, though. The second problem spot is the area where the cloud is attached to the cloud bank. You do not need that for your cutout. Instead of laboriously excluding this area, simply invert the mask. To do so, click on "Invert". Afterwards, you can already see which weaknesses still remain. That is fine, because the fine-tuning follows in the next step.

Step 7: Clean up the mask with the black brush
Select the Brush tool, set the color to black and the opacity to 100 percent. Enlarge the brush tip to quickly paint away the corners and other unnecessary areas. The tree in the image also doesn't belong to the cloud and can disappear. However, make sure the brush tip isn't too soft, otherwise you will unintentionally remove parts of the cloud. Work near the cloud with a smaller tip and carefully. It's better to invest a bit more time than to look for mistakes later.

Step 8: Cut hard edges cleanly
Not every edge has to be soft. Some spots where the mask doesn't blend well lie outside the visible area of the finished scene. A smooth cut is enough there. Simply draw a clear line with the brush so that the unwanted remnants disappear. In this step, check whether the area is actually not visible in the finished composition. Only then can you proceed this way without it being noticeable.

Step 9: Paint soft transitions in Overlay mode
For the edge areas that remain visible, you need soft transitions. To do this, select the Overlay mode in the options bar of the Brush tool. It is important that you set the blending mode on the tool itself and not assign it to a layer. With this mode you can also paint in black mask areas without anything visible changing there. This gives the edges a natural gradient that fits excellently into the scene.

Step 10: Check the mask and remove leftover clouds
Next, display the mask to critically check the result. There you can see very precisely which spots still contain remnants of the cloud. Once you have found them, switch back to black, undo the Overlay mode and set the blending mode to Normal. Then remove the remaining little clouds with the brush. Afterwards, return to the normal view to assess the result in the image.

Step 11: Place the cloud and check the edges
When the cutout is provisionally finished, select the actual tool again and activate the Move tool. Bring the cloud to the desired position, that is, to the left of the church tower. Make sure it fits the lighting situation you identified in step 1. The edges are probably not perfect at this point. That is normal, because with the cloud you usually have to make further improvements. The basic cutout is done, though, and the cloud already sits well in the image.

Summary – Cutting out a cloud in Photoshop: Layer mask with Color Range
With Color Range, a carefully set tolerance and a layer mask, you can cut out a cloud against a solid-color background quickly and convincingly. Decisive are the step-by-step fine-tuning, the targeted masking out of problem areas and soft transitions in the Overlay brush mode. If you keep the lighting situation in mind, the cloud will fit harmoniously into the rocket launch in the end.
FAQ
Question: Why should I use Color Range and not the Magic Wand?Answer: Color Range captures similar color tones more precisely via the tolerance and can be fine-tuned, which offers significantly more control with a uniform background.
Question: What does the value 44 mean for the tolerance?Answer: It is the most recently used value in Color Range. Photoshop remembers it, and in this tutorial it serves as a guide for further fine-tuning.
Question: Why must the Invert checkbox not be checked at the beginning?Answer: Without the checkmark, the blue areas are selected. The cloud is then specifically cut out by inverting the mask later.
Question: When should I use the Overlay mode?Answer: You use it with the brush for visible edge areas where you need soft transitions. Painting in black mask areas remains invisible in the process.

