

Many people who cut out subjects rely on the "Select and Mask" function and expect Photoshop to do the rest. With clear contours, this often works surprisingly well. But as soon as thin structures such as railings, wires or grids come into play, the tool quickly shows its limits. In this tutorial, you will see exactly where the automatic mask refinement fails, and you will learn how to edit the layer mask by hand instead.
The video is only loaded from YouTube when you play it – data (including your IP address) is then transmitted to YouTube/Google. More in the privacy policy
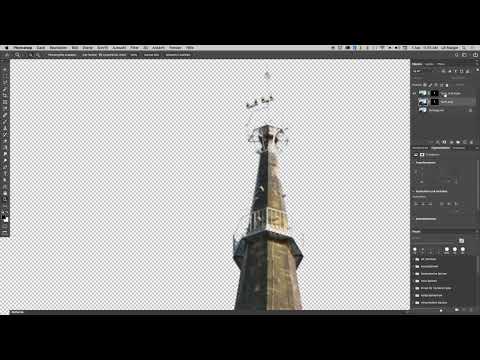
The starting point is an image with a tower that is to be cut out from its surroundings. In some places the contours are straight, in others they are intricate. This is exactly where the wheat is separated from the chaff.
Key Takeaways
- The "Select and Mask" function delivers usable results with rough edges, but fails with fine structures.
- A radius that is too large destroys edges that were clean before. A radius of about one pixel is often the safest value.
- Once the refinement has been applied, you should not build on it again. It is better to start over from the original layer.
- Manual editing with a small brush on the layer mask delivers the most reliable results.
Step-by-Step Guide
Step 1: Create a Layer Mask and Check the Result
First, create a layer mask so you can see how the tower is separated from the background. Depending on the selection, either the tower or the entire surroundings will be isolated afterwards. Neither is a problem, because the mask can be inverted with the keyboard shortcut Ctrl+I (Mac: Cmd+I). After it is created, the mask is usually already active, so you only need to look at the result.

Step 2: Invert the Mask and Examine the Result Closely
If the wrong side is isolated, invert the mask with Ctrl+I. Then zoom in closer to the edges. Pay particular attention to the upper area of the tower, because that is where the typical problems show up. The edges initially look smooth here, but on closer inspection, hard transitions and fraying become noticeable.

Step 3: Open "Select and Mask"
Open the function by double-clicking the layer mask in the Properties panel, or alternatively via the corresponding menu. The first time, Photoshop asks whether you want to start the function by double-clicking. Confirm this so that double-clicking works directly in the future.

Step 4: Set the View and Opacity for Control
Set the display to a black background so that you can better see light edges and residual colors. You should set the layer opacity to 100 percent, otherwise the background cannot be judged properly. With this setting, you can best see what is actually happening to the edge.

Step 5: Test Smart Radius and Recognize Its Limits
In the first pass, it becomes apparent that the edge has become very hard and stair-stepped through the automatic processing. Smart Radius promises a remedy here, but the radius can only be used sensibly if a cautious value was set beforehand.
Therefore, first set the radius to about one pixel. The edge then already looks much smoother. It is tempting now to increase the value to 20 pixels or more. However, you will lose the areas that were clean until now, for example on the lower part of the tower. The edge is completely eaten away there. A larger radius is therefore not a solution for this image. Stick with a small value.

Step 6: Use the "Refine Edge" Tool Only Sparingly
For the upper area of the tower, the "Refine Edge" tool helps, which you can find via the toolbar or the context menu. Go over the problematic areas with it and observe whether image content returns and the edge looks better.
In this example, it brings only a limited improvement. Part of the railing does come back, but the result remains unsatisfactory. This very tool should therefore be the point at which you realize that the automatic method has been exhausted. Confirm the selection and exit the function.

Step 7: Start over with the original layer
You should not correct the layer you have already edited again. Every further processing step amplifies the artifacts and worsens the result. Therefore, delete the edited copy and go back to the original layer. Apply the layer mask there anew and from now on continue working only manually.

Step 8: Repaint fine structures with the brush on the layer mask
Show the background on the layer mask so that you can see exactly which areas are still missing. Typically these are thin wires, iron reinforcements, or railing bars. Choose a small brush of about two pixels in size and set the brush opacity to around 70 percent. Otherwise the thin lines will be too transparent, and you won't get clean transitions.
Repaint the lines with white on the mask, because white makes things visible, while black hides them. For straight lines, click once at the starting point and then hold down the Shift key while you click on the end point. For longer, continuous structures, it is best to work without the Shift key and guide the brush in one stroke along the contour. For thicker areas, you may choose a larger brush.

Step 9: Check the result and perform fine-tuning
Briefly show the background again and again to check your work. This way you can quickly see which spots still have gaps. Areas that should be fully retained are repainted with white at full opacity. With black you can specifically remove remnants of the background. This approach takes patience, but leads to a very clean result.
Summary – Optimizing a layer mask in Photoshop: Manually isolating fine edges
The "Select and Mask" function is a useful helper, but it quickly reaches its limits with fine structures. A radius of about one pixel improves the edges, while larger values often destroy them. The "Refine Edge" tool can help in individual spots, but does not replace clean rework. If the result is not convincing, it is best to start over with the original layer. Then you repaint thin structures with a small brush directly on the layer mask. This takes some time, but reliably delivers good results.
FAQ
Why does the edge look so hard after refining?The radius is often too high or the view is set too imprecisely. A radius of about one pixel and a view on black help to better recognize stair-step effects.
Why should I avoid a larger radius?Larger radii can destroy clean edges and cause areas that previously looked good to fray. Therefore, a cautious value is usually the better choice.
Can I correct the already refined layer further afterwards?This is not recommended. Further processing amplifies artifacts. It is better to start over with the original layer.
Why do you work with 70 percent opacity for the brush?At full opacity, thin lines often become too transparent or uneven. With 70 percent, the transitions can be controlled better.
What is the Shift key used for when painting?With the Shift key held down, you connect two click points with a straight line. This is practical for railing bars or straight wires.
How can I tell whether the mask is clean?Show the background again and again and check the edges for gaps or remnants. A view on black shows residual colors most clearly.

