

A cut-out cloud still looks like a foreign object on its own. Only when it sits in the right place, is scaled and rotated appropriately, and blends softly into the image does the scene begin to work. That is exactly what this section is about: You refine the edges of the cloud, place it below the rocket in the image, and add a second cloud that balances the picture. In the end, the impression is created that the church tower is just taking off.
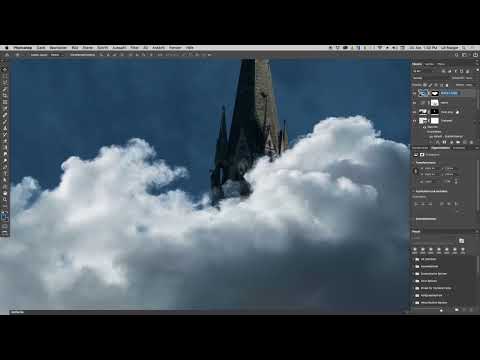
The video is only loaded from YouTube when you play it – data (including your IP address) is then transmitted to YouTube/Google. More in the privacy policy
Key Takeaways
- The edges of a selection determine how believable the cloud looks. With the radius in "Select and Mask", you bring back the fine, fluffy edges.
- Smart Radius is a tool for exceptional cases. Use it only if unsightly gaps appear after the radius adjustment.
- A layer mask with a black fill and a white brush is more flexible than erasing. You can make areas visible again at any time.
- A low brush opacity, around 10 percent, creates soft streaks that make the launch look more dynamic.
Step-by-Step Guide
Bring the cloud into the image and position it
Open the file with the cut-out cloud and select the Move tool. Drag the cloud to the center of the image so that you can evaluate it at all. Its final position is not yet decisive; more fine-tuning will follow later. For now, just make sure that the cloud is clearly visible and that the layer mask is then displayed correctly.

Open the mask and switch to "Select and Mask"
Click on the layer mask of the cloud so that it is active. In the Properties panel you will find the "Select and Mask" button. This is where all the tools for refining the edges of your selection are located. The command is the same one you used earlier to find the color range, so the workflow stays familiar.

Adjust the mask opacity and view
By default, the mask opacity is set to 50 percent. You can leave it as it is, set it to zero, or set it to 100 percent. This is a matter of clarity, not of the result. What matters is the view: Select "On Layers". Then you see the layers underneath directly in the image and can immediately tell whether the cloud works against the background. With Command plus (Ctrl plus on Windows) you zoom in closer to the edges.

Set the radius for the soft edges
The selection you made at the beginning is too hard. That is why the cloud still looks artificial at the edges. Set the radius to a value between 25 and 40 pixels. In this tutorial, a value of 38 pixels proved to be suitable. Photoshop calculates for a moment, after which the fine, fluffy edges return. The difference is clearly visible, so compare before and after before you continue.

Check the fluffiness and use Smart Radius selectively
Check the edges using the zoom function. If they are soft again, you do not need Smart Radius. It is only necessary if gaps or unnatural cuts suddenly appear after the radius adjustment. Photoshop then compares the shape with cloud shapes from its experience and closes holes accordingly. Use it sparingly and always check the result in the image afterwards.
Output to a new layer with a layer mask
Confirm the selection with "OK" and choose "Layer Mask on New Layer" as the output (that is, the selection as a layer mask in a new layer). This option leaves you the ability to edit the mask again later. The result is a new layer containing the refined cloud. The original layer is initially kept so that you have a direct comparison.
Comparison with the original layer and cleanup
Show and hide the new layer to compare the old and the new cloud. The difference should be clear. If the result is satisfactory, you can delete the original layer. If you still want to improve something, it is best to edit the source layer again rather than the result. That way you do not lose any information.

Name the layer and check the placement beneath the tower
Give the layer a clear name, such as "Cloud 01". With multiple layers, this will save you a lot of time later. If you drag the cloud directly beneath the tower, the bright white immediately disappears into the night layer below it. The cloud must therefore sit above the layer that darkens the image. Keep an eye on the order of the layers, otherwise the effect is lost.

Shrink the cloud and place it at the engines
Scale the cloud with Command T (Ctrl T on Windows). Hold down the Shift key to keep the proportions. Make it a bit smaller and rotate it slightly until it fits the engines. If you are working with a Smart Object, you can adjust the size at any time without loss of quality. This is especially helpful if you are not yet sure how large the cloud should appear in the end.

Duplicate Cloud 01 and flip it as Cloud 02
Since the cloud covers only one half of the effect, duplicate the layer "Cloud 01" and name the duplicate "Cloud 02". Then rotate it using Command T so that it sits on the other side of the church tower. This creates a symmetrical-looking cloud formation on the left and right. Let the cloud run a bit steeper so the image doesn't look boring.

Edit the layer mask for Cloud 02 with a soft brush
The edges of the second cloud are too conspicuous in some places. Create a layer mask for Cloud 02 and carefully remove the distracting edges with a soft brush. Work with restraint so the transitions stay natural. The mask is only a fine correction, not a radical cure.

Group the layers and create a black group mask
Select both cloud layers and create a new group from them. This group then gets its own layer mask. Hold down the Alt key when clicking the mask icon, which creates a black mask that hides everything. That sounds impractical at first, but it's the trick: you now paint with white to reveal precisely the areas where the cloud should be visible.

Paint cloud areas selectively with a white brush
Take a normal brush with white color and 100 percent opacity. Start at the top, where the cloud should definitely be visible. If you later find that an area shows too much, simply paint over it with black. This method is flexible and prevents you from irrevocably deleting parts of the cloud.

Add side areas with a smaller brush
On the other side of the tower, you proceed in the same way, but with a smaller brush. The cloud should be visible there up to a certain height. You don't have to work perfectly at this point, because the connection to the actual launch point is created later. The current cloud is a preliminary impression that you can refine with additional layers.

Paint in streaks with ten percent opacity
Now choose a larger brush and set the opacity to 10 percent. Use it to paint light cloud streaks over the roof and into the trees, so that part of the cloud already becomes visible without showing the typical cloud shape at full strength. At 10 percent, soft, transparent layers are created that enhance the impression of movement. It's a kind of preview of the explosion.

Build up cloud intensity by tapping multiple times
If you want a spot to be stronger, you don't have to increase the opacity. Simply tap several times with the brush over the same spot. At 10 percent, the effect adds up until, after a few passes, you practically reach the full cloud shape. This way you keep control over the gradient.
Summary ??? Rocket Launch in Photoshop: Cutting Out a Cloud and Placing It Logically
You have refined the cloud, softened it with the right radius, and moved it onto its own layer. Then you scaled it down, rotated it, and added a second cloud. With a group mask and a white brush, you fine-tuned the visibility and added soft streaks with a low opacity. The cloud is now ready for the next step: more power and impact, so that the rocket launch is convincing.
FAQ
Why should I set the view to "On Layers"?With this view, you see the layers beneath the cloud directly in the image. This way, you immediately see how the edges interact with the background.
When do I really need Smart Radius?You only use Smart Radius if gaps or unnatural cut-ins appear in the cloud after the radius correction.
Why shouldn't I delete the original layer right away?The original layer serves as a comparison. As long as you are not sure that the result works, you can fall back on the starting point at any time.
Why do I create the group mask in black with the Alt key?A black mask hides everything. With a white brush, you then selectively paint in the areas where the cloud should be visible. Mistakes can be corrected with black at any time.
Can I merge Cloud 01 and Cloud 02 into one layer?Yes, that is possible once you are happy with the placement. Until then, it is worth editing both layers separately, because then you can make corrections independently of each other.

