

Anyone who zooms in close on a 3D object in Photoshop often gets an unpleasant surprise: edges look stair-stepped, surfaces are grainy, and shadows appear where they don't belong. Using an engine as an example, this tutorial shows you how to fix these problems with rendering. This includes limiting the render area, adjusting material and light, and turning off distracting shadows.
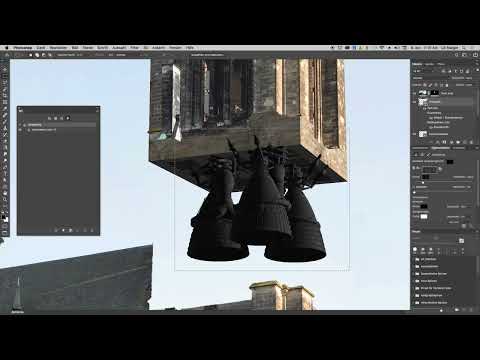
The video is only loaded from YouTube when you play it – data (including your IP address) is then transmitted to YouTube/Google. More in the privacy policy
Key Takeaways
In Photoshop, a 3D object is initially only a mathematical description. Only rendering converts color, geometry, light, and surface properties into real pixels. Before that, you only see a rough preview.
You can limit the render area with a rectangular marquee selection. This way the renderer only has to calculate the object, not the entire background. That saves time.
Materials that are too bright and light sources with shadows distort the result. Lower the base color in the material area and turn off shadows selectively. Afterwards, adjust the intensity of the directional light.
Rendering can be canceled at any time with the Escape key and undone with Ctrl/Cmd+Z. So you don't have to wait until the end, but can evaluate an intermediate stage at any time.
Step-by-Step Guide
Step 1: Identify the Problem in Detail
First, zoom in on the engine. From a distance the image looks coherent, but up close you can see clear stair-step effects on the edges. The reason is that the object has not been rendered yet. You see the vector description, but no finished pixels.

Step 2: Understand What Rendering Means
A 3D object in Photoshop is not a pixel file, but a description of surfaces. This description contains color, geometry, incidence of light, and properties such as gloss or metallic quality. During rendering, Photoshop translates this information into an image made of pixels. Only then can you judge how the surface actually looks.

Step 3: Find the Render Button
The render button is located in the top bar of the 3D area. One click is enough to start the process. The term sounds technically demanding, but the actual operation is very simple.
Step 4: Limit the Render Area with a Rectangular Marquee
If Photoshop renders the entire image, the renderer starts at the top left and works square by square, row by row. Areas without 3D content, such as the sky, needlessly consume time. Therefore, use the Rectangular Marquee tool to select only the engine. Draw as tightly as possible around the object, because the larger the selection, the longer the rendering takes. Feel free to zoom in closer so you can work more precisely.

Step 5: Start a Test Render
Before you change settings, a first pass is worthwhile. Click the render button and observe the result. At the beginning the image often looks rough and grainy. But look a little longer, because with each pass the surfaces become smoother and more cohesive. This first impression shows you which problems really exist.

Step 6: Critically Evaluate the Render Result
Two problems stand out in the test run. First, the result is too bright overall and doesn't match the dark areas on the tower. Second, cloud-like shapes appear around the engine. These are a shadow cast by one of the light sources onto the invisible ground plane. Since the engines hang exactly in the middle, the shadow appears directly in the center of the object. So you need to correct two things: darken the material and turn off the shadow.


Step 7: Open the Material Settings
In the 3D panel, select the material filter. It is located in the panel at the top and is the third icon from the left, second from the right. The material settings then appear in the Properties panel. Make sure to click the material icon, because otherwise you will see paint system options such as base color and brush, which are not relevant for editing materials.

Step 8: Lower the Base Color
In the material area, you see a very light gray on this object. It needs to become significantly darker. Open the color settings of the base color and lower the values. In the video, you start at a value of around 185 and then switch to even darker values. Patience is important here, because Photoshop sometimes only applies changes after some time. The duration also depends on your computer's specifications.

Step 9: Set Red, Green and Blue to 85
Set the three color channels to the value 85 one after another. After this change, a significantly darker gray results. Since Photoshop processes the inputs individually, you may need to confirm the value several times. At the end, check whether all three values have actually been applied.

Step 10: Turn on the Light Sources
The material is now adjusted, but the light sources are still turned off. Click the light bulb icon to activate them. Afterwards, both light sources appear in the Properties panel. One of the two is switched off, but can still cast shadows. You should correct this in the next step.

Step 11: Remove the Shadow of the IBL Light
The first light source is the IBL (Image Based Light). Here, an image file is placed around the entire scene as light. The bright spots in it create reflections that become visible depending on the surface. For this object, the IBL light is not necessary. Therefore, turn off the shadow and let Photoshop apply the change.

Step 12: Adjust the Directional Light
The more important light source is the directional light coming from the right. Here too, you first remove the shadow. Once Photoshop has accepted the change, you increase the intensity. Values around 90 look too dark, so it's best to stay in the range of 130 to 140. In the video, the value is set to 140. Then confirm the input.

Step 13: Render the Scene Again
You don't necessarily have to save the file before you start rendering. Rendering is considered very stable. Start the process directly once the render progress display disappears. The duration varies greatly and cannot be predicted exactly. The same file can finish quickly on one run and take significantly longer on the next. The progress is not always displayed, but this is not an error.

Step 14: Evaluate the Result and Cancel the Process
You decide for yourself when the result is sufficient. Depending on the computer, the renderer needs ten to twenty minutes or more for this object. From a certain point on, further rendering hardly brings any improvements, because the surfaces already look fine and smooth. You can cancel the process with the Escape key. Sometimes you have to press it several times. The renderer works on the processor (CPU), not on the graphics card, but still delivers good results.

Step 15: Retouch Distracting Artifacts
Small squares may appear in the result, the origin of which often remains unclear. You have to retouch such artifacts by hand. Afterwards, deselect with Ctrl+D or Command+D so that you can view the object without a frame. You don't necessarily have to re-render the intermediate floor, since the photographed texture is in the foreground here anyway.

Step 16: Insert the Engine into the Environment
For the engine to look realistic, you should hide superfluous parts. To do this, create a layer mask and take a soft, black brush with 100 percent opacity. Use it to paint away the areas that should not be visible later, such as parts that disappear into the masonry. In this way, the object blends with the scene and no longer looks like an inserted foreign element.

Summary ??? Photoshop 3D Rendering: Making the Engine Realistic
You have learned that a 3D object in Photoshop only becomes fully visible after rendering. You limited the render area with a selection rectangle, darkened the material, and adjusted light sources in a targeted way. You also now know how to cancel the renderer, evaluate the result, and touch up artifacts. With these steps, you achieve cleaner edges, softer surfaces, and more logical shadows.
FAQ
Question: Why does my 3D object look so rough before rendering?Answer: Before rendering, Photoshop only shows a simplified representation of the surfaces. Only during rendering are real pixels created with correct color, geometry, and light distribution.
Question: How long does rendering take?Answer: The duration depends on the size of the selected area, the performance of your computer, and the complexity of the scene. In this example, it can take ten to twenty minutes or more.
Question: How do I cancel a running render process?Answer: Press the Escape key. Sometimes you have to press it several times. You can then undo the process with Ctrl+Z or Command+Z respectively.
Question: Why is my rendered image too bright?Answer: The base color of the material is often set too bright. Lower the values for red, green, and blue in the material area and then adjust the intensity of the light.
Question: How do I remove unwanted shadows?Answer: Turn off the shadow for the respective light source in the Properties panel. This applies to both the IBL light and the directional light.

