
An athlete in the middle of a movement, sweat on the skin and hair standing out in all directions: such subjects barely forgive a single mistake when it comes to cutting them out. This guide shows you how to separate a model from their background step by step. You first work roughly with the Quick Selection tool, refine the edges with the brush, and treat the hair with the "Refine Edge" brush tool. In the end, you have a layer mask that you can edit again at any time.
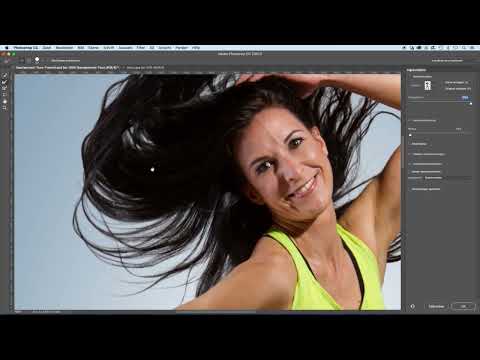
The video is only loaded from YouTube when you play it – data (including your IP address) is then transmitted to YouTube/Google. More in the privacy policy
Key Takeaways
- The "Select and Mask" mode is the central workspace for cutting out subjects.
- The "Onion Skin" view makes the model visible while you create the selection.
- The Quick Selection tool provides the rough selection, the brush the fine work.
- Hair can be cut out with the "Refine Edge" brush tool, since Photoshop automatically separates hair and background there.
- Output to a layer mask is non-destructive and allows later corrections.
Step 1: Select the layer and switch to mask mode
First, click on the layer in the Layers panel on which your model is located. Then you need a selection tool, because only then does the "Select and Mask" button appear in the options bar at the top. Click on it. You land in a dedicated editing area in which you can specifically cut out the model.

Step 2: Make the model visible with Onion Skin
At first, you will probably see only the background in this area, not the model. This is due to the view mode. At the top, select the "Onion Skin" view. There you can reduce the transparency of the layer. A medium value has proven effective, because then you can see both the model and the old background and can see exactly what you want to cut out.
Step 3: The rough selection with the Quick Selection tool
Activate the Quick Selection tool and, holding down the mouse button, drag once over the entire model. Proceed piece by piece: first the legs, then the shoes and part of the body. Release the mouse button as soon as an area is captured, and start again there. If you have selected too much, hold down the Alt key (the Option key on Mac) and drag over the area to subtract it again. This phase serves only for the basic selection. The details come later.

Step 4: Correct major errors in the magnification
Now zoom in closer on the model and, holding down the Alt key, remove the rear area that was mistakenly selected. Accept that the Quick Selection tool simply does not detect some spots. You can add such areas manually later. Smaller areas, such as at the elbow, you simply include right away. You deliberately leave the hair out for now, because it will get its own treatment at the end.

Step 5: Fine work with the brush
Now the brush comes into play. Holding down the Alt key, you remove areas from the selection; without Alt, you add areas. Work in short, controlled strokes and approach the final cutout in this way. This takes patience but pays off. Especially with subjects that will later appear as a large-format print or poster, small inaccuracies become visible. So it is better to work carefully before you move on.

Step 6: Understand the output as a non-destructive working step
At the latest here, it is worth taking a look at the basic principle. The selection is later output as a layer mask, and this can be edited at any time. Via the mask, you can also return to the "Select and Mask" mode and improve the selection. The work is therefore never considered finally completed. If you notice a mistake later, you simply correct it instead of starting over. This is exactly what makes non-destructive working so valuable.

Step 7: Add shoe soles and shoelaces
Go around the model and check each area. The legs are usually already cleanly cut out and need no further editing. The Quick Selection tool, however, often does not detect the shoe soles because the contrast to the ground is too low. Therefore add them manually with the brush, as well as the shoelaces. Go over them generously once and then correct any missing spots.

Step 8: Refining the Arm and Elbow with Straight Lines
For straight edges, such as on the arm, you can use a technique that saves a lot of time. Click on a point, hold down the Shift key, and click on the next point. This creates a straight line that fits cleanly into the selection. Proceed this way along the arm and along the side of the body. At the elbow, too, watch for areas where too much is selected, and brush over them to remove them.

Step 9: Isolating the Hair with the "Refine Edge" Brush Tool
Now it's the hair's turn. Switch to the second tool, the "Refine Edge" brush. Use it to brush over all areas where the background shows through between the hair. Photoshop then automatically calculates which parts are hair and which are background, and separates the two. Make sure you go over each problem area once. With dark hair on a light background, this works particularly well because the contrast makes the separation easier.

Step 10: Checking the Result and Choosing Output to a Layer Mask
Fade the transparency back in completely so you can see the actual result. Often a slight gray haze remains between the hairs. You will correct that later in the mask. Once you are satisfied with the selection, switch back to Photoshop. Make sure the "Layer Mask" option is selected in the Output menu, and confirm with OK. Your model is now isolated, and you can view the mask on the layer.

Step 11: Removing Remaining Traces with the Burn Tool
If the old background still shows through in some places, the Burn tool helps. Set it to Shadows and brush over the light gray to mid-gray areas. These are thereby darkened and hidden in the mask. Hide the mask from time to time to judge the result directly. If you increase the contrast of the mask, the hair becomes sharper. But don't overdo it, otherwise the fine edges break off and the transitions look grainy.

Step 12: Targeted Reworking of the Layer Mask
Check the mask and watch for too many gray areas that should actually be completely white. To do this, set white as the foreground color, lower the brush opacity a little, and paint over the affected areas. If areas are too light where they should be dark, switch to black with the X key. With black as the foreground color and 100% opacity, you remove background remnants. If you discover a dark edge, paint it away with black on the mask. Be sure to make sure you are really working on the layer mask and not on the image.

Step 13: Checking the Mask with a Straight Line and the Alt Key
For the shoes, you can again set straight lines with the Shift key held down so the edges run cleanly. To check the mask as a whole, hold down the Alt key and click on the mask. This displays the mask and lets you recognize areas that are still completely black and need touching up. Add missing parts, such as a portion of a shoe, by painting with white.

Step 14: Creating Soft Transitions with the Blur Tool
Finally, you can soften individual spots. Take the Blur tool with a small brush tip and brush over stray pixels at the edge. This makes distracting pixels disappear without the edge looking unnatural. Then show the mask again by holding down the Alt key once more and clicking on the mask. After that, your model is isolated and ready for further editing.


Summary ??? Isolating a Sports Portrait in Photoshop
You have seen how to isolate a model in Photoshop step by step. You begin in the "Select and Mask" mode, make the model visible with the onion skin, and create a rough selection with the Quick Selection tool. Then you refine with the brush, supplement difficult areas with straight lines, and treat the hair with the "Refine Edge" brush tool. Output as a layer mask preserves the flexibility to make corrections at any time. With patience and clean mask work, you achieve a result that is convincing even in large prints.
FAQ
Which tool is suitable for the rough selection of the model?The Quick Selection tool is suitable for this because you can quickly capture large areas by holding down the mouse button. You then do the fine work with the brush.
How do I remove areas that were selected by mistake?Hold down the Alt key (the Option key on a Mac) and move the tool over the affected areas. This subtracts them from the selection.
Why isn't the hair isolated with the Quick Selection tool?Fine hair structures are difficult to separate with the Quick Selection tool. For this, you use the "Refine Edge" brush tool, which automatically distinguishes hair from background.
Can I still change the cutout later?Yes, the output as a layer mask is non-destructive. You can edit the mask at any time with a brush and colors or switch back to the "Select and Mask" mode via the mask.
What is the onion skin for?The "Onion Skin" view reduces the visibility of the layer so that you can see the background and the model at the same time and better judge what you want to isolate.
How do I quickly switch between black and white on the mask?Press the X key to swap the foreground and background colors. This way you switch without any detour between black for removing and white for adding.


