
An athlete often looks flat in a photo, even though their body is full of muscles and edges. This is exactly where Dodge & Burn comes in. With this technique, you deliberately emphasize highlights and shadows so that muscle groups, wrinkles, and clothing appear much more three-dimensional. In this tutorial, I show you how to build the editing on a separate layer so that you can make corrections at any time. You will also learn where the limit lies beyond which the result looks artificial.
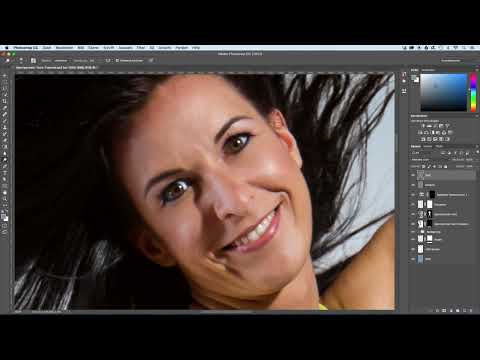
The video is only loaded from YouTube when you play it – data (including your IP address) is then transmitted to YouTube/Google. More in the privacy policy
Key Takeaways
- Dodge & Burn works best on a separate layer in "Soft Light" mode, filled with 50% gray. This leaves the original image unchanged.
- With the Dodge tool, you lighten highlight edges; with the Burn tool, you darken shadows. The Alt key switches between the two functions.
- Work in the "Midtones" range with a low exposure of around 20% so that you proceed step by step.
- Check your work regularly by showing and hiding the layer, and reduce the opacity if necessary.
Step-by-Step Guide
Step 1: Create the Dodge & Burn Layer
The first step is creating a new layer, which you do not create with a normal click on the layer icon. Hold down the Alt key while clicking the "New Layer" icon. This opens a dialog window in which you can name the layer directly and set its options. Give it the name "Dodge and Burn" so that you can quickly recognize it later.

In the dialog window, you can enter the name directly. This saves you an additional step and helps you keep track of multiple layers in larger projects.
Step 2: Set the Layer Mode and Fill the Layer with Gray
Now set the layer mode to "Soft Light". In this mode, the colors and brightness of the original are preserved, while only the light and dark areas of your corrections become visible. Then fill the layer with 50% gray. This color is invisible in "Soft Light" mode, so your image initially looks unchanged. Only when you paint lighter or darker areas with the tool do these changes become visible. This has a big advantage: you can see at any time what you have already changed.

The 50% gray fill forms the foundation for all further steps. Without it, the neutral starting point is missing, and your corrections would discolor the image in an uncontrolled way.
Step 3: Prepare the Dodge Tool
Now select the Dodge tool from the toolbar. With this tool, you lighten areas on the gray layer. The spot where you paint then becomes brighter in the image. The trick here: the tool only affects the layer, not the original photo.
In the options bar, set the range to "Midtones". The exposure should be around 20%. With a low value, you work gently, and you can slowly build up the effect by painting over an area several times. With values that are too high, hard, unnatural transitions quickly appear.

Step 4: Work Out Muscles and Body Shapes
Begin with the highlights on the shoulders. Here the light often sits on the muscle edges, and these are exactly the spots that should be emphasized. Carefully run the tool over the highlight areas so that they become slightly brighter. This emphasizes the shapes of the body and makes individual muscle groups visible.
Then work your way step by step across the entire body. Do not treat every spot equally strongly, but orient yourself by where the light actually hits. This way you model the body without overdoing it.
Step 5: Shape Clothing and Wrinkles
Clothing also benefits from Dodge & Burn. Bring out individual wrinkles that are hit by the light by carefully lightening them. To strengthen shadows, switch to the Burn tool. To do this, hold down the Alt key while working with the tool. This darkens areas instead of lightening them.
In this way, you can bring out wrinkles even more strongly and deepen shadows. Afterwards, deliberately place individual highlights so that the clothing does not look flat.

Step 6: Check your progress regularly
After a few corrections, it is worth briefly hiding the layer and showing it again. This way you can immediately see how much the image has changed. A correction often seems harmless on its own, but looks exaggerated in the overall picture. The layer becomes more three-dimensional and tangible as a result, and you can see which muscle groups have already come out well.
Repeat this comparison again and again, especially when you are working on several areas of the body at the same time.
Step 7: Emphasize arms, highlights and reflections
For the arms, it is worth taking a close look at the light reflection. If you brighten it slightly and darken the areas next to it a little, the arm stands out clearly from the background. Highlights can also be nicely worked out this way. Strengthen them a bit if needed, because sports photography can certainly have a more extreme, higher-contrast look.


Step 8: Work on the face, nose and forehead gently
On the face, you work particularly carefully. Darken the sides of the bridge of the nose slightly so that the nose looks narrower. The forehead looks more even if you brighten dark areas a little and darken areas that are too bright slightly. Make sure you don't change too much, because faces react sensitively to exaggerated edits.
Step 9: Fine-tune eyes and teeth
The eyes are a rewarding detail. If you brighten the inside of the iris slightly and make the light reflections a bit stronger, the eyes look more lively. You may only brighten the whites of the eyes very slightly, otherwise they quickly look artificial. You darken the edges of the eyes at the top and bottom a little so that the eye stands out more clearly. You can also darken the eyebrows slightly. For the teeth, it is usually enough to make them a bit whiter.


Step 10: A before-and-after comparison for review
A comparison between the original image and the edited result quickly shows you whether the effect is coherent. The face and the entire body now look more three-dimensional, and that is exactly the goal. Afterwards, consciously look at the result in the overall picture and occasionally zoom out so that you don't lose sight of the overall impression.

Step 11: Work out the pants and legs
With the pants, you proceed in a similar way as with the clothing. Continue darkening the shadow areas and specifically emphasize the bright spots. This makes the creases stand out more, and the pants look shiny. You can brighten the long, bright reflections on the legs while darkening the dark areas in between a little. Make sure you don't overdo it, because then the pants quickly lose their natural structure.


Step 12: Emphasize shins and shoes
The shins benefit from brightening the front and slightly darkening the back. The body shape looks more spatial as a result. With the shoes, you can emphasize the bright areas a little, such as the sole or the stripes. The shoelaces can also be brought out better with a bit of brightening. Keep in mind: the shoes are small details, so a few gentle strokes are enough.


Step 13: Harmonize the hair and the overall image
Finally, you turn to the hair. Bring out individual strands by brightening the light areas a little and darkening the dark areas in between. This gives the hair more volume and structure. Then zoom out once to view the entire model and check whether all areas fit together harmoniously.


Step 14: Adjust the Opacity
If the overall result looks too strong to you, you don't have to go back and redo the corrections. Instead, reduce the opacity of the Dodge & Burn layer. At around 75%, the image often already looks balanced and more natural. This way you keep the dimensionality without the effect looking artificial.
Summary ??? Dodge & Burn for Sports Portraits: Sculpting Body Shapes Step by Step
With Dodge & Burn on a separate layer, you shape muscles, wrinkles, and clothing with noticeably more dimension, without altering the original photo. Important are a neutral 50% gray layer in "Soft Light" mode, a careful way of working with low exposure, and regular checks by toggling the layer on and off. Finally, you control the intensity with the opacity. The more practice you gain, the better you will recognize where you need to darken and where you need to lighten.
FAQ
Why should I perform Dodge & Burn on a separate layer?The corrections remain flexible and can be adjusted at any time without permanently altering the original image.
Why is the layer filled with 50% gray?In "Soft Light" mode, neutral gray is invisible. Only the areas you lighten or darken become visible.
How do I switch between lightening and darkening?By holding down the Alt key, you switch from the Dodge tool to the Burn tool and darken areas.
Why do I work with an exposure of about 20%?A low value allows fine, controllable steps. You build up the effect slowly instead of creating harsh transitions.
How can I tell if my editing is too strong?Repeatedly toggle the Dodge & Burn layer off and on. If the result looks exaggerated in the overall image, reduce the opacity.
How much practice do you need for a good result?The technique takes time. Over time, you develop a feel for where light and shadow should be sensibly emphasized.


