
Your portrait looks clear, but still a bit flat? With Dodge & Burn, you bring out exactly what makes an image look three-dimensional: shadows and highlights. In this tutorial, you work on a separate layer, so you can check, tone down, or undo every adjustment at any time. The result is a model who appears significantly more three-dimensional. At the same time, the image becomes slightly more artificial, which may well be intended for stylized sports portraits. You decide how far you go.
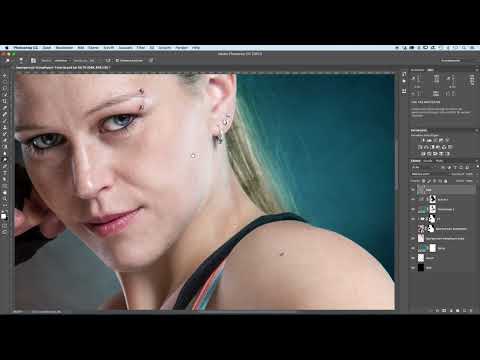
The video is only loaded from YouTube when you play it – data (including your IP address) is then transmitted to YouTube/Google. More in the privacy policy
Key Takeaways
- Dodge & Burn works best on a separate layer in Soft Light mode, filled with 50% gray.
- The Dodge tool brightens highlights, the Burn tool darkens shadows. By holding down the Alt key, you switch between the two.
- An exposure of about 20 to 25% is a good starting point, especially for the midtones.
- Eyes, hair, and skin areas benefit the most when you work with a light touch and in small steps.
- With the layer's opacity, you control how strong the effect is. Compare before and after regularly.
Step-by-Step Guide
Step 1: Create the Dodge-and-Burn Layer
Before you darken or lighten anything, you need the right working foundation. Hold down the Alt key and click the new layer icon at the bottom of the Layers panel. This opens the dialog where you can name the layer. Name it, for example, "Dodge and Burn" so you can quickly find it later. Set the mode to Soft Light and fill the layer with 50% gray. The layer is then not visible, because the neutral gray in Soft Light mode produces no change. That is exactly the advantage: every brushstroke you make now affects only this layer and can be readjusted later.

Step 2: Edit the Midtones with the Dodge Tool
Select the Dodge tool (shortcut O) and set the Range to Midtones in the options bar. The exposure should be around 20 to 25%. With such low values, you work slowly and in a controlled way. Go through the model piece by piece and emphasize areas that are already bright so that they stand out more. In this way, you sculpt the entire face and body without individual spots looking unnatural. It is important that you don't work with too much pressure or too high values, because then hard transitions quickly appear.

Step 3: Selectively Brighten Highlights and Check Before/After
In the next step, you turn to the bright areas. At first glance, comparatively little happens here, and that is exactly the intention. Briefly toggle the layer on and off again and again to see the difference. You will notice that certain areas move clearly forward and the image becomes noticeably more three-dimensional. You should carry out such comparisons regularly so that you don't overdo it.
Step 4: Switch Between Lightening and Darkening with the Alt Key
A particularly practical trick is switching between the tools. As long as you hold down the Alt key, the Dodge tool automatically becomes the Burn tool. This allows you to both set highlights and deepen shadows with a single tool. Use this, for example, on the bridge of the nose: there you brighten the shiny area to give it volume. With the Alt key held down, you then darken the adjacent areas again. This creates clear sculpting without switching tools.
Step 5: Work Out the Eyebrows and Eyes
The eyes are the focal point of a portrait and deserve special attention. First, lightly brighten the eyebrows so they gain structure. Then darken the areas under the eyes so that the face looks somewhat stronger. For the iris, you work with contrast: you brighten the light structures further and darken the dark areas. Since an iris is not an even surface, the editing can be somewhat irregular. Also draw a fine line around the iris to emphasize it. Be careful here, because overly strong interventions quickly look artificial.

Step 6: Carefully Edit the Whites of the Eyes and Eyelid Contour
You brighten the whites of the eyes only very subtly. If they are too bright, the eye loses its liveliness and looks almost lifeless. Then frame the eye using the Alt key and darken the outer areas, where kohl or mascara is often applied. This makes the eye stand out clearly. Make sure you proceed evenly. When you edit both eyes, the results should visually match each other.
Step 7: Work with Patience and Control the Opacity
Take your time with this step. Dodge & Burn is time-consuming, and the best results come when you think before each brushstroke about what you want to darken and what you want to lighten. If the overall effect remains too strong, you don't have to undo everything. Simply reduce the opacity of the layer. This lets you fine-tune the effect without losing your work.

Step 8: Structuring Hair, Hairline, and Strands
With hair, it's all about depth and structure. First, lighten the strands that catch the light. Then darken the hairline and the gaps between the hairs so that they gain more depth. With a smaller brush, you can work out fine details. Orient yourself to the natural direction of the hair and follow its lines. If you place the dark areas correctly, the hairstyle immediately looks fuller. Also make sure that the skin at the hairline doesn't show through too much by slightly darkening the relevant areas.

Step 9: Modeling Neck, Shoulders, and Arms Evenly
Now work your way systematically through the body. Lighten the neck in the places where the light hits, and darken the transitions. For shoulders and arms, you repeat the principle: light edges are lightened, shadow zones are darkened. You don't have to solve every detail at once. Work in sections and keep looking at the overall picture so that the body looks more three-dimensional overall. Especially with large areas, evenness determines the quality.

Step 10: Bringing Out Texture in Gloves and Seams
Clothing also benefits from Dodge & Burn. With gloves, you can bring out a lot of texture by darkening the dark areas a bit deeper and lightening the upper edges. Seams can also be emphasized by lightening them and slightly darkening the shadows beneath them. Here too, keep checking the overall view, because too much contrast in the clothing can quickly distract from the face.

Step 11: Checking the Overall Result and Finishing
Finally, you view the image in the overall view. Pay attention to whether the shadows and highlights interact harmoniously and whether individual areas look exaggerated. The hair should appear fuller and shinier, and the face should be modeled more clearly. If the effect is too strong for you, reduce the opacity of the Dodge-and-Burn layer. If it is too weak, work specifically on the places that still look flat. At the end, feel free to give yourself a few minutes of distance before deciding that the result is finished.

Summary – Dodge & Burn for Three-Dimensional Sports Portraits
With a separate Dodge-and-Burn layer in Soft Light mode, you can specifically work out shadows and highlights without destroying the original image. The Dodge tool lightens, the Burn tool darkens, and the Alt key switches between the two. Work with low exposure, regularly check the effect in a before-and-after comparison, and use opacity to fine-tune the effect. Eyes, hair, and clothing benefit especially strongly. Take your time, because careful details make the difference.
FAQ
Does the Dodge-and-Burn layer really have to be filled with 50% gray?Yes, the neutral gray ensures that the layer initially has no visible effect in Soft Light mode. Only your brushstrokes change the image.
Why should I work with a low exposure?Low values of about 20 to 25% allow fine control. This creates soft transitions, and you avoid unnatural blotches.
How do I remove an effect that is too strong?You can reduce the opacity of the layer. This way the editing is preserved but looks more subtle.
How do I quickly switch between lightening and darkening?Hold down the Alt key while working with the Dodge tool. The tool then automatically switches to the Burn tool.
How do I tell if I've overdone it?Regularly toggle the layer on and off and compare the result with the original. If the image looks artificial, it's usually time to reduce the opacity.


