
Imagine a young woman standing among high-rise buildings and slowly seeming to sink into a building facade. Marco Kolditz creates exactly this oppressive effect in his artwork "Die Großstadt". Before you can assemble the scene, the woman has to be cleanly separated from the background. I'll show you step by step how to cut her out using Quick Mask mode, refine fine strands of hair, and prepare her reflection for the later composing.
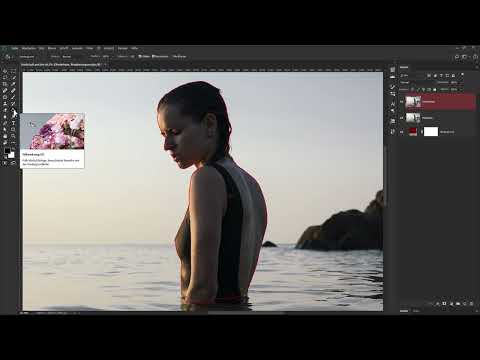
The video is only loaded from YouTube when you play it – data (including your IP address) is then transmitted to YouTube/Google. More in the privacy policy
Key Takeaways
- Convert the background layer into a Smart Object so you can work non-destructively and adjust every step later.
- Trace the outline of the person in Quick Mask mode and fill the inner areas with the Paint Bucket tool so that no gaps remain.
- Round the selection by a single pixel to close tiny lines.
- Bring back fine hair details with the "Refine Edge" tool and correct light edges using a clipping mask.
- Prepare the reflection as its own layer, which you roughly cut out with the Quick Selection tool and refine with a white mask.
Step-by-Step Guide
Step 1: Plan the Layers
Open the original image and look at the Layers panel. You need two separate layers: one for the woman's upper body and one for the reflection in the water. Both will be incorporated differently into the composing later, so it's worth separating them from the start.

Step 2: Create a Smart Object
Right-click the background layer and choose "Convert to Smart Object". This way you work non-destructively. Changes can be undone, adjusted, or removed completely at any time without losing the original material.
Step 3: Duplicate and Name Layers
Rename the layer to "Oberkörper" by double-clicking it. Then press Ctrl + J to create a copy and name it "Reflektion". Move the reflection layer down to keep your layer structure clear.
Step 4: Create an Auxiliary Layer
To check the cutout later, create a Solid Color adjustment layer, for example in red. Drag it below the upper body layer and rename it "Hintergrund". It serves as an auxiliary layer with which you can immediately see where remnants of the old background still show through.

Step 5: Activate Quick Mask Mode
Select the "Oberkörper" layer and zoom into the image. Take the Brush tool with a round, hard tip. Then click the icon for Quick Mask mode. The layer is displayed in red. Make sure the foreground color is black, because black marks the areas you want to select later.

Step 6: Trace the Outline of the Person
Run the brush along the outline of the person. With a graphics tablet, you control the stroke width via pen pressure. Without a tablet, the key combination Alt and right mouse button helps: with the keys held down, moving left or right changes the brush size, and moving up or down changes the hardness. You don't have to capture the fine little hairs at the edge perfectly yet, because you'll refine the mask later.

Step 7: Rotate the View and Navigate
With the R key, you switch to the Rotate View tool. This way you can adapt the view to the course of the outline without rotating the image itself. Double-clicking the tool resets the rotation. While holding the space bar, the cursor turns into a hand, with which you move around the image.

Step 8: Fill the Inner Areas
Switch to the Paint Bucket tool with the shortcut G and click in the area inside the outline. This only works if the red outline is closed. Otherwise, the color spills out like from a tipped-over bucket and the entire image gets selected. So check beforehand whether you have closed all gaps.

Step 9: Refine the selection
Exit Quick Mask mode. Go to "Select", "Modify" and "Smooth" and choose a radius of one pixel. The change is barely visible. But if you switch back to Quick Mask mode, the fine line between the outline and the interior area has disappeared.

Step 10: Create a layer mask
With the selection active and the "Oberkörper" layer selected, click the icon for creating a layer mask at the bottom of the Layers panel. Briefly hide the reflection layer to check that only the upper body is still visible.
Step 11: Optimize hair details with "Refine Edge"
Right-click the mask and choose "Select and Mask". Alternatively, double-clicking the mask leads to the same result. Use the second tool, the Refine Edge Brush. Brush over the hair areas at the edge. Photoshop analyzes these areas and brings individual strands of hair back into the image. Then confirm with OK.

Step 12: Create an adjustment layer as a clipping mask
After cutting out, the strands of hair often look light because they were originally in front of the light background. Select the top layer, create a new empty layer and name it "Korrektur". Hold down the Alt key and click between the correction layer and the "Oberkörper" layer. A small arrow appears, indicating the clipping mask. Everything you now paint on the correction layer appears only within the figure.

Step 13: Pick up the hair color with the eyedropper
Select the Brush tool with greatly reduced hardness and a suitable size. Hold down the Alt key to pick up a color tone from the hair with the eyedropper. Paint carefully over the light strands of hair. You can pick up a different color tone at any time so that the correction looks natural. For heavily textured hair, the Clone Stamp tool would be the better choice, but in this example the hair area is fairly uniform in color.

Step 14: Correct light outlines
Work area by area. Where the hair becomes lighter at the top edge, pick up a lighter color tone. In the outline area, paint only with the soft edge of the brush so that no transition looks abrupt. Afterwards, compare the result with the state before. The hair should now appear significantly more detailed.

Step 15: Roughly cut out the reflection
Show the reflection layer again and activate it. The reflection does not have to be cut out as precisely as the upper body, since you will use it differently later in the composing. You select the darker areas of the water. For quick selecting, use the Quick Selection tool and drag over the areas that Photoshop automatically detects.

Step 16: Add to and correct the selection
Hold down the Shift key to add areas to the selection. With the Alt key held down, you remove areas again. So that the reflection overlaps cleanly with the upper body later, you add to the selection manually with the Lasso tool. Hold down Shift to extend the selection. Then create a layer mask with the icon.

Step 17: Touch up the mask with a white brush
Show the other layers again and check the cutout. If the background still shows through in some spots, select the mask and the brush. With the X key, you swap the foreground and background colors so that white is in front. With white, you paint areas of the reflection back into the image.

Step 18: Save the file
Save your project via "File" and "Save As" as a separate PSD file, for example as frau.psd. This way, you can access all layers, masks and corrections when creating the composing.

Summary – Photoshop: Cutting Out a Woman: Mask and Hair in Compositing
You have isolated the woman from the original image by converting the background layer into a Smart Object, tracing the outline in Quick Mask mode, and filling the interior areas. With the Refine Edge brush and a clipping mask, you brought back fine hair details and corrected light edges. You cut out the reflection separately with Quick Selection and Lasso and refined it with a white mask. The result is a PSD file in which you can flexibly use every layer in further compositing.
FAQ
Why do I convert the background layer into a Smart Object?A Smart Object enables non-destructive working. You can undo or adjust changes at any time without losing the original image.
What is the red auxiliary layer for?The color fill in a bold color shows where remnants of the old background are still left. This way you immediately spot errors in the cutout.
Why do I round the selection by one pixel?When filling, fine lines often appear between the outline and the interior area. Rounding by one pixel closes these gaps so that the mask becomes even.
Do I have to cut out the reflection as precisely as the upper body?No. The reflection will be incorporated into the composition differently later. A rough cutout of the darker areas is sufficient.

