
Many consider cutting out subjects the supreme discipline of image editing, but it can also be done far more easily. In this tutorial, you will learn an approach where you are deliberately allowed to keep the selection rough. Afterwards, the workflow shows you how to insert a water surface into a scene using a reflection and a self-made water brush, even though there is no water at all in that spot.
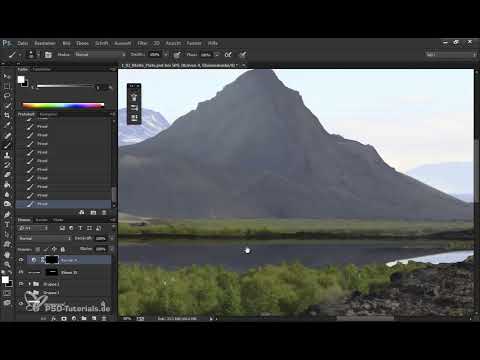
The video is only loaded from YouTube when you play it – data (including your IP address) is then transmitted to YouTube/Google. More in the privacy policy
For this, you need basic knowledge of layers, layer masks, and selection tools, for example in Photoshop or a comparable program. The keyboard shortcuts refer to Windows. On macOS, replace Ctrl with Cmd and Alt with Option.
Key Takeaways
- A cutout does not have to be accurate to the millimeter. Imprecise selections can be refined afterwards with layer masks and color ranges.
- Water is essentially a reflection. You do not have to draw a surface in the classic sense, but rather create the reflection of the subject.
- The reflection becomes believable through motion blur, darkening, and masking.
- A custom brush with scattering and pen pressure saves a lot of time and delivers a coherent water surface.
Step-by-Step Guide
Preparing the Starting Point
Begin with a copy of your image layer. Duplicate it with Ctrl + J and drag the copy into a new group, which you name "Group 2". Then move this group below the background layer so that it serves as the basis for all further steps. It is important that you set up the structure now, because this way you keep an overview when many layers are created later.

Defining the Area for the Water
Before you select anything, think about where the water should go. In the scene shown, the area with the plants and the dark ground is well suited, because the foreground edge is planted and looks like a natural shoreline. Zoom in a bit so that you can see the entire area.

Creating a Rough Selection with the Lasso
Take the Lasso tool and trace around the area where the water will appear later. Deliberately keep the selection imprecise. Feel free to go around the plants and leave bulges in place. That is exactly the advantage of this method: the precise edge is created later, not now.

Pulling a Tongue into the Selection
If you want the water to extend further into the image area, add a narrow tongue to the selection. Later, it ensures a more natural transition between the shore and the water surface.
Converting the Selection into a Layer Mask
Create a new layer and, while the selection is still active, use the layer mask icon to create a mask from it. If you then hold down the Alt key and click on the mask, you will see the mask in black and white. White stands for visible, black for invisible. This way you can immediately see what the selection covers.

Refining the Color Range
The lower edge is still rough at this point, so we improve it with a trick. First select the background, meaning the plants and the dirt. To do this, go to Select and then Color Range. Take the eyedropper with the plus sign and click on various shades of green in the plants. The tolerance should not be too high, otherwise areas you want to keep will also be captured. After confirming, you have selected all the plant tones.
Hold down the Alt key and look at the layer mask again. The selection is now much more precise than before.

Touching Up the Mask with a Soft Brush
In the next step, you fill the selected areas in the mask with black. Use a soft, round brush for this. This creates a more precise edge without you having to spend much time with the lasso. You can still do a second round of fine work with a plant brush later.

Deselect and flip the image
Deselect the selection with Ctrl + D. Then activate Group 2 and press Ctrl + Shift + Alt + E. This creates a new layer containing the entire visible image. It is important that you do not simply merge the layers, but create a copy of the visible layers. Then flip this layer vertically so that the subject is upside down.


Position the reflection
Now place the flipped layer in the right spot. Release the clipping mask by adjusting the layer accordingly in the Layers panel. Drag the desired area of the reflection over the water surface. You can then delete the auxiliary layer that you only needed for flipping.
With Ctrl + T you activate the transformation. Move and scale the reflection so that the shoreline of the mirror image meets exactly where the land meets the water. The reflection appears compressed vertically, and that is exactly what is intended, because the perspective of the layer on the ground differs from that of the vertical plane.


Soften the reflection
A perfect mirror looks artificial, so you add blur. Under Filter, choose the Motion Blur blur filter and set the angle to 90 degrees. The blur should be moderate, because water is rarely a flawless mirror.

Darken the water
Water is transparent, so you can see the bottom. Since this bottom in the image consists of dark mud and plants, you darken the reflection. To do this, work with an adjustment layer, such as Brightness/Contrast, and reduce the highlights so that the water does not look too bright.

Add shadows with a curves adjustment
Along the coast, shadows of the plants should fall onto the surface. To do this, create an adjustment layer with a curves adjustment and pull the curve downward. Choose the clipping mask so that the correction only affects the water. Since everything is now darkened, you invert the layer mask with Ctrl + I and paint with a soft white brush where the shadow should appear.

Improve the edge with the plant brush
The edge still looks too straight in some places. Hold down the Alt key, click on the layer mask, and work with a plant brush. Paint with white to make areas more visible, and with black to hide areas that look too harsh. This creates a natural-looking transition edge.

Create your own water brush
For the waves, you create your own brush. Start with a soft round brush and reduce the size to about 80 pixels. Since the water surface is flat, the roundness should be only very slightly pronounced, about 5 percent. You set the spacing high, to about 1000 percent. Under Shape Dynamics, you set the Size Control to Pen Pressure, and the Roundness Control likewise to 100 percent.
For Scattering, you choose a value of around 400 percent on both axes, increase the Count to 2, and the control again uses Pen Pressure. Then save the brush so that you can use it again at any time.

Draw waves
Create a new layer above the reflection and choose a color similar to the sky, such as a light blue. Now make short, irregular strokes that give structure to the water surface. Vary the stroke sizes and do not make the strokes too regular, because otherwise the result quickly looks like a cheap filter. In the area where the sun is reflected, you may place more strokes and use brighter accents. In darker areas, a slightly darker tone is suitable.

Hide Unnecessary Strokes and Adjust the Opacity
The strokes are often too strong at first and also lie in places where they don't belong. Reduce the opacity of the layer until the effect looks right. Then copy the layer mask of the reflection by holding down the Alt key and dragging the mask onto the wave layer. By holding down the Shift key, you can briefly hide the layer to check what disappears. Then you refine the mask with a black brush at about 50 percent opacity.


Group the Water Layers
To keep your file organized, group the layers for the water. Select the bottom layer, hold the Shift key, and click on the top one. Press Ctrl + G to put them into a group. Name this group "Water", while leaving the mountains in their own group if necessary.

Summary – Matte Painting: Adding Water via Reflection – Step by Step
You have seen that cutting out doesn't necessarily have to be precise. With a rough lasso selection, a color range, and a layer mask, a usable base is created. The water surface itself is created by a vertically flipped copy of the image, which you make believable with motion blur and darkening. A custom water brush with scattering provides the waves, and masks ensure that in the end only the appropriate areas remain visible. The more time you invest in details, the more convincing the result will be.
FAQ
Do I really have to work precisely when cutting out?No. A rough selection is enough, because you can refine the edge later with color range, layer mask, and brush.
Why is the image flipped vertically for the water?Water essentially shows a reflection of the subject. Flipping vertically creates exactly this reflection, which you then position and adjust.
Why should the reflection be blurred?A perfect mirror looks artificial. A slight motion blur makes the reflection appear more natural, because water is never completely smooth.
How do I create my own water brush?Set a soft brush with a small size, low roundness, large spacing, and strong scattering. Size and roundness should be controlled via pen pressure so that the strokes look irregular. Then save the brush.
How do I prevent the waves from looking too uniform?Make the strokes in different sizes and with different densities. Use strokes in lighter tones in bright areas and darker tones in dark areas.


