
Imagine you've been working on a landscape for a while, and the layers are slowly getting out of hand. This is exactly where this tutorial picks up. You continue working on a black-and-white matte painting image, move the sun, paint water and rocks, and learn how brush tips from a set can save you a lot of time. Photoshop's default brushes are a good foundation for this, but with additional brush tips your working speed increases significantly and the details turn out finer.
The video is only loaded from YouTube when you play it – data (including your IP address) is then transmitted to YouTube/Google. More in the privacy policy
Key Takeaways
In this tutorial, you work with selections, layers and brushes, not with new techniques. What matters is how you combine these tools. A color range, a soft or hard brush edge and a curves adjustment are enough to change the sun, water and tonal values in a targeted way. Brush tips from a set speed up the work, but they don't replace your sense of perspective and contrast. Always place atmosphere, clouds and haze on their own layers so that you can remove them later without rework.
Step-by-Step Guide
Merging layers and preparing the sun
Before you paint anew, you merge all previous layers into a single one. For this, you use the keyboard shortcut Shift, Ctrl, Alt and E. After that, you work only on this one layer. This feels unfamiliar at first, but it prevents you from accidentally losing old areas when erasing.

Selecting the sun via Color Range
To paint over the existing sun in a targeted way, you select it via Select, Color Range and pick up the eyedropper. Make sure you don't catch too many tonal values. Reduce the tolerance step by step until exactly the brightness range you want to replace is marked. An overlap with the sky hardly matters here, because you are working on a single layer.

Repainting the sun
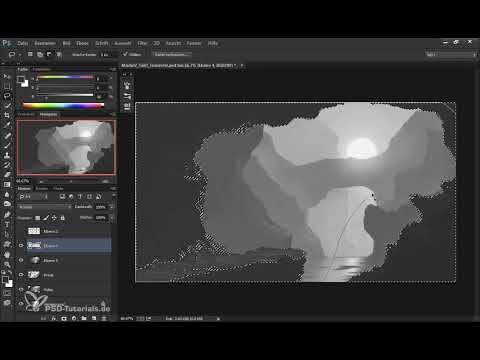
Now you delete the old sun and place it in a new location, for example so that its light shines downward and is reflected in the water. For the sun disc, you choose a hard brush with about 80% hardness and deactivate the Transfer option so that the opacity stays constant. With a generously chosen size, you paint the disc. Then you set a higher opacity of about 95% and paint over the sun once more cleanly.
Glow with the soft brush
For the glow, you work with the soft brush Big Softy and an opacity of about 20%. With the number keys, you can quickly adjust the opacity. Carefully paint a halo around the sun. You can trace the edge of the selection with the lasso so that the transition stays clean. Only paint light where it looks believable, because too strong a glow draws the eye away from the composition.
Creating water with the lasso
For the water surface, you draw a selection with the lasso tool that resembles the course of a river or lake. Create the water surface on a new layer so that you can still modify it later. With Ctrl and H, you briefly hide the selection edge while the selection remains active. The selection itself has a feathered edge of 0.5 pixels. For water, a somewhat harder edge is often better.
Light color, reflection and opacity
Take the Big Softy brush, choose a light color tone and set the opacity to about 50%. Paint the water within the selection. Then you add a reflection of the sun by running over the area a second time vertically beneath it. This reflection makes the scene more believable. If the area glows too strongly, you lower the layer's opacity, for example to 70%.
Cleaning up the selection and correcting details
If the selection creates an unattractive line at the edge, you can set it to zero pixels of feathering in this area. The edge can then be cleanly refined with the eraser. The Navigator helps you view the image from a distance. This way you can tell whether the area already looks like water.
Darkening the foreground with a curves adjustment
If you want an area to look closer, you darken it. To do this, you create a selection via Color Range and invert it with the lasso tool in subtract mode so that only the desired area remains. With Ctrl and M, you open the curves adjustment, choose the right layer and pull the curve slightly downward. Don't overdo it. A black that is completely closed quickly looks harsh. The layering of a dark foreground and a lighter background creates depth.

Integrating Jonas Derot's Brush Set
Now the additional brush tips come into play. Download the set and open the Preset Manager. There you will find categories such as Basic, Paint, Environment, Nature, or Special Brushes. You can transfer the brushes into your own set and sort them according to your needs, for example rocks into the Rock brushes, clouds into the Cloud brushes, and plants into the Nature brushes. Then save the set so you can use it again at any time.

Creating a Ground with Stone Texture
To make the ground more interesting, use the Ground Pebbles brush. Pick a color from the image, paint over the ground area with it, and increase the opacity so the texture becomes more visible. If something doesn't fit, you can remove it right away.

Defining Perspective with Flat Formations
With a flat rock structure, you give the ground a clear direction. Paint the formations so that they lead the eye into the depth. Each rock should follow an imaginary line pointing toward the horizon. This way the perspective looks coherent without you having to construct it laboriously.
Developing Foreground Rocks with the Rock Small Brush
The Rock Small brush is suited for vertical or nearly vertical rock formations in the foreground. The further back a formation is, the less structure it needs. With light tones, you place individual highlights on the edges. Contrasts are the most important shape-givers here. Erase everything you don't like, preferably with a soft brush on the eraser.
Distant Mountains with the Mountain Brush
For the far-off mountain ranges, you use the Mountain brush. Take a slightly lighter color than the background and make a few strokes. Since the brush quickly creates too much structure, you remove excess details with the eraser. Repeat the process until the size of the structures fits the distance.

Building Atmosphere on Separate Layers
Always place haze, fog, and cloud effects on separate layers. This way you can insert them between foreground and background without damaging the rest of the image. If you work on a single layer, you have to laboriously repaint everything later. On a separate layer, on the other hand, a correction is done with just a few clicks.
Creating the Sky with Cloud Brushes
The Cloud 1 brush is suited for the sky. It is slightly softer than Cloud 2 and fits well with a landscape. Place light clouds that are lit from below, and add darker clouds where the sky needs more contrast. If you erase near the rock, it's best to use the cloud brush as an eraser so that the edges stay soft and no hard hooks appear.

Grouping Layers and Refining Details
When you have layers that belong together, group them with Ctrl and G. This way you keep an overview. Then you refine the edges of individual rocks. With the Lasso tool, you can select edges specifically and fill them with a base color, then trace over them with a lighter color. This makes the image more lively.

Refining the Water Surface
For the final details of the water surface, the Wasser 3 brush is suitable. It has an interesting structure and makes fine strokes. Work with it on a separate layer so you can still adjust the effect later. When the cloud brush no longer fits, use the soft Big Softy brush in a small size.

Summary ??? Matte Painting: Creating Textures Faster with Brush Sets
You have learned how to work on the sun, water, ground, and rocks in a targeted way using selections, layers, and brush tips. Organization is crucial: work on separate layers, use selections for precise adjustments, and use brushes deliberately. This creates depth, atmosphere, and details in a short time.
FAQ
Do I need a special brush set for this tutorial?No, the standard brushes are sufficient, but additional brush tips speed up the work and bring more detail.
Why should I put atmosphere on separate layers?That way you can later remove fog and clouds without laborious repainting or place them elsewhere.
What does the selection in subtract mode mean?This removes areas from an existing selection, so that only the desired part remains.
Why is the sun painted with a hard brush?A hard edge creates a clearly recognizable light source, while the soft brush provides the glow around the sun.
How can I tell whether the water looks believable?View the image in the Navigator from a distance. If the area looks like a reflective surface, the effect fits.
How do I create depth in the image?Darken the foreground with a tone curve, stagger rocks from front to back, and work with contrasts.
What can I do if a brush creates too much texture?Erase the excess details selectively with the eraser or the appropriate brush.
Why should I save brush sets?Saved sets are retained, can be reused, and can be sorted into your own categories.


