
A disco flyer almost always needs the same sunbeams effect in the background. If you redraw it from scratch every time, you waste time unnecessarily. With a few steps, you create such effects once as brush presets and then apply them with a single click in every new layout.
The video is only loaded from YouTube when you play it – data (including your IP address) is then transmitted to YouTube/Google. More in the privacy policy
Key Takeaways
Key Takeaways
- Recurring background motifs such as sunbeams, swirls, or intermediate rays can be saved as brush presets and reused at any time.
- A brush tip is created from the pixels of a layer, which you save via "Edit > Define Brush Preset".
- Transforming, duplicating, and rotating with keyboard shortcuts significantly speeds up building an effect.
- Filters such as the Twirl distortion filter create variations without you having to redraw.
- Outlines and blending options ensure that the brush tip also looks clean on colored backgrounds.
Step-by-Step Guide
Step 1: Create a generous working document
First, create a new document measuring 5000 × 5000 pixels. This is the maximum size Photoshop allows for brush tips. Large templates stay sharp when used later, even if you enlarge them significantly. It is best to work in an empty layer so that you can cleanly isolate the effect later.

Step 2: Draw the first line and transform it
Select the Line tool and set the weight to 20 pixels. Draw a line in the middle of your document. Press Ctrl + T to open Transform mode. Move the reference point all the way to the right so that the line rotates around this point. Then enter a rotation of 10 degrees and confirm with Enter.

Step 3: Build the ray effect through repetition
The real speed lies in repetition. Press Ctrl + Shift + Alt + T to repeat the last transformation while creating a copy at the same time. Repeat this process until the lines have gone completely around the center point once. All copies then lie in one layer, which you move to the center.
Step 4: Define the first brush preset
Hide the other layers and select the pixels of your rays layer. Then go to "Edit > Define Brush Preset" and give it a unique name, for example "Thin rays". Afterwards, deselect with Ctrl + D. Your first effect is now saved.

Step 5: Create a second effect with the Polygon tool
For the next effect, select the Polygon tool and set three sides. Drag out a very small triangle and edit it with Ctrl + T. Place the reference point at the right edge of the triangle and rotate it by a fixed angle. With Ctrl + Shift + Alt + T, you repeat the rotation until a complete ring of rays is formed. If needed, repeat this step with additional polygons to vary the spacing.
Step 6: Combine multiple layers into a Smart Object
If you have several polygon layers, select them all by clicking the top layer and, holding the Shift key, clicking the bottom one. Then convert the selection into a Smart Object. This way you can modify the effect later without loss of quality. Load the pixels of the Smart Object with Ctrl + click on the layer thumbnail, move the selection to the center, and save it as a brush preset named "Thin sunbeams 2".

Step 7: Create variations using duplicates and opacity
For a variation, duplicate a layer with Ctrl + J and rotate the copy slightly. This creates an additional center stripe that makes the effect more lively. If the effect is too strong, reduce the layer's opacity. Then select both layers, convert them into a Smart Object again, and save them as their own brush preset.

Step 8: Build a psychedelic variant with the Twirl filter
If you need even more variety, open the filter "Distort > Twirl" and set the angle. The effect initially looks very strong. Load the pixels via Ctrl + click on the layer thumbnail, save them as the brush preset "Twirled sunbeams", and then reduce the angle until the effect is more subtle. This slightly twirled version is often the most versatile because it works in many layouts.

Step 9: Clear the inner area
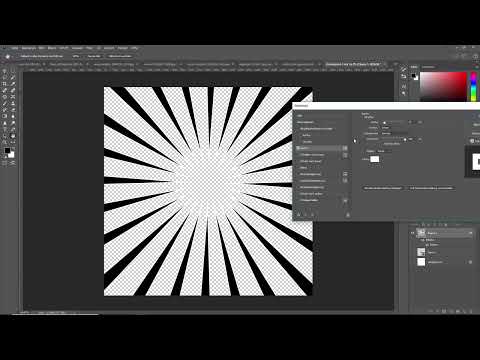
Many flyers need a free area in the center where you place text or a main motif. To do this, open the layer's blending options and enable a white stroke, which you pull slightly outward. When selecting the pixels, this white stroke would be included, even though it is actually supposed to be transparent. Therefore, create a new layer from the blending option, merge it down with Ctrl + E, and then open the blending options again. In the "Blend If" section, move the slider to the left so that the white areas become transparent. Load this layer again with Ctrl + click on the thumbnail and save it as a brush preset named "Sunbeams Center Free".

Step 10: Add a subtle stroke
For a set-off look, you can add a stroke to the effect. Choose a dark gray that is not quite black, so that the edge remains visible later in brush editing. Then save this variant as a brush preset as well and compare it directly with the version without a stroke. This way you can quickly see which variant fits your layout.

Step 11: Create the reversed ray effect
Many flyers use rays that run from the outside toward the center. To do this, you place the reference point of a triangle not in the center, but outside the motif. When moving the reference point, hold down the Shift key so that it stays on the central axis. Rotate the triangle by 15 degrees and repeat the rotation with Ctrl + Shift + Alt + T. Then you add smaller intermediate rays by creating an even smaller triangle, scaling it to 50 percent of the original size, and duplicating it as well.

Step 12: Save a custom brush tip from a complete motif
To combine the effect with a main motif, you place a shape or text in the center and insert the background beneath it. Merge the layers with Ctrl + E, load the pixels via the layer thumbnail, and choose "Edit > Define Custom Shape". Give this template the name "Ray Effect". This way you can quickly reuse the entire setup in future projects.

Step 13: Use the set and keep expanding it
After this short bit of work, you have several brush tips that you can use immediately in your flyer projects. For example, if you need a slightly swirled background in blue, you select the appropriate brush tip, adjust the color, and apply the effect in a few seconds. With every design, think about which elements repeat, and create them as brushes early on.

Summary – Creating flyer backgrounds as brush presets in Photoshop
With simple tools such as Line and Polygon, combined with transformation, duplicate repetition, and filters, you can create your own background effects in a short time. Save every successful variant as a brush preset so that you can use it in new layouts without detours. If you get into the habit of checking in every project which motifs repeat, you will permanently save a lot of working time.
FAQ
Which document size is suitable for brush tips in Photoshop?The maximum size of 5000 × 5000 pixels is ideal, as brush tips then remain sharp even when greatly enlarged.
How do I save a layer as a brush preset?Select the pixels of the layer with Ctrl + click on the layer thumbnail and then open "Edit > Define Brush Preset". Then assign a name.
How do I repeat a transformation and create a copy at the same time?With the key combination Ctrl + Shift + Alt + T, you repeat the last transformation and duplicate the layer in one step.
What is a smart object used for with brush tips?A smart object makes it possible to edit, scale, or modify the effect with filters later on without loss of quality.
How do I remove white strokes that get included when selecting the pixels?Create the stroke as its own layer, merge it with Ctrl + E, and lower the slider in the "Blend If" section so that the white areas become transparent.
How do I create a ray effect that runs from the outside toward the center?Place the triangle's reference point outside the motif, hold down the Shift key while moving it, and repeat the rotation with the key combination for duplicates.


