
A text that looks as if someone had embroidered it onto a fabric patch with a thick needle and yarn doesn't need an elaborate template. You can create it yourself in Photoshop by filling a path outline with a custom brush tip. In this tutorial, I'll show you step by step how to create a stitch pattern, save it as a brush preset, and apply it to text or shapes. In the end, you'll have three variations at hand: a classic embroidery pattern effect, a heart outline with a clipping mask, and a rotated stitch variation.
The video is only loaded from YouTube when you play it – data (including your IP address) is then transmitted to YouTube/Google. More in the privacy policy
The technique is more versatile than it first appears. Once you understand how the brush tip, path, and brush settings work together, you can fill any outline with any motif.
Key Takeaways
- A text or shape becomes a work path via "Make Selection," which you can then fill with a brush.
- You define the brush tip yourself: you draw a simple stitch pattern on a small canvas and save it via "Define Brush Preset."
- With Paint Symmetry (available from CC 2018 in the Technology Previews), you create mirror-symmetrical stitches that look exactly the same.
- Spacing, size, and angle jitter determine whether the pattern looks machine-even or hand-embroidered.
- With texture placement, clipping mask, and drop shadow, the effect becomes three-dimensional and looks like a real patch.
Preparation: Creating Text and a Work Path
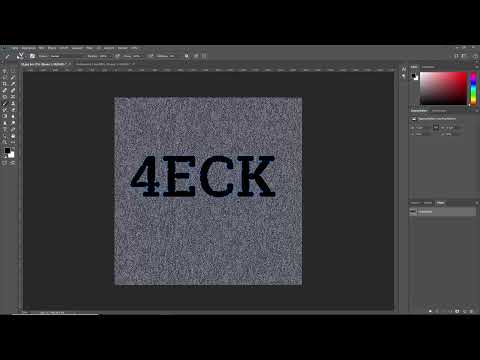
Start with a text. Select the Type tool and write a short word; in the video it is "Viereck." A bold, slim typeface works well because the stitches show up best there. In the video, you can also see a carpet or fabric texture as a background, which is later used for the patch look.
Next, click on the thumbnail of the text layer in the Layers panel while holding down the Ctrl key (Mac: Cmd). This loads the outline of the text as a selection. Then switch to the Paths panel and click the "Make Selection" icon at the bottom, which creates the work path. This path is the line along which you will later place your stitches.


Defining the Stitch Shape as a Brush Tip
Now create a new layer in the Layers panel and hide the background layer, since you don't need it for the brush tip. Create a new document of about 100 × 100 pixels. That is entirely sufficient for a stitch shape. Then zoom into the document as far as possible so you can work precisely.
Now select the Brush tool with a round, hard brush in black. Reduce the brush tip size using the keyboard shortcut Alt plus right mouse button, dragging the mouse to the left or right. Draw a short, straight line using a guide: click once, hold down the Shift key, and set a second point. A simple double stitch, meaning two short strokes next to each other, looks the most convincing in the result.

When your stitch is finished, select the layer with the stitch, click "Edit," and then "Define Brush Preset." Give the preset a clear name, for example "Long Stitch" or "Embroidery Pattern," so you can find it quickly later.

Activating Mirror Symmetry for Even Stitches
Paint Symmetry is particularly handy. It ensures that every stroke you make is automatically mirrored along an axis. To use it, you first need to activate the function in Photoshop CC 2018 or newer versions. Open the Preferences with Ctrl plus K, switch to the "Technology Previews," and check the box for "Paint Symmetry." Then restart the program if the option is not yet visible.
In the brush editing area, you will now find the icon for the symmetry options. Choose vertical symmetry here and drag the symmetry line to the center of your image. Delete the contents of the layer and place a stroke near the edge. You will see that it is immediately mirrored on the opposite side. For an exact copy at the bottom of the image, you can use the area with the Shift or Alt key held down, depending on the desired alignment. This avoids imprecise pixels, which easily arise when working by hand.


When the mirroring is right, open the Layers panel again, click on the thumbnail of the layer with the stitch, and define it as a brush preset. Give it a name like "Embroidery Pattern".

Fill path with the brush
Now switch back to your actual document with the text. In the Paths panel you will find the work path. Click on the "Fill path with brush" icon at the bottom. Your most recently created brush is selected automatically. Before you carry out the fill, open the brush settings to refine the pattern.
First, increase the spacing between the stitches. Already now a typical embroidery pattern look emerges. Then reduce the size, to about 33 percent in the video, so that the stitches look finer. Often, however, the stitches do not follow the course of the path exactly, and this is immediately noticeable on curves. In that case the "Angle Jitter" setting in the shape dynamics helps: set the control to "Direction". The pattern now aligns itself with the course of the path.

Then fine-tune the spacing once more and adjust the size; in the video it ends up at about 30 percent. Carry out the fill again to check the result.
Swap colors and add fabric texture
If your stitch is still black but you want a light embroidery color, swap the foreground and background colors with the X key. Then simply carry out the fill once more. The result already looks like an embroidered lettering.
To make the effect even more believable, you can add a fabric texture. Via "File" and "Place" you bring an image into your document, for example a texture from a fabric pattern. Scale it to fit the lettering and apply it as a clipping mask to the text layer. To do this, hold down the Alt key and click between the two layers. This way the fabric texture appears only inside the text, and the patch look is done.

Drop shadow for more depth
A minimal drop shadow gives the embroidery pattern a three-dimensional quality. To do this, add a drop shadow via the layer styles and keep it deliberately subtle, because a shadow that is too strong quickly looks artificial. You can also transfer the settings to other layers with the Alt key by dragging the effect out of the layer style and onto the fabric layer or the contour layer.

Variation 1: Second brush with long stitch
For more variety, a second brush is worthwhile. To do this, create a new layer and temporarily hide the symmetry by switching off the symmetry option. Take the round, hard brush in black again and make it slightly smaller. Now place two strokes at the top and bottom so that a longer stitch is created. Save it as a brush preset as well, for example under the name "Long stitch".

Variation 2: Heart contour with clipping mask
Now I'll show you a variation with a heart shape. Call up the Custom Shape tool, choose the heart shape, and drag it out in a new layer. The fill color is irrelevant here, since the shape only serves as a boundary. Place the layer with the heart shape above the text layer and apply it as a clipping mask, again holding down the Alt key between the two layers. This way the heart looks like a cut-out piece of fabric.


In the Paths panel, you then convert the shape path into a work path. With this you can fill the heart contour with your brush. Activate the "Fill path with brush" icon and choose the appropriate brush preset. Increase the spacing so that the stitches stand out clearly from one another.

Also increase the angle jitter a little so that the stitches do not look mechanically straight but vary naturally. Then adjust the size slightly and carry out the fill. With the X key you swap the colors again if you don't like the contrast effect.


Variation 3: Rotated Stitches for Dynamism
For a third variation, repeat the process with a new heart path. Convert the shape back into a regular work path. Before filling, open the brush settings and set the angle to 90 degrees. The stitches will then tilt completely, which creates a totally different impression. Since the stitches can now overlap more, you need to increase the spacing so that the pattern remains legible.

Hide the shape layer once you have assessed the result, and switch to the Paths panel to create a new stitch. This way, each variation is preserved independently of the others.

Conclusion: Developing Your Own Embroidery Patterns
The technique is based on a simple combination: a path determines the course, a self-drawn brush tip provides the motif, and the brush settings control spacing, size, and direction. With drop shadows, fabric texture, and clipping masks, this becomes a convincing patch effect. If needed, also add the shadows to the heart shape or the text by dragging the effect onto the new layer while holding Alt.
Try out the method with your own motifs, such as cross-stitches, zigzag lines, or small symbols. Each brush preset opens up new creative possibilities for text logos, invitations, or textile designs.

Summary – Embroidery Pattern Effect in Photoshop: Filling Contours with Brushes
You create a text or a shape, convert the selection into a work path, and define your own stitch shape as a brush preset. With paint symmetry, you ensure mirror-identical stitches, and you fine-tune the pattern via spacing, size, and angle jitter. Fabric texture, clipping mask, and a subtle drop shadow complete the look. With heart contours and rotated stitches, a wide variety of variations can be created.
FAQ
Which Photoshop version do I need for paint symmetry?The function is available from Photoshop CC 2018 and, if it is not displayed, must be activated in the preferences under Technology Previews.
What is the brush preset for?It saves your self-drawn stitch shape so that you can reuse it for path fills at any time.
Why don't the stitches follow the path?In the shape properties area, activate the "Direction" control for the angle jitter, then the stitches will align with the course of the path.
How do I achieve a more natural, hand-embroidered look?Increase the angle jitter slightly so that the stitches don't run exactly straight, and vary the size minimally.
How do I set up a fabric texture as a clipping mask?Place the image via "File" and "Place", scale it, and then click between the text layer and the texture layer while holding the Alt key.
Can I also apply the effect to shapes instead of text?Yes, any shape can be converted into a work path via "Make Selection" or the shape path and then filled with your brush preset.


