
Digital & Matte Painting Techniques: the tutorial for Photoshop in German

- Exploring the painterly worlds of Photoshop step by step
- Comprehensive instructions in German for creating breathtaking paintings
- Learn how to use tonal values, brushes, color, perspective, photo texturing and details
- Take your creative horizons to a new level in digital painting
- For optimum traceability with project files
- Photoshop tutorial by digital artist Christian Gerth
Painting in Photoshop can be so easy - Christian Gerth and this video training prove it!
32 Videos, 710 minutes
Introduction
Digital Painting & Matte Painting: Training overview
Module 0 - Part 1: This video training gives you an overview of the entire training. You will also find out what prerequisites are required. But don't be put off: it's just as suitable for Photoshop cracks as it is for complete beginners ...
Digital Painting & Matte Painting: Overview of different techniques
Module 0 - Part 2: There are big differences in the way digital paintings are made. In addition, the technique is largely decisive for the time required. The choice is entirely up to you!
Digital Painting & Matte Painting: Excursus - Matte Painting
Module 0 - Part 3: What actually is matte painting? Although this technique sounds so modern, it has its origins way back in the last century.
Fundamentals
Digital Painting & Matte Painting: Optimizing the workspace
Module 1 - Part 1: To be able to paint efficiently, it makes sense to adjust the workspace in Photoshop a little. Thanks to the option of saving different settings, you can try them out to your heart's content.
Digital Painting & Matte Painting: Brush tool and its settings
Module 1 - Part 2: The brush tool is the most important element of all when painting in Photoshop. Thanks to its countless setting options, working with the predefined standard tips alone is already very multifaceted.
Digital Painting & Matte Painting: Interaction of lasso tool and brush
Module 1 - Part 3: The lasso selection tool is much more than just a cropping tool. Rather, together with the brush tool, it becomes an unbeatable duet when creating hard edges and clearly defined shapes.
Digital Painting & Matte Painting: Create special brush tips yourself
Module 1 - Part 4: The brush tips supplied by Photoshop are already very good. But it's the countless possibilities of self-created brushes that add the salt to the soup and make the workflow run like clockwork.
Digital Painting & Matte Painting: Clipping - made easy
Module 1 - Part 5: Cropping is often referred to as the supreme discipline of image editing. But it can also be done much more simply and just as effectively. In this video training, you will also learn how to add water to the image without it actually having to be there.
Digital Painting & Matte Painting: Stamping tool and its settings
Module 1 - Part 6: If you don't want to crop exactly, you can also use the stamp tool. However, you will need a suitable brush tip, which is also no big deal.
Digital Painting & Matte Painting: Controlling lighting conditions with adjustment layers
Module 1 - Part 7: At the end of this basic module, you will learn how to not only add light with a few adjustment layers, but also how to control it. Just sharpen and your - perhaps first - matte painting is ready!
Tonal values
Digital Painting & Matte Painting: The importance of tonal values
Module 2 - Part 1: Colors can emphasize a motif, but the tonal values build it up. Why do we see depth in landscape photographs? Quite simply: because the tonal values are right!
Digital Painting & Matte Painting: Defining image composition
Module 2 - Part 2: A picture is always a whole. However, you always have to consider where the viewer should look first.
Digital Painting & Matte Painting: Setting tonal values
Module 2 - Part 3: Now it's time to paint ... With just a few steps and tools, you can learn how to create a landscape concept in no time at all. Although it does not yet contain any details, the most important work is already done!
Digital Painting & Matte Painting: Inserting structures
Module 2 - Part 4: Photoshop's standard brushes are good. However, you can increase your working speed immensely if you have access to additional brush tips. In this video training you will get my absolute brush set secret tip!
Digital Painting & Matte Painting: Defining proportions
Module 2 - Part 5: Landscapes only take on a clear dimension when familiar elements appear in them. A person or an animal in the picture helps us to quickly define the proportions.
Color
Digital Painting & Matte Painting: Colorwash - coloring tonal values
Module 3 - Part 1: Normally you want more than just tonal values. With a color wash, you can apply a first layer of color without destroying the cleanly selected tonal values.
Digital Painting & Matte Painting: Working out colors
Module 3 - Part 2: After the first wash, a little more fine-tuning is required. Here you will learn how to enhance the colors of a picture a little more.
Digital Painting & Matte Painting: Select monochromatic palette and add complementary color
Module 3 - Part 3: The title sounds daunting, but the effect is all the easier. There is a quicker way to use tonal values and a monochrome palette in one swipe. Add a little complementary color and most of the work is done.
Digital Painting & Matte Painting: Collecting colors and defining the color palette
Module 3 - Part 4: If you are not yet comfortable with the choice of colors, existing landscape photos can help you create a color palette yourself. This can be saved in Photoshop, sorted and used over and over again.
Digital Painting & Matte Painting: Start with color palettes
Module 3 - Part 5: What good is a color palette if it's not used? With a coherent color palette, you don't have to worry and can paint freely.
Perspective
Digital Painting & Matte Painting: Horizon and central perspective (a vanishing point)
Module 4 - Part 1: The correct perspective of an image forms another basis alongside the tonal values. Although this topic sounds rather dry, it doesn't necessarily have to be.
Digital Painting & Matte Painting: Normal perspective (two vanishing points)
Module 4 - Part 2: The normal perspective is probably the most frequently used option. It is already more effective than the central perspective, but is still manageable. By using a bird's-eye or frog's-eye perspective, a picture mood can be largely defined.
Digital Painting & Matte Painting: Three-point perspective
Module 4 - Part 3: It is interesting, but it also harbors a certain potential for danger. Nevertheless, it is worth taking a closer look at the three-point perspective and its dynamics.
Digital Painting & Matte Painting: Create SketchUp models
Module 4 - Part 4: This free program is a quick way to create simple 3D models.
Digital Painting & Matte Painting: Integrating SketchUp models into Photoshop
Module 4 - Part 5: An additional, free plug-in allows you to export these to different variants for Photoshop. With different layer modes, you can not only use the individual SketchUp images as an aid, but also integrate them directly into the image.
Digital Painting & Matte Painting: Defining the perspective of a picture
Module 4 - Part 6: With existing motifs, it is important to first analyze and understand the perspective before adding new elements. With the right guidelines, however, this can be done quickly.
Photo texturing
Digital Painting & Matte Painting: Use suitable photo textures
Module 5 - Part 1: Photo textures can speed up the work process enormously and also make the result much more detailed. Although there are no limits to textures, there are better and less good photos.
Digital Painting & Matte Painting: Using different layer modes
Module 5 - Part 2: If you only want to take over the structure of a photo, the "Soft light" or "Copy into each other" layer modes are ideal. Together with shapes painted in masking mode, organic elements can be created in no time at all.
Digital Painting & Matte Painting: Texturing with a photo structure (Part 1)
Module 5 - Part 3: In "Normal" mode, the photos can be inserted very well in their actual form. A few color and saturation corrections paired with some additional light and the mountain comes to life.
Digital Painting & Matte Painting: Texturing with a photo structure (Part 2)
Module 5 - Part 4: The edges are best refined with the stamp tool and an organic brush tip. Finally, a little extra atmosphere helps to blend everything together nicely.
Digital Painting & Matte Painting: Texturing with a 3D template (Part 1)
Module 5 - Part 5: With the help of a 3D base, houses can also be textured very easily. You often have to work on the perspective and add the first shadows and lights.
Digital Painting & Matte Painting: Texturing with a 3D template (Part 2)
Module 5 - Part 6: If you have created a shadow layer in SketchUp, you can now insert and adjust it. Together with some additional light, the houses come to life.
Examples of use
-
 Digital & Matte Painting Techniques: the tutorial for Photoshop in German
 -
 Digital & Matte Painting: A scenario painted in Photoshop showing a village under a tree.
 -
 Digital & Matte Painting: A scenario created with many brushstrokes, showing a valley surrounded by mountain ranges.
 -
 This digital painting shows a ship in the golden ratio on a painted body of water with mountains and villages in the background.
 -
 Digital Painting. Overview of the training content and the lessons
You might also like

More style, more power, more templates!
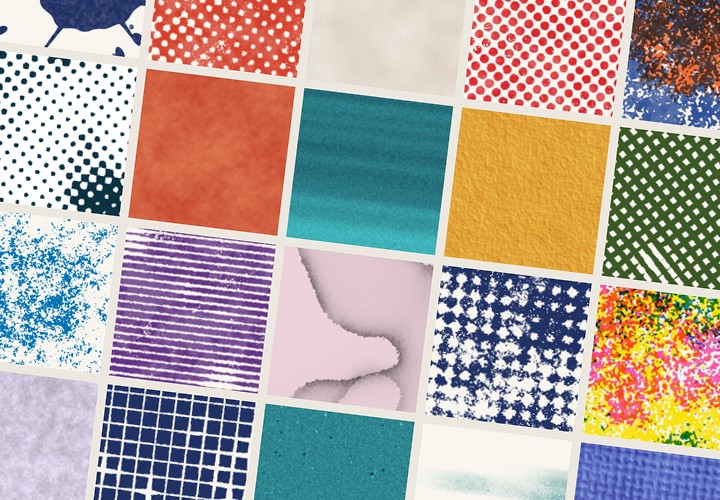
20 sets in 4K (4096 × 4096 px, 300 DPI) as JPG plus Photoshop patterns, calibrated to the fill method
Live your layout now!

Full power, more inspirations, maximum WOW effect!
Comment now „Digital & Matte Painting Techniques: the tutorial for Photoshop in German“