
A mountain, a range of hills or the edge of a forest often looks harmonious in its basic form, but it is only the texture that turns a clean drawing into a believable matte painting. In this tutorial, the instructor shows how to texture hills with the Soft Light layer mode, how to refine edges cleanly, and how to organize your layers so that you keep an overview even with more than 300 layers. By the end, you will know the advantages and disadvantages of this method and when you should rather switch to Normal mode.
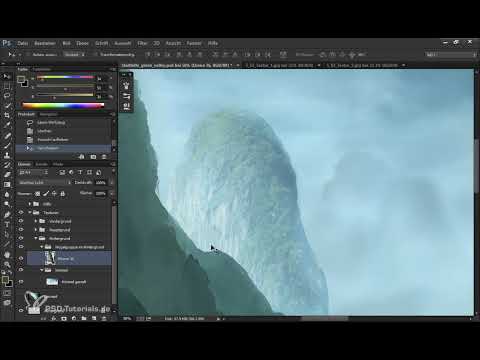
The video is only loaded from YouTube when you play it – data (including your IP address) is then transmitted to YouTube/Google. More in the privacy policy
Key Takeaways
The Soft Light layer mode transfers the brightness and structure of a texture onto your subject without greatly changing the colors. It is particularly suitable for elements with little detail, such as distant hills. Edges can show unattractive blending artifacts, which you should correct deliberately. Clean naming and grouping of your layers will save you a lot of time later. If you plan to make adjustments to color or brightness, it is worth copying the texture to its own layer in Normal mode.
Step-by-Step Guide
Step 1: Analyze the Starting Image and Check the Concept
Open the starting image at its original size and first hide all textures so that you can see the basic concept. Look at which areas already look painterly and where structure is still missing. In the example, it is mainly the hills in the background that are still too smooth. Download the textures used and check their direction of light before you start inserting them.

Step 2: Break Down the Landscape into Layers and Name Them
Cut the concept layers into individual areas, for example foreground, midtones and background, and place them in sensible groups. Assign clear names from the start, such as "Hügel_Hintergrund_links" or "Himmel". That way you can quickly find the right layer when making later changes, and a layer chaos that is confusing at first remains manageable.


Step 3: Insert the Texture with the Soft Light Layer Mode
Insert the texture file as a new layer and set the layer mode to Soft Light. For distant areas, choose a subtle texture, because the atmosphere swallows details. If the texture is too strong, it is better to remove details beforehand rather than laboriously correcting them later.
Step 4: Position the Texture and Align It with the Direction of Light
Place the range of hills at the desired location with the Lasso tool and scale it with Ctrl T. Make sure that the direction of light in the texture matches the light source of your image. With strong light from one side, flip the layer horizontally if necessary, which significantly improves the effect in this example.

Step 5: Refine the Hill Shape with the Warp Tool
If the silhouette still looks angular, use the Warp tool to make the edges softer and rounder. A harmonious hill contour looks more natural than a rigid shape. Work with small movements and regularly compare with the overall image.

Step 6: Recognize and Remove Unattractive Edges in Soft Light Mode
Zoom in closer and check the edges. In Soft Light mode, dark edges or areas that become much too dark often appear. Simply cut away unsuitable parts before you continue working. These outliers are typical of this method and cannot be completely avoided.


Step 7: Refine Edges on a New Layer in Normal Mode
Duplicate the area on a new layer, set it to Normal and soften the edge with the Clone Stamp tool. This way you are not cutting off the edges, but working with a gentle transition. Zoom in closely beforehand so that you can work precisely.

Step 8: Choose the right brush for structure and direction
In the Clone Stamp tool, choose a brush that suits your subject. Different brushes are suitable for harder and larger structures than for soft fog structures. For brushes with a direction setting in the brush properties, make sure the edges point in the right direction. Also always paint in the same direction so that the structure looks consistent. For brushes with low opacity, you should apply enough strokes so that the area is fully covered.

Step 9: Add rocks with the chalk brush
For rock structures, a small chalk brush that you apply almost vertically is suitable. Control the opacity via the pen so that the transitions stay soft. If you add rocks on a separate layer, you can correct them at any time later without changing the entire image.
Step 10: Smooth abrupt transitions with a plant brush
If an edge remains too abrupt, you place a soft transition over it with a plant brush. Work carefully so that the structure doesn't look artificial. With two layers, you can already achieve a solid texture.
Step 11: Solve the problem of the Soft Light mode with subsequent adjustments
If you adjust the image later with a curves adjustment, layers in Soft Light mode do not change to the same degree as the photo layer. The stamped layers in Normal mode remain the same. To avoid this conflict, hide the foreground and the main part, copy everything visible onto a new layer with Ctrl Shift Alt E, and remove the surroundings using a selection. The texture is then in Normal mode and can be adjusted independently.


Step 12: Try the variant using Quick Mask mode
With a second method, you first draw the edge in Quick Mask mode. Create a new layer, activate Quick Mask mode, and draw the desired shape in black. Then you fill the area with a dark color and add the texture as a clipping mask. This way, the structure is created exactly where you need it.

Step 13: Use the texture as a clipping mask and adjust it
Place the texture as a clipping mask on the drawn layer while holding down the Alt key. Reduce its size or copy it to match the structure of the image. If the color isn't right, correct hue and saturation with Ctrl U. If necessary, reduce the opacity so that the texture doesn't look too dominant.


Step 14: Balance the result with a layer mask and new stamps
A dominant pattern is immediately noticeable, so you keep stamping in different places and hide unsuitable areas with a layer mask and a black brush. Always work on a new layer so that you know at all times which layer has which effect.

Step 15: Add individual elements and fog as a finishing touch
Place individual trees on their own layers and try out several variants, because not every idea works right away. For soft transitions at the bottom edge, the Big Softy brush with a medium color tone is suitable. It creates a fog structure that gives the image depth. Then adjust the opacity until everything looks harmonious.


Summary – Matte Painting Texturing with the Soft Light Layer Mode
You have seen how to texture hills with the Soft Light mode, correct edges, and structure layers clearly. The method is quick, but carries risks with edges and color adjustments. For problem cases, switching to Normal mode helps, where you control textures more flexibly. Experiment with different brushes and textures, because the result often only shows itself through trial and error.
FAQ
Why do the edges in Soft Light mode often look dark or messy?The mode strongly blends brightness differences. Edges with extreme values therefore quickly become too dark. Remove these areas or rework them on a new layer in Normal mode.
When should I use the Soft Light mode?It is particularly suitable for elements with little detail, such as distant mountains or hills, where the texture should look subtle anyway.
How do I avoid problems with later color or tonal adjustments?Copy what is visible onto a new layer, remove the surroundings using a selection, and then continue working in Normal mode.
Why is layer naming so important?With many layers, you otherwise quickly lose track. Clear names and groups help you edit specific areas in a targeted way.
What should I do if the pattern looks too dominant?Reduce the opacity of the texture and continue stamping in different places. Also add a layer mask to hide unsuitable areas.


