
Two computers, two Photoshop interfaces, and yet the same software runs on both. If you come across a different arrangement of the right-hand side at a colleague's, a friend's, or in a training session, it is almost always down to the panels. Photoshop can be customized to a large extent, and you should take advantage of exactly that as soon as you work with it regularly.
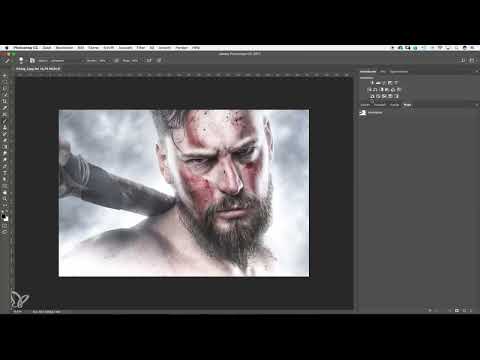
The video is only loaded from YouTube when you play it – data (including your IP address) is then transmitted to YouTube/Google. More in the privacy policy
In this tutorial, I will show you how to switch between existing workspaces, detach panels, dock them, hide them, and show them again. At the end, you will save your own interface as a workspace so that it is available to you at any time. Whether you draw, photograph, or illustrate: the procedure remains the same.
Key Takeaways
You can find workspaces via the Window menu and switch them at any time. You should hide panels you don't need so that the image has room. Frequently used panels such as Layers and Adjustments belong close to your hand. You save your own arrangement as a new workspace, otherwise it will be lost when you close Photoshop.
Step-by-Step Guide
Step 1: Recognizing Differences in the Interface
When you open Photoshop, you will probably notice that the panels on the right-hand side are arranged differently than for other users. This is completely normal, because Photoshop allows an individual setup for every workflow. Consider the arrangement first as a starting point and not as a fixed default.

Step 2: Opening Workspaces via the Window Menu
You can find access to all workspaces at the top in the menu under Window. There you will find the entry Workspaces, through which you call up existing interfaces. Open this submenu every time you want to switch the arrangement. That way you keep track of which presets already exist.

Step 3: Using a Minimized Workspace for Retouching
An example of a focused interface is a workspace that shows only a few panels. This leaves almost the entire area available for the main subject. The panels are smaller but still accessible. Especially for retouching you benefit from this, because the image remains large enough to see fine details.

Step 4: Trying Out Predefined Workspaces
Adobe provides ready-made workspaces, for example for painters or photographers. The workspace for painters mainly shows brushes, layers, and colors, while the workspace for photography additionally offers a histogram, navigation, libraries, and standard adjustments. Try out these templates to see which panels a professional uses for their task. Afterwards, you can use the arrangement as a basis for your own interface.
Step 5: Detaching and Rearranging Panels
In the Essentials workspace, all panels are open, which quickly becomes cluttered. You can grab any panel by its tab or title bar and drag it to a new position. Take your time experimenting. First drag out everything you don't need right now and push it aside. Afterwards you will see very clearly which panels remain.

Step 6: Defining Layers as the Central Panel
In the opinion of many users, the Layers panel is one of the most important elements of all. Through the layers you control adjustments, retouching, and black-and-white conversions. Therefore, keep it permanently visible and position it so that you can reach it without searching. Panels for Paragraph, Character, or Brush Presets are usually not needed for image editing and can be closed.

Step 7: Docking Panels
A panel can be docked at the top, at the side, or as a tab next to another panel. If you drag the History panel onto the Layers tab, for example, both appear side by side as tabs. Choose the variant that suits your working style. You rarely use a panel like History, but still want to have it nearby, which is why docking it to Layers is a good option.

Step 8: Place Adjustments and Layers as the Core of Image Editing
You will often use the Adjustments panel to modify contrast, brightness, color, and image looks. Drag it right next to the Layers panel so you don't constantly have to shift your gaze while working. You can also check other panels here, such as Styles or Paths. You need Styles more for graphic work and layouts, while Paths are needed after a cutout. Decide for yourself what is needed regularly and what only occasionally.

Step 9: Retrieve Missing Panels via the Menu
If you have accidentally closed a panel, such as the Histogram, you can always find it again under Window. Click on the desired panel, and it appears in its default position. From there, you can move it to a suitable place. You adjust the size by dragging the edge of a panel. This is especially practical on a large monitor with high resolution, while on a smaller screen you'd rather keep the panels narrow.

Step 10: Collapse Panels to Icons
Panels that you only need now and then can be displayed in a space-saving way. By double-clicking the tab or the header of a panel, you reduce the display to icons or thumbnails. The text disappears, and only the graphic remains visible. This works with almost all panels, for example with Color, Libraries, or Navigator. A click on the icon reopens the panel when needed.

Step 11: Save Your Own Interface as a Workspace
When you are satisfied with your arrangement, save it as your own workspace. To do this, click Window at the top, select Workspace, and then New Workspace. Give it a meaningful name, such as Retouching, and confirm the save. Your workspace is available in the menu from now on, even after restarting Photoshop.

Step 12: Return to the Saved Workspace
If you have accidentally changed your interface, simply switch back to your saved workspace via Window and Workspace. However, be aware that unsaved changes are lost when you close Photoshop. The last saved version then opens again. Therefore, always deliberately save changes to an interface as a workspace if you want to keep them.

Summary ??? Setting Up Photoshop Panels: Customizing and Saving Workspaces Effectively
You have seen that the Photoshop interface can be adapted to your workflow. Start with an existing workspace, remove everything you don't need, and arrange the remaining panels so that they help you in everyday work. Layers and Adjustments generally belong in the front row, while less frequently used panels can be on standby as icons or nearby. Then save your arrangement as your own workspace so that you can call it up at any time.
My final tip: less is often more. A clear interface saves time and nerves, and you won't lose the joy of working. Calmly try out different arrangements until it feels right for you.
FAQ
Why does my Photoshop interface look different from others'?Photoshop can be set up individually, and each user arranges the panels according to their own workflow.
How do I find workspaces in Photoshop?You open the Window menu and select the Workspace entry there, where all available interfaces are listed.
How do I save my own arrangement?Click on Window, then Workspace and New Workspace, give it a name, and confirm the save.
What happens if I don't save my changes?When closing Photoshop, unsaved changes are lost, and the last saved workspace is loaded again.
How do I bring back a closed panel?You can find all panels in the Window menu and reopen them there with a click.
Can I shrink panels without closing them?Yes, by double-clicking the tab or header of a panel, you reduce it to an icon view with a thumbnail.
Which panels are most important for image editing?Usually Layers and Adjustments are the most important, since you use them to control contrast, colors, and retouching.
How do I adjust the size of a panel?You drag the edge of the panel until it reaches the desired width or height.


