
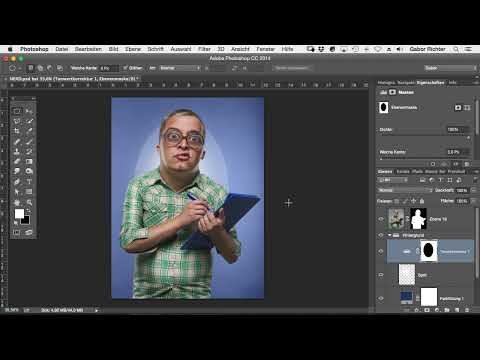
Do you know that feeling when your image looks clean, but the figure somehow sticks to the space? The background looks flat, and the drama that makes comics and illustrations so vivid is missing. This is exactly where this tutorial comes in. You will learn how to create a kind of backlight with a simple light spot behind your figure, change the lighting, and use a soft vignette to deliberately guide the viewer's eye. Everything can be done in Photoshop with just a few layers, and you keep control at all times, because none of it is permanently burned in.
The video is only loaded from YouTube when you play it – data (including your IP address) is then transmitted to YouTube/Google. More in the privacy policy
Key Takeaways
- A white, softly drawn dot behind the figure creates depth and a slight glow from behind.
- The spot sits on its own layer. You can move it, scale it, or adjust its opacity at any time.
- A vignette is created from a selection that you transfer as a mask into a Levels adjustment. The softness of the mask determines how natural the transition looks.
- The mask can be inverted so that only the edge is darkened and the figure in the center stays bright.
- Before-and-after comparisons help you realistically judge the strength of the effects.
Step-by-Step Guide
Step 1: Identify the initial problem and prepare the background
Before you change anything, look at your image critically. If the background looks evenly flat, there is no gradation between the foreground and the surroundings. In your document, open the group containing the background, which already holds your color overlay. Above it, create a new, empty layer and give it a clear name, for example "Spot". A clear name saves you a lot of searching later, especially if your document contains several layers.

Step 2: Set the brush to white paint and full opacity
Select the Brush tool and set the opacity to 100 percent. Then switch the foreground color to white. With this setting you place a single dot that will later act as a light source. Make sure you are really working on the empty Spot layer and not accidentally on the background layer.

Step 3: Place the light point behind the figure
Now you place the white dot in the image with a single click. The big advantage of this approach is that you can reposition the dot at any time. Place it behind the figure's back, roughly at neck height and centered in the image. This creates the impression that the light is coming from behind and gently wraps around the silhouette. Depending on the pose, you can experiment with the position until the figure's contours show to their best advantage.
Step 4: Enlarge the spot and strengthen the effect
The dot is initially far too small to create a gradient. Therefore, activate the Transform function with Ctrl or Command and T and drag the anchor points until the light area reaches roughly the desired size. Then confirm with Enter. Now the spot no longer looks like a dot, but like a soft light source that gently brightens the background.
Step 5: Fine-tune the gradient, glow, and opacity
Only now does the actual effect become visible. The background gets a pleasant gradient, and the figure stands out clearly thanks to the slight glow from behind. Move the spot once more until you like the lighting. If the effect is not enough for you or is too strong, simply reduce the opacity of the Spot layer. This flexibility is one of the biggest advantages of this method, because you don't have to commit right away.
Step 6: Create an elliptical selection for the vignette
Now it's about the vignette, which directs the eye to the center of the image. Select the Elliptical Marquee tool and drag a selection around the area you want to emphasize. Position the ellipse so that it roughly encloses the center of the subject. The edge of the selection doesn't have to fit perfectly, because the later blurring will conceal minor inaccuracies.

Step 7: Create the Levels adjustment layer
Now create an adjustment layer for Levels. As soon as you move the sliders, your image gets darker. By default, however, this affects the area inside the selection, and that is exactly what you don't want with a vignette. You want to darken the outer area and leave the center bright. For that you need the next step.
Step 8: Invert the Mask
The selection you created earlier is automatically adopted as a layer mask. To make sure the darkening ends up outside the ellipse, you invert the mask using the keyboard shortcut Ctrl or Command and I. After this inversion, the edge is dark and the center remains untouched. The result already looks like a vignette, but the transition often still has an unnaturally hard edge.

Step 9: Adjust the Softness of the Mask
To soften the hard edge, you open the properties of the mask. There you will find sliders for density and feather. The feather is exactly the value you need for a natural gradient. Move the slider to the right and watch how the edge dissolves. Make sure you don't overdo it. In the video, it quickly becomes clear that a very high value overdoes the effect, while around 100 can deliver a balanced gradient. However, your setting depends heavily on the image size and the subject.
Step 10: Check the Result with a Before-and-After Comparison
Now it's time for fine-tuning. Turn the visibility of individual layers on and off to see how the effect changes. It may be enough to reduce the softness a little so that the vignette doesn't look too blurry. You can also darken the vignette more or less. A before-and-after comparison quickly shows you whether the image has really gained depth.
Step 11: Evaluate the Overall Effect and Readjust if Necessary
Finally, look at the complete image. The background no longer looks flat, the lighting is much more lively, and the colors appear more vivid. You can reposition the spot at any time and move the vignette as well. If the effect seems too subtle to you, increase the darkening. If, on the other hand, the image looks too high in contrast, reduce the strength of the adjustment layer. It is often worth favoring a version with moderate intensity, as it presents the figure in a more pleasing way.
Summary – Setting a Light Spot in Photoshop: Comic Look with More Depth
With a white light spot behind the figure, a softly drawn vignette, and an inverted mask, you bring more depth out of your image. The method is flexible because each layer can be edited separately. Try out the steps on your own subject and experiment with position, size, and softness until you are happy with the lighting.
FAQ
Can I move the light spot afterwards?Yes, the spot is on its own layer. You can move it, enlarge it, or adjust its opacity at any time without changing the rest of the image.
Why do I use an adjustment layer for the vignette?An adjustment layer is non-destructive. You can adjust the darkening at any time later, and the original image remains unchanged.
What does inverting the mask do?Without inversion, the inside of the selection would be darkened. By inverting it, only the outer area is darkened, so the subject in the center stays bright.
How do I set a soft transition for the vignette?Open the properties of the layer mask and increase the softness. Be careful not to overdo the value so that the effect looks natural.
What is the ideal softness setting?A value around 100 often provides a good starting point. However, the right setting depends on the image size and subject, so a before-and-after comparison is worthwhile.
Can I change the intensity of the vignette later?Yes, you can adjust the strength of the levels adjustment at any time afterwards. This makes it easy to tone down a result that has too much contrast.


