
An oversized head on a perfectly normal body is one of the simplest ways to make a portrait look instantly комisch. You know exactly this effect from comic series and cartoons, and exactly this look can also be transferred to photos with Photoshop. You don't need any elaborate retouching knowledge for it, just a feeling for proportions and a few clean working steps.
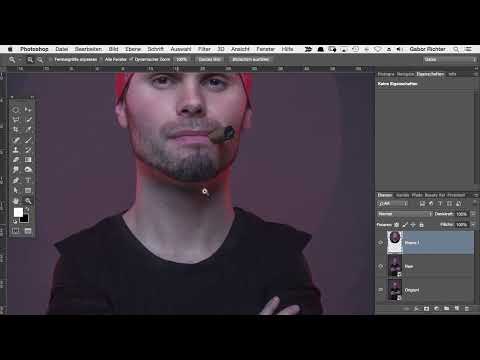
The video is only loaded from YouTube when you play it – data (including your IP address) is then transmitted to YouTube/Google. More in the privacy policy
In this tutorial, I'll show you how to select a person's head, put it on its own layer, enlarge it in a targeted way, and then blend it into the body with a mask so softly that the edit is barely noticeable. You only need basic knowledge of working with layers and selection tools.
Key Takeaways
The selection should include the neck. If you select the head alone, the transition will be much more difficult later. A generous area around the neck and collar gives you material for soft transitions.
The transformation works best from the neck. Deliberately reposition the anchor point so that the head grows upward and the body stays stable.
Proportions are only preserved when the Shift key is held down. Without it, you quickly distort the face in an unflattering way.
The mask is your most important tool for the transition. With a soft brush at low opacity, you carefully work your way up to the edge instead of cutting it off harshly.
Step 1: Select the Head
Start with the Elliptical Marquee tool, which you'll find in the toolbar among the selection tools. With it, you draw a circle or ellipse around the head. The exact shape is secondary here, because a perfect circle isn't necessary. All that matters is that the selection completely encloses the head.
Deliberately include the neck and, if possible, the collar as well. That may sound like too much at first, but it makes the entire job considerably easier. This way you have enough image material to blend softly into the body later, and you don't have to laboriously work along the neckline.

Step 2: Copy the Selection to Its Own Layer
Now switch to the layer with the original photo. With the keyboard shortcut Command+J (Mac) or Ctrl+J (Windows), you copy the selected area to a new layer. This way the original stays untouched, and you can go back at any time.
If you then click on the new layer while holding down the Alt key, you'll see that only the selected area, i.e. your head including the neck, is on this layer. It's best to give the layer a meaningful name right away, such as "Head". This will save you a lot of searching time later.
Step 3: Make Room and Free Transform
Since the enlarged head needs more space, it's worth zooming the view out a little. Then start Free Transform via Edit, Free Transform, or with Command+T or Ctrl+T.
You will now see the frame with the handles at the corners and edges. Drag one of the corner points to change the size. Be sure to hold down the Shift key while doing so. Without it, the face becomes distorted and quickly looks unnatural. With the Shift key, the proportions are preserved, and the head grows evenly.

Step 4: Place the Anchor Point on the Neck
By default, Photoshop scales from the center of the selection. That's unfavorable for our purpose, because the head then grows in all directions and the neck shifts. The small anchor point in the middle of the frame determines where the scaling is done from.
It's therefore best to cancel the transformation with Escape and open it again. Then move the anchor point to the spot where the neck merges into the body. From there, you now transform. This is a small extra step, but it saves you a lot of rework later, because you no longer have to laboriously move the head.
Step 5: Enlarge Evenly
Now, holding down the Alt and Shift keys, drag from the anchor point. The Alt key ensures that the scaling occurs symmetrically from the anchor point, and the Shift key maintains the proportions. The head now grows evenly upward and to the sides, while the neck stays in place.
How much you enlarge is a matter of taste. As a guideline, you can try anything from half to double the original size. Always take a calm look at the result again and again, because changes often seem stronger in comparison than you initially think.

Step 6: Reduce the Opacity and Adjust the Layer
Before you continue, reduce the opacity of the head layer to about 50 to 60 percent. This way you can see the original showing through underneath and recognize where the head and body don't fit together. For this, it is best to zoom in close to the transition area.
If the position isn't right yet, you can fine-tune the layer with the Move tool. With the arrow keys on the keyboard, you move the layer pixel by pixel. Pay particular attention to the shoulders: the best transitions occur there when the head sits cleanly on the body.

Step 7: Create a Layer Mask for the Transition
Only now does the mask come into play. Select the head layer and click the layer mask icon at the bottom of the Layers panel. The mask is initially completely white, so everything remains visible. With the mask, you control which areas of the layer are shown and which are not.
Your goal is to hide excess material at the shoulders and neck so that the head blends seamlessly into the body. To do this, you work with black paint on the mask, because black hides and white reveals.

Step 8: Remove Hard Edges with the Brush
Select the Brush and set the foreground color to black. For the first pass, you can set an opacity of 100 percent and a hardness of 100 percent. With this hard brush, you quickly remove excess material. Work your way forward bit by bit and stop as soon as the transition roughly fits.
Work on both sides of the neck and on the shoulders. The hard transition is deliberately chosen here in order to cleanly remove material in the first step. The fine transitions come in the next step.

Step 9: Create Soft Transitions with Low Opacity
Now comes the crucial finishing touch. Reduce the brush opacity to about 20 percent and the hardness completely to zero. Set the size so that you can work comfortably. A brush of around 400 pixels often works well for large images, but you can adjust it by feel.
Now go over the areas that still look hard several times. Each pass removes a little material, so the transition becomes softer step by step. It is important to stay patient, because a single strong stroke at full opacity would immediately make the transition hard again. Work on the other side of the head in the same way, with the same feel for gradations.

Step 10: Check the Result
Finally, zoom out a bit again and look at the image as a whole. If necessary, briefly show and hide the layer to see the before-and-after comparison. Often a slight glow or a small edge remains in one spot, which you can touch up with the soft brush.
The before-and-after comparison immediately shows you how strong the effect already is. An enlarged head often turns a portrait into a humorous cartoon character in just a few steps. This approach can easily be transferred to other images, so that over time you can apply it routinely.

Summary – Comic Look in Photoshop: Enlarge the Head Step by Step
You have now learned a simple but effective method for enlarging a person's head in Photoshop. You select the head including the neck with the Elliptical Marquee tool, copy it to its own layer, and transform it proportionally from the neck. With a layer mask and a soft brush with low opacity, you then create an inconspicuous transition. With a little practice, you will achieve this comic look quickly and reliably.
FAQ
Do I absolutely have to mark the head with an exactly round selection?No, the shape of the selection is secondary. The only important thing is that it completely encloses the head and includes the neck.
Why should I hold down the Shift key while transforming?With the Shift key, the proportions are preserved. Without it, the face is squashed or stretched, which quickly looks unnatural.
What do I need the anchor point for?The anchor point determines from which point the scaling occurs. If it is at the neck, the head grows upward, and the connection to the body remains more stable.
Why do I work with a layer mask instead of directly with the eraser?The layer mask is non-destructive. You can touch up black or white at any time without permanently losing image information.
Which brush settings are suitable for soft transitions?A low opacity of about 20 percent and a hardness of zero are ideal. This way you remove the material in several fine steps.
Can I also apply the method to other images?Yes, the procedure is universally applicable. With each image, pay attention to suitable proportions and a neck where the transition can be created cleanly.


