
Exaggerated cartoon shoes only look funny if they blend organically into the figure. This is exactly the point where it is decided whether your result looks charming or botched. In this tutorial, Gabor shows you how to inflate shoes with the Liquify filter in Photoshop without the shape falling apart. He makes no secret of his mistakes, and that is exactly what makes the guide so valuable. You learn not only the techniques, but also when you should stop.
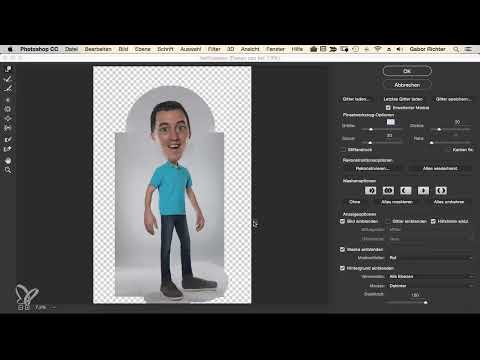
The video is only loaded from YouTube when you play it – data (including your IP address) is then transmitted to YouTube/Google. More in the privacy policy
Key Takeaways
- Liquify is fundamentally reversible. If you work with a Smart Filter, you can go back at any time and make improvements.
- Protect areas you do not want to change with a mask before you get started. The heel and toe in particular otherwise warp quickly.
- Exaggeration requires control: Thick soles and large toes only work if the baseline of the sole stays straight.
- A comparison with the original or the other shoe shows you mistakes that get lost in the details.
- Breaks help. If you have gotten stuck, a fresh look often achieves more than continued pushing around.
Step-by-Step Guide
Step 1: Finding the mistake and rescuing the hand
Before you tackle the shoes, you should critically examine your document. At the beginning, Gabor shows that he accidentally deformed the hand while using Liquify. Such mistakes often only become noticeable when you compare the result with the original. Therefore, look at every area of the image, not just the object you are currently working on. If something is warped, you can restore it via the Liquify filter by carefully pushing the affected spot back or by editing it with the Reconstruct tool. Gabor emphasizes that this is exactly the advantage: You can go back in at any time and fix the mistake.

Step 2: Defining the basic shape of the shoes
The shoes should look round, funny, and exaggeratedly large. To do this, first use the Liquify tool to push the heel in the desired direction. Gabor leaves the heel slightly slanted so the shoe does not look stiff. Work with small movements and brush sizes that suit the detail. This way you avoid unwanted outliers at the edges. Keep in mind that you can correct the shape again later, so the first pass does not have to be perfect.

Step 3: Inflating the shoes and thickening the sole, toe, and heels
Now comes the actual cartoon effect. Push the sole, the sides, and the toe outward so that the shoes look as if huge feet had been squeezed into them. Gabor enlarges the toe significantly in particular, because it is the most distinctive feature of a cartoon shoe. You decide for yourself whether you want leaf-shaped or round feet. Both variants work as long as you decide on one direction and implement it consistently. Gabor himself chooses thick, round clodhoppers that go clearly beyond the original.

Step 4: Protecting sensitive areas with a mask
Before you shift the heel significantly, secure the areas you no longer want to change. For this, Gabor uses the Freeze Mask tool in the Liquify dialog. Mark everything you want to preserve before you continue working. This prevents a careless brushstroke from destroying a detail that has already turned out well. Gabor honestly admits that he quickly makes mistakes despite the protective mask, which makes this precaution all the more worthwhile.

Step 5: Correcting flat feet and keeping the shoe sole straight
With the heels, it can happen that the shape unexpectedly becomes flat or a flat foot appears. Gabor therefore pushes the affected spot upward in a targeted way and adjusts the opposite side. In doing so, the sole remains crucial: It should run straight so that the shoe looks stable. If it warps too much, it quickly looks like a scooter. Gabor notes that he has already messed up the sole a bit and will adjust it afterwards later. This is a good example of the fact that you do not have to fix mistakes perfectly right away, as long as you keep them in view.

Step 6: Adjust the Overall Height and Pay Attention to the Shoelaces
Once the sole and heel are in place, you raise the shoe as a whole so that it does not sit too low on the ground. Gabor also pushes the shoelaces slightly outward, because in comic style they may look oversized as well. Make sure the shoelaces are not distorted and do not lose their line work. This is exactly where unsightly tangles or blurred contours can quickly appear, so you should only work on them gently.
Step 7: Check in Comparison in Photoshop
At this point, Gabor checks his work in the main document instead of only in the filter window. The left shoe already looks successful, but the right one does not yet. It looks as if an elephant had stepped on it. The heel has bulged out and needs to be pushed back in again. Therefore, look at your work in the normal workspace again and again. A shoe that looks good in the filter can look completely out of place in the overall picture.

Step 8: Stop, Take a Break, and Continue with Fresh Eyes
In this section, Gabor shows that not every distortion has to be salvaged. Sometimes you have already invested 10 to 15 minutes in an area and it still doesn't look good. In that case, it makes more sense to abort the process and start over. A short break, doing something else, or simply taking a moment to breathe helps you look at the result without bias again. Gabor describes this as working with fresh eyes, and this tip applies to almost every creative project.

Step 9: Fine Corrections and Assessing How to Deal with Pixel Loss
In the next pass, you push the shoes further outward, because they still look too small and too pointy. Gabor notices that the shoe has probably turned out too long and the tip tapers off too much. In the process, liquifying alters the pixels, which leads to a certain loss of quality. Gabor knowingly accepts this, because he sharpens the image again afterward. Decide for yourself how far you zoom in and how much loss you accept. Not everyone will zoom in as far as Gabor, and for many projects a normal view is enough.

Step 10: Apply the Finishing Touches and Complete the Result
Finally, you thicken the shoe a little more subtly and compare the result with the original image. Gabor finds the liquified version clearly better than the unchanged one, above all because the comic effect now looks coherent. In this step, make sure not to keep pushing continuously. As soon as the overall picture works, it is often wiser to stop. If you later decide you want to change something after all, you can reopen the filter at any time and keep working.

Summary – Liquifying Shoes in Photoshop: Step-by-Step Guide for Comic Style
You have seen how Gabor makes shoes exaggeratedly large and round in comic style. The workflow begins with a check of the entire image, because mistakes on other objects quickly become noticeable. Then you shape the heel and basic form, thicken the sole and toe, and protect sensitive areas with a mask. Make sure to keep the sole straight and to work on the shoelaces carefully. A comparison in the main document, a break when you feel frustrated, and subtle fine corrections round off the process. It is also important that you factor in pixel loss and decide on a result in good time.
FAQ
Do I absolutely have to enlarge the shoes as much as Gabor?No. The exaggeration is a stylistic device that you can dose freely. Gabor himself emphasizes that you can choose between round and leaf-shaped feet.
What do I do if I accidentally distort other areas of the image?Liquify can usually be undone or reopened via the filter. Gabor shows how he restores a distorted hand by gradually reversing the distortion.
How do I prevent the shoe sole from warping?Keep an eye on the sole while distorting and correct it with small movements. When needed, Gabor deliberately pushes the flat-foot areas back and adjusts the opposite side.
Is it bad if liquifying damages the pixels?Liquifying can slightly degrade the image quality. Gabor sharpens the image again afterward, which is a sensible step if you notice visible blurriness.
When should I stop working on the shoe?Stop as soon as the overall picture looks coherent. Gabor deliberately decides against further changes when the result suits him, and reserves the right to come back at any time if needed.


