Creating comic style images requires not only creativity but also precise color adjustments to achieve vibrant and engaging subjects. In this tutorial, you will gain valuable insights into the key steps and techniques to refine your graphic works with color adjustments.
Key Insights
- Through targeted color corrections, you can greatly improve the overall impact of your subject.
- Working with masks and adjustment layers allows you to make precise adjustments to individual parts of your image.
- Experiment with different hues and saturations to achieve the desired effect.
Step-by-Step Guide
Intensifying the Eyes
To make the eyes of your subject more radiant and lively, the process starts with the brush tool. Decrease the brush size so you can selectively paint in the area of the eyes. Set the hardness of the brush to about 20% to allow for smooth transitions and enable the mask option.
Next, select only the inner part of the eyes. This is done by marking the desired area with a circular brush. It's best to use the "x" key to remove areas filled with white. Even if the selection is not perfect, you can always adjust it later. Now repeat the process for the other eye.
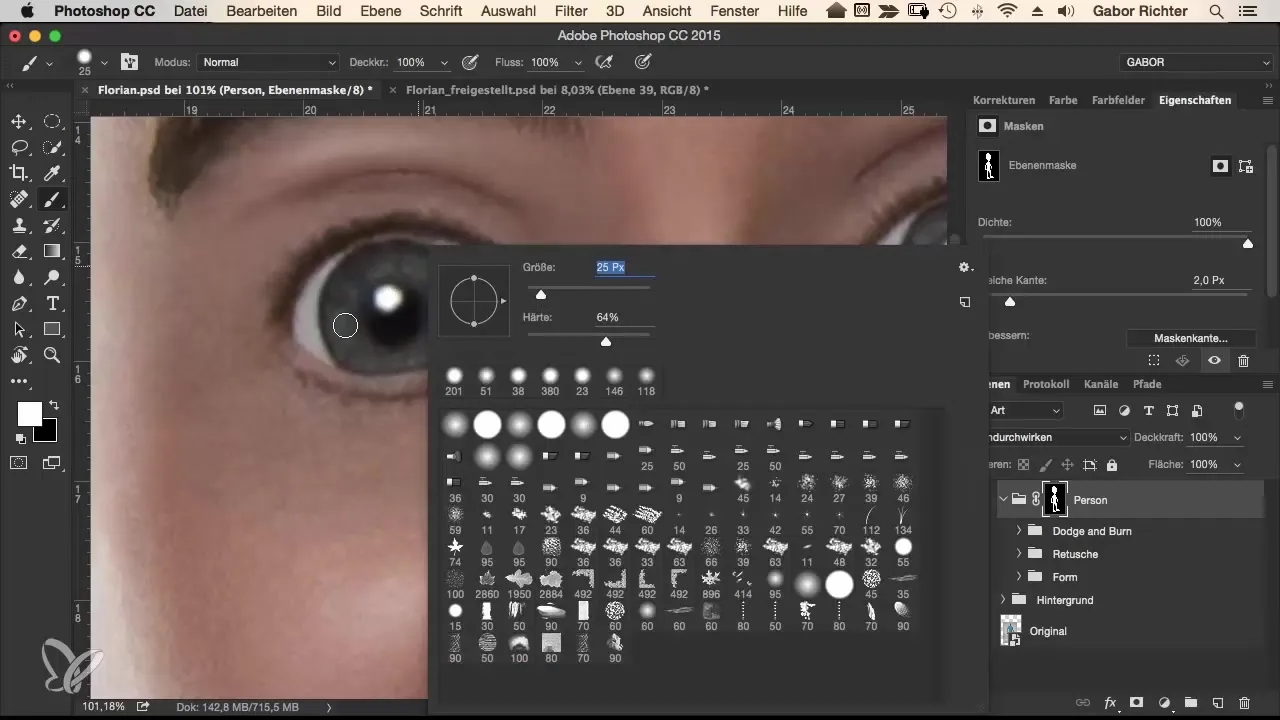
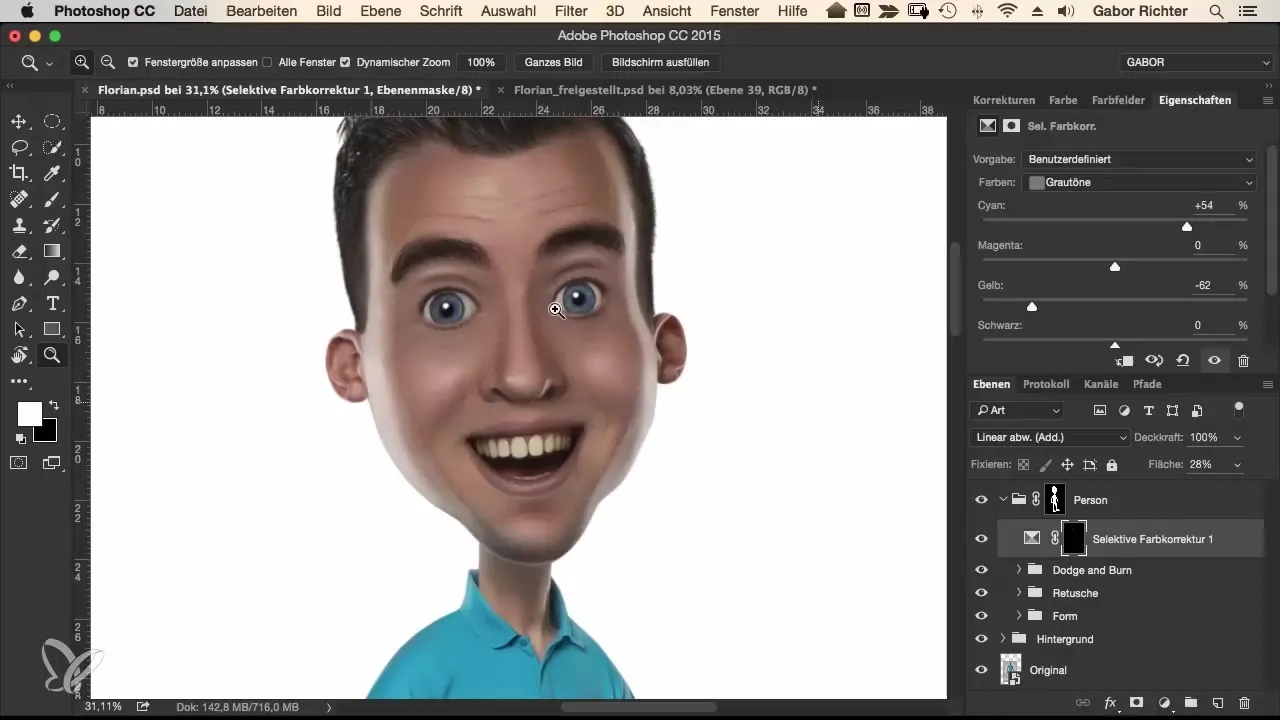
When you have a feel for the right color, go to the "Dodge and Burn" layers and select a selective color correction. Here, focus only on the gray tones and increase the blue parts (cyan). Set the layer to the blending method "linear dodge" to intensify the radiant effect of the eyes.
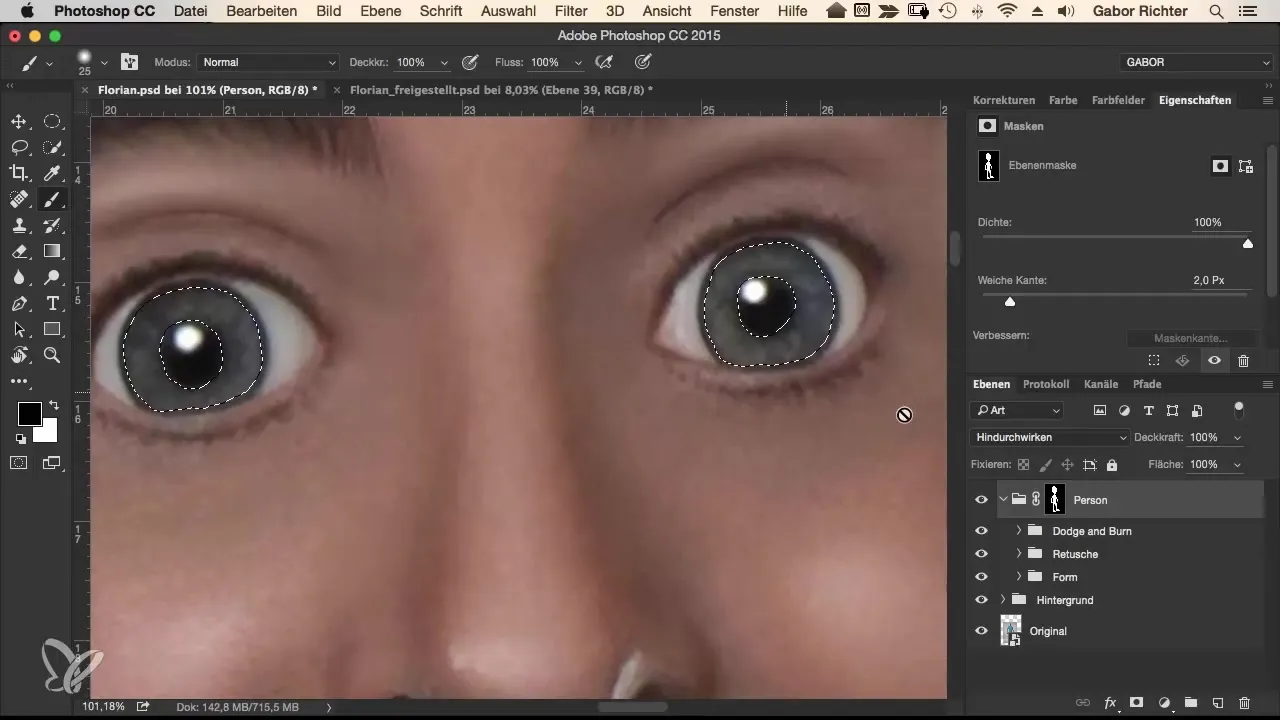
Then, reduce the opacity to 20-30% to optimize the look. Add a bit of yellow to play with the complementary color. Here you can experiment and adjust colors to your liking—whether it's blue, red, or green.
Adjusting Skin Tones
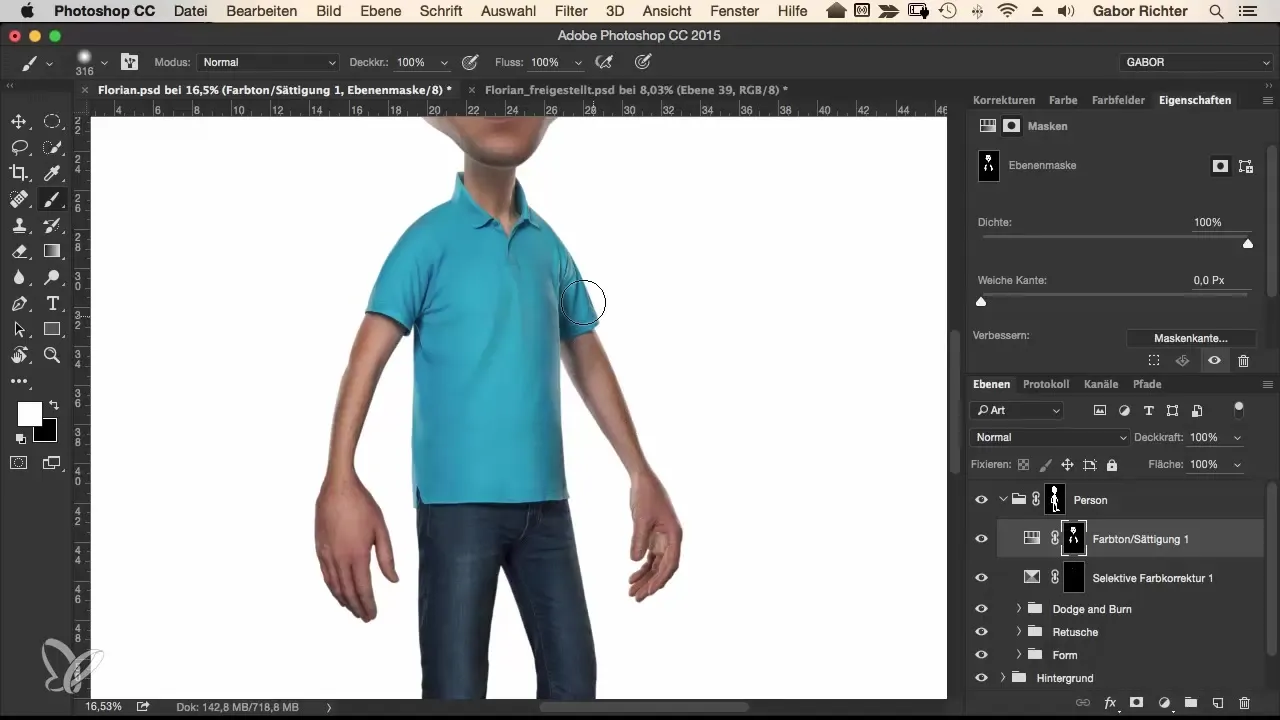
In the next step, we will focus on the saturation of the skin tones. Create a new adjustment layer for hue/saturation and initially increase the saturation to about 20%. You will immediately see a noticeable difference between before and after. To achieve a healthy complexion, you can increase the saturation to 30%, which gives the subject a sun-kissed look.
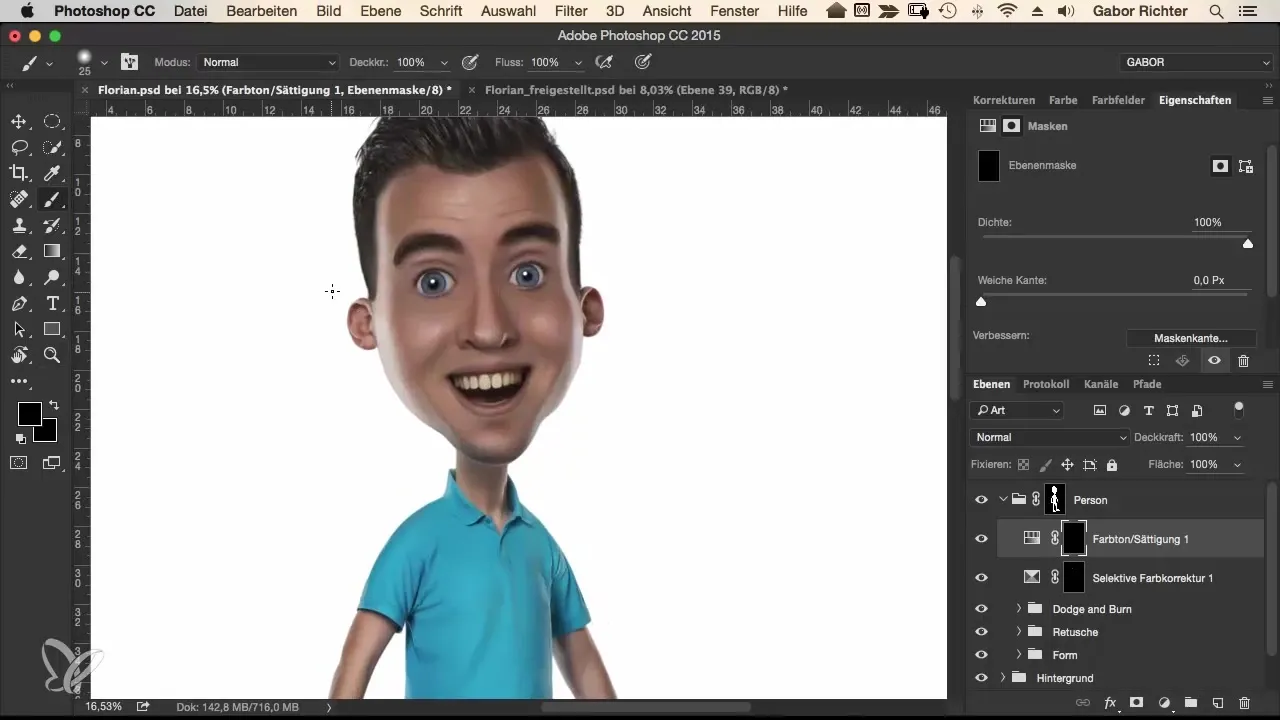
To specifically edit only the skin tones, the mentioned mask is inverted. Now paint the effect specifically onto the skin areas of the subject while keeping areas like the collar untouched. Make sure to work precisely to achieve the desired saturation. The neck and arms should also be included in the effect.
Whitening Teeth
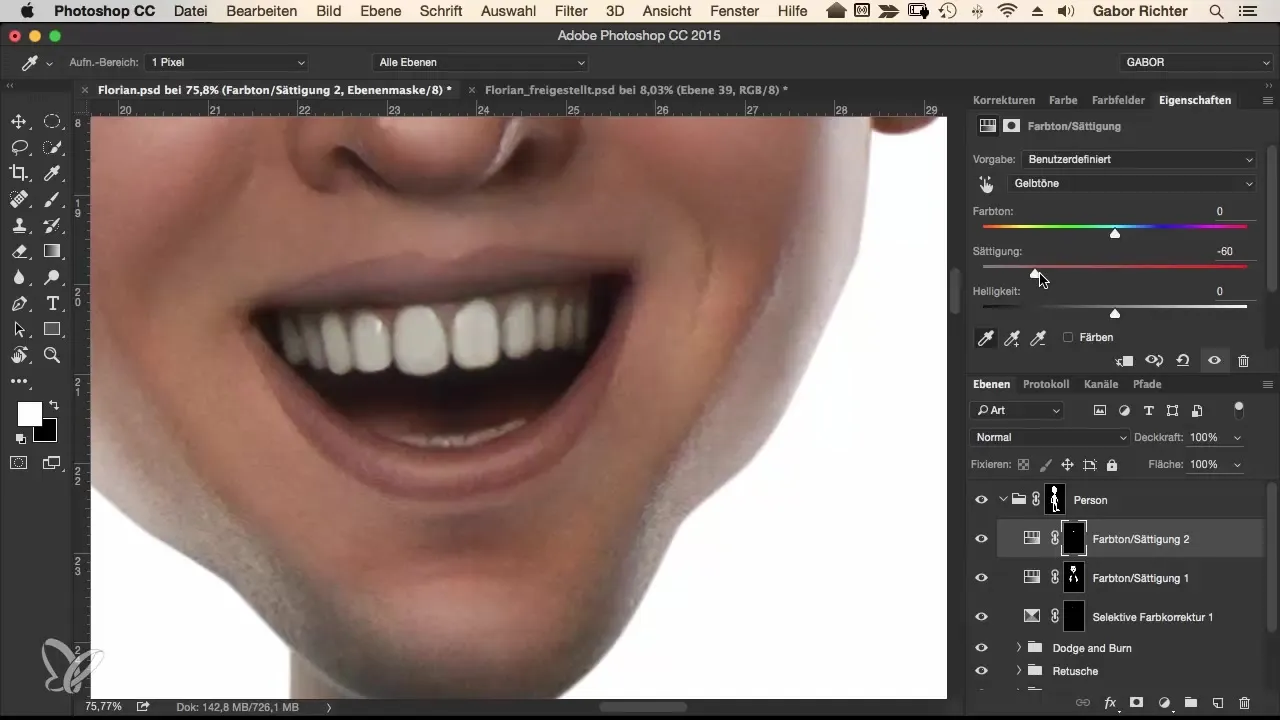
Another important element is the teeth. To whiten them, you again start with a selection and choose the mask option to isolate the teeth. Then select a selective color correction and focus on the yellow tones. Here, you can use the eyedropper to select a reference color and reduce the saturation of the yellow tones while slightly increasing the brightness.
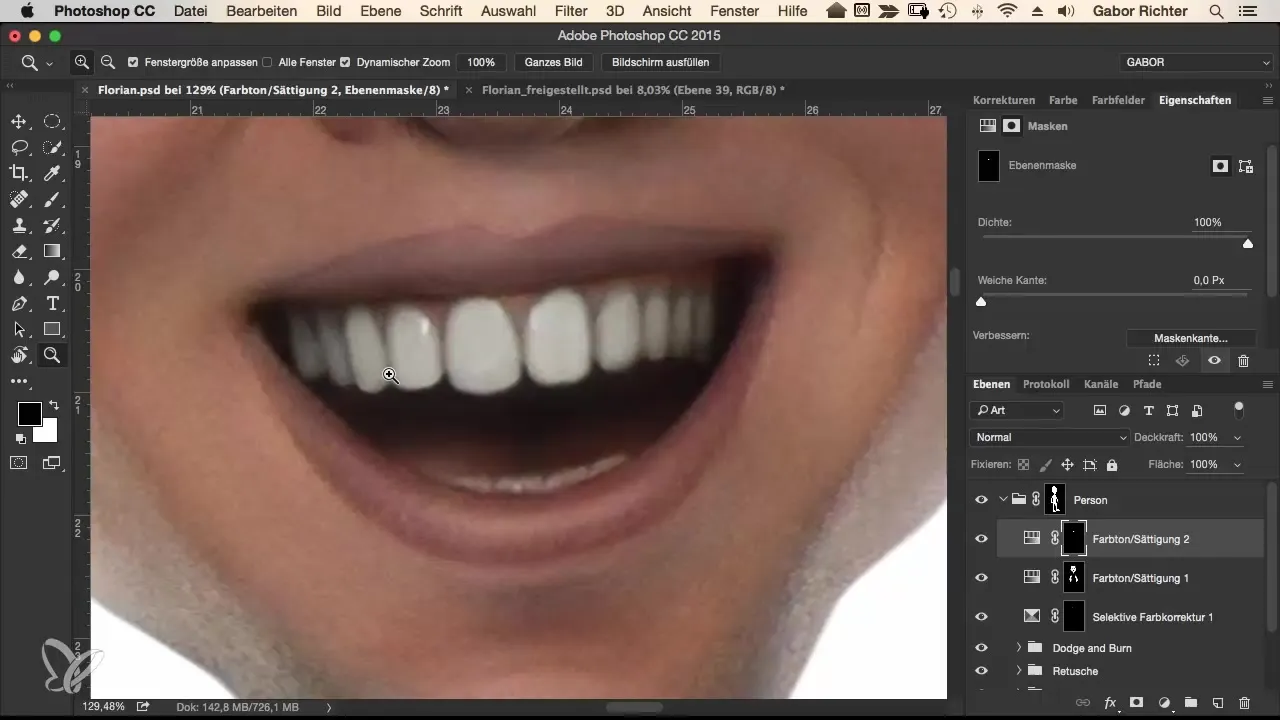
If the transition is not perfect, you can use the black brush to gently remove the areas that should not be desaturated.
Grouping and Final Touches
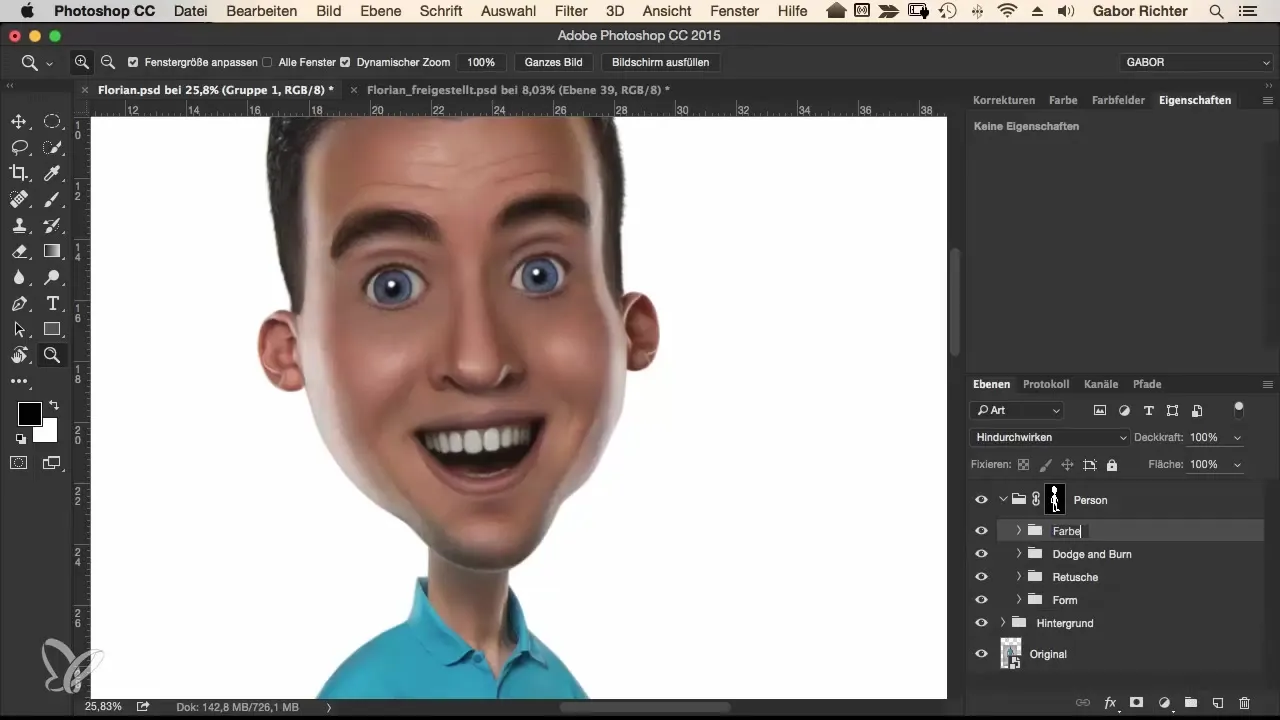
At the end of this process, you should group all three adjustment layers to make managing your work easier. With this grouping, you can always go back and make adjustments as needed. It also lets you reduce the saturation of the skin, make the teeth yellower, or intensify the colors of the eyes.
Summary – Guide to Optimal Color Adjustment in Comic Style
In this guide to color adjustments in comic style, you have learned how to intensify the eyes, adjust skin tones, and whiten teeth. By applying the right techniques and tools, you can give your image a vibrant and appealing look.
Frequently Asked Questions
How can I adjust the saturation of a specific color in my image?You can create an adjustment layer for hue/saturation and increase or decrease the saturation as needed.
What is the best way to use masks?Typically, you select the area you want to edit and work with masks to make precise adjustments.
How can I undo what I’ve done?You can always adjust the settings of the adjustment layers or use the mask option to edit specific areas.
Can I undo the color correction?Yes, by using adjustment layers you can revise and adjust all changes at any time.
Are color adjustments permanent?No, as long as you are working with adjustment layers, your changes remain non-destructive and can be adjusted.


