
If you want to edit a photo in a comic style later on, you often need more space around the subject. Especially if you want to enlarge the head or body, the original canvas quickly becomes insufficient. This guide shows you how to extend the canvas, fix the pixel errors that result, and cleanly adjust the new background.
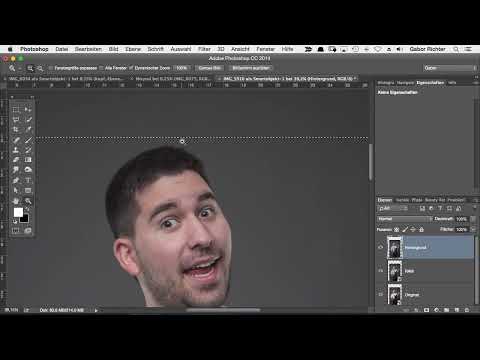
The video is only loaded from YouTube when you play it – data (including your IP address) is then transmitted to YouTube/Google. More in the privacy policy
Key Takeaways
- Plan your editing ahead: Think about which changes will come later, such as enlarging the head.
- Extend the canvas with the Crop tool and keep the proportions while doing so.
- Merge all visible layers onto a new layer before you adjust the background.
- Extend the background with selection and transformation so that enough material is available.
- Remove the resulting pixel errors with a selection from the RAW image and noise reduction.
Step-by-Step Guide
Step 1: Assess the space requirements correctly
Before you even touch a tool, you should take a close look at the subject. Imagine how big the head will be after editing. In the example, it will grow by at least half, possibly even to double its size. Without additional space, it would reach the top edge of the image, which would look distracting later. So it's worth looking ahead even at this stage.

Step 2: Extend the canvas with the Crop tool
Select the Crop tool in the toolbar. Photoshop then immediately displays the frame of the original image size. Now drag one of the handles outward. Hold down the Shift key so that the proportions of the image are preserved. Extend the area far enough so that there is enough space above the head. Confirm the new size by clicking the checkmark.

Step 3: Define space at the top, bottom, left, and right
The space at the top is the most important because that's where the head will grow. You should also extend the bottom, since that usually keeps the proportions harmonious. A person is rarely lengthened downward during editing, but rather made wider or narrower. That's why you should also leave some room on the left and right, because you don't yet know how much you will change the subject later. Check the result and only confirm the size once there is enough room at the top, bottom, and sides.

Step 4: Identify the resulting pixel errors
After the extension, you notice that the newly created areas no longer have a clean structure. Pixels are missing, so a gray, empty area appears. This step is initially just taking stock. Before you continue, you should decide for yourself whether you want to work this area later with a color overlay or whether the structure is a problem.

Step 5: Merge all visible layers onto a new layer
So that you can edit the background independently of the rest of the image, you need a separate layer. To do this, press the key combination Cmd, Alt, and Shift plus E on macOS. On Windows, use Ctrl, Alt, Shift, and E. Photoshop merges all visible layers onto a new layer. Then give this layer a meaningful name, for example "Background," so that you can find it quickly later.

Step 6: Mark the background with the Rectangular Marquee
Now select the Rectangular Marquee tool. Mark the area you want to keep, deliberately leaving a gap from the hair or the subject. This way you avoid damaging the subject during the later transformation. It's not a problem if the selection isn't perfect, because you can still adjust it in the next step.

Step 7: Move and distort the background with "Free Transform"
Press Cmd and T on macOS or Ctrl and T on Windows. Alternatively, you can find the command via the "Edit" menu and "Free Transform". Now you can move, enlarge, or distort the selected background. Drag the upper area upward so that the background continues above the head. Then confirm the transformation with the Enter key.

Step 8: Extend the background to the left and right
Often you still have to pull the background a bit further up so that the distracting shadow of the original background disappears. To do this, create a new rough selection below the problem area and transform it again. Then do the same on the left and right until there is enough material everywhere. Make sure you don't overdo the distortions, because they should remain inconspicuous.

Step 9: Check the result and assess the noise structure
Now look at the image enlarged. The background looks significantly better overall, but in some places slight ripples or distorted patterns are still visible. Whether this bothers you depends on your standards. For many projects, the current solution is completely sufficient, especially if you are going to overlay the area with color later anyway.

Step 10: Load a selection from the RAW image
If you want to clean up the structure, you can take over the pixels from the original RAW image. Hold down Cmd or Ctrl and click on the thumbnail of the RAW layer. Photoshop then creates a selection of the original image. This selection initially does not cover the entire area, so you will need to supplement it in the next step.

Step 11: Supplement or correct the selection
Hold down the Shift key to add further areas to the existing selection. With the Alt key held down, on the other hand, you subtract areas again. If you make a mistake, you can correct it using Undo or the Alt key. The goal is a selection that includes the well-preserved pixels of the original.

Step 12: Invert the selection
The current selection contains only the good pixels. However, you need the areas outside of it, because the noise reduction is supposed to work there. To do this, go to "Select" in the menu and choose "Inverse". Afterwards, the marching ants show the entire background.

Step 13: Apply the noise reduction
Now select the background layer and go via "Filter" to "Noise" and then to "Reduce Noise". Set the Strength value to 10 and all other settings to zero. Watch the preview while you move the slider. Before, the area looks pixelated or distorted; afterwards, it looks significantly smoother. Then confirm with OK.

Step 14: Compare the result and refine if necessary
Compare the image before and after the noise reduction by undoing and restoring the step in between. If the result isn't enough for you, you can apply the filter a second time. The pixels will then become even softer. However, make sure that details don't get blurred. An imprecise selection can also be visible, so it's worth refining it if necessary.

Step 15: Understand the term "background adjustment" correctly
The layer is called "Background," but it is actually a background adjustment. The colored background is, after all, preserved on the original layer. The new layer only serves to optimally prepare the extended area. This is exactly what allows you to later enlarge the head significantly without the edge of the image getting in the way.

Summary ??? Photoshop Enlarge Canvas: Adjust Background for Comic Style
With the Crop tool, you extend the canvas and gain space for changes to the subject. Then you merge all visible layers, adjust the background with Free Transform, and remove the visible pixel errors with a selection from the RAW image and noise reduction. This gives you a clean foundation on which you can continue working in a comic style.
FAQ
Do I have to extend the canvas downward?Not necessarily, but it usually makes sense, as the proportions of a subject stay more harmonious that way.
Why should I use the Shift key when extending?With the Shift key, the proportions of the image are preserved, so no unwanted distortions occur.
What happens if I don't merge the layers?You then work directly on the individual layers. This makes adjusting the background confusing and riskier.
Is noise reduction always necessary?No. If the structure is sufficient for your project, you can leave it unchanged. However, if you want a perfect result, the filter is a good solution.
Can I apply the filter multiple times?Yes, that is possible. With repeated application, the pixels become softer, but you should make sure that details are not lost.


