
You open a photo, put the brush to it, and notice: nothing happens. Or you move a text and it stubbornly stays put. Most of the time this isn't down to the program, but to the layer type you're currently working with. Photoshop has several layer types, and each has its own rules and strengths. If you know these differences, you work more confidently and can change edits later without any problems.
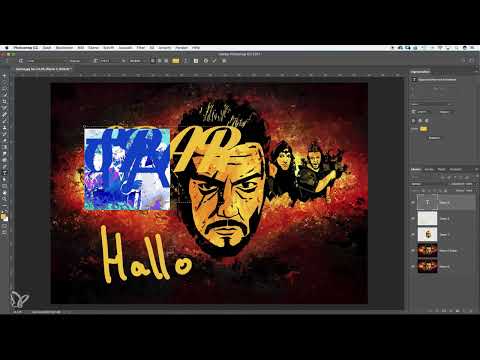
The video is only loaded from YouTube when you play it – data (including your IP address) is then transmitted to YouTube/Google. More in the privacy policy
In this tutorial, you'll get to know the most important layer types: the locked background layer, duplicates, selection layers, empty pixel layers, text layers, adjustment layers, and shape layers. The examples are based on a simple artwork that you can recreate step by step.
Key Takeaways
- A newly opened image sits on a locked background layer. Clicking the lock icon removes the lock.
- Duplicates and selections on new layers protect your original, since you can fall back on it at any time.
- Always paint on an empty layer. Strokes painted directly onto pixels can no longer be moved.
- Text layers remain editable as long as you don't rasterize them. Once rasterized, text is just pixels.
- Adjustment layers don't change the image permanently, but can be adjusted, hidden, or deleted at any time. Shape layers are suited to scalable graphics and layouts.
Step-by-Step Guide
Recognizing the Locked Background Layer
As soon as you open an image, it lands on a background layer. In the Layers panel, you can recognize it by the small lock icon. If you move the brush over the image, the cursor shows a prohibition sign. This is Photoshop telling you that the layer is restricted. You can make individual corrections, but you can't paint freely. Clicking the lock removes the restriction, after which the layer can be edited normally.

Duplicating a Layer via the Context Menu
A duplicate is the simplest way to create a second layer. Right-click the layer in the panel and select "Duplicate Layer". Photoshop asks you for a name, which you can accept or change. Afterwards you have the original and the copy. The copy is perfect for experiments, because the original stays unchanged.

Duplicating by Dragging onto the "New Layer" Icon
Alternatively, hold down the mouse button and drag the layer onto the small "New Layer" icon at the bottom of the panel. The result is the same. If you prefer working with the keyboard, Ctrl+J (Cmd+J on a Mac) helps you. Without an active selection, the command duplicates the entire layer.

Copying a Selection to a New Layer
Now it gets more targeted. Choose the selection tool, for example the Ellipse, and roughly select the figure's head. The selection doesn't have to be perfect. Then right-click in the image and select "Layer via Copy". At first glance nothing changes, because the new layer sits in exactly the same spot. However, if you hide the original layer, you'll see the head on its own layer.

Copying and Pasting a Selection
You can achieve the same result with the keyboard as well. Copy the selection with Ctrl+C and paste it with Ctrl+V. Here too, a new layer is created. Be sure to make sure that the correct layer is active. If the selection accidentally sits on a text layer, what you expect won't happen. You remove the selection with Ctrl+D.

Creating an Empty Layer
You create an empty layer via the "New Layer" icon. It acts like a transparent sheet. In the image, you recognize it by the gray-and-white checkerboard pattern, which indicates that there are no pixels here. If you hide the layers beneath it, you only see the pattern. Empty layers are the foundation for everything you want to draw freely.

Painting on the Empty Layer
Select the brush and set the hardness, size, and color. The preview of the brush circle shows you how thick the stroke will be. In this example, you paint a vivid yellow and use it to write a word on the empty layer. The advantage is obvious: you can move the painted layer at any time without changing the image underneath.
If, on the other hand, you paint directly on a pixel layer, the stroke is fixed in the image. It can no longer be moved easily. In that case, undo the step with Ctrl+Z and work on a separate layer from now on.

Creating a Text Layer
With the Text tool, you drag out an area where the text should go. Choose a font, in the example Arial in the Regular style, and a font size of about 60 points. In the Layers panel, the new layer appears with a large "T" in the thumbnail. This symbol shows you that you can edit the text at any time. Double-clicking the T opens the text again, and you can change words, adjust the color, or center the alignment.

Rasterizing a Text Layer: Better Not To
In the context menu of the text layer, you will find the option "Rasterize Type". After that, the text is only a pixel graphic, the T disappears, and you can no longer change the content. Therefore, only rasterize your text layer if you want to apply a filter to it, for example. It is best to create a backup copy of the layer beforehand.

Creating Adjustment Layers
You will find adjustment layers at the bottom of the Layers panel. The icon with the half-black, half-white circle stands for "New Adjustment Layer". In the example, you choose Black & White, and the image is immediately desaturated. However, the pixels are not permanently converted in the process. The adjustment layer lies over the image like a filter. If you hide it, the color reappears. Especially for contrasts, brightness, and color corrections, this layer is indispensable.

Adjusting the Opacity of the Adjustment Layer
The effect of an adjustment layer can be weakened by reducing the opacity. At 50 percent, the image looks only half black and white. By the way, this also works with normal layers. Feel free to try out several values until the effect suits your subject.
Controlling Hue and Saturation Precisely
With a "Hue/Saturation" adjustment layer, you can saturate or desaturate the entire image. You can both decrease and increase the saturation, depending on whether the image should look more vibrant or calmer. The hue can also be shifted. These changes apply only within this layer, which is why you can adjust them at any time later.

Using Color Lookup and the Curves Adjustment
The "Color Lookup" adjustment layer offers ready-made presets with which you can quickly try out different looks. With the Curves adjustment or the Levels adjustment, you control contrast and brightness more precisely. The basic principle is important here too: if you save the file and open it again later, you can subsequently change, weaken, or remove every adjustment.

Creating a Shape Layer for Graphics
The so-called vector layer is displayed by Photoshop as a shape layer, as you find it in the program. If you drag out a rectangle with the Shape tool, for example, an icon for a shape object appears in the panel. The shape remains vector-based, so it can be enlarged and reduced without loss of quality. You can also change the color or shape afterwards. This layer type is particularly suitable for layouts, designs, and web graphics.

Summary ??? Photoshop Layer Types: From Duplicate to Shape Layer
Photoshop offers several layer types, and each fulfills its own task. The locked background layer must first be unlocked before you can work freely. Duplicates and selections on new layers protect your original, while empty layers give you space for drawings and paintings. Text layers remain editable as long as you do not rasterize them. Adjustment layers change contrasts, colors, and brightness without permanently altering the pixels. Shape layers provide scalable graphics for layouts and web design. If you internalize these differences, you can design images flexibly and readjust them at any time.
FAQ
Why can't I paint on my layer?The background layer is locked, which you can recognize by the lock icon. Clicking the lock removes the lock.
How do I recognize a text layer?In the Layers panel, the thumbnail shows a large T. This icon means that you can edit the text at any time.
Why shouldn't I paint directly on the pixel layer?Painted pixels can no longer be moved easily. On an empty layer, however, your artwork stays flexible.
What does an adjustment layer do for me?It doesn't change the image permanently, but can be adjusted, hidden, or deleted at any time.
Why shouldn't I rasterize a text layer?After that, the text is only a pixel graphic and can no longer be edited in terms of its content.
What is a shape layer suitable for?It is suitable for graphics, layouts, and web design because it can be scaled without loss of quality and modified afterwards.


