The creative processing of images is an art form that continually brings forth new techniques and tools. In the Adobe Creative Cloud 2014, Photoshop introduced an exciting new tool called the Path Blur Tool, which helps you to bring movement and dynamism into your photos. This guide shows you how to efficiently use the Path Blur Tool to achieve impressive results easily.
Key Insights
- The Path Blur Tool enables realistic motion blurs.
- You can precisely adjust the direction and strength of the blur.
- Multiple paths can be combined to achieve more complex effects.
- It is possible to create abstract effects that you can use for various designs.
Step-by-Step Guide
1. Accessing the Path Blur Tool
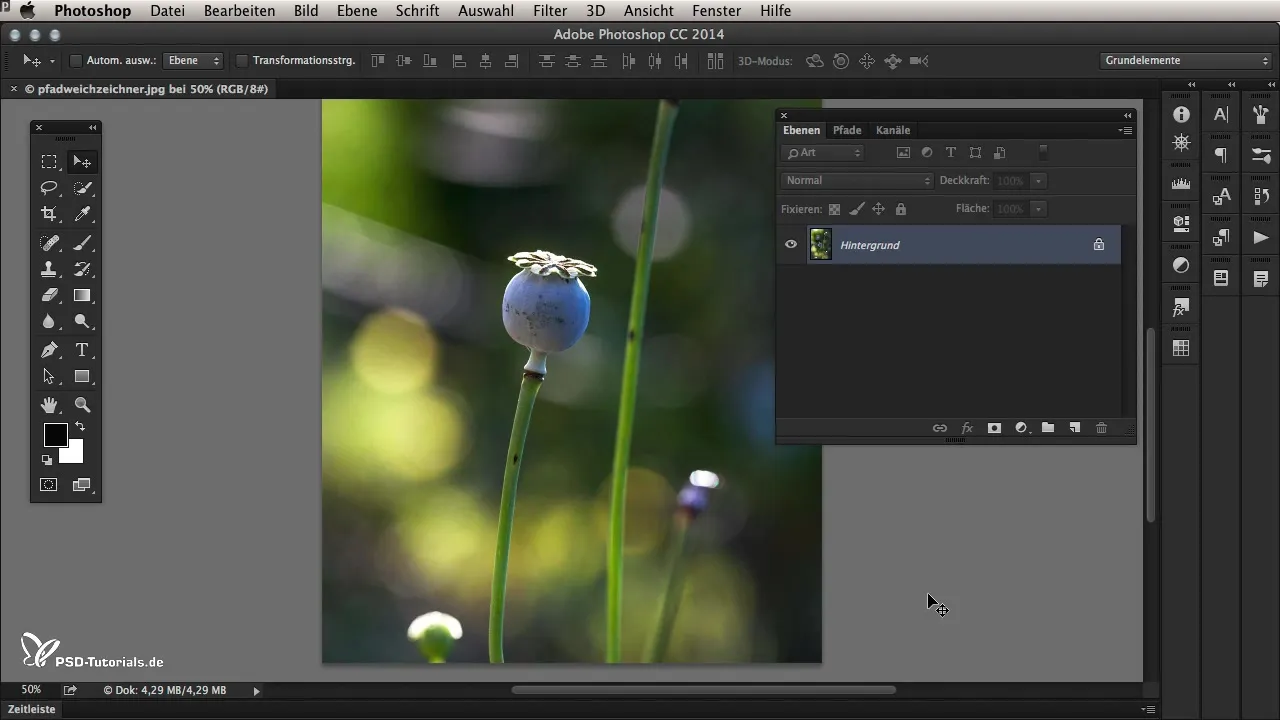
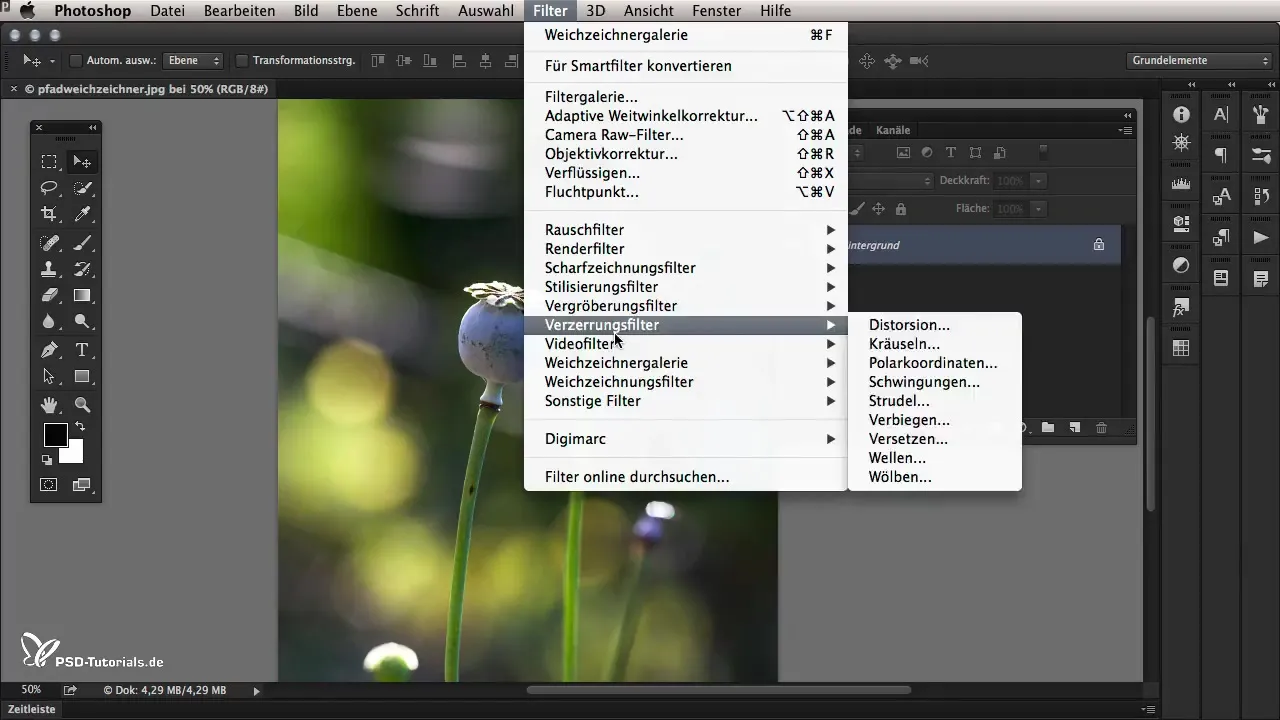
Start by opening the photo you want to work on. In this example, we are using an image of a moon plant, where we want to add some dynamism to the left plant. To access the Path Blur Tool, go to Filter > Blur Gallery > Path Blur. This step opens the detailed filter gallery within Photoshop.
2. Determining the Direction of Movement
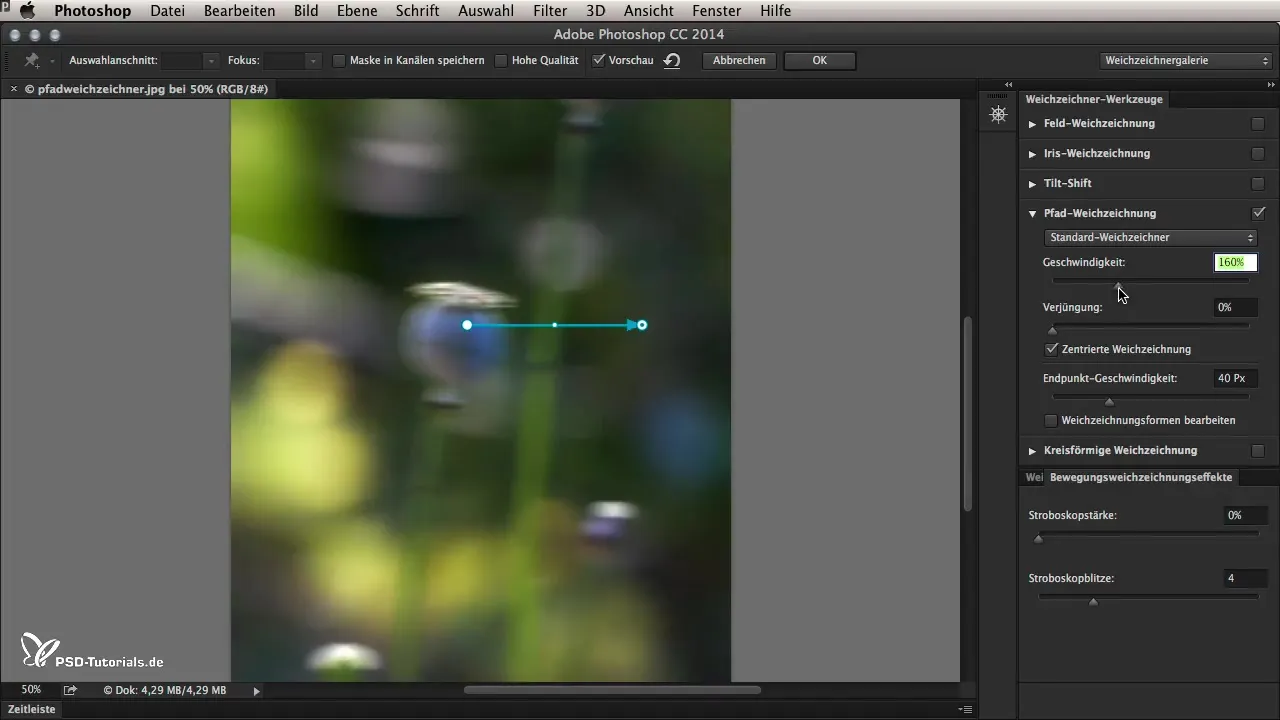
Once the Blur Gallery is open, you will see a blue arrow that appears in the middle of the image. This arrow represents the starting and ending point of your blur. You can easily move the arrow to adjust the direction of the motion blur. Try it out by moving the arrow and observing the changes.
3. Adjusting the Strength of the Effect
To perfect the strength of the Path Blur, you can use the speed slider in the right section of the gallery. Drag the slider up to intensify the effect, or down to reduce it. Watch how the overall impact of the image changes.
4. Editing the Curvature
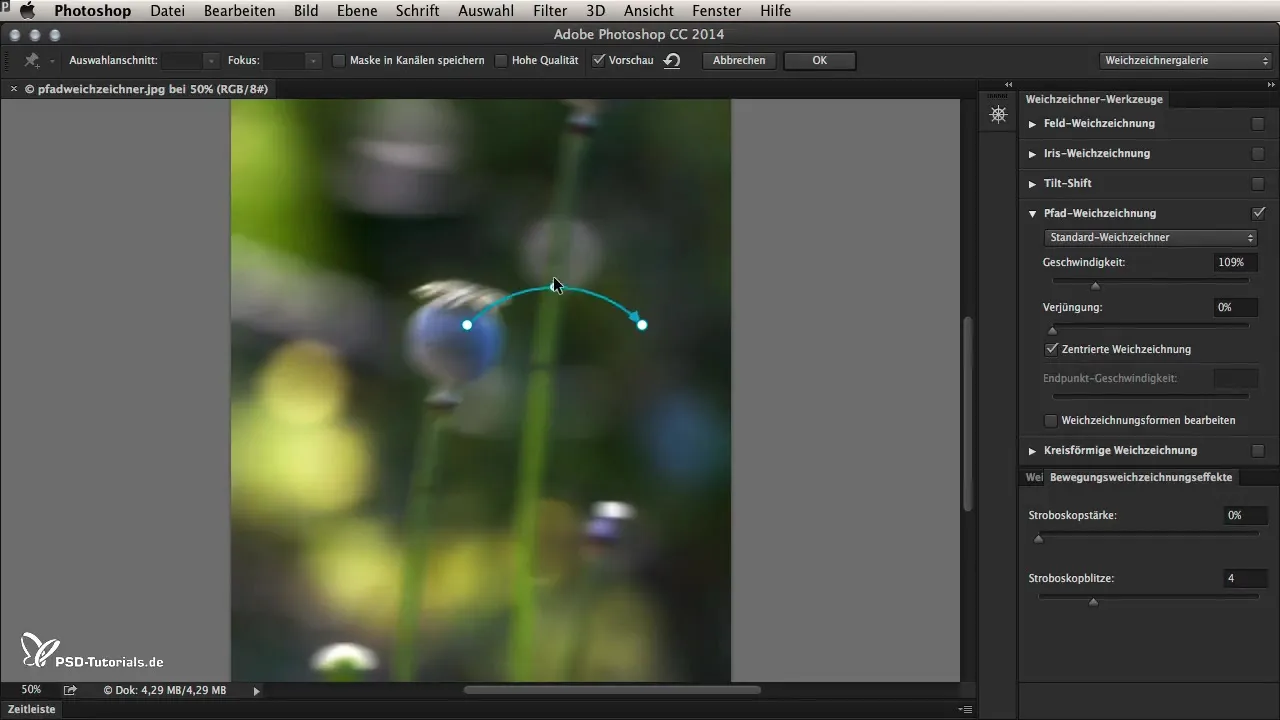
In addition to the direction, you can also adjust the curvature of the blur. Click on the small white dot in the middle of the arrow and drag it to create curved blur effects. This allows you to make more dynamic adjustments in the areas of the image where necessary.
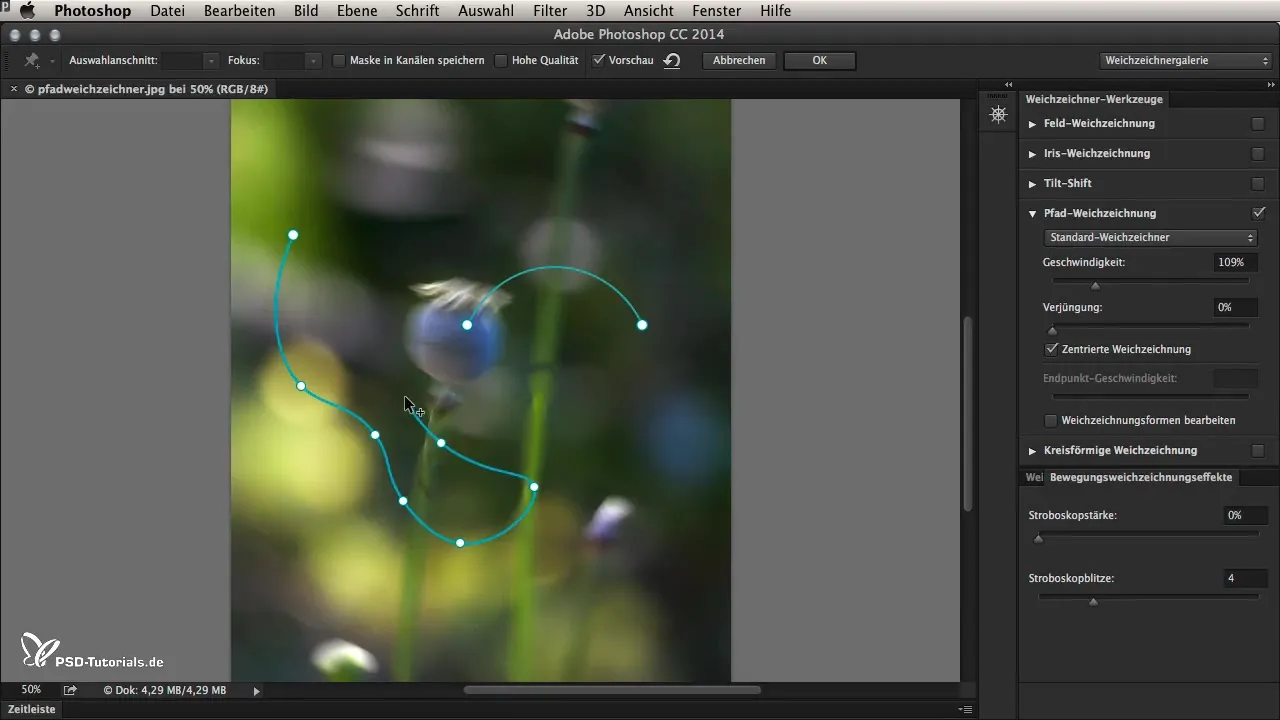
5. Using Multiple Paths
Photoshop allows you to create multiple paths to generate complex blurs. Simply click on the spot in the image where you want to add a new path. You can then adjust the new points and create as many curves as you need. If a point is no longer required, you can delete it using the Backspace key.
6. Moving the Plant
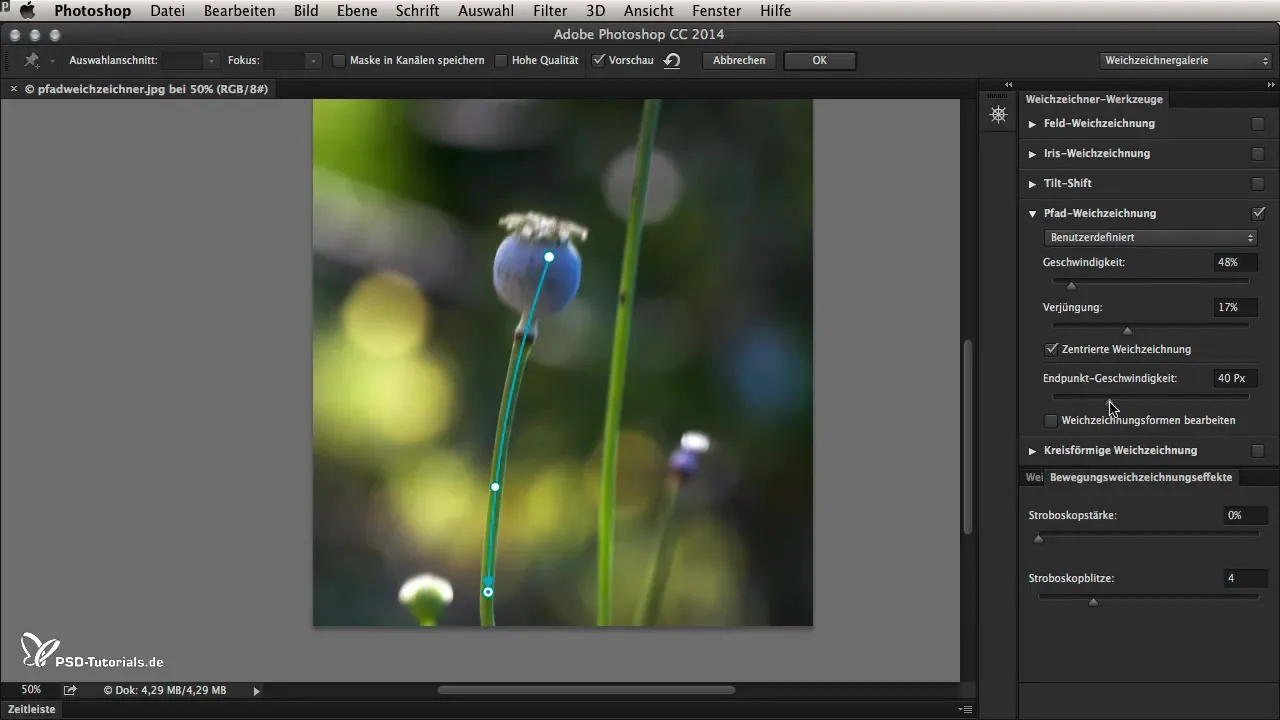
To simulate movement, move the position of the entire path along the stem of the plant. This causes the stem to have a natural up-and-down movement, adding liveliness to the image. You can adjust the speed and tapering to achieve the desired effect.
7. Fine-tuning the Endpoint Speed
When adjusting the endpoint speed, these changes are particularly important for determining how strong the blur effect is at the endpoint of the path. Experiment with the settings until you are satisfied with the result.
8. Editing the Blur Shapes
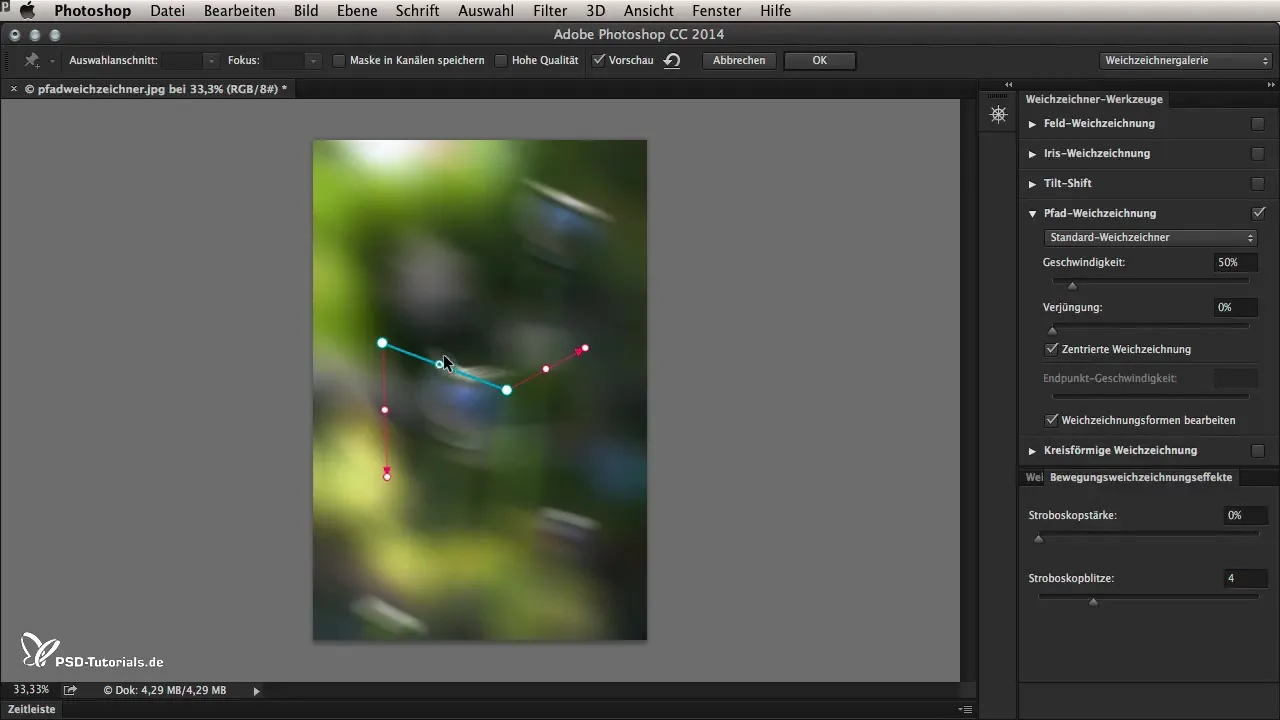
If you are satisfied with the paths you have already created, you can further edit the blur shapes. Open the shape editing tool and drag the red dots to adjust the areas of blur. This gives you exactly the movement you want to simulate for your bud.
9. Confirming and Previewing the Result
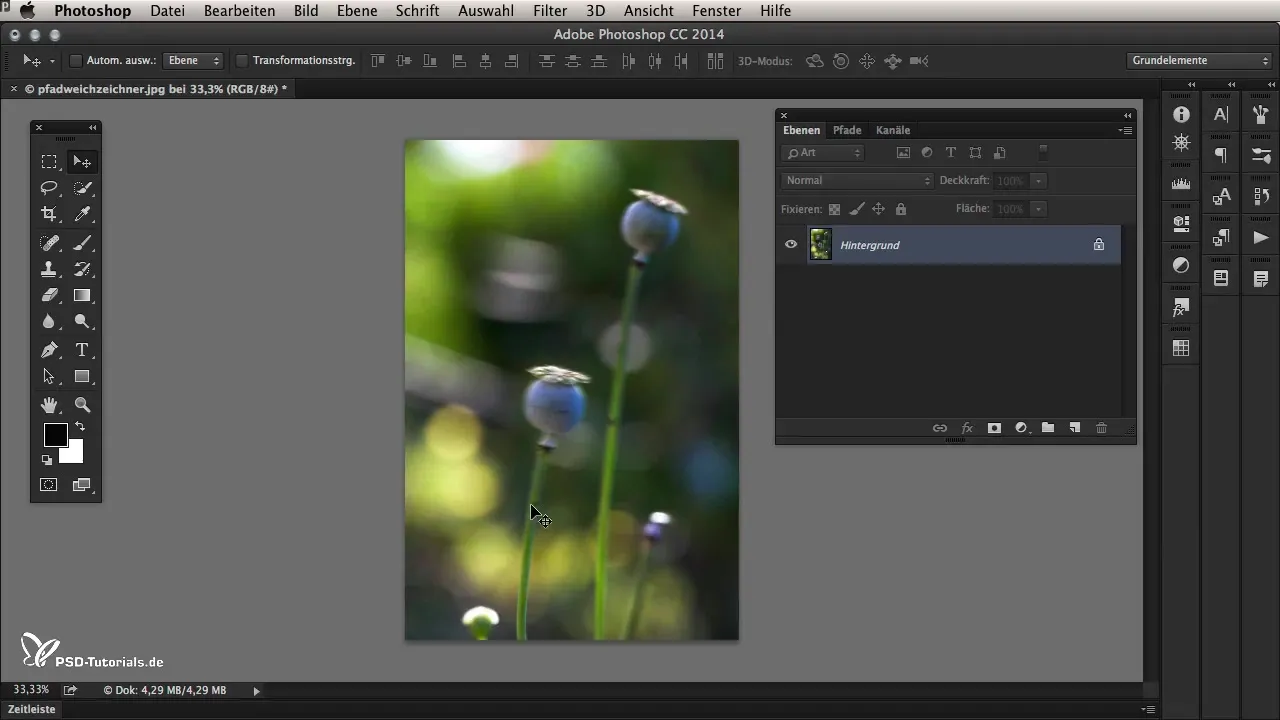
Once you have made all the adjustments, click "OK" to apply the effect. You can now compare the original image with the edited version and check how effective the effect is. Pay special attention to how movement is expressed in the overall image.
10. Creating Abstract Effects
If you want to further explore creative possibilities with the Path Blur Tool, you can create wild and abstract forms. Go back into the Blur Gallery, select the Path Blur Tool, and start creating distorted and fractal structures that can be used as background elements or design elements.
Summary – Path Blur in Photoshop CC 2014
The Path Blur in Photoshop CC 2014 is a powerful tool for bringing movement to your images. With the right application, you can achieve both realistic and creative effects. Use the step-by-step guide to spice up your images and experiment with different settings to achieve the best results.
Frequently Asked Questions
What is the Path Blur Tool in Photoshop?The Path Blur Tool is a new filter in Photoshop CC 2014 that allows for the creation of realistic motion blurs.
How does the direction setting work in the Path Blur Tool?You move the blue arrow to determine the direction of the blur.
Can I use multiple paths in the Path Blur Tool?Yes, you can create and adjust as many paths as you like to simulate more complex movements.
How do I adjust the strength of the effect?The strength can be adjusted using the speed slider in the Path Blur Tool.
Are there ways to create abstract effects?Yes, you can experiment with different settings to create distorted and fractal designs.


