The possibilities for image editing in Photoshop are nearly limitless. With the introduction of new features in version CC 2015.5, especially in June 2016, you receive the "Face-Aware Liquify" tool, which helps you easily optimize faces. Whether you want to enlarge the eyes, adjust the nose, or make the lips appear fuller – much can now be done efficiently and intuitively. The improved "Refine Edge" feature, which has been renamed "Select and Mask," also allows for more precise cutouts. In this guide, I will show you step by step how to make the most of these new features.
Key Takeaways
- The "Face-Aware Liquify" allows for effective adjustments of facial features.
- Eyes, nose, and lips can be easily edited.
- "Select and Mask" enhances your options for cutouts.
- You can switch between different faces during editing and make adjustments.
Step-by-Step Guide
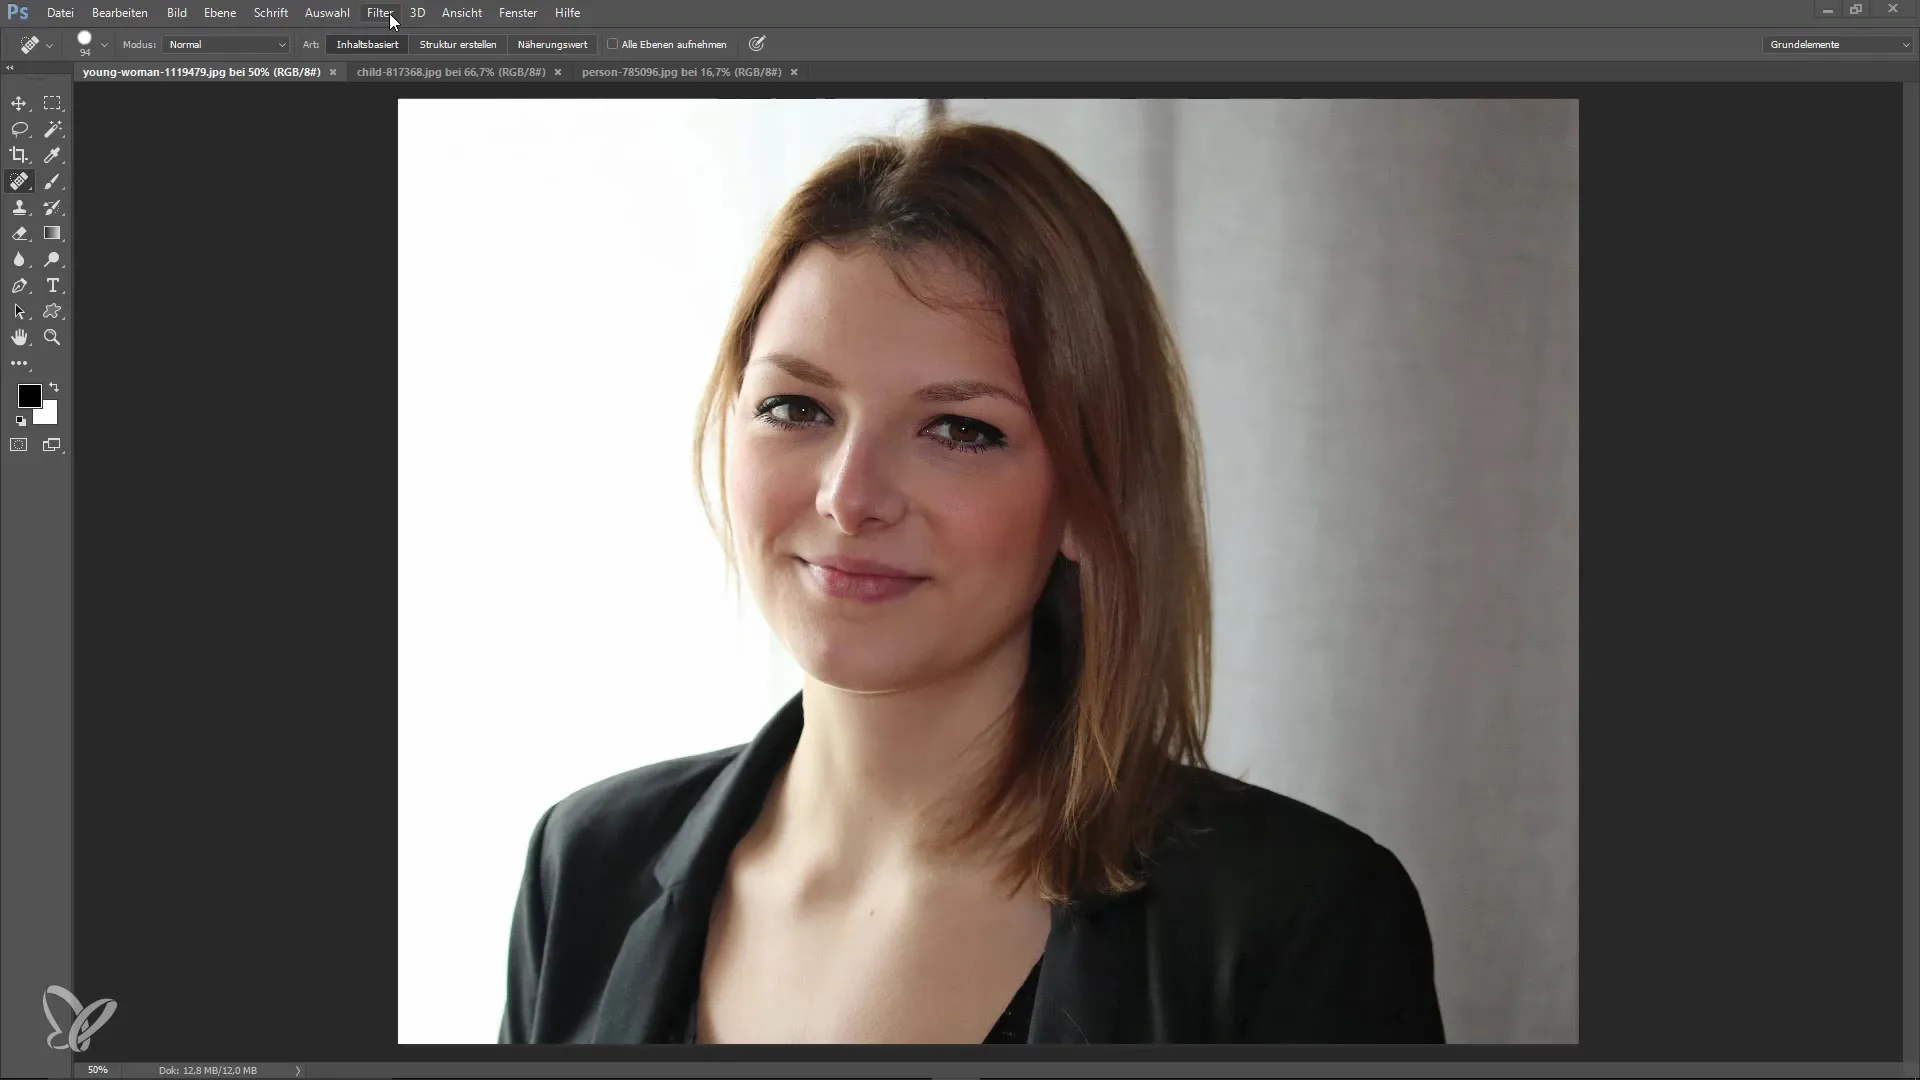
1. Access the Face-Aware Liquify
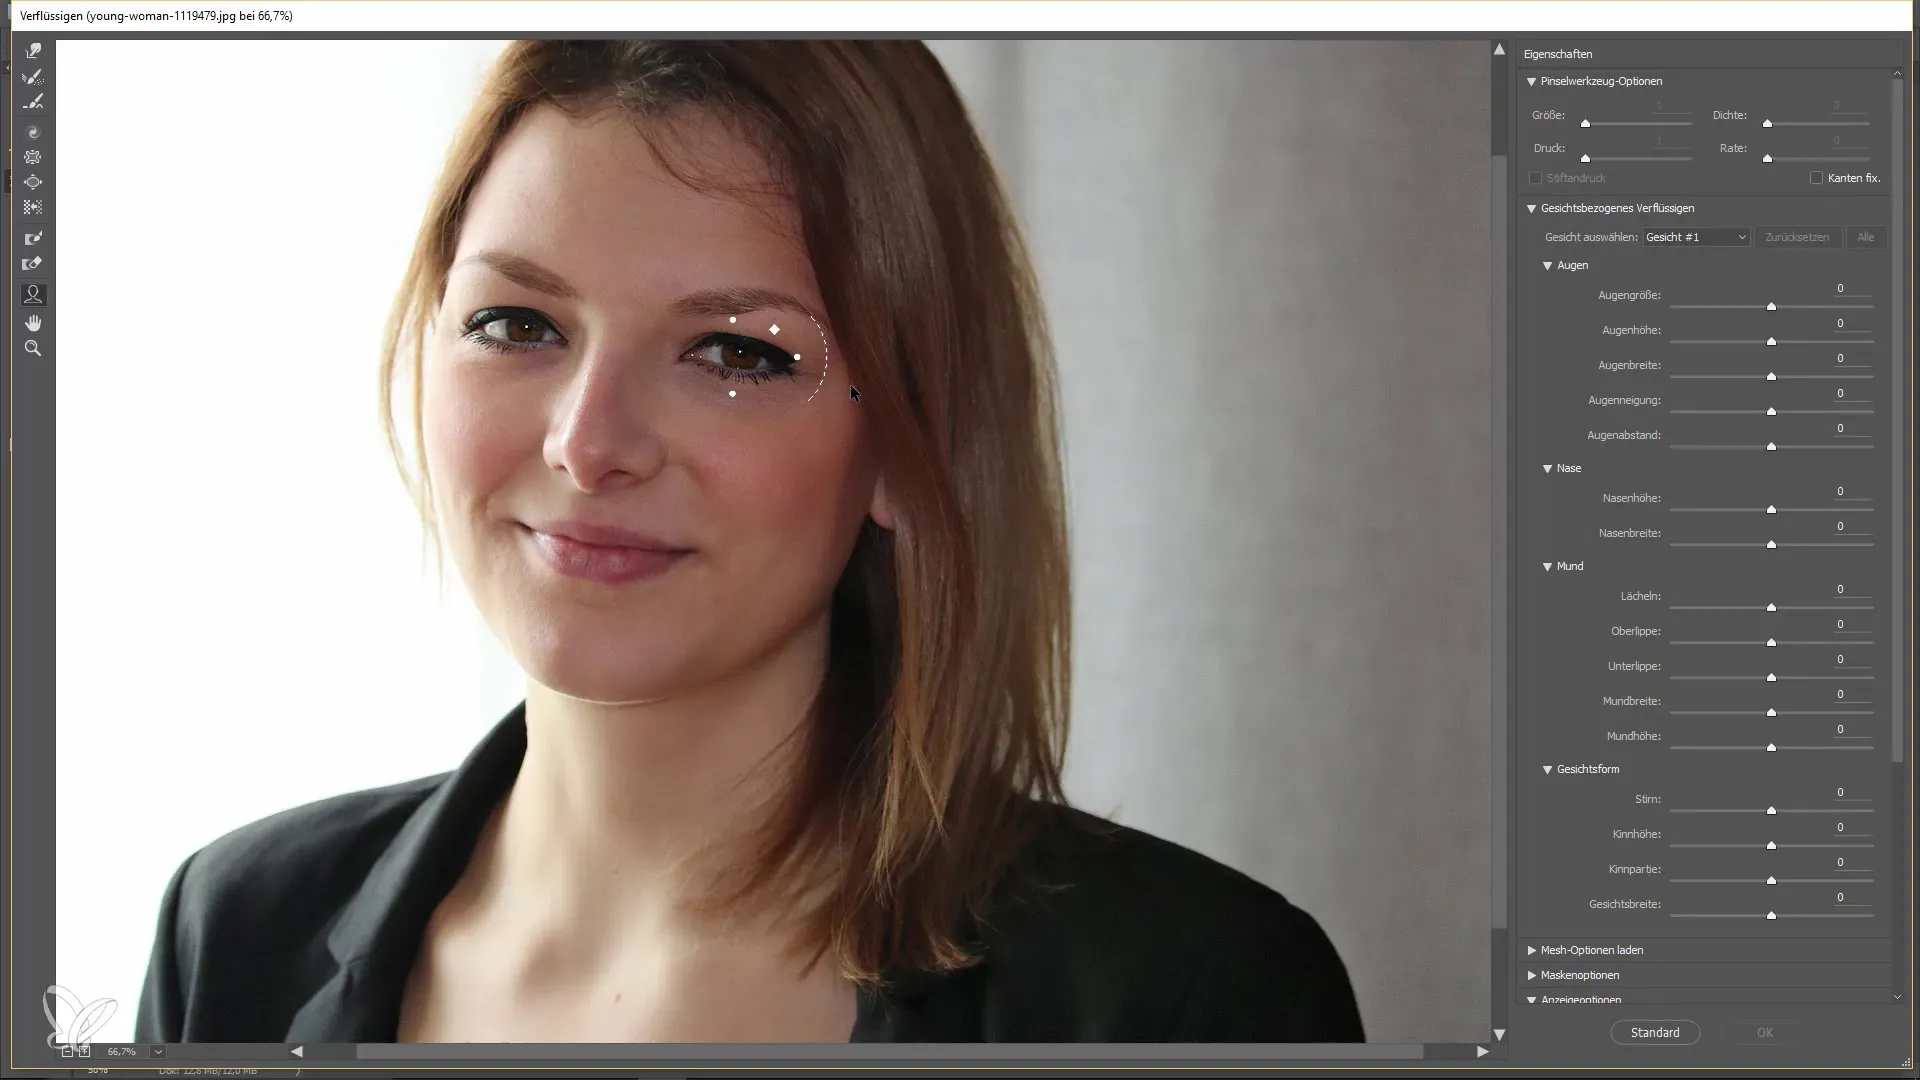
To use the Face Liquify, navigate to the Filter menu and then select Liquify. This step allows access to the specific tools for face optimization.
2. Enable Face Detection
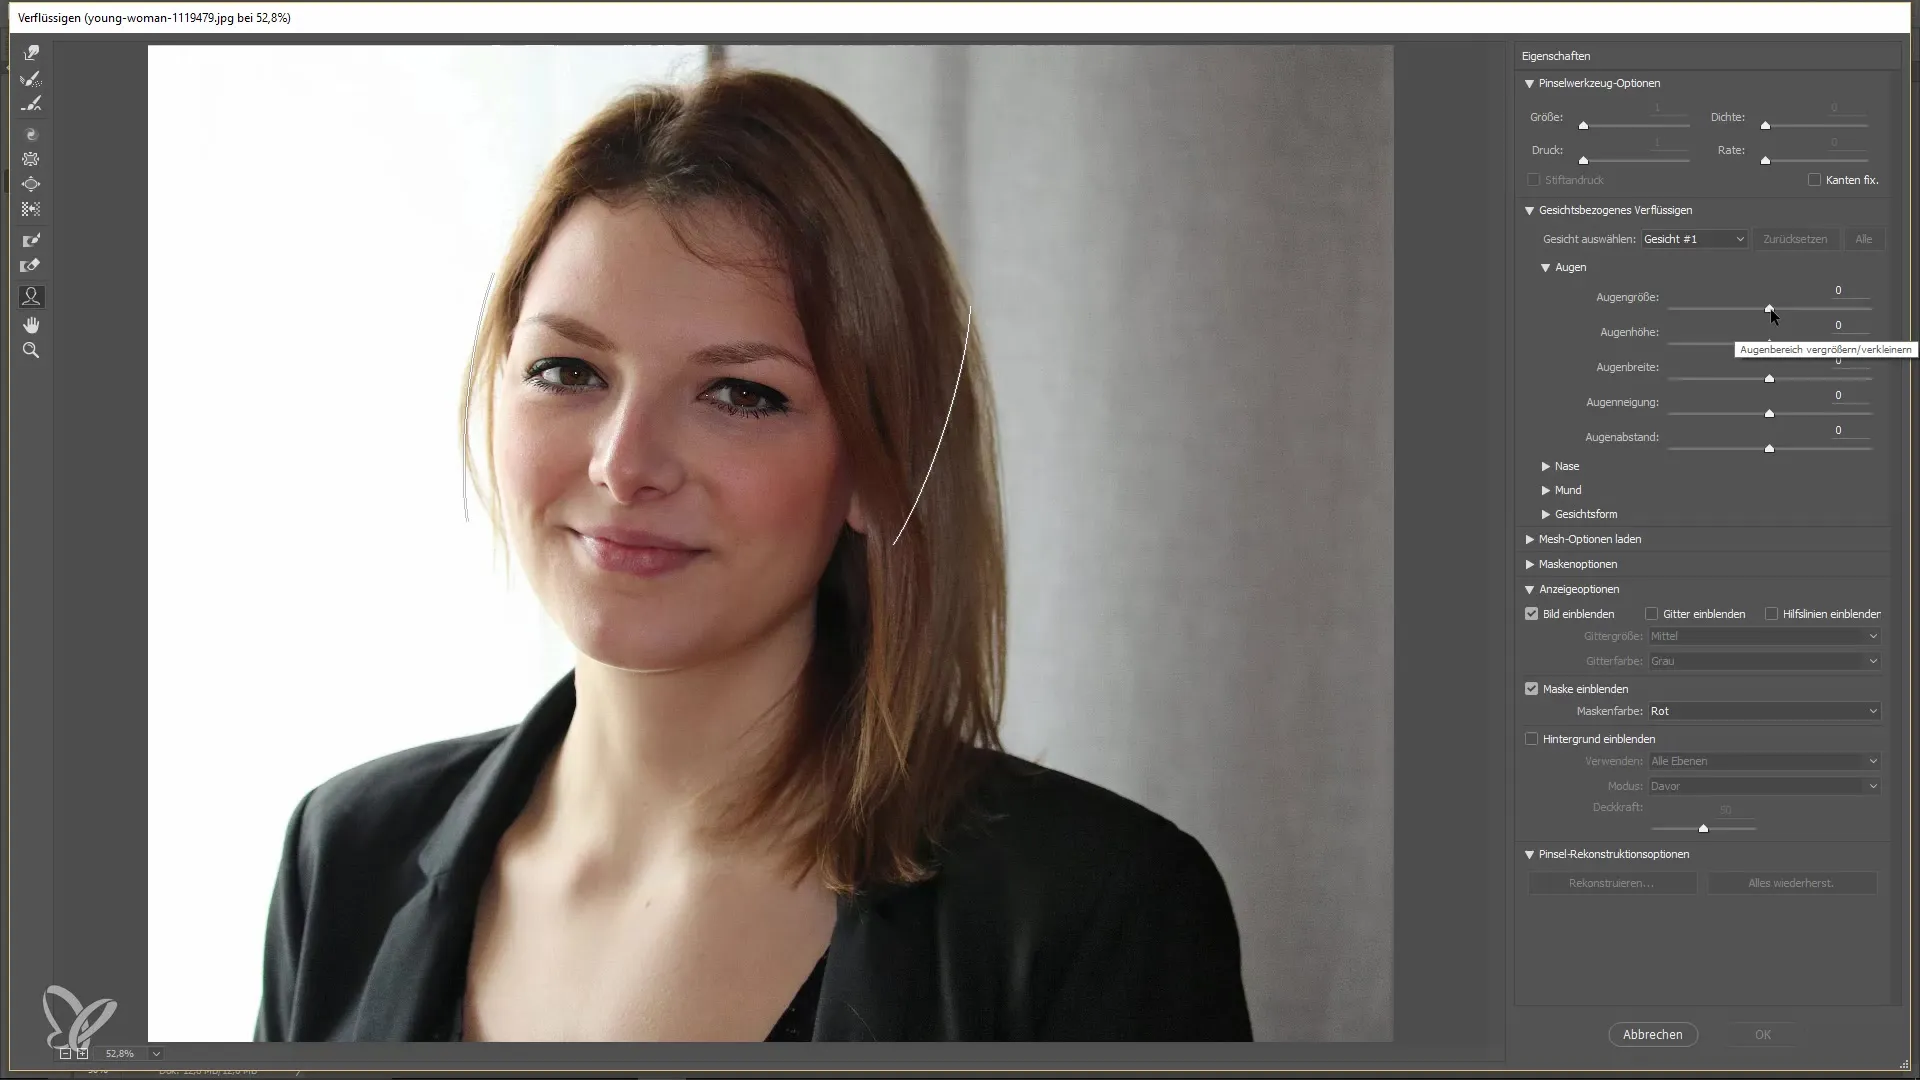
On the right side of the Liquify tool, you will see an options overview. Here, Photoshop displays all detected faces. The first face is listed as "Face 1." If there are multiple faces in the image, you can switch between them and make adjustments.
3. Enlarge Eyes
To enlarge the eyes, move the slider for eye enlargement. You can simply drag the slider to the right and watch both eyes grow larger simultaneously. However, be careful to do this subtly unless an exaggerated comic effect is desired.
4. Adjust Nose
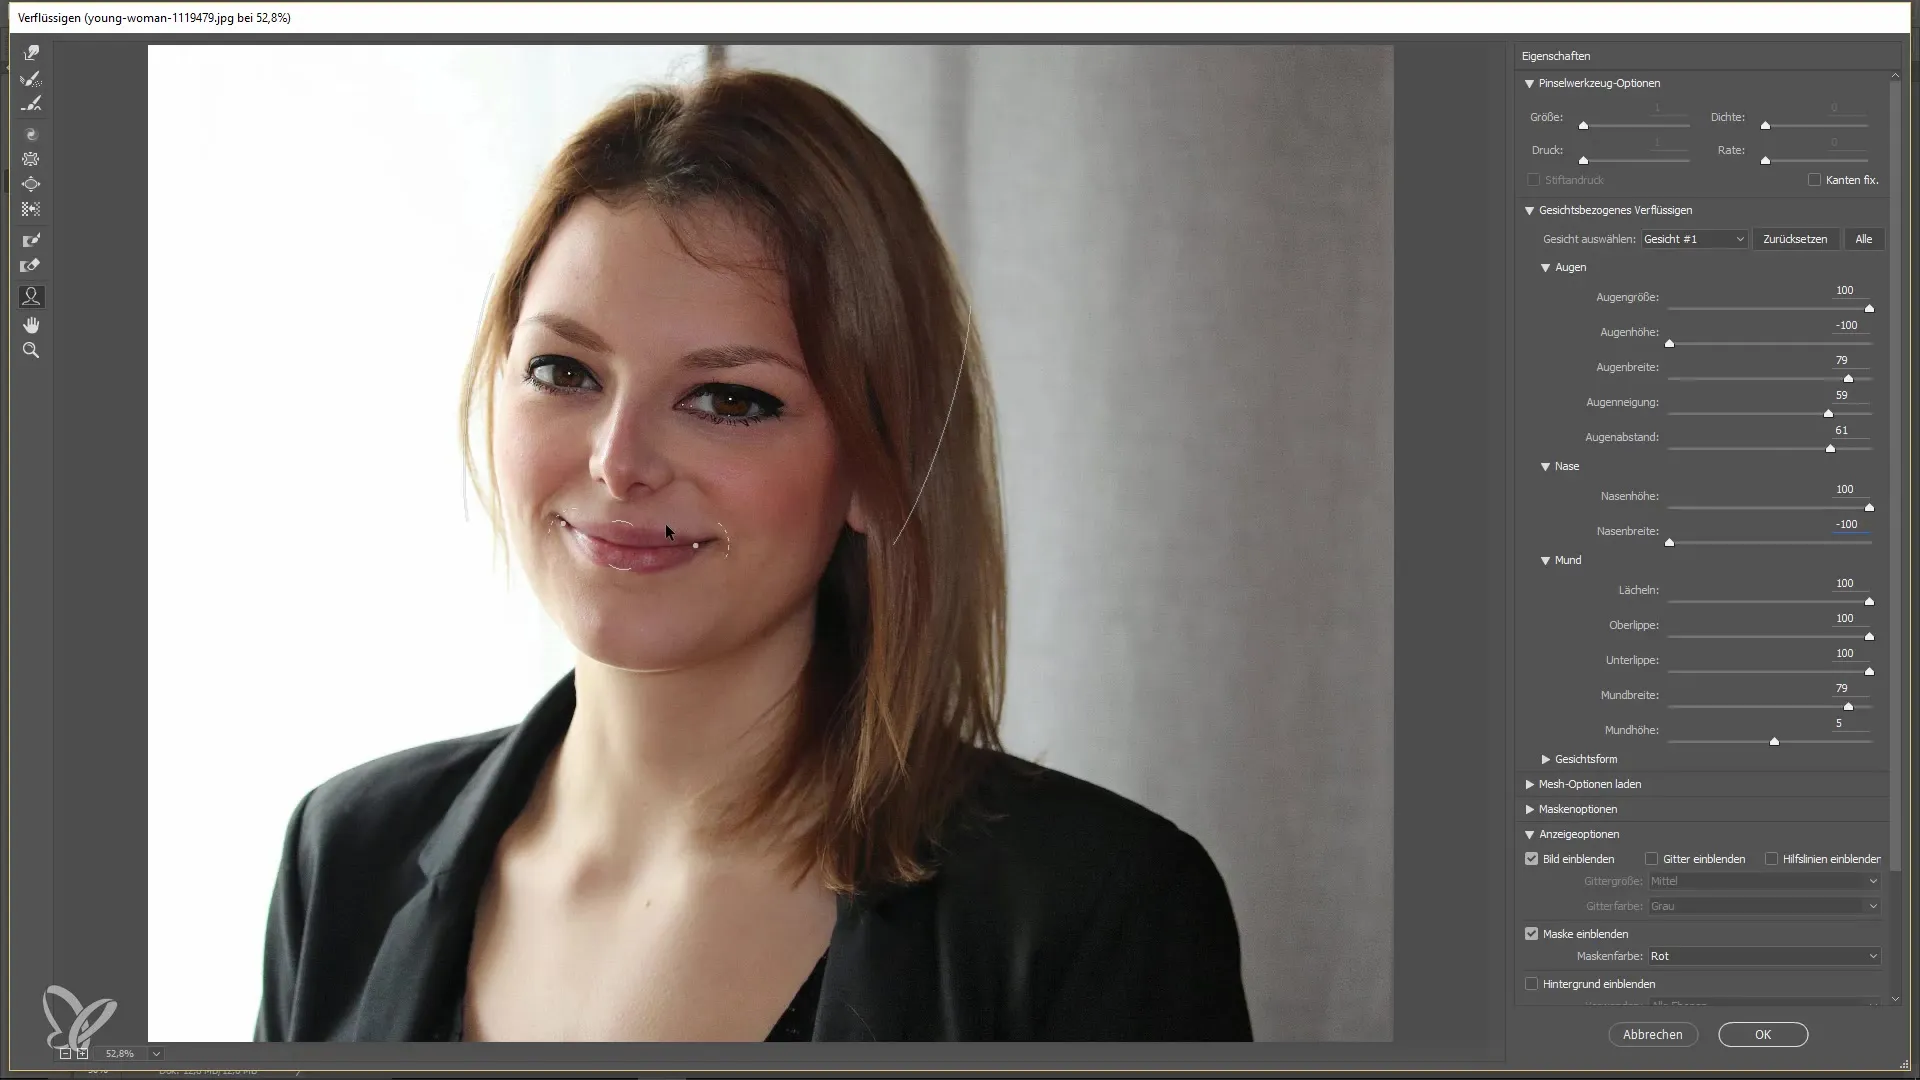
For nose adjustments, you can use the sliders for nose height and width. Here, you can lift the tip of the nose or reduce its width to achieve your desired shape.
5. Optimize Mouth and Lips
Use the slider to bring more smile to the mouth or to make the lips appear fuller. Again, it's essential to remain subtle to ensure a realistic result.
6. Intuitive Adjustments with the Mouse
A great new feature is the ability to make adjustments directly with the mouse. For example, you can pull the forehead up or down with the mouse, making the editing significantly easier and faster.
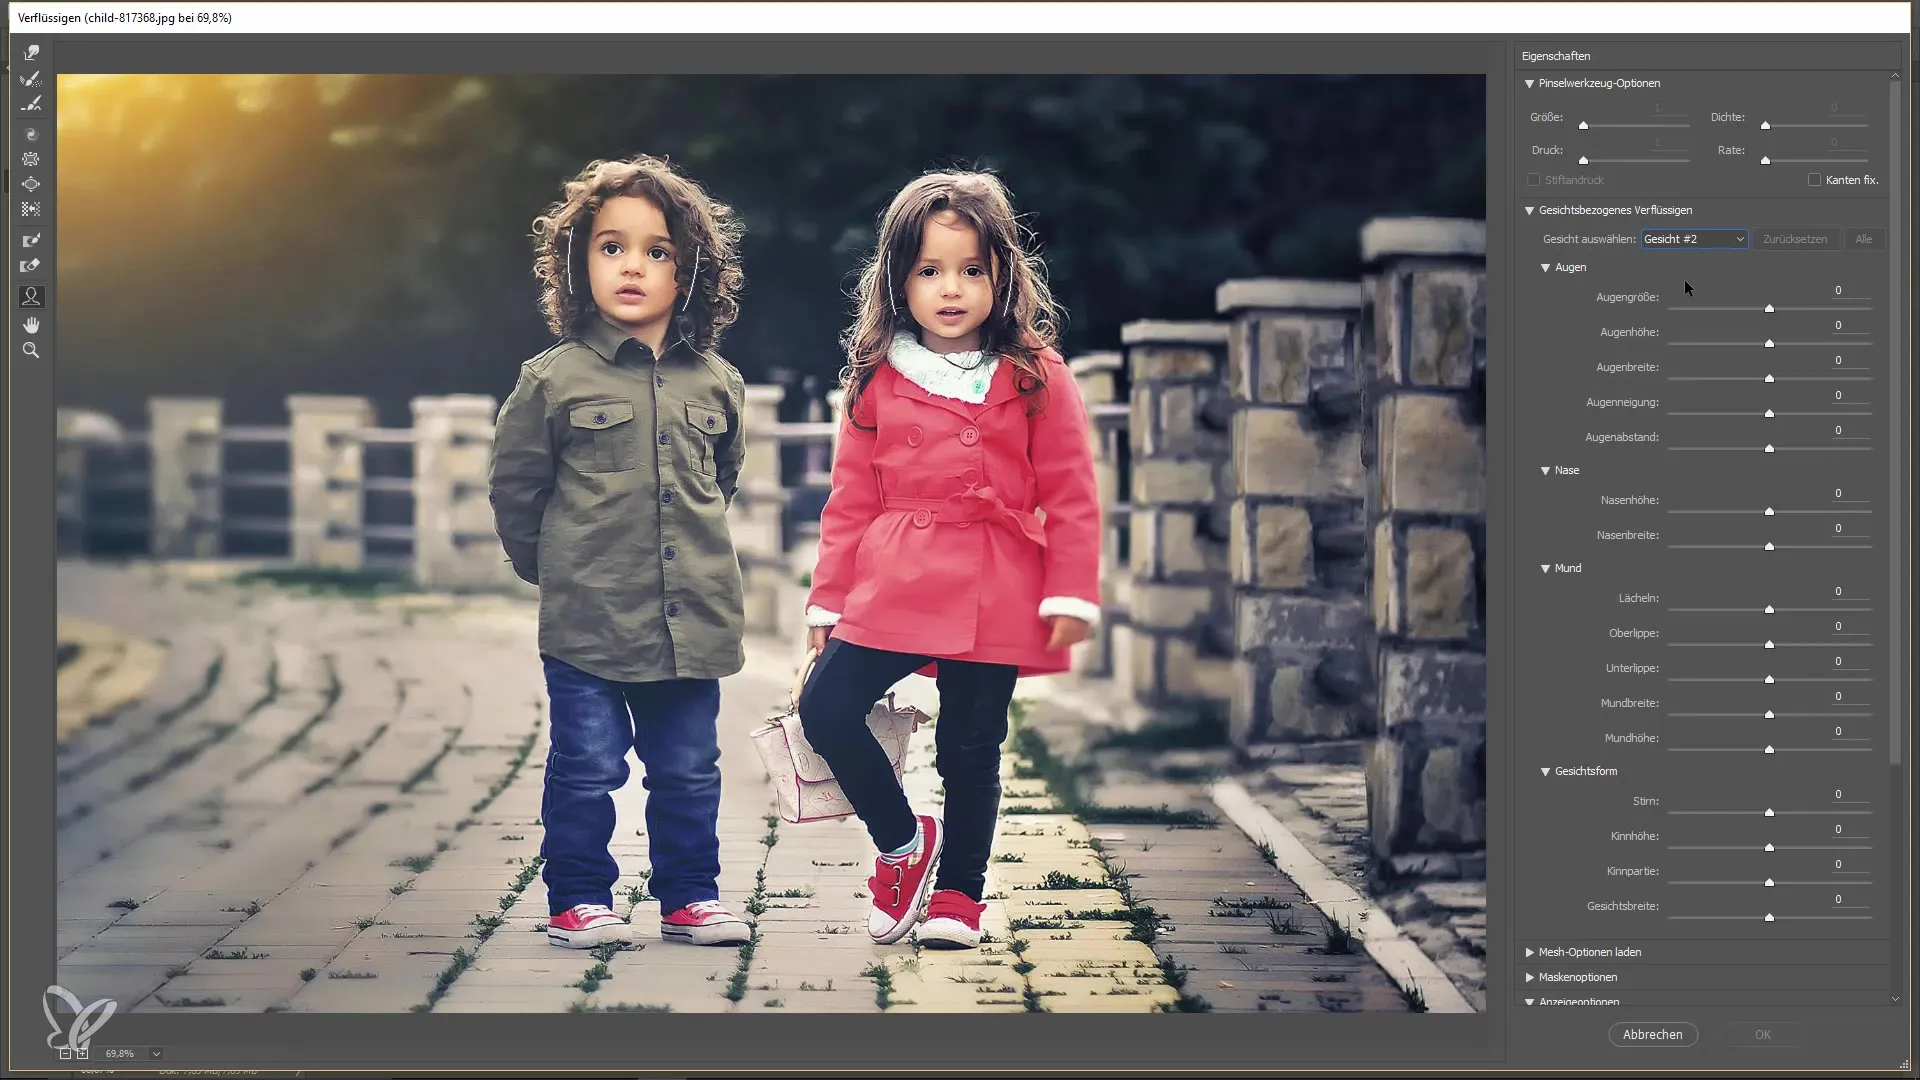
7. Working on Multiple Faces
If there are multiple faces in the image, you can easily switch between them. Go back to the Face Liquify and select "Face 2." You can then make the same adjustments as before, editing the eyes, mouth, and nose.
8. Before-After Comparison
To immediately see your changes, you can use the before-after display feature. Simply increase the opacity of the original image. This is useful for assessing whether the adjustments made are coherent.
9. Use Select and Mask
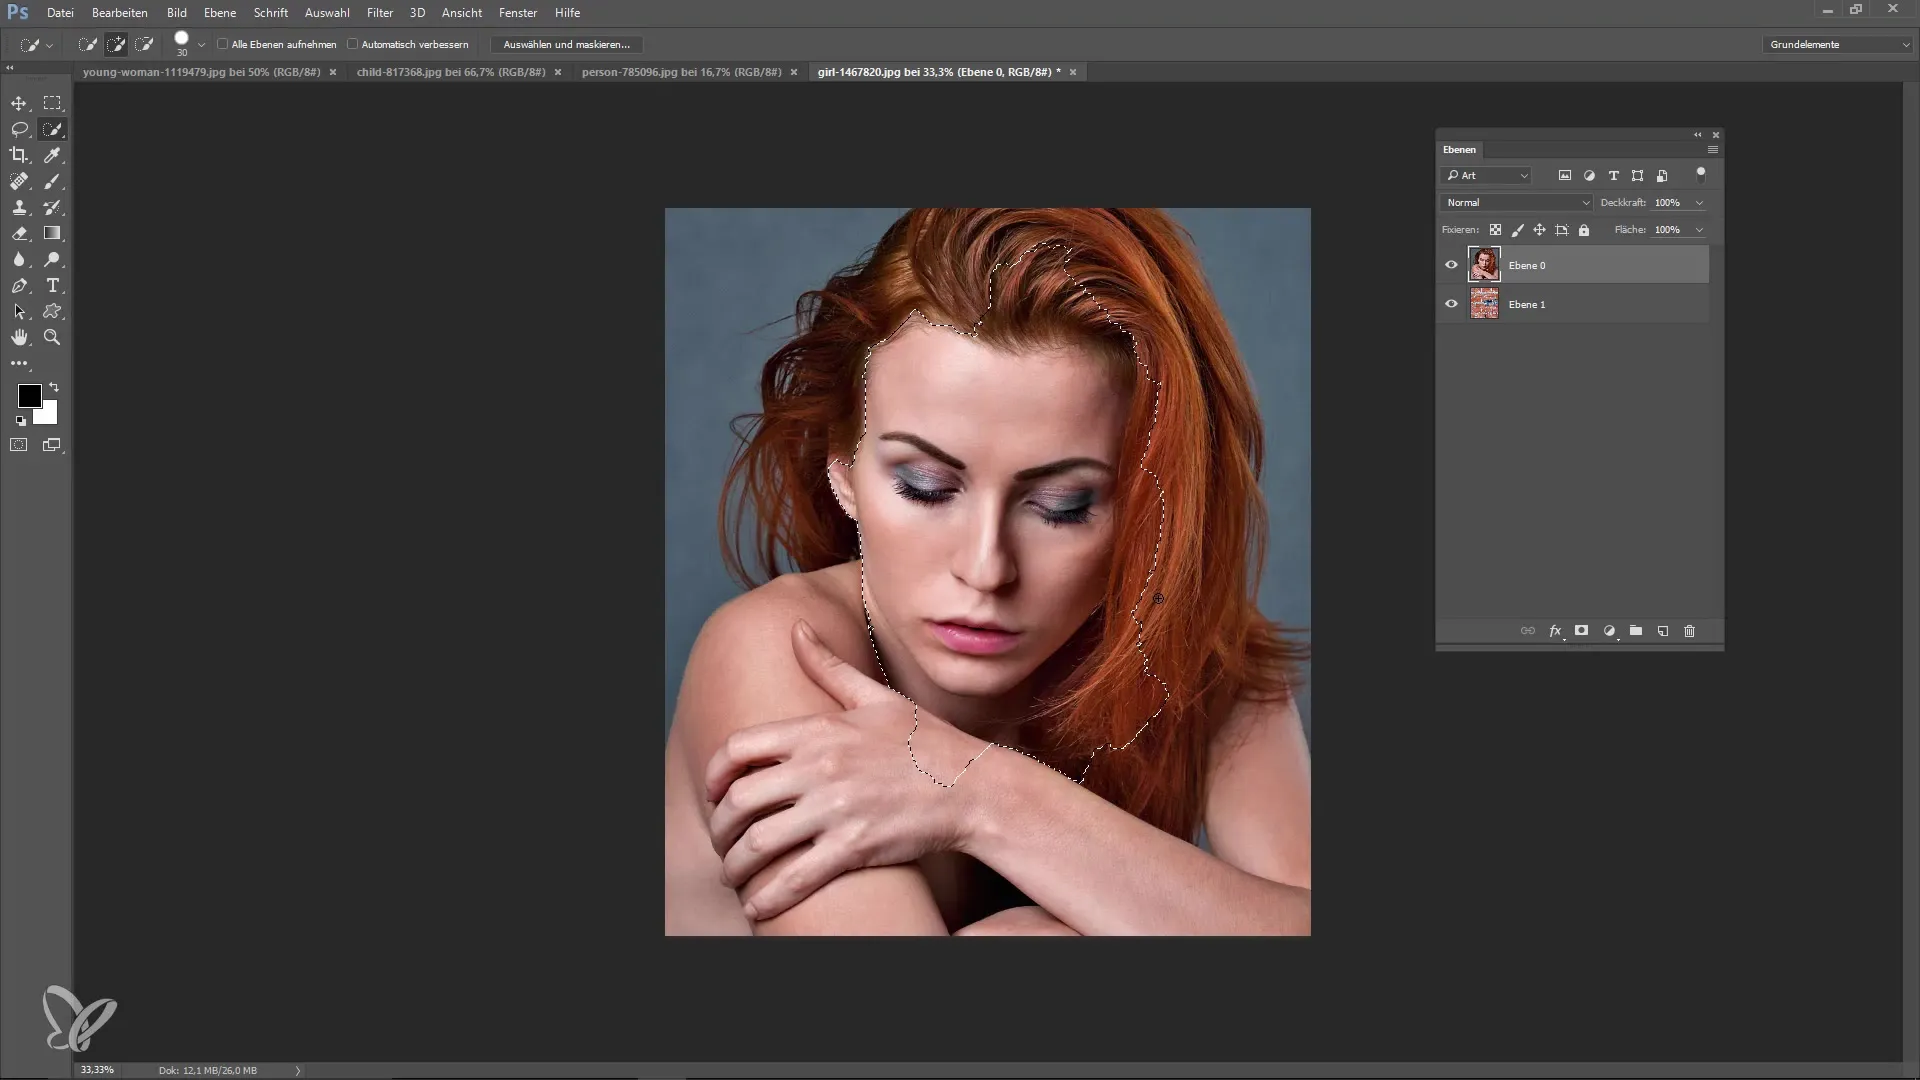
If you want to start cutting out an image, switch to Select and click on Mask. Here, you can adjust the background and focus on the subject.
10. Use Onion Skin View
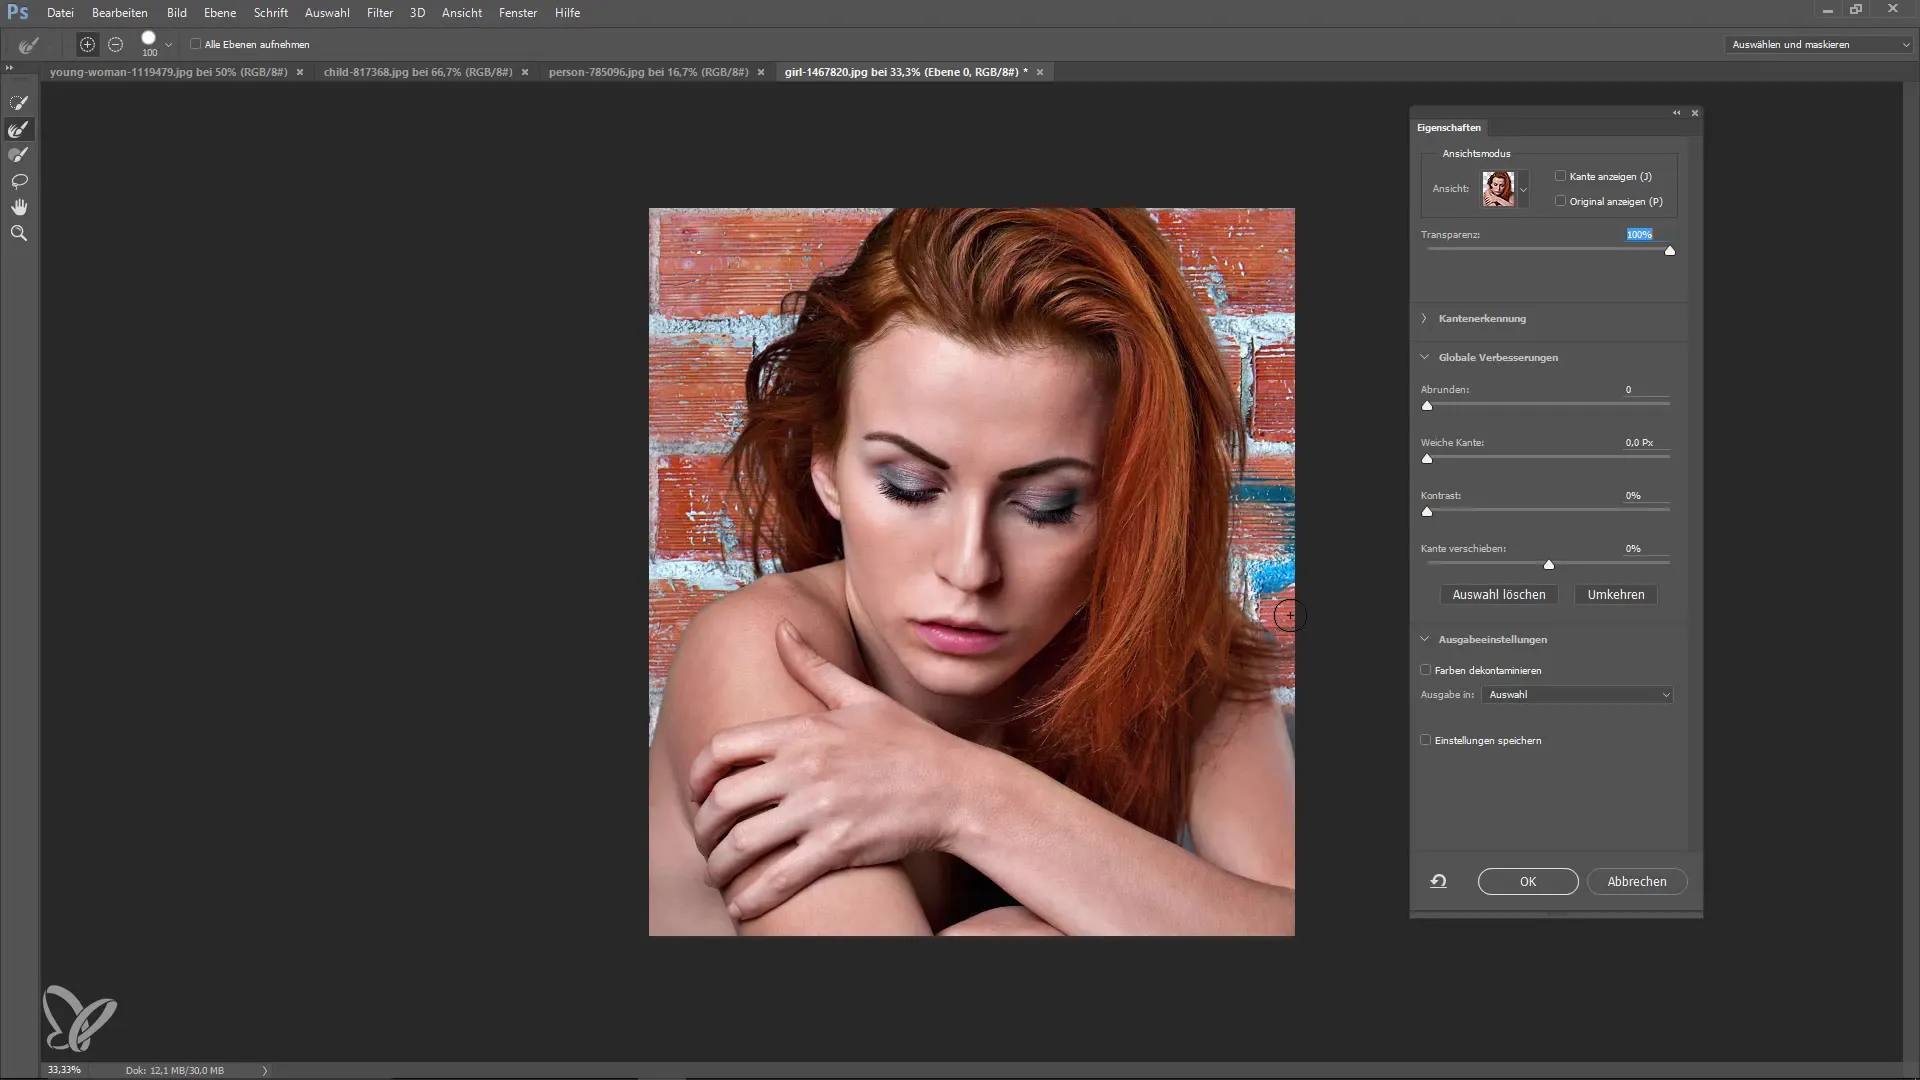
In the new masking environment, you can switch between different views to check the quality of the cutout. You can edit the mask directly and correct any mistakes.
11. Completing the Cutout
When you are satisfied with the editing, go to Output Options and save the settings. Close the window and view the final result. Your work is now complete!
Summary – Face Optimization and Better Cutouts in Photoshop
The new features in the Creative Cloud of Photoshop CC 2015.5 allow for easy and efficient editing of faces as well as improved cutouts of objects. With the face-specific Liquify, you can intuitively adjust faces. The "Select and Mask" feature provides you with a user-friendly way to do cutouts. These tools will help you significantly enhance your image editing.
Frequently Asked Questions
How can I undo the liquify effect?Simply go back into the Liquify mode and reset the slider to its original values.
Can I edit multiple faces at the same time?No, adjustments apply only to one face at a time, although you can switch between them.
How exactly does the onion skin view work?This view shows both the edited and the original image transparently overlaid, allowing you to compare changes.
Do I need to learn a new technique for cutouts?With the "Select and Mask" feature, it is much easier than before, as the new tools are more intuitive.


