

Imagine you are developing a campaign that should look equally good on the desktop, the iPad and the smartphone. Instead of three separate files, you work with multiple artboards in a single document. The November update of Photoshop CC 2015.1 brings practical tools for this: You can duplicate artboards faster, keep an overview with filters, set guides for each artboard individually and align objects precisely. The CC Libraries have also received new features that let you conveniently collect recurring elements and use them from anywhere. In this tutorial, I will guide you step by step through all the important new features.
The video is only loaded from YouTube when you play it – data (including your IP address) is then transmitted to YouTube/Google. More in the privacy policy
Key Takeaways
Key Takeaways
- Artboards can be selected via the Layers panel, duplicated with the plus sign, and copied together with their content by holding down the Alt key.
- The layer filter "Artboard" shows only the active artboard with its contents, creating clarity in complex layouts.
- An artboard can be locked so that it is not accidentally moved while you work.
- Each artboard can have its own guide grid, and the display of inactive guides can be controlled in the preferences.
- Objects can be aligned to the edges and the center of an artboard.
- With the new CC Libraries, you import styles, fonts, colors and smart objects from documents and access Adobe Stock directly.
Creating and duplicating artboards
Selecting an artboard
You can activate an artboard in two ways: Click directly on its name or on the artboard's group in the Layers panel. If there is only one artboard, it is active automatically. You can recognize an active artboard by the small plus signs that appear on its four sides.

Duplicating an artboard
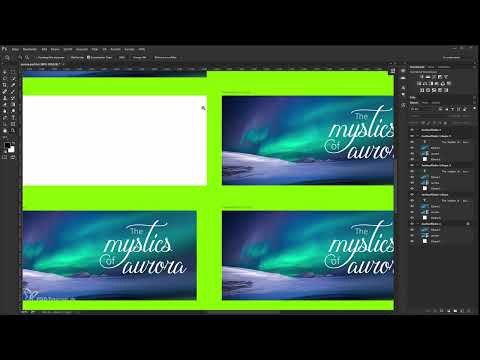
A click on one of the plus signs on a side creates an exact copy of the artboard with identical dimensions, but without content. This is ideal when you need a basic layout for additional formats.

Copying an artboard with its content
If the copy should also contain all layers and objects, activate the artboard, hold down the Alt key and drag it to the desired location. The entire artboard is then duplicated including its content.

Adjusting dimensions in the Properties panel
You can change the size of an artboard at any time afterwards. In the Properties panel you will find presets for devices such as the iPad mini or the iPad Pro. Select the desired format there, and the artboard adapts. Afterwards, the artboard can also be moved to a different position.

Keeping an overview
Using the layer filter for artboards
With many artboards containing nested folders and objects, you quickly lose track. Using the Alt key to zoom in helps only to a limited extent. The better solution is at the top in the layer filters: Click on "Artboard," and Photoshop shows you only the activated artboard with its objects and layers.

Switching between artboards and turning off the filter
To get to another artboard, hold down the H key and click with the mouse in the desired artboard. Afterwards you still need to click on it so that it is actually selected. You turn the filter off again by deactivating the field in the filter menu. The remaining artboards are then displayed again.

Locking artboards
Also new is the lock function for artboards. In the Layers panel you will find a dedicated icon for it. It prevents elements from being automatically nested into an artboard when moved. If you drag a text over an artboard, for example, it becomes part of that group without the lock. If you activate the lock icon beforehand, the text stays in the main artboard. It can then be moved freely without changing its affiliation.

Setting guides for each artboard
Creating your own grid
The guides feature has been significantly improved. You can now create a separate grid for each individual artboard. Activate the desired artboard, go to "View" and then "New Guide Layout", and specify the number of columns and rows. Eight columns are provided as the default setting. The grid is aligned to the top left corner of the artboard.

Determining the target of the grid
In the dialog, you also specify which artboards the grid is applied to. If you select all artboards, each artboard gets its own grid. If you have selected the canvas, the grid refers to the entire workspace and is aligned to its top left corner. In most cases, the selected artboard is the most sensible choice.

Showing and styling inactive guides
When you switch to another artboard, the guides of the previous artboard are hidden by default. If you still want to see them, go to "Edit" and "Preferences" and, in the "Guides, Grid & Slices" section, enable the option to show guides of the inactive artboard. If you additionally disable hiding, the inactive lines are displayed dotted. You can also set the colors: inactive artboards appear in a dashed light blue display, the active artboard in solid light blue.

Using canvas guides
In addition to artboards, there are also guides for the canvas. If you drag a guide out into an empty area, it belongs to the canvas. Under "View" and "Show", you can specifically choose whether you want to show or hide only the artboard guides, only the canvas guides, or all guides. This way you keep control even with extensive projects.

Adjusting the appearance of artboards
Changing background color and border
You change the background color of the canvas as before with a right-click, for example to a light gray. In addition, you will now find the setting in the preferences under "Interface" in the new item "Artboards". There you can also specify whether a line should appear around the artboard. A fine line is clearly visible if you adjust the color. If you turn it off, the artboard appears without a border. Note that the artboard settings are only available in GPU mode of the RGB color mode. To do this, enable the graphics processor under "Performance".

Aligning objects to artboards
Snapping to artboard boundaries
Another practical new feature is aligning elements to the edges of an artboard. To do this, you must first enable the option under "View", "Snap To" and "Artboard Boundaries". After that, your object snaps to every edge of the artboard when you move it. This speeds up work and increases accuracy.

Centering with the alignment icons
The alignment icons in the options bar also refer to the artboard. If you want to place a square in the center, you select it and click the appropriate icon. It is then centered exactly, both horizontally and vertically if desired. If you want to align several objects together to the artboard, select them together with the artboard and then use the alignment icons.
Using CC Libraries
Creating a library from a document
When opening a file that contains smart objects, text layers, or styles, a dialog appears. With "Create New Library from Document" you automatically import all of these elements into a new CC Library. This saves a lot of time if you frequently access the same elements. You can later also use them on other devices or in other documents without having to open the original file. If you no longer want to see the dialog in the future, check the box "Don't show again" at the bottom. You can call it up again later via the small button in the Libraries panel.

Using elements from a library
Once you have created a library, you can drag fonts, colors, styles, and graphics from it directly into your current document. Each library carries the name of the document it comes from. You can conveniently switch between multiple libraries via the menu.

Searching Adobe Stock directly
The Libraries panel now has a search field. Here you can search Adobe Stock, the current library, or all libraries. If you enter, for example, a font or a term like "Aurora" and confirm with Enter, matching images appear. With a right-click you can buy an image, save it as a preview in your library, or search the internet for similar motifs. The preview is downloaded, and you can then drag it directly into your document. Purchased images get a higher resolution and no longer have a watermark.

Dragging brushes, styles, and colors into the library
One of the most recent new features is the direct route from the panels. Simply drag styles, brushes, or colors into your Libraries panel via drag and drop. Previously, you had to take detours via certain icons to do this. This way you can quickly put together your personal favorite library and have the elements you need most often ready in every project.

Summary ??? Mastering artboards and CC libraries in Photoshop
The artboards in Photoshop CC 2015.1 have become significantly more powerful. You can duplicate them quickly, keep them organized with the layer filter, lock them, and add your own guides to them. Snapping to edges and center makes precise work easier. With the CC libraries, you import elements from documents, search Adobe Stock, and collect styles, brushes, and colors via drag and drop. With these features, you can design multi-format projects in a more structured and faster way.
FAQ
How do I duplicate an artboard with its content?Activate the artboard, hold down the Alt key, and drag it to the desired position.
How do I display only a single artboard?Activate the "Artboard" option in the layer filters, and only the active artboard and its contents will be displayed.
How do I prevent elements from being automatically nested into an artboard?Lock the artboard using the corresponding icon in the Layers panel.
Can each artboard have its own guide grid?Yes, under "View" and "New Guide Layout" you define the grid for the selected artboard or for all artboards.
How do I display guides of inactive artboards?In the preferences under "Guides, Grid & Slices", activate the option for inactive artboards and deactivate hiding.
How do I align an object to the center of an artboard?Under "View", "Snap To", activate the artboard boundaries, select the object, and then use the icon for centered alignment.
How do I create a CC library from a document?Open a file with smart objects, text layers, or styles and select "Create new library from document" in the dialog that appears.
How do I buy an image from Adobe Stock directly from Photoshop?Search for the motif in the Libraries panel, right-click the image, and select "Buy image".

