

Photoshop CC 2018 brings several new features that noticeably make everyday work easier. This guide walks you step by step through the most important functions, from improved image enlargement and the new brush management to the range mask in Camera Raw.
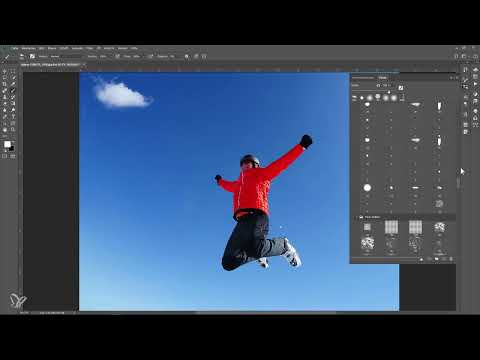
The video is only loaded from YouTube when you play it – data (including your IP address) is then transmitted to YouTube/Google. More in the privacy policy
Key Takeaways
Image enlargement with "Preserve Details 2.0" delivers finer details than the previous method in many cases, but the difference depends heavily on the particular subject. The brush management now organizes your brushes into groups and folders, and you can save your own brush presets with color and tool settings. With smoothing and paint symmetry, you can draw cleaner lines and mandala-like patterns. You can copy and paste layers directly between documents, and text layers with variable fonts can be adjusted quickly. The range mask in Camera Raw allows targeted changes to individual color ranges.
Enlarging images with "Preserve Details 2.0"
Open your image and call up the image size via the "Image" menu. The previous "Preserve Details" method often shows soft, slightly blurry edges at strong enlargement, so you frequently have to sharpen afterwards. You will find the new "Preserve Details 2.0" method in the dialog under the resampling options. If it does not appear there, enable it under "Preferences" in the "Technology Previews" section.
For a direct comparison, duplicate the image and enlarge both versions to the same pixel size, for example 5000 pixels. Arrange the documents side by side via "Window", "Arrange" and move the view synchronously while holding down the Shift key and the Space bar. With fine strokes, you can see that the new method works with minimally more detail and produces fewer color fringes. For some subjects the difference is small, so it is worth testing with your own images.


Managing brushes clearly
Open the Brushes panel with the F5 key. The interface has been restructured: brushes now sit in folders such as the default brushes or the legacy brushes. You switch between brush settings and the Brushes panel via the corresponding icon, and the folder structure is preserved when you switch back and forth between the two views.
Load new brushes via the options menu. In the past, they were simply appended to the end of the list. Now you get a separate folder that you can move afterwards. If the thumbnail view is too small for you, drag the slider at the bottom edge of the panel to the right. The brush size does not change in the process, only the display in the panel. This helps especially with high-resolution screens.


Moving folders and opening all folders at once
A folder can be dragged to the desired position via drag and drop, for example all the way to the top. So that you don't have to search long with many brushes, a trick helps: hold down the Alt key and click the arrow of a folder. Then all folders at that level open, including the subfolders.
With the key combination Ctrl and Alt and a click on a folder, you can even open all folders in the entire panel. A simple click, on the other hand, only opens that particular folder. These combinations save time when you want to find a brush quickly.

Restoring legacy brushes
If you accidentally deleted the default brushes, you don't have to reinstall anything. Open the options menu in the Brushes panel and select "Legacy Brushes". The brushes are then available again.
Saving your own brush presets
When saving your own brushes, you should look closely. Create a new document with an empty layer, paint something, and click "New" in the Brushes panel. The brush is saved with the current tool preset, not with the brush you have just selected. If you also want to save color, opacity, or tool settings, enable the options "Include Color" and "Capture Tool Settings" in the dialog.
Afterwards, you can save the brush again via "Edit" and "Define Brush Preset". Then change the color or opacity and save another version. Both brushes are now available to you independently of each other. This is useful if you often work with the same settings.

Painting clean lines with smoothing
You can find smoothing in the options bar of the Brush tool. Set a small brush tip and paint a line without smoothing so that the edges look uneven. Then increase the smoothing, for example to about 30 percent, and paint the line again. At higher values, such as 100 percent, very even curves are created. String mode pulls a virtual string behind the brush, which is especially helpful for flowing shapes.

Painting with symmetry
You also activate paint symmetry under "Preferences" in the "Technology Previews" section. Then select the desired symmetry axis in the tool. As soon as you paint, the stroke is automatically mirrored along the axis. This way, mandalas or symmetrical ornaments are created much faster than with manual work. You can also combine the axis with multiple orientations and thus create more complex patterns.
Copying layers between documents
This function makes working with multiple files easier. Select the desired layers in the Layers panel while holding down the Shift key. Copy the layers with Ctrl and C, switch to the target document, and paste them with Ctrl and V. Previously, you had to move the layers via drag and drop or duplicate them via the context menu. Layer styles such as a drop shadow are also carried over.

Sharing images directly
Via "File" and "Share" you can pass your image on to apps, such as Skype or Lightroom. Photoshop suggests suitable services to you, and you can add more apps. For quickly passing images on to friends or colleagues, this is a practical shortcut.

Using animated tool tooltips
If you hover the mouse over a tool icon, a short video now appears showing the function. This is especially helpful for beginners who want to know what, for example, the Eraser tool or the Dodge tool does. Experienced users, on the other hand, may quickly find the animation annoying. In that case, you can deactivate the tooltips again via the Preferences.

Mini tutorials in the "Learn" panel
Under "Window" and "Learn" you will find small step-by-step guides. One example is changing colors: the tutorial first has you select the Lasso tool, shows you the right place in the interface, and guides you via "Image," "Adjustments," and "Hue/Saturation" to the goal. Wrong tools are immediately highlighted. These mini workshops do not replace detailed video trainings, but they are well suited for a quick start.

Using variable fonts
Variable fonts offer adjustable axes such as weight or width, which you can quickly adapt. Select the Type tool, type a text, and choose a variable font from the list. Then sliders for weight or width change the font directly. You select multiple text layers by holding down the Shift key and adjust the settings together. Not all fonts support this function yet, but the selection is constantly growing.

Using the Curvature Pen and line weight
The new Curvature Pen tool creates rounded paths with just a few clicks. Set two points, and Photoshop calculates the curve automatically. With the Pen tool, you can also set a line weight. This helps when paths are otherwise barely visible on dark or light images.
With the Rubber Band option, you activate a preview of the next path segment before you click. Without the Rubber Band, the preview stays off, and you have to place the line first to see how it runs. The option thus helps with precise work with paths.


Using the range mask in Camera Raw
Open your image via "Filter" and "Camera Raw Filter". In the Graduated Filter or Radial Filter, you can now create a range mask. Drag the tool over the area that you want to edit. Then activate the "Range Mask" option at the bottom and choose "Color". Use the eyedropper to click on the color that should be changed. After that, adjustments such as Clarity or Saturation only affect this color range. Try out both modes for color selection, as they work with different levels of precision.


Photos from the Cloud on the Home Screen
If you close all documents, the home screen appears. There you can open photos from your Creative Cloud that you have previously uploaded. This is particularly handy if you work on multiple devices.

Summary ??? Photoshop CC 2018 New Features: Brushes, Image Enlargement and Symmetry
Photoshop CC 2018 offers many features that make everyday work more pleasant. Image enlargement with "Preserve Details 2.0" delivers better results for some subjects, brush management provides a clear structure, and smoothing as well as paint symmetry make drawing easier. Layers can be copied more quickly, images shared directly, and variable fonts adjusted flexibly. The range mask in Camera Raw enables targeted changes, and the mini tutorials help with getting started. It's best to try out the features with your own projects to discover the greatest benefit for you.
FAQ
Where do I find the "Preserve Details 2.0" option?You can find it in the "Image Size" dialog under the resampling options. If it is missing, enable it under "Preferences" in the "Technology Previews" section.
Why are my own brushes saved without color?By default, only the brush tip is saved. When saving, enable the options "Include Color" and "Include Tool Settings" to also save color and tool settings.
How do I restore deleted default brushes?Open the options menu in the Brushes panel and choose "Legacy Brushes". After that, the default brushes are available again.
How do I open all brush folders at once?Hold down the Ctrl and Alt keys and click on a folder. This opens all folders in the panel.
What is smoothing for the brush good for?Smoothing makes brush strokes more even, especially with fast movements. Higher values produce very clean lines.
How do I activate paint symmetry?You can find paint symmetry under "Preferences" in the "Technology Previews" section. After that, you can choose the symmetry axis in the tool.
Can I copy layers between two documents?Yes, select the layers, copy them with Ctrl and C, and paste them into the target document with Ctrl and V.
What are the animated tooltips for?When you hover over a tool icon, Photoshop shows a short video that explains the function. You can disable them in the preferences.
Where do I find the mini tutorials?They are located under "Window" and "Learn". There, short guides lead you step by step through tasks.
What are variable fonts?Variable fonts can be continuously adjusted via axes such as weight or width. Not all fonts support this yet.
What can the Curvature Pen tool do?With the Curvature Pen tool, you create rounded paths with just a few clicks, without having to align each point individually.
How does the range mask work in Camera Raw?In the Graduated or Radial Filter, choose the "Range Mask" option and then "Color". With the eyedropper, you determine the color range that your adjustments affect.

