
A flawless skin type often determines the entire look of an image in portrait editing. Before you work with lighting mood, color grading, or film effects, it is therefore worth doing a clean basic retouch. This is exactly where this tutorial comes in. You will learn how to remove skin blemishes, stubble, and small hairs with the Healing Brush without creating new flaws in the process.
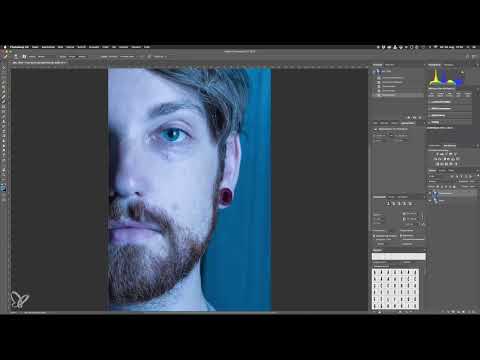
The video is only loaded from YouTube when you play it – data (including your IP address) is then transmitted to YouTube/Google. More in the privacy policy
The step seems inconspicuous, but it is the foundation for everything that follows. Blemishes that you overlook now will become more and more clearly visible as editing progresses through contrast boosts and sharpening. If you even out the skin early, you retain control over the result later on.
Key Takeaways
Key Takeaways
- Always work in the embedded color profile so that no image information is lost.
- Duplicate the base layer and edit only the copy. That way you can return to the original at any time.
- Rasterize the layer before you use the Healing Brush.
- The source point moves along with your mouse pointer. Therefore, reset it frequently to avoid unwanted copies.
- Brush size and hardness can be adjusted much faster with keyboard shortcuts than via the menu.
Step-by-Step Guide
Choosing the Right Color Space
When opening a photo in Photoshop, a color management dialog box often appears. It indicates that the embedded profile differs from the working color space. In this case, the embedded profile is ProPhoto RGB, and the working color space is sRGB.
In the dialog, always choose the top option, i.e., the embedded profile. ProPhoto RGB is the larger color space and contains all the information from your shot. You only need sRGB when exporting, for example for social media. Until then, you should work in the larger color space throughout.

Duplicating the Base Layer
Before you begin retouching, select the bottom layer and create a copy. The base layer contains the basic settings from Lightroom and serves as your safety net. The easiest way is with the keyboard shortcut Command + J on a Mac or Ctrl + J on Windows.
The copy appears above the original. From now on, this is where you work. The original remains untouched, and you can fall back on it at any time.

Naming Layers Meaningfully
Give your layers a meaningful name. Double-clicking the layer name opens the input field. Name the layer after how you edited it, for example "Basic Skin Retouch". In a complex project, many layers quickly accumulate, and without clear names you quickly lose track when you want to readjust individual aspects later.

Rasterizing the Layer
The Healing Brush can only work on pixel layers. However, the copy is initially a Smart Object, recognizable by the small icon in the Layers panel. Right-click the layer and choose "Rasterize Layer". The icon disappears, and all tools can now be applied.

Activating the Healing Brush and Adjusting the View
You will find the Healing Brush in the left toolbar, recognizable by the bandage icon. It is faster with the shortcut J. The cursor then turns into a small circle, the size of which you can adjust.
Before you get started, zoom in closer on the face. With Command + Plus (Ctrl + Plus on Windows) you enlarge the view step by step. With Command + Minus you reduce it again, and with Command + 0 you return to the full view. A zoom of about 66.5 percent provides a good overview of the skin blemishes in this example.

Navigating with the Space Bar
While a tool is active, you can move the image without switching tools. To do this, hold down the space bar. The cursor turns into a hand, and with the left mouse button held down you can move the image freely. As soon as you release the space bar, you are back in the Healing Brush. This technique saves an enormous amount of time and is something you should definitely get used to.

Quickly adjust brush size and hardness
You can set the brush size via the menu at the top, but it is much faster with a keyboard shortcut. On a Mac, hold down Control + Option; on Windows, Ctrl + Alt. Hold down the left mouse button and move the mouse left or right to change the size. If you move it up or down, you change the hardness.
If you commit this combination to memory, you will work in Photoshop much more fluidly. This technique will accompany you through all of the following steps, because the Dodge tool, the Burn tool, and the brush also benefit from it.

Set the reference point and retouch
The Healing Brush works in two stages. First, you define a source point, that is, an area of skin that serves as a template. To do this, hold down the Alt key until the cursor turns into a crosshair, and click on a healthy area of skin near the spot you want to correct. Make sure that the texture, brightness, and skin tone match the surroundings.
Then release the Alt key and move the cursor over the blemish. You will now see the copied area of skin as a preview. Hold down the left mouse button while you paint over the spot. The Healing Brush automatically adjusts brightness and color to the surroundings.

Keep an eye on the source point
An important point is often overlooked: the source point moves along with your mouse pointer. You can recognize this by the small cross that travels along during retouching. If you move the brush in an unfavorable direction, the source point can end up on areas such as the nose, eyebrow, or lips. Then you copy exactly those areas to the wrong place.
In the video, the instructor shows how a nose could be copied onto the cheek if the source point wanders there. If in doubt, undo such steps by pressing Command + Z or Ctrl + Z respectively.


Change the reference point regularly
The cleanest method is to set a new source point before each individual correction. This takes a bit longer at first, but prevents unwanted structures from being transferred. So deliberately hold down the Alt key often to change the source.
The effect is clearly visible with beard stubble. Instead of working on a large area at once, you set the source point anew bit by bit and remove the stubble spot by spot. The hardness of the brush is around 40 percent here. This keeps the edge soft enough that the transition looks natural.

Completing the basic retouching
With this method, you gradually remove skin blemishes, stubble, and individual hairs. The technique takes some practice, and you should train it deliberately until you master the movements automatically. With each repetition, the result becomes more precise and cleaner. The basic retouching then forms the foundation for all further editing steps.

Summary ??? Skin retouching in Photoshop: The Healing Brush step by step
You have learned how to choose the color space correctly, duplicate the base layer and name it cleanly, rasterize the layer, and use the Healing Brush purposefully. You now know how to zoom, navigate, and adjust brush size and hardness with keyboard shortcuts. You have also seen why you should change the source point regularly. With these basics, you create a clean skin base on which all later effects can be confidently built.
FAQ
Why should I work in the embedded color profile?The embedded profile is usually the larger one and contains all the information from your photo. The smaller sRGB color space is only applied when exporting for Facebook or other platforms.
Why do I duplicate the layer instead of working directly on the original?The copy protects the basic settings from Lightroom. If something goes wrong, you can always fall back on the unchanged base layer.
Why do I have to rasterize the layer?The Healing Brush can only work on pixel layers. Smart objects must therefore be converted into pixel layers beforehand.
How do I know that the source point has shifted?The small crosshair above the brush shows the current position of the source point. If it moves into an unwanted region, you should set the source point again.
How often should I change the source point?Ideally before each individual correction. This way you avoid unwanted structures being transferred to the skin.
Why does a brush hardness of around 40 percent make sense?At this hardness, the brush edge is soft enough that the retouching blends naturally into the surroundings.


