
Imagine you had a new employee who takes on every task with enthusiasm and gets started right away. That is exactly the feeling Claude Cowork, a tool from Anthropic, conveys. It can rename files on your computer, edit images, operate programs or the browser, and create complete reports or analyses. You can send tasks via your smartphone and retrieve the results later from anywhere.
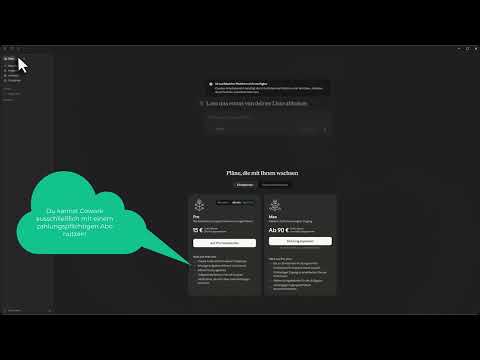
The video is only loaded from YouTube when you play it – data (including your IP address) is then transmitted to YouTube/Google. More in the privacy policy
The installation is basically straightforward. On Windows, however, there are two stumbling blocks that slow down many users: a Windows feature that must be enabled first, and a temporary directory that is not on the default drive. Both problems can be solved with a few quick steps. In this guide, I walk you step by step through the entire process, including the solution to the error that cost me a particularly large amount of time during installation.
Key Takeaways
- Claude Cowork first downloads a small installation file. Afterwards, around 230 MB of required files are downloaded.
- On Windows, you must enable the "Virtual Machine Platform" feature. After that, a restart is mandatory.
- If your temporary directory is not on drive C, Claude Cowork cannot start. You change the path via the environment variables.
- For cryptic error messages, it is worth checking the storage locations of the temporary files before you get lost in details.
Step-by-Step Guide
Step 1: Start the download and select the operating system
Open the Claude Cowork product page and scroll down until you see the section with the download options. Click "Download" there. The page will then ask which operating system you use. Select "Windows" and start the download.

Step 2: Save and run the installation file
The save dialog now appears in the browser. Confirm saving and wait until the file has been completely downloaded. At first, it is only a small installer. Then run it. The installer then automatically downloads all the other files that Claude Cowork needs. Currently that is about 230 MB, so depending on your internet connection it may take a few minutes. Use this time and let the process run undisturbed.

Step 3: Grant access and use administrator rights
As soon as the installer starts, Windows asks for permission. Confirm it with "Yes". For me, a small error message then appeared concerning access to the log file. In hindsight, it would have been sensible to run the installation file directly as administrator via right-click. Then you would also have access to the log file if something goes wrong later. If you also get the error, you can continue for now, because the actual installation usually works anyway.

Step 4: Accept cookies and sign in via email
After the application starts, you must confirm the cookie notices and then click "Start now". Now enter your email address. You will then receive a message with a login link. Open your emails and click on this link. After that, you will be signed in automatically and the application can begin its work.

Step 5: Enable the Windows feature "Virtual Machine Platform"
On the first launch, a message may appear saying that the "Virtual Machine Platform" is not available. Don't let that unsettle you. The message merely means that a Windows feature is missing, which can easily be installed afterwards. Claude Cowork even offers you the activation directly. Alternatively, you can do it yourself: Enter "Turn Windows features on or off" in the Windows search and open the entry. Tick the box next to "Virtual Machine Platform" there and confirm with "OK". Windows sets up the feature, which usually doesn't take long.
In the video, it is assumed that this step is not necessary on macOS because the feature is already active there. On Windows, however, you must carry it out in any case.

Step 6: Restart Windows
After activation, Windows requires a restart. This step is essential, because only afterwards does the virtual machine platform work and Claude Cowork gain access to your computer. So save open documents, close all programs, and restart the computer.

Step 7: Switch the temporary directory to drive C
For me, this step was the real crux. Claude Cowork kept reporting incomprehensible errors, such as that there was no access to a certain file. The cause was that my temporary directory was not on the default drive C, but on drive D, i.e. on an external hard drive. The program apparently cannot cope with that.
To change this, type "Environment variables" into the Windows search. Open the entry "Edit the system environment variables" and then click on "Environment Variables". In the lower section you will find the temporary directories, which are labeled "TEMP" and "TMP". For you, they should point to drive C. If a different drive is entered for you, adjust the path accordingly so that it is on drive C.


It may be annoying to undo the relocation to the external drive, especially if you chose this setting deliberately. For Claude Cowork, however, you have no other choice for the time being.
Step 8: Restart and first look at Claude Cowork
Confirm the changes and restart the computer. After that, you can open Claude Cowork and try out the features. If the application still does not want to start properly, first check whether all temporary paths really are on drive C. That is where the application is most likely to lack write access if there are problems.
Summary – Installing Claude Cowork on Windows: Instructions with a solution for the temporary directory error
You have now learned all the important steps. You download the installer, let the required files download, and log in via an email link. On Windows, you enable the virtual machine platform and restart the computer. If Claude Cowork refuses to work and shows cryptic error messages, the first thing to check is whether your temporary directory is on drive C. With this sequence, you avoid most stumbling blocks and can start right away with the actual tasks.
FAQ
Do I have to restart the computer after enabling the Virtual Machine Platform?Yes, the restart is mandatory for the feature to take effect and for Claude Cowork to get access to the computer.
Why does Claude Cowork not start even though the installation was successful?One possible cause is a temporary directory that is not on drive C. Check the TEMP and TMP environment variables and make sure they point to drive C.
How do I find the environment variables on Windows?Type "Environment variables" into the Windows search, open "Edit the system environment variables" and click on "Environment Variables". The temporary directories are in the lower section.
Why should I start the installer as an administrator?As an administrator, you get access to the log file. This helps you trace errors if the installation has problems.
Do I also need the steps with the Virtual Machine Platform on a Mac?According to the video, this feature is probably already active on macOS. On Windows, on the other hand, you have to enable it manually.
How large are the files that are downloaded during the installation?At the time of the video, it was about 230 MB. The exact size may change with new versions.
What can Claude Cowork do after installation?It can rename and edit files, adjust images, operate browsers and programs, and create reports and analyses. Tasks can also be sent via smartphone.
