

Photoshop 2022 brings many small improvements that quickly become noticeable in everyday use. Whether you work with web images, packaging designs, or hair subjects: the following guide takes you step by step through the most important new features presented in the video.
The video is only loaded from YouTube when you play it – data (including your IP address) is then transmitted to YouTube/Google. More in the privacy policy
Key Takeaways
- Photoshop now supports WebP natively, so you no longer need an external plugin.
- The Oil Paint filter has been rewritten with GPU support and works significantly faster.
- Text layers can be copied directly from Illustrator and remain editable.
- Multithreaded and GPU compositing speed up your work if your graphics card cooperates.
- You can find cloud documents and recently used files faster via the start screen.
- The dialog for saving new documents can be preset to Cloud or Computer.
- The cylindrical transform warp is particularly suitable for bottles, glasses, and packaging.
- The hair refinement when selecting subjects delivers better results.
- Guides can be colored differently for each document.
- Object Selection shows previews when you hover over objects with the mouse.
- Gradients benefit from new interpolation options, and the export dialog has been revised.
Step-by-Step Guide
Using WebP Support
Previously, you had to install an external plugin for the WebP format. Since Photoshop 2022, you can open, edit, and save WebP files directly. A sample image with transparency can be loaded without detours. The advantage is obvious: WebP files are smaller than PNG files, but also support transparency and are displayed without problems by most browsers.

To save, go to File, Save a Copy and select WebP as the format. Photoshop then asks whether you want to save lossless or lossy. With lossy compression, you set the quality using a slider. Unfortunately, the dialog does not yet show a preview or the file size. So you have to set the quality, save, and check again if necessary.

Using the Oil Paint Filter Faster
You find the filter under Filter, Filter Gallery and then in the Artistic section under Oil Paint. There you can adjust Stylization, Cleanliness, Scale, and the direction. It is important to have the preview enabled so that you can immediately judge the effect on your image.

The most striking new feature is the speed. The filter has been completely reprogrammed to make better use of native GPU support on Mac and Windows. The look remains unchanged. Especially with large files and a powerful graphics card, you will notice the difference clearly.
Transferring Text Layers from Illustrator
If you frequently switch between Illustrator and Photoshop, you will appreciate this feature. Write a text in Illustrator, select it, and copy it with Ctrl + C. In Photoshop, paste it with Ctrl + V. Photoshop asks whether you want to paste the text as layers, as a Smart Object, as pixels, or as a shape. Choose Layers, and the text remains editable.

The text ends up in a new group, and you can continue editing it directly. Font, size, and color are preserved.
Enabling Multithreaded and GPU Compositing
Open the Preferences with Ctrl + K and switch to the Performance section. There you will find the Multithreaded Compositing option and the Use Graphics Processor option. Enable these options so that Photoshop involves the graphics card more heavily when calculating layers and effects.

If Photoshop crashes or freezes after enabling them, simply disable the checkbox again. Not every graphics card and not every driver works perfectly with these features. With a current graphics card, however, you often benefit significantly from the higher speed.
Finding Cloud Documents Faster
On the start screen, recognizable by the house icon, you now see recently edited documents more clearly. If you want to specifically see all files stored in the Creative Cloud, click on Your Files. All cloud documents are displayed there. The advantage: you can access these files on any computer with your Adobe ID.


Setting the Save Location for New Documents
Adobe has added a new option in the Preferences under File Handling. There you specify whether Creative Cloud or your own computer should be selected by default when saving. If you mostly work locally, set the computer as the default. For projects that you need on the go or on multiple devices, the cloud is the better choice. This saves you the detour through the save dialog box every time.

Applying Cylindrical Transform Warp
This function is aimed primarily at packaging designers. First draw a shape, activate Free Transform with Ctrl + T, and switch to Warp mode via the icon in the options bar. There you will find the new Cylinder option. With it you can wrap stickers or labels around bottles or jars. While holding down the Ctrl key, drag the handles and adjust the curves until the curvature is right.

Cutting Out Hair More Precisely
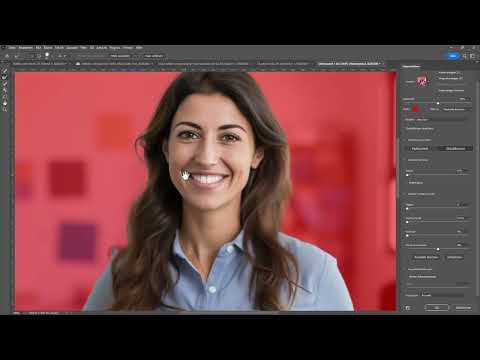
Cutting out hair has been significantly improved. First select the selection tool and roughly outline the subject. Then click Select and Mask. With the Select Subject option, Photoshop creates a selection based on artificial intelligence. Then activate Refine Hair to cut out fine structures even more precisely.


As the output, you can export the selection as a layer mask. To check the cutout, place a gradient underneath. If color remnants of the old background color are visible, the Decontaminate Colors command helps. Zoom in closely on the edges so you can assess the results.
Customizing Guides Individually
Guides can now be customized not only program-wide but also per document. Drag a guide from the ruler, then go to View, Guides, and select New Guide Layout. There you set a new color. If you only want to change a single guide, select it and choose View, Guides, Edit Selected Guides.


If you save the file as a PSD, the color is retained. A newly created document shows the default color again.
Setting a Neutral Interface
This step is an optional convenience feature. If the colored interface bothers you, open the Preferences with Ctrl + K, switch to User Interface, and activate the Neutral Color Mode option. The buttons then turn gray and are less distracting.

The search function in the Preferences helps you find options more quickly. Simply enter a term such as Graphics Processor, and Photoshop will show you the matching setting.
Using Object Selection with Preview
With the Object Selection tool, you can now see which selection would be possible just by hovering over it with the mouse. A single click creates the selection. Afterwards, you can refine it via Select and Mask. Make sure the correct layer is active, because nothing will be selected on the background layer.


Using the Gradient Tool with New Interpolation Methods
In the options bar of the Gradient tool, you will now find the interpolation methods Perceptual, Linear, and Classic. The Perceptual method is the new default setting and is based on the human perception of light mixing. Gradients therefore look finer and more harmonious. Try out the methods on an example to see the difference for yourself.

Using the Export Dialog
You can find the revamped export under File, Export, Export As. The dialog works faster and shows you a preview with the file size. You can compare originals and exports side by side. In addition, multiple sizes can be exported at the same time, for example a version at 100 percent and one at 50 percent.


3D Features and Plugins
Adobe is gradually removing some 3D features from Photoshop, since the program is not primarily intended for 3D. New, on the other hand, is the Plugins menu item. There you can install third-party extensions directly and load them into your programs with a single click.

Summary ??? Photoshop 2022: The Most Important New Features at a Glance
Photoshop 2022 brings numerous practical improvements. In particular, the native WebP support, the faster work with the Oil Paint filter, and the improved hair selection save you a lot of time in everyday work. If you work with Illustrator, the direct transfer of text layers makes your workflow considerably easier. It's best to try out the features on your own projects, then you will quickly find out which new features are of the greatest benefit to you.
FAQ
Can Photoshop 2022 open WebP files without a plugin?Yes, WebP files can be opened, edited, and saved directly; an external plugin is no longer necessary.
How do I save a file as WebP?Choose File, Save a Copy, set WebP as the format, and then specify lossless or lossy with the quality slider.
Why is the Oil Paint filter getting faster?The filter has been reprogrammed and makes better use of the graphics card through GPU support.
How do I copy text from Illustrator to Photoshop?Copy the text in Illustrator with Ctrl + C, paste it into Photoshop with Ctrl + V, and select the Layers option.
What should I do if Photoshop crashes with GPU compositing?Disable the Use Graphics Processor option in the Preferences under Performance.
Where do I find my cloud documents?On the Home screen, click Your Files, where all documents from the Creative Cloud are displayed.
Can I specify where Photoshop saves new files by default?Yes, in the Preferences under File Handling you specify whether Cloud or Computer should be the default.
How do I distort a subject cylindrically?Activate Free Transform with Ctrl + T, select the Cylinder option in Warp mode, and drag the handles.
Can guides be colored per document?Yes, via View, Guides, you can create a new layout or give individual selected guides a different color.
Which interpolation should I choose for gradients?The Perceptual option is the new default setting and usually looks the most natural, but you can also try Linear or Classic.

