
Imagine you have developed exactly the look you had in mind for an image, and you want to transfer it to dozens of other photos with a single click. That is exactly what Color Lookup Tables, or LUTs for short, make possible. Until now, you may only have known the ready-made presets in Photoshop, which can be used to create moods such as "Amber" or "Horror Blue". Since Photoshop CC 2014, however, you can create your own tables from your adjustment layers and reuse them in other programs.
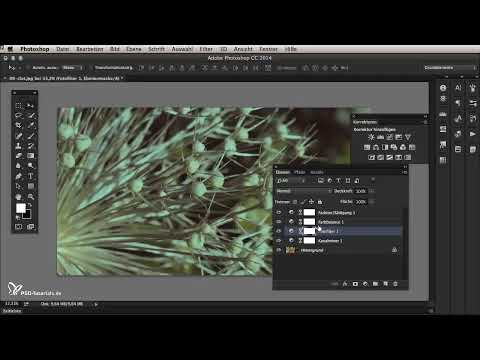
The video is only loaded from YouTube when you play it – data (including your IP address) is then transmitted to YouTube/Google. More in the privacy policy
In this tutorial, I will guide you step by step through the entire process: from properly preparing your image, through the export, to assigning the finished table. The steps are based on the video tutorial by Philip Fuchslocher.
Key Takeaways
The background layer must be present. Photoshop calculates all changes relative to this layer and saves them in the LUT.
Use only global corrections. Local adjustments such as brushes, dodge tools, or selections cannot be cleanly transferred into a LUT.
The export is done via File > Export > Color Lookup Tables. There you set the name, quality, and format.
The quality is usually between 15 and 30. Higher values improve the result only up to a point, but greatly increase the file size.
The 3DL format works well in Photoshop. For other programs, you have to check the appropriate format yourself.
The finished LUT can be assigned at any time. With Color Lookup and "Load 3D LUT", you apply the look to any images.
Step-by-Step Guide
Step 1: Check the Background Layer
Before you get started, check your image in the Layers panel. The layer must actually be a background layer. A layer that is merely named "Background" is not enough. You can recognize the real background layer by the lock icon and the italic text. If this is the case, you can begin with the design.

Step 2: Add Adjustment Layers
Now you build up your image look. Add any adjustment layers you like via the Adjustments icon in the Layers panel. You don't have to work perfectly here. It's about the structure, not a high-quality final result. If the panel is in the way, simply move it so that you can clearly see the effect on the image.

Step 3: Adjust Color, Warmth, and Saturation
Now experiment with several settings. For example, you can remove color, apply a warm filter, shift the color balance, and finally reduce the saturation. Each of these layers contributes to a look of its own. It is important that you create all adjustments as separate adjustment layers so that you can export them together later.

Step 4: Make Sure to Use Global Corrections
Before you export, check whether all adjustments affect the entire image. Local corrections such as partial areas with color or exposure, selections, or dodge tools do not belong in the LUT, because the table works only with global values. Use only adjustment layers that act on the complete image. That way, the look stays consistent.

Step 5: Start the Export
Once you have finished your look, go to File in the menu bar, then Export, and choose Color Lookup Tables. A dialog window opens in which you make all the settings for the table. So you don't have to save a file first, but create the table directly from your current edit.

Step 6: Set the Name and Quality
In the dialog, you first assign a name for your table. Then you set the quality via the grid points. The higher the value, the better the result, but the larger the file. Beyond a certain value, you can hardly see any differences. In practice, I recommend starting with 15. If the quality is not sufficient for you, increase the value gradually. Values between 15 and 30 are generally well suited. Alternatively, you can choose one of the preset options, which automatically enters values for low, medium, or high quality.

Step 7: Choose the Right Format
Photoshop offers various formats, including 3DL, Cube, CSP, and ICC profiles. Which format you need depends on the application in which you want to use the LUT later. Since programs differ, no one can give you a blanket recommendation here. Therefore, check the documentation of the target software. Within Photoshop, the 3DL format works reliably, which is why you usually can't go wrong with this choice.

Step 8: Save the Table
Click OK. Photoshop will then ask you where the file should be saved. Choose an easy-to-find location, such as the desktop, and confirm. The file gets the extension .lut or .3dl, depending on the format. Save it with a good name so that you can find it again later without searching.

Step 9: Apply the LUT to an Image
For testing, you can group your adjustment layers and hide them. Then, via the Adjustments icon, add a Color Lookup layer. There, select the option "Load 3D LUT" and look for your saved file. Open it, and the table is applied to your image.

Step 10: Compare the Result
Then show the group with the original adjustment layers again and compare the result. If the export was done correctly, you will see no difference. The LUT therefore contains the entire look from your individual layers. This comparison is the best check before you apply the table to many images.

Step 11: Transfer the LUT to Other Media
The advantage of this method becomes apparent in larger projects. You can transfer the same image style to an entire series of photos. In addition, LUTs also work with video files, provided the program supports Color Lookup Tables. When using external programs, make sure that the format is compatible with the software.

Summary – Creating Color Lookup Tables in Photoshop
With adjustment layers, a correct background layer, and the export via Color Lookup Tables, you can capture your own image looks. Pay attention to global corrections, choose a quality between 15 and 30, and save the table in the appropriate format. Afterwards, your look can be transferred to any images and videos.
FAQ
Do I need to have a specific layer in Photoshop before I export?Yes, you need a real background layer with a lock icon, because Photoshop calculates all changes relative to this layer.
Can I include local corrections in a LUT?No, a LUT only works with global adjustments that affect the entire image.
Which quality level should I choose?Start with a value of 15 and increase it if needed. Values between 15 and 30 are usually sufficient in practice.
Which format is the right one?That depends on the target application. In Photoshop, 3DL works well; for other programs, you should check the software's documentation.
How do I apply a saved LUT?Add a Color Lookup adjustment layer, select "Load 3D LUT," and open your file.
Do LUTs also work with videos?Yes, provided the video program supports Color Lookup Tables.


