

Photoshop CC 2019 brings several new features that look unremarkable at first glance but quickly save time in everyday work. This tutorial guides you through the most important functions: from the Frame tool, through the revised Content-Aware Fill, to Symmetry mode. I'll show you not only where the options are located, but also how to use them in typical situations. The guide follows the order of the new features in the video. That way, you can follow every step directly in Photoshop.
The video is only loaded from YouTube when you play it – data (including your IP address) is then transmitted to YouTube/Google. More in the privacy policy
Key Takeaways
- With the Frame tool, you create placeholders for graphics that you can insert later without any detours.
- Content-Aware Fill can now be controlled precisely by including or excluding areas for the calculation.
- The live preview for blend modes shows you the result as soon as you hover the mouse over an option.
- With Ctrl+Z, you go back step by step while keeping an eye on the history.
- Transforming is now proportional by default, and you no longer have to confirm transformations manually.
- Symmetry mode with radial and mandala mirroring opens up new possibilities for creative designs.
Step-by-Step Guide
1. Getting to Know the Frame Tool
You can find the new Frame tool in the toolbar on the left. It is recognizable by the crossed-out frame icon. Select it, and Photoshop displays a short explanation. The frame serves as a placeholder for graphics that you want to insert later.

2. Drawing a Frame and Placing an Image
Use the Frame tool to draw a frame in the document. Then drag an image file, for example a butterfly from the Mini Bridge window, directly into the frame. The image is automatically inserted as a Smart Object and stays inside the frame. With Ctrl+T, you can also enlarge or reduce it.

3. Moving the Frame and Content Separately
When you work with the Move tool, you move the image within the frame by default. If you click on the frame itself, you move the entire frame instead. A double-click in the image brings you back to the mode in which you move the image content. This separation is especially handy when you create placeholders for projects where you don't yet know the final motif.

4. Opening Content-Aware Fill
You open Content-Aware Fill via Edit and then Content-Aware Fill. A separate workspace with numerous options opens. Before you begin, you should check whether the preview is displayed correctly. If not, open the Preferences with Ctrl+K, switch to Performance, and deactivate the option Use Graphics Processor. In the video, this was the solution to a preview problem during recording.

5. Defining Areas for the Calculation
Now you define which areas Photoshop should use for the calculation. In the example in the video, the plants are a problem because they are green and distort the result. Therefore, mark only the areas that define the structure, such as the stairs, and exclude everything else. The more precisely you choose the source areas, the cleaner the result will be.

6. Adjusting Rotation and Mirroring
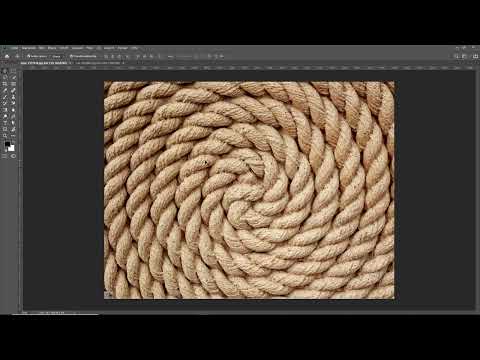
If the fill is not yet convincing, it is worth taking a look at the options for rotation and mirroring. For a rotated motif, such as a curved rope, a low or medium rotation adaptation often brings significantly better results. Mirroring is useful when a symmetrical motif, such as a butterfly wing, is missing in one spot. Photoshop then copies the intact wing onto the gap. Keep in mind, however, that not every source material is equally suitable.

7. Working with Live Preview
With the blend modes in the Layers panel, you can now see immediately how an effect will look. If you hover the mouse over a mode, the change appears in the image without you having to click. In the video, a blur filter is applied to a duplicated layer and then compared by moving the mouse between Multiply and Darken. This saves a lot of time when experimenting.

8. Multiple Undo
The keyboard shortcut for Undo has changed. Previously, you used Ctrl+Alt+Z for multiple steps. Now you press Ctrl+Z and go back step by step. To keep track of the history, open the History panel via Window and then History. There you can see all your work steps, for example several brush strokes, and can go back to a specific one.

9. Transforming without confirmation
When transforming with Ctrl+T, you previously had to explicitly confirm every change. Now it is enough to switch to another tool, such as the Selection tool. The transformation is applied automatically. This is especially convenient when you make many small adjustments in a row.

10. Editing text directly
With the Type tool (T), you drag out a text frame. Photoshop fills it directly with placeholder text, so you can see the layout immediately. If you leave the text and want to edit it again, a double-click on the text layer in the document is enough, even from the Move tool. That sounds like a small thing, but it saves many clicks.

11. Using the reference point
When rotating a text, the object rotates around its center by default. If you want to move the pivot point, activate the reference point in the Options bar via the corresponding icon. Then click on the desired position, for example at the top, or drag the point freely to any location. The rotation then takes place exactly around this point.

12. Returning to the Home screen
Via the little house icon, you can return to the Home screen at any time. From there, you open another image without taking the detour via the menu. The Home screen also shows thumbnails of the most recently opened files. This makes finding them again much easier.

13. Proportional transforming as the default
In the video, you convert the background layer into a regular layer and transform it with Ctrl+T. It is noticeable that Photoshop now scales proportionally by default. If you want to distort the image, hold down the Shift key. For beginners, this is a sensible change, because in most cases the aspect ratio should be preserved. Experienced users, on the other hand, first have to get used to it.

14. Locking the workspace
If you work with a graphics tablet, a panel may accidentally slip out of place. Via Window, Workspace, and Lock Workspace, you protect the arrangement. Once the panels are docked, they can no longer be moved unintentionally. You remove the lock in the same way.

15. Activating symmetry mode
With the Brush, you can activate symmetry in the Options bar. Newly added is the radial mode, also called Mandala. Choose the number of segments, five in the video, and the desired size. Every stroke you draw is then repeated in all segments. This creates elaborate patterns with little effort. The Radial mode, on the other hand, repeats the stroke in only one direction and thus produces a different effect.

16. Showing the color wheel
Under Window, you will find the Color panel. Via the small options menu in the corner of the panel, you choose the color wheel. It shows you the complementary colors. If you choose red, for example, you immediately see the opposite hue, here a turquoise. This helps enormously with color design.

17. Calculating with Formulas in Number Fields
Number fields in Photoshop now accept mathematical expressions. If you enter 100 % / 2, for example, Photoshop automatically calculates 50 %. This works in all input fields, such as image sizes. A small new feature, but one that often helps in everyday work.
18. Flipping the View Horizontally
When painting with a graphics tablet, it is often helpful to flip the image to check proportions. Previously, you had to rotate the image, which triggered calculations. Now you go to View and select Flip Horizontal. The image is flipped without Photoshop recalculating anything. Once you have finished working, you undo the flip using the same function.

19. Scaling the User Interface
In the preferences, opened with Ctrl+K, you will find the option under Interface to scale the font and interface. This is especially helpful if you work with a very high-resolution monitor, such as a 4K or 5K display. The interface then adapts, and menus and panels become more readable.

Summary ??? Photoshop CC 2019: The Most Important New Features Step by Step
Photoshop CC 2019 brings no spectacular upheavals, but many practical improvements. The Frame tool helps with placeholder work, content-aware fill can be controlled more precisely, and symmetry as well as live preview expand your creative possibilities. In addition, there are small conveniences such as the undo behavior, the automatic confirmation of transformations, or the start screen. Together, they make for a noticeably faster daily workflow.
FAQ
How do I insert an image with the Frame tool?Drag out a frame with the Frame tool and then drag the image directly into the frame. It is inserted as a Smart Object and stays in the frame.
Why is the preview of the content-aware fill not displayed?In the preferences under Performance, disable the option Use Graphics Processor. Open the preferences with Ctrl+K.
How do I go back several steps?Press Ctrl+Z to go back step by step. The History panel under Window helps you keep track.
How do I activate the reference point when transforming?Show the reference point in the options bar and click on the desired position. You can also move it freely.
How do I transform an object with distortion?By default, Photoshop scales proportionally. Hold down the Shift key if you want to distort the object.
How do I activate symmetry mode?Select the brush and activate symmetry in the options bar. For mandala patterns, choose the radial mode and the desired number of segments.
How do I lock the panels?Go to Window, Workspace, and select Lock Workspace. Once the panels are docked, they no longer shift.

