

A photo in portrait format that actually belongs in landscape format, or a vacation picture with a distracting passerby in it: almost everyone knows situations like these. With the 2023 version of Photoshop, you get a tool for this that would have sounded like science fiction just a few years ago. Generative Fill uses artificial intelligence to sensibly fill in missing image areas or make unwanted elements disappear.
The video is only loaded from YouTube when you play it – data (including your IP address) is then transmitted to YouTube/Google. More in the privacy policy
This guide takes you step by step through the most important new features. You will learn how to install the beta version, use the new toolbar, extend images, remove objects, and add new elements. I will also show you where the technology currently still reaches its limits, because many of these features are still in the beta phase.
Key Takeaways
- You first test the new AI features in the beta version of Creative Cloud. They are gradually being incorporated into the full version.
- The new toolbar displays commands matching the selected tool and speeds up your workflow.
- With Generative Fill, you can extend images, for example from portrait to landscape format, without laboriously redrawing pixels by hand.
- You can often remove unwanted people or objects with just a few clicks, and the results are usually convincing thanks to clean transitions.
- Precise descriptions, so-called prompts, improve the result when you have new elements generated.
- Short tutorials directly in the program help you get to know tools without a long search.
Step-by-Step Guide
Step 1: Install the Beta Version via Creative Cloud
You get the latest AI features first in the beta version. To do this, open the Creative Cloud desktop app. There you see all installed programs. At the very bottom, somewhat hidden, you will find the "Beta Applications" section. Here you install the Photoshop beta. Incidentally, this also works for many other Creative Cloud programs, so you can test new features early, before they land in the full version.

Step 2: Start the Beta and Assess Its Status
After installation, you start Photoshop as usual. You can recognize the beta by an icon at the top of the program that shows the beta status. Via this icon you can also send feedback directly to Adobe, which supports further development. The beta is considered comparatively stable, so many users already work productively with it. You should avoid an alpha version, however. Still, back up important files beforehand, because with new features a backup is always a good idea.

Step 3: Get to Know the New Toolbar
At the bottom edge of the image you will now find a small bar that offers matching commands depending on the selected tool. If you choose the selection tool, for example, you can mark the main subject, such as a robot in the image, with one click on "Select Subject". Afterwards you can continue immediately with the next edit. If you switch tools, the offered options change as well. Incidentally, this bar is also included in the regular full version of Photoshop.

Step 4: Customize the Toolbar to Your Needs
Not everyone wants the bar permanently in view. Via the menu with the three dots, you can hide the bar or reset its position. If it gets in the way, you can also drag it to another spot by grabbing it and moving it. Afterwards, you set the desired position by pinning the bar. It then stays where you want it and does not constantly jump around your image.
Step 5: Access Short Tutorials Directly in the Program
If you hover the mouse pointer over certain tools, a short help video appears. A click on the play icon starts playback. The videos are in English, but below the clip you will find a German translation, so you quickly learn what the tool is meant for. There are also such clips for the Layers panel. For the Channels or Fill, no help videos were available yet at the time of recording.

Step 6: Extend an Image with Generative Fill
The real novelty is Generative Fill. Suppose you have a square photo and need a landscape format. Select the Crop tool and drag the crop frame beyond the edge of the image. The new area initially remains white. Then you open the input field in the toolbar. You can leave it empty or enter a short description, for example the desired surroundings. One click on "Generate" is enough. Photoshop now adds new image information that blends into the light, mood, and subject. The result lands in its own generative layer.

Step 7: Compare variants and choose the right one
Most of the time, Photoshop suggests several variants, usually three. You can switch between them by clicking the corresponding numbers. You don't have to search long for this, because the variants are also found in the Properties panel, where you can switch directly. In the Layers panel, a dedicated icon shows that it is a generative layer. If you later decide you no longer like a version, you simply switch back to another variant.

Step 8: Remove distracting objects and people
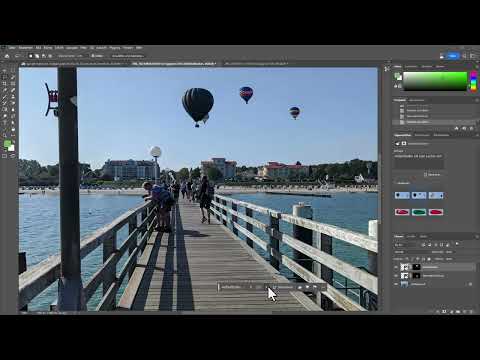
Removing objects works similarly, but is even more impressive. Open an image with distracting people and select them with a selection tool. You don't have to work with millimeter precision. However, make sure to also mark the shadow and the complete legs, because then the result turns out better. Then you click on "Generative Fill", leave the input field empty, and start with "Generate". The AI recognizes that the people should disappear. In the bridge example, it continues the wood pattern and railing seamlessly. The spots where the people stood then look as if they had never been there.

Step 9: Formulate precise descriptions for new elements
If you want to bring something new into the image, the result depends heavily on your wording. If you only enter "hot air balloon" ("Heißluftballon"), it can happen that the AI draws a balloon filled with hot air, or delivers a result that doesn't match your expectations. So refine your prompt. Describe details such as "hot air balloon with passengers" or add a color. In the test, the more precise description produced significantly better results. You can adjust the description at any time and have it generated again.

Step 10: Add objects and critically check the results
You can also insert animals or objects in a targeted way. To do this, mark the area where the object should appear and describe it in the input field, for example "polar bear". The AI adjusts the lighting mood, shadows, and in some cases also the blur. Since August 2023, you can also enter the terms in German, which simplifies operation for many users. In the test with a bicycle, however, the result still didn't look entirely realistic, and the polar bear was too blurry when zoomed in. Therefore, always check at 100 percent view whether details such as edges, proportions, and sharpness are right. The technology is still in the development stage in the beta, so plan for some rework if necessary.

Step 11: Continue an image with new content
Generative Fill is also suitable for extending a scene beyond its original boundaries. In the test image, a forest motif with a waterfall showed an empty area on the right. There I entered the description "city with skyscrapers". The AI continued the motif and inserted buildings into the background that fit harmoniously into the scene. The transition looked surprisingly coherent. Here, too, compare the suggestions, because not every variant fits your image equally well.

Step 12: Paint on a Smart Object without an error message
A small but helpful novelty concerns Smart Objects. If you convert a selection of objects into a Smart Object, you previously couldn't paint directly on it. Photoshop would then report an error. Now the program automatically creates a new layer as soon as you work with the brush on the Smart Object. This way you can, for example, adjust the opacity or paint over an area without interrupting your workflow.

Summary – Photoshop Generative Fill: Extend images and remove objects
Generative Fill in Photoshop 2023 changes how you edit images. You extend photos with a few clicks, remove distracting elements, and add new motifs. The new toolbar, the short tutorials, and the improved work with Smart Objects additionally make your everyday work easier. Since the AI features are still in the beta phase, you should always check the results critically and work with precise descriptions. With a little practice, convincing images are quickly created.
FAQ
How do I find the Photoshop beta?Open the Creative Cloud desktop app, switch to the Beta apps section at the very bottom, and install Photoshop there.
Is the beta version safe to use?The beta is considered relatively stable, but you should still back up important files before testing.
Can I also use the new toolbar in the full version?Yes, the toolbar is already part of the regular full version of Photoshop.
How can I hide or move the toolbar?Use the menu with the three dots to hide, reset, or pin it. To move it, simply grab the bar.
Why do several suggestions appear with Generative Fill?Photoshop usually generates three variants, between which you can switch via the numbers or the Properties panel.
How do I recognize a generative layer?In the Layers panel, a dedicated icon indicates that it is a generative layer.
Why are the results not always perfect when removing objects?Mark the object including its shadow and complete body parts so that the AI can better recreate the surroundings.
Can I describe objects in German?Yes, since August 2023 you can enter German terms in the input field.
Why should I always check at 100 percent with new objects?At higher magnification, blurriness, unnatural edges, or distorted proportions become visible that are not noticeable in the overall view.

