
Imagine your architectural photo is almost finished, and then you notice a trash can at the edge of the image that ruins the entire composition. This is exactly where image cleanup comes in. Before you think about light, color or contrast, you tidy up the image: leaves, signs, trash cans and other distracting elements disappear so that the viewer's eye stays on the building.
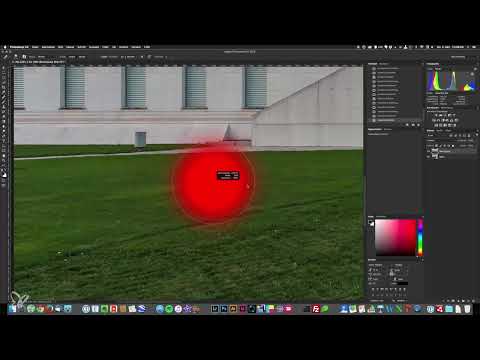
The video is only loaded from YouTube when you play it – data (including your IP address) is then transmitted to YouTube/Google. More in the privacy policy
In this chapter, I will show you how to use the most important tools in Photoshop for this, how to organize your layers, and which keyboard shortcuts save you a lot of time. All examples come from a real architectural shot. The shortcuts are given for macOS; on Windows, you replace the Command key with Ctrl.
Key Takeaways
Always work on a rasterized duplicate layer above your unchanged base layer. That way you can undo any mistake without starting over.
Name your layers immediately. This saves you a lot of time later when searching for settings.
Zoom with keyboard shortcuts instead of the magnifying glass and work at 100 percent at least, so that you can see the details.
The Patch tool is ideal for larger, structured areas. The Healing Brush is suited for fine corrections, and the Clone Stamp is the most precise choice for straight edges and lines.
Content-Aware Fill often removes objects with a single click, but it does not work reliably everywhere. With every attempt, plan on having to touch things up afterward.
Step-by-Step Guide
Step 1: Transferring the Image from Lightroom to Photoshop
When opening the image from Lightroom, a dialog asks about a color profile. Choose the embedded profile here so that the image keeps its color space. Save the conversion to sRGB for the end, and only if it is really necessary.
The image is opened as a Smart Object. This means you can reopen and adjust the raw file settings at any time. You can recognize the Smart Object by the small icon in the layer thumbnail.

Step 2: Duplicating and Rasterizing the Base Layer
The most important working step that I take with every image, whether architecture, food or portrait, is duplicating the base layer. Press Command + J for this. Then right-click the copy and choose "Convert to Pixel Layer", in other words "Rasterize Layer". The following tools do not work on a Smart Object.
The base layer remains untouched. If a correction goes badly wrong, you simply delete the working layer and duplicate the base layer again. That way you never lose the raw material.

Step 3: Consistently Naming Layers
Organization sounds like a minor matter, but it is the foundation of clean editing. Name the bottom layer "Base", because it contains your unchanged raw material. The rasterized working layer gets a name that describes its purpose, such as "Cleanup". If you are looking for a problem later, you will find it in seconds this way.

Step 4: Navigating Properly with the Zoom Level and the Spacebar
Skip the magnifying glass and use the keyboard shortcuts instead. Command + Plus zooms in, Command + Minus zooms out. With Command + 0, you fit the image back to the window size. For cleaning up areas, you should work at 100 percent at least, otherwise you will be missing details. At 500 percent you get a very precise view, but with larger image areas you quickly lose the overview.
The spacebar is also indispensable. Hold it down while you have any tool active, and the image can be moved with the mouse. As soon as you release the key, your tool is back. Get used to this handling from the very beginning.

Step 5: Using the Patch Tool for Large Areas
The Patch tool is my personal favorite tool. You circle the area you want to remove and then drag the selection onto a spot in the image that looks suitable. Photoshop automatically adapts the color and brightness to the surroundings.
On areas with a calm structure, such as a house wall or a patch of lawn, this works very well. For areas that will end up dark later anyway or will no longer be visible, you don't have to get every pixel perfect. However, make sure that the pattern of the surroundings is preserved so that the correction looks natural.
If you want to deselect the selection again, press Command + D.

Step 6: Show and hide layers to find errors
It is worth taking a look at the result every now and then. Show and hide the cleanup layer repeatedly to see what you have already removed and what you have still missed. Often it is only during the comparison that you notice small remnants that seemed to get lost in the overall picture.

Step 7: Control the Healing Brush with size and hardness
The Healing Brush works similarly to the Clone Stamp, but additionally takes color and brightness information into account. You don't set the brush size and hardness via the options menu at the top edge, but faster via a keyboard shortcut. Hold down Control + Alt and then drag the mouse to the left or right to change the size, and up or down to adjust the hardness. On Windows, you use Ctrl + Alt.

Step 8: Set the reference with the Healing Brush
The Healing Brush needs a source from which it takes structure and color. Hold down the Alt key until the cursor becomes a crosshair, and click on the spot that should serve as the reference. Then you paint over the area you want to correct. The crosshair moves along with it, and the reference stays at a fixed distance from your brush position.
You have to press the Alt key again for each new reference. Choose the source as close as possible to the area you are correcting so that color and brightness match.

Step 9: Remove distracting objects with Content-Aware Fill
For compact objects such as trash cans, the "Content-Aware Fill" function is often the quickest solution. First select the Lasso tool (key L) and roughly trace around the object. Make sure that the rasterized working layer is active, otherwise the command will not work.
Then press Shift + F5. In the dialog, choose "Content-Aware" for Contents and the color adaptation in the options. The strength slider should be set to 100 percent. Confirm with OK, and the object usually disappears surprisingly well.
If remnants remain, you correct them with the Healing Brush. Reduce the brush tip size and only go over the spot briefly. By the way, the history in the History panel helps you retrace every single step and undo it if necessary.

Step 10: Remove the second trash can in the same way
You repeat the procedure for the second trash can. Select the Lasso, trace around the object, press Shift + F5 and confirm. Photoshop has meanwhile saved the settings, so you only have to press OK. Afterwards, you correct any remaining traces again with the Healing Brush. The difference from the original image is already clear now; the image looks more homogeneous and calmer.

Step 11: The camera and the limits of Content-Aware Fill
With the camera, Content-Aware Fill reaches its limits. The function orients itself to sharp edges in the surroundings. If such edges are missing, for example on a featureless meadow, muddy areas quickly result. Whether the result fits is therefore often a gamble. If it doesn't work, you go back a step via the History panel.
A sensible strategy is to draw the selection more precisely, that is, to go closer to the object. This gives the algorithm a point of reference. If that doesn't help either, you reach for the Clone Stamp.

Step 12: Use the Clone Stamp for edges and structures
The Clone Stamp copies exactly what is at the reference spot, without color or brightness adjustment. That makes it fiddly, but also precise. A hardness of about 60 to 70 percent prevents the edges from becoming too soft and the correction from being noticeable.
Set your reference points very carefully, because the Clone Stamp copies everything it finds at that spot. Proceed in small steps and pay particular attention at edges to make sure the lines continue cleanly. A stroke that is too long can cause the reference point to move along with it and unwanted areas to be copied.
Step 13: Cleaning up linear elements such as roller blinds and edges precisely
For straight lines, the Clone Stamp is ideal because it reliably continues the course of the edges. For the roller blind, Content-Aware Fill also helps, since there are many guide lines. Work your way forward in stages. First, you draw a straight stroke through the area and remove the rough parts. Afterwards, you take care of the fine work with the Clone Stamp.
When setting the reference point, make sure the lines are aligned exactly. Not every small brightness deviation has to disappear immediately. For windows that will be edited separately later anyway, you can compensate for some differences later.

Step 14: Checking walls, transitions and halos
With walls and joints, it is worth zooming in to 500 percent. Compare the joint lines until they match. If a row of bricks is offset, you undo the mistake made with the Clone Stamp and work your way forward piece by piece. For transitions, the Patch Tool can help by selecting the area generously and moving it.
From 600 percent, Photoshop displays a pixel grid, which is of little use for the correction. Therefore, stick with 500 percent as the maximum zoom level for fine work.
Halos at edges caused by Clarity or sharpening do not have to be fixed right away. They will be corrected in a later step anyway. So don't let them slow you down.

Step 15: Comparing the result
Finally, you compare the state before and after the cleanup, best done by showing and hiding the layer. Check whether the symmetry of the building is correct and no remnants are visible in the image anymore. With this step, the preparatory work is complete.

Summary ??? Image cleanup in Photoshop: Removing distracting elements step by step
Image cleanup is the foundation of every edit. You work on a rasterized duplicate layer, name your layers clearly and use the appropriate tools for each situation. The Patch Tool is suitable for large areas, the Healing Brush for fine corrections, the Clone Stamp for edges and lines, and Content-Aware Fill for compact objects. Good results require care and time, and that is exactly what makes the difference between a usable image and a truly clean one.
FAQ
Why should I always work with a duplicate layer?The base layer remains unchanged, so you can discard any correction and start over without losing the original material.
Why does the layer have to be rasterized before I use content-aware fill?On Smart Objects, tools such as lasso-based fill and the repair tools do not work, so you convert the copy to a pixel layer beforehand.
Which tool is best suited for large areas?The Patch Tool is particularly well suited for large, textured areas such as lawns or house walls, because it automatically adjusts color and brightness.
When should I use the Clone Stamp instead of the Healing Brush?The Clone Stamp is the better choice for straight edges, joints and lines, because it copies exactly and does not smear the structures.
Why does content-aware fill sometimes not work?The function needs clear edges and structures in the surrounding area. On featureless areas, muddy results quickly occur, which is why you should always check the result.
How do I adjust the brush size the fastest?Hold down Control and Alt, or Ctrl and Alt on Windows, and drag the mouse left or right for the size and up or down for the hardness.
Why should I not keep working beyond 500 percent zoom?From 600 percent, a pixel grid is displayed, which makes it harder to judge the correction. 500 percent is a good maximum zoom level for fine work.
Do I have to remove all small irregularities perfectly?No, areas that will become dark later or are no longer visible can remain rough. Concentrate on the spots that stand out in the final image.


