

Do you know this? You're standing in front of an impressive mountain range on vacation, you press the shutter button, and back home the photo suddenly looks flat. The distance blurs into gray, the sky is pale, and the depth you felt on location is completely missing. This is exactly where the "Remove Haze" filter comes in. It brings back contrast and clarity without you having to fight your way through complicated layer work.
The video is only loaded from YouTube when you play it – data (including your IP address) is then transmitted to YouTube/Google. More in the privacy policy
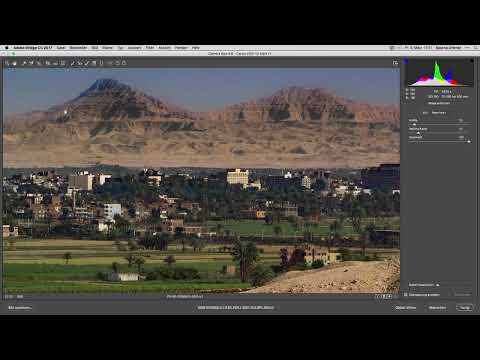
In this tutorial, you follow the development of a landscape image in Raw format. You will learn how to use the haze filter, straighten the horizon, rework the sky with gradients, remove sensor spots, and finally fine-tune colors, sharpness, and noise.
Key Takeaways
- The "Remove Haze" filter increases the contrast and clarity of flat landscape shots with a single slider.
- Gradient filters allow you to edit the sky and foreground separately.
- You remove sensor spots with the Spot Removal tool, and the overlay display helps you check them.
- You check the white point and black point for overexposed or underexposed areas by holding down the Alt key.
- By tinting highlights and shadows, you create a warm summer look.
Step-by-Step Guide
Step 1: Activate and Adjust Remove Haze
Open your photo in the Develop module and switch to the Effects section. There you will find the "Remove Haze" filter. Move the slider slowly to the right. Often even a small movement is enough for the mountains to emerge from the gray and for the landscape to look noticeably higher in contrast.

Keep in mind that this filter also makes existing sensor spots more visible. This is not a mistake, but a hint that you should clean up these spots later. You can recognize them by small, dark dots that stand out especially in the sky.

Compare your result with the original regularly. The before-and-after view immediately shows you how strong the effect actually is and whether you should dial the slider back.

Step 2: Straighten the Horizon
A crooked horizon makes any landscape look unsettled, even if everything else is right. So choose the Straighten tool and draw a line along the horizon line. The program then rotates the image automatically. If unsightly edges appear as a result, you crop the frame with the Crop tool.

Step 3: Enhance the Sky with Gradient Filters
After the haze filter, the sky often still looks pale. To fix this, open the Graduated Filter section and pull a gradient from top to bottom. Reduce the exposure by about one stop so that cloud structures become visible.

Then move the color temperature slider toward blue. This step alone turns a gray sky into a rich blue. However, pay attention to moderation. A sky that is too garish quickly looks artificial. So try out different values and evaluate the result on the screen before you commit.

To keep the transition between sky and landscape natural, drag the graduated filter beyond the edge of the image. This creates a soft gradient. In the upper area your setting has its full effect, and toward the center of the image it steadily decreases.

If the effect still seems too subtle to you, you can intensify it using the sliders. Proceed step by step and check each change.

Step 4: Emphasize the Mountain Range with the Radial Filter
With the Radial Filter, you edit a specific area of the image in a targeted way, in this case the mountain range. Place the elliptical filter over the mountains and increase the clarity. This makes rock edges and contours stand out clearly. A slight yellow tint gives the light additional warmth, and a little more contrast creates depth. You don't have to copy the settings, but can adapt them to your subject.

Step 5: Undo Unwanted Corrections in the Sky
Your graduated and radial filters often also affect areas where they don't belong, such as the sky above the mountain range. To correct this, select the brush and set it to minus. Then paint over the affected areas so that the correction is reversed in those regions.

Proceed carefully. If you subtract too much, the effect also disappears where it is desired. A look at the before-and-after comparison shows you whether the transition looks natural.

Step 6: Remove Sensor Spots with the Spot Removal Tool
Sensor spots are caused by dust on the camera sensor and are particularly distracting in the sky. First, zoom into the image. By holding down the space bar, you can move the image to reach all affected areas.

Now select the spot removal tool. Set the brush size so that it is slightly larger than the spot, and simply click on the individual spots. The program automatically finds a suitable image area as a source and replaces the spot with it.

If the circles displayed by the tool bother you, hide the overlays. This way you keep an overview without the markers being distracting. If you enable the overlay display again, you can see at any time which image areas the program used as a source. This helps you spot flaws.

If a spot did not work properly, as can certainly happen with individual spots, simply remove it a second time or choose a different source area with a slightly offset click. After a few passes, the sky looks significantly cleaner.


Step 7: Fine-Tune the Basic Settings
Now it's time for the basic settings. Pull the highlights down slightly to tame bright areas, and the shadows up slightly so that dark areas gain detail. Then increase the contrast carefully.

To set the white point and black point precisely, hold down the Alt key while dragging the respective slider. The image then switches to a display in which overexposed areas are marked in red and underexposed areas are marked in color. If you push the white slider too far to the right, red areas appear that lose detail. Proceed in the same way with the black slider. Stop as soon as the marked areas disappear or are reduced to a reasonable minimum.

Step 8: Balance Clarity, Sharpness, and Noise
Clarity gives landscape images additional structure. Set the slider moderately, because too much clarity quickly looks exaggerated. You can leave the vibrance unchanged in this example, since the image already has enough color.

For sharpening, the following starting values have proven effective: Amount 80, Radius 0.8, Detail 60, and Masking 40. These values are not a fixed rule, but a good starting point that you adapt to your subject. When viewing at 100 percent, make sure that no bright edges appear.

Since the dehaze filter can amplify image noise, a slight noise reduction is worthwhile. Even a subtle setting smooths the image without washing out details.

Step 9: Adjust Colors and Create a Summer Look
Take a look at the blue tones. Often they can easily be toned down so that the sky looks more natural. Afterwards, adjust the hue carefully. For this image, a small correction was enough, because overly strong interventions quickly take the authenticity away from the landscape.

For the look, you use the color grading of highlights and shadows. Tint the highlights with a warm orange tone. This creates a sandy summer tone. The shadows receive a subtle purple hue that forms a pleasant contrast to the warm highlights. With a slight reddish touch in the shadows, you achieve a summery atmosphere without the image looking kitschy.

The comparison between the original and the final result impressively shows how much potential lies in a dull vacation photo.

Step 10: Transferring the settings to Lightroom
All the settings described can be made in Lightroom as well. The user interface and the names of the sliders are largely identical, so you can easily transfer your workflow.

Summary ??? Removing Haze in Raw: Developing Landscape Photos Optimally
With just a few clicks, you transform a dull landscape image into a high-contrast, atmospheric shot. The "Dehaze" filter forms the foundation. Then you straighten the horizon, rework the sky with gradients, and correct unwanted effects with the brush. You remove sensor spots with the spot removal tool and check the result via the overlay display. You set the white and black points precisely by holding down the Alt key, before balancing clarity, sharpness, and noise. Finally, you create your own look with color grading. These steps work in Lightroom in exactly the same way.
FAQ
Question: Does the Dehaze filter also increase noise?Answer: Yes, since the filter increases contrast, noise and sensor spots often become more clearly visible. A slight noise reduction and the spot removal tool help you calm the image down again.
Question: Why should I carry out the editing in Raw format?Answer: The Raw format contains significantly more image information than a JPEG file. This allows exposure, colors, and contrasts to be strongly adjusted afterwards without visible loss of quality.
Question: How can I tell if my white or black point is set too far?Answer: Hold down the Alt key while dragging the slider. If colored areas appear, image information has been lost there. Adjust the slider until only a few or no marked areas are visible.
Question: Can I remove or change the gradient filters afterwards?Answer: Yes, all gradient, radial, and brush masks remain editable. You can change or move settings at any time, or take them back with the brush in minus mode.
Question: Does the tutorial also apply to other landscape photos?Answer: In principle, the steps can be transferred to any landscape image. However, the specific values should always be adapted to the subject, the lighting mood, and your personal taste.

