

A gray sky can quickly turn a beautiful vacation shot into a rather unremarkable photo. With Photoshop, you can change that without the edit being noticeable in the image later. In this tutorial, I'll show you how to select the sky, isolate it, replace it with a new one, and finally adjust the colors so that both parts fit together harmoniously. You don't need any prior knowledge, just the original photo and a sky image of your choice.
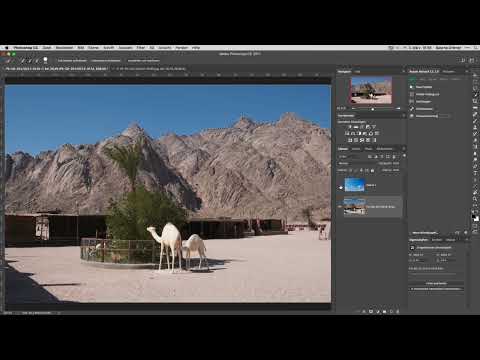
The video is only loaded from YouTube when you play it – data (including your IP address) is then transmitted to YouTube/Google. More in the privacy policy
Key Takeaways
- The sky image is placed as its own layer above the original photo and positioned appropriately there.
- The Quick Selection tool marks the sky quickly, and the edge is then refined in the "Select and Mask" dialog.
- With the old dialog (hold Shift when opening it), edges can be edited more precisely.
- The finished selection is created as a layer mask so that the original is preserved at all times.
- A color correction via a clipping mask ensures that only the new sky is adjusted.
Step-by-Step Guide
Step 1: Open the sky image and insert it as a layer
First, open your vacation photo and the image with the new sky in Photoshop. Activate the Move tool, then take the sky image and simply drag it into the window of your vacation photo. This places it as a new layer above the original. Roughly position the sky the way you want it to look in the end, so you get an idea of the result.


Step 2: Prepare the layers
Temporarily hide the top layer with the new sky by clicking the eye icon. Then activate the lower layer, which is your original photo. Zoom in a bit so you can better see the edges of the sky. This makes the later selection considerably easier.

Step 3: Mark the sky with the Quick Selection tool
Now select the Quick Selection tool from the toolbar. Simply drag it across the sky. Photoshop recognizes the areas and expands the selection automatically as you move the mouse. Make sure you don't include any mountains or buildings. The selection doesn't have to be perfect, because you'll work on the edges in the next step.


Step 4: Open the "Select and Mask" dialog
Click "Select" in the menu bar and then "Select and Mask". In the newer version, a dialog with a different layout opens, which is not as well suited for this task. Therefore, hold down the Shift key when opening it. This way you open the older dialog, with which you can work with the familiar precision here. For the view, it's best to set Black or another high-contrast background so you can see the edges well.

Step 5: Make the edges soft and clean
Now comes the most important fine-tuning. Set the edge to a feather of about 0.5 pixels. Feel free to zoom in a bit closer and check the transitions, especially in places with fine structures. If remnants of the original sky are still visible, shift the edge slightly until it fits. With the Contrast slider, you can sharpen the selection further.

Step 6: Refine with the Refine Edge Brush
Now take the Refine Edge Brush and run it along the problematic edges, for example where mountains or treetops merge into the sky. Photoshop recalculates these areas and usually delivers a significantly better result. If you need to move the selection, hold down the spacebar, and then the image can be moved. Work your way piece by piece along the entire edge. Let Photoshop finish the calculation in peace before you continue.

Step 7: Create the selection as a layer mask
Once the edge is satisfactory, confirm the selection. Then activate the layer with the sky image and create a layer mask. The sky is now in place, and the original remains untouched because you can adjust the mask at any time. Feel free to take a step back and look at the result from a bit of distance.

Step 8: Position the new sky
If the sky doesn't quite fit yet, you can move it. To do this, you first have to unlink the layer image and the layer mask by clicking on the small chain icon. Then you take the Move tool and move the sky image to the desired position. Also try out different cloud motifs until you like one variant best. Afterwards, you reactivate the link.

Step 9: Adjust the color of the sky
So that the new sky fits the subject better, you can match the colors. Use an adjustment layer for this and choose Selective Color. For example, slightly increase the red component in the midtones. So that the adjustment only affects the sky, you create a clipping mask: click on the small arrow icon of the adjustment layer so that it only affects the layer below. By holding down the Alt key and clicking between the two layers, you can also activate or deactivate the clipping mask.

Step 10: Fine-tune highlights, shadows and opacity
Next, test the effect in the highlights and the shadows. Change the values carefully until the sky looks natural. You can also reduce the opacity of the adjustment layer if the color change is too strong. Feel free to reset sliders you don't like back to their original value. In the end, the colors should look harmonious, but not exaggerated.

Step 11: Compare before and after
Finally, you view the image at full size and compare it with the original. To do this, show and hide the layers one after another. Pay particular attention to the transitions between the sky and the landscape. If everything looks coherent, you have successfully replaced the sky in your vacation photo.

Summary – Replacing the sky in Photoshop: How to replace the sky in your vacation photos
With the Quick Selection tool, the "Select and Mask" dialog and a layer mask, you replace the sky quickly and without visible traces. Fine edge refinement and a color adjustment via a clipping mask ensure that the new sky fits the subject. Your original photo stays unchanged at all times, because you control all steps via layers and masks.
FAQ
Do I need a special sky image for this tutorial?No, you can use any sky image. However, make sure that the lighting mood and perspective roughly match your photo so that the result looks believable.
Why should I use the old "Select and Mask" dialog?The old dialog offers more control over the edges for this task. You open it by holding down the Shift key when calling it up.
What does the layer mask offer compared to deleting the sky directly?The mask doesn't delete anything permanently. You can refine the selection with the brush at any time, and the original image is preserved.
What is the clipping mask used for in the color correction?The clipping mask limits the effect of the adjustment layer to the layer below. This way, only the sky is color-adjusted and not the entire image.

