

After a vacation, there are often dozens of photos of the same subject, in the same light, sitting on your hard drive. If you edit each one individually, you lose a lot of time and risk inconsistent results. Lightroom offers a simple solution for this: you develop one image and transfer its settings to the other shots. Even local adjustments such as radial filters can be carried over.
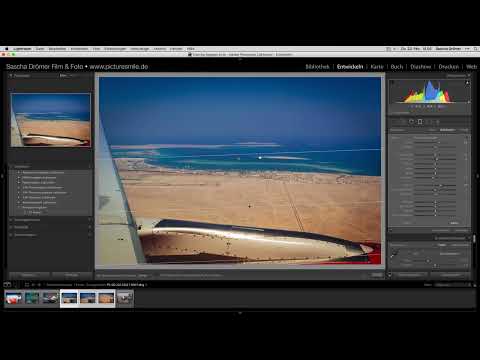
The video is only loaded from YouTube when you play it – data (including your IP address) is then transmitted to YouTube/Google. More in the privacy policy
In this tutorial, I'll show you how to synchronize develop settings, check the transferred local adjustments, and then use the radial filter to modify specific areas of an image. You will also learn how to approach cropping and straightening the horizon.
Key Takeaways
- Similar images can be edited together in Lightroom using multiple selection.
- With "Synchronize Develop Settings" you transfer all settings to the selected photos.
- Local adjustments are only carried over if you explicitly enable them in the dialog.
- After synchronizing, you should check the local adjustments on each image and readjust them if necessary.
- With the radial filter, you edit a specific ellipse, and with the "Invert Mask" option, you affect either the inside or the outside of the ellipse.
Step-by-Step Guide
Step 1: Select and develop the source image
First, choose an image that you want to use as a template. Ideally, it is already fully developed, because everything you set here will be transferred later. The other images should be as similar as possible to the source image, otherwise the settings won't fit.

Step 2: Transfer settings to other images
Hold down the Shift key and select the source image together with the other shots. Then open the context menu with a right-click and choose "Synchronize Develop Settings". Alternatively, you can reach the dialog via the shortcut Shift + Command + S on Mac or Shift + Ctrl + S on Windows. It is important that the source image is included in the selection so that Lightroom knows which settings should apply.

Step 3: Synchronize local adjustments as well
In the dialog, you specify which settings are applied. For radial filters, graduated filters, and brush corrections to also be transferred to the other images, you must check the box for local adjustments. Without this checkmark, they will be missing afterwards. Then confirm with "Synchronize". The remaining images are now edited with the same settings.

Step 4: Check local adjustments on the target images
Synchronizing carries over the positions of the local adjustments unchanged. However, since subjects can shift slightly, you should check each image. Check whether the radial filter or the gradient is still in the right place and has the desired effect. If necessary, move the ellipse, change its size, or adjust the sliders. Often small corrections are enough for the second image to look just as harmonious as the first.

Step 5: Crop the image
With the crop tool, you define the image section. A proven guideline is the rule of thirds: mentally divide the image into three sections and place the horizon on one of the lines. In the example shown, the sky takes up about one third of the area, the ground two thirds. This looks balanced and doesn't unnecessarily draw the eye to one half of the image.

Step 6: Adjust exposure and straighten the horizon
In the second image, the exposure is too bright, so you reduce it a little with the corresponding slider. Then the "Straighten" tool comes into play. Use it to draw a line along the horizon, and Lightroom automatically rotates the image into the correct position. Make sure the horizon runs exactly horizontally, because crooked horizons are immediately noticeable in landscape photos.

Step 7: Readjust the graduated filter for the sky
After straightening, the graduated filter for the sky no longer has exactly the desired effect. Move the starting point of the gradient downward so that the effect isn't too strong. Fine-tuning is often decisive here, because a well-placed gradient looks natural, while a gradient that is too strong makes the sky look artificial.

Step 8: Compare three images
Now open all three images side by side and compare the look. Pay particular attention to the color. In the example, two shots still don't look golden yellow enough, while the reference image has the desired mood. This comparison shows you where you need to make further adjustments.

Step 9: Draw and rotate the radial filter
Select the radial filter and drag an ellipse over the area of the image that you want to edit selectively. If you accidentally create a second filter, simply remove it again. To rotate the existing ellipse, move the mouse pointer outside the ellipse until the icon changes. Then you can rotate the shape by dragging and thus adjust it to the subject.

Step 10: Invert the mask and intensify the golden tone
So that only the inside of the ellipse is changed, you activate the "Invert Mask" option in the radial filter. Then you increase the warmth or the yellow component until the desired golden tone is reached. Caution is advised, because a value that is too strong quickly looks unnatural. Gradual changes usually give better results.

Step 11: Create a second ellipse for another image
For the next image, you repeat the process with a new ellipse. Enlarge it, rotate it, and move it to the appropriate spot. Here too you can invert the mask so that the filter only acts on the inside. In doing so, make sure you keep control over the effect on the rest of the image.

Step 12: Reset settings and re-dose the yellow
If you want to readjust a radial filter, you reset its sliders to zero via the "Effect" option. Then you increase the yellow value again, this time with more feel for the result. Make sure you invert the mask again so that the change only acts on the inside. Often the result is too strong on the first attempt, so a second pass is worthwhile.

Step 13: Evaluate the result and assess the crop
Look at the image after all the adjustments. In the example, the golden tone is convincingly pleasing. With this shot you don't need to crop, because part of the machine is still visible and the subject thereby gains depth. So decide anew for each image whether the crop improves the visual impact.

Step 14: Hide distracting elements
In the other two images, you hid the machine completely. The result looks very harmonious because the eye now rests entirely on the light, sky, and landscape. What matters is that you consciously decide on one variant and don't just remove elements casually.

Summary – Synchronizing develop settings in Lightroom – Tutorial
Synchronization saves you a lot of time when editing a series of similar photos. Make sure to explicitly include the local adjustments in the dialog, and check each image afterwards. With the radial filter you can emphasize individual areas selectively, for example with a golden tone, while with Invert Mask you determine whether the inside or outside of the ellipse is affected. With cropping and straightening the horizon, you decide how much of the subject should remain in the image.
FAQ
How do I synchronize develop settings in Lightroom?Select the source image and the target images, choose "Synchronize Develop Settings" via right-click, and confirm the dialog.
Are local adjustments copied automatically?No, you must activate the checkbox for local adjustments in the dialog, otherwise radial filters and gradients will not be transferred.
Which shortcut opens the synchronization dialog?On a Mac you use Shift + Command + S, on Windows accordingly Shift + Ctrl + S.
How does the radial filter affect only the inside of the ellipse?Activate the "Invert Mask" option in the radial filter area, then your changes will only take effect inside the ellipse.
How do I rotate an existing ellipse in the radial filter?Move the mouse pointer outside the ellipse until the icon changes, then drag the shape in the desired direction.
How do I straighten a crooked horizon in Lightroom?Use the "Straighten" tool and draw a line along the horizon, after which Lightroom rotates the image automatically.

