
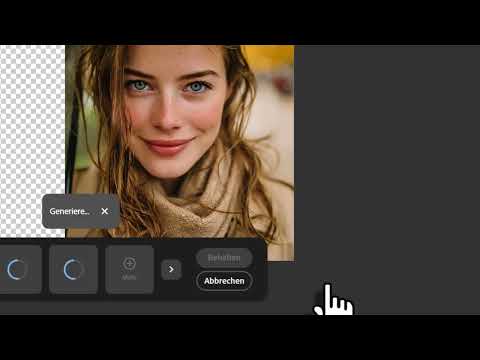
Imagine you have a successful portrait, but the image crop is too tight. This is exactly the problem that the "Generative Fill" function in Adobe Firefly solves. It uses artificial intelligence to add missing image areas, so that the subject continues to the left and right without you having to retouch laboriously. In this tutorial, I'll show you step by step how to upload an image, determine the format, control it with prompts, and select the best variant from the generated suggestions.
The video is only loaded from YouTube when you play it – data (including your IP address) is then transmitted to YouTube/Google. More in the privacy policy
Key Takeaways
- You can reach Adobe Firefly in your browser at firefly.com. You'll find the "Generative Fill" function in the left navigation under the "Generate" item.
- With the Expand function, you determine in which direction the image should grow: square, landscape, widescreen, or portrait. You can also adjust the expansion using the handles.
- A prompt is optional. If you use one, the AI takes your input into account, for example a tree or a butterfly. Without a prompt, the AI decides for itself what fits into the image.
- Firefly usually shows you three variants. Via "More" you get additional suggestions, and you can regenerate at any time.
Step-by-Step Guide
Step 1: Open Firefly and find the function
First, go to firefly.com in your browser. In the left navigation area, you'll find the various tools under the "Generate" item. Further down in this list is "Generative Fill". Click on it, because this is exactly the tool we need for expanding the image.


Step 2: Upload the image
Next, you can upload your image directly into the program. To do so, click on the upload area or simply drag and drop the image file into it. In my example, I'm using a portrait of a woman with an umbrella, which is actually already perfect but lacks space at the sides.

Step 3: Activate the Expand function
Once the image is loaded, click on "Expand". This switches you to the mode in which you can enlarge the image area. Only now are the options for designing the new area available to you.

Step 4: Choose the right format
Below the image, you'll find the format options. You can choose between square, landscape, widescreen, and portrait. If you made a mistake, simply reset the selection. A landscape format is a good choice when you need new material on the left and right, while with a portrait format you'd rather expand upward or downward.

Step 5: Fine-tune the expansion with the handles
The format presets are handy, but you don't have to stick to them. With the handles on the image, you drag the edges in the desired direction yourself. For example, you can expand only the left side if you specifically need more space there.

Step 6: Write a prompt for the desired content
If you want to control exactly what appears in the new area, enter a short description in the prompt field. Write something like "a tree", and the AI will take this wish into account during generation. Keep the prompt short and specific, and the result will usually turn out more accurate.

Step 7: Use the AI's suggestions without a prompt
You can also leave the prompt empty. In this case, the AI analyzes the existing subject and decides for itself what can sensibly be added. With the umbrella, for example, the AI first recognized that the umbrella could be continued, and additionally suggested some landscape. This variant is especially convenient if you don't have a concrete idea yet.

Step 8: Compare and choose the results
After generating, you will see several suggestions side by side. Pay attention to how well the new area blends with the original. With the umbrella, the subject was extended, but one of the variants enlarged the umbrella much more harmoniously. Choose the variant that looks the most natural in the overall image, and not necessarily the most eye-catching one.

Step 9: Load more variants
If none of the displayed variants convinces you, click on "More". This gives you additional suggestions without having to restart the process. This step is especially worthwhile for more complex subjects where the transition is hard to get right.

Step 10: Edit a second image
To practice the workflow once more, you return to the selection via "Back" and upload a new image. In the example, it is a dog that looks astonishingly similar to his own four-legged friend. Here, too, you proceed the same way: click Expand, choose a format, drag the sliders if needed, and enter a prompt if necessary.

Step 11: Start the generation and make your selection
When all the settings are right, you click "Generate". Firefly usually shows you three examples. This selection is helpful because you don't have to simply accept the first offer. With the dog, one variant looked especially coherent because it additionally hinted at a house in the background.

Step 12: Implement creative ideas with a targeted prompt
If you don't like any variant, you cancel the process and write a new prompt. In the example, I wanted a butterfly flying through the air. The AI implemented this wish and extended the image accordingly. So feel free to specify concrete subjects if you have a particular detail in mind.

Step 13: Check the result
Finally, take a calm look at the extended image. Pay attention to transitions, perspective, lighting, and details at the edges. If something bothers you, you can work again with a different prompt or a different variant. The result that ultimately convinces you is your goal.

Summary – Adobe Firefly Generative Fill: Easily extend images
With "Generative Fill" in Adobe Firefly, you extend images quickly and without elaborate retouching. You upload your image, activate the Expand function, choose a format, adjust the extension using the sliders, and decide whether a prompt should guide the AI. Afterwards, you compare the variants, load more suggestions if needed, and select the most coherent result. With a little practice, you will achieve extensions that are barely distinguishable from the original at first glance.
FAQ
Do I always have to enter a prompt in Firefly?No, the prompt is optional. Without input, the AI analyzes the image itself and suggests suitable additions.
Which format should I choose for the extension?That depends on where you are missing material. For side extensions, landscape or widescreen is suitable; for extensions upward or downward, portrait format.
What do I do if I don't like any of the three variants?Click on "More" to get additional suggestions, or write a new prompt and generate again.
Can I extend only one side of the image?Yes, with the sliders on the image you drag the edges specifically in the desired direction without changing all sides at the same time.
