
Imagine you need a cover image for a blog post, a scene for a project, or simply an idea you want to make visible within a few minutes. That is exactly what Adobe Firefly is designed for. The web-based AI generates images from a text description and lets you decide on the format, reference image, and model yourself. I will show you step by step how to get from your first prompt to post-processing in the browser.
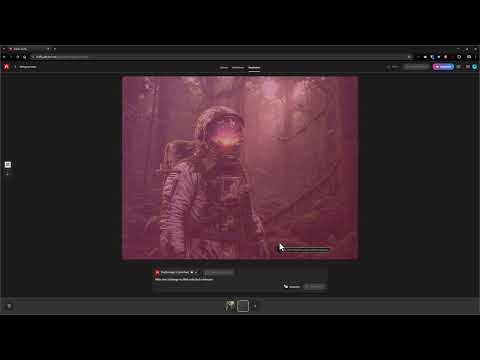
The video is only loaded from YouTube when you play it – data (including your IP address) is then transmitted to YouTube/Google. More in the privacy policy
Key Takeaways
- Firefly offers you a free allowance of generations, with which you can try out all the basic functions.
- On the home page, you enter your prompt, choose between image and video, and select the AI model.
- Via the "More" section, you can set the aspect ratio and reference image to influence the result more strongly.
- With Firefly's own model, you generally get a significantly higher resolution than with external models.
- Existing images can be edited directly in the browser, for example by inserting objects.
- Without a subscription, some partner models have limits, but Firefly models remain usable.
Step 1: Your Account and the Free Generations
Getting started is simple. Click on the small, inconspicuous account icon at the top right. There you can see how many free generations are currently available to you. Keep an eye on this number, because every image you create uses up part of your allowance.

Step 2: Enter a Prompt on the Home Page
On Firefly's home page, you will find the input field for your prompt. Here you describe which image you would like to create. The more precise your description is, the better the result will be. It is best to prepare your prompt in advance in a text document, so you can quickly adjust it if needed.

Step 3: Choose Image or Video and the Right Model
Right next to the prompt, you decide whether you want to generate an image or a video. In this tutorial, we will stick with images. Below that, you select the model. You can use Adobe's models, but also try external partner models such as Flux, Gemini, or ChatGPT without leaving the page. Each model has its own style, so a comparison is worthwhile.


Step 4: Using External Partner Models
The partner models expand your selection considerably. Flux, for example, delivers very good images, and Gemini or ChatGPT are also available. For your first test, you can generate the same subject with different models and compare the results directly side by side. This way you can quickly see which model suits your project.

Step 5: Set the Aspect Ratio and Reference Image
Before you generate, it is worth taking a look at the format options. If your image is meant to serve as a banner or video thumbnail, for example, you choose an aspect ratio such as 16:9. Under "More," you will find further ways to influence the result. There you can upload a reference image that the AI uses as a guide. This is especially helpful if you want to keep a particular style or image composition.


Step 6: Evaluate the First Result
As soon as you click "Generate," creation begins. After a short wait, your image appears. Click on it to examine it in a larger view. Pay attention to details such as lighting mood, sharpness, and hands or faces, because that is often where AI images show weaknesses. The quality in the video seemed very realistic overall.

Step 7: Modify Existing Images Selectively
Firefly can also add to a finished image after the fact. In the example, a realistic-looking snake was added to a scene. You can specify exactly where it should appear, such as on a rock, on a branch, or in the immediate vicinity of a figure. However, you do not have to describe everything. If you give the AI free rein, surprising results often emerge, which can even be better than what you had imagined.

Step 8: Switch the model and test a new prompt
Switching models noticeably changes the look of your image. In the video, Flux 2 was chosen for this and a cyberpunk motif was created. The history shows you all previous generations, so you can return to earlier versions at any time. The result looked futuristic and matched the desired style well.

Step 9: Download the image and check the resolution
Before downloading, it's worth taking a look at the resolution. In the video, the cyberpunk image from Flux was 1200 × 896 pixels. With the Firefly model, by contrast, the resolution was around 2300 pixels, so significantly higher. If you work with an external model and need more size, you can upscale the image afterwards. There are special tools for this that increase the resolution without major loss of quality.


Step 10: Generate more variations
Not every first result fits right away. Via the three dots below the image, you can select "Generate more". You will then get further suggestions for the same prompt. This option is ideal when you like the direction but still need some fine-tuning.

Step 11: Note the subscription notices for certain models
Not every model is available to you without a subscription. With one model in the video, a notice appeared about a seven-day free trial period, with which you could generate 2000 images. Without a subscription, in this case you are left with only the Firefly models. That is not a disadvantage, because Adobe models are constantly improving. In addition, they were trained on material from Adobe Stock, for which the copyrights are cleared. With other providers, the origin of the training data is often less transparent.

Step 12: Edit the image directly in the browser with Photoshop
Finally, I'll show you editing in the browser. Via the Photoshop button, you open your image directly in the web editor. There you can paint directly into it or work with layers, similar to the desktop program. Note that not all features of the full version are available. For quick and targeted adjustments, however, the most important tools are entirely sufficient.

Summary – Firefly by Adobe: Create images and control them precisely
Adobe Firefly combines simple operation with many adjustable settings. You start with a prompt, choose the suitable model, set the format and reference image, and check the result in full size. Afterwards, you can add to images in a targeted way, generate further variations, and refine them in the browser. With the Firefly model, you get particularly high resolutions and a clearly cleared data basis.
FAQ
Do I need a subscription to use Firefly?No, you get free generations. However, a subscription may be required for some external models.
Which model delivers the best resolution?According to the video, the Firefly model delivers significantly higher resolutions, at around 2300 pixels, than the tested partner models.
Can I use my own image as a template?Yes, under the "More" item you can upload a reference image that the AI uses as a guide.
How do I get more suggestions for my prompt?Click the three dots below the generated image and select "Generate more".
Can I still modify images after they have been created?Yes, you can add objects or edit the image in web Photoshop with layers and tools.
