
A small bright patch at the hairline or a gap in the beard is immediately noticeable in portraits, especially with male models. Even a few bald spots make the result look unfinished. With the dodge-and-burn technique, you can selectively darken such areas and create the impression of fuller hair without altering the image heavily.
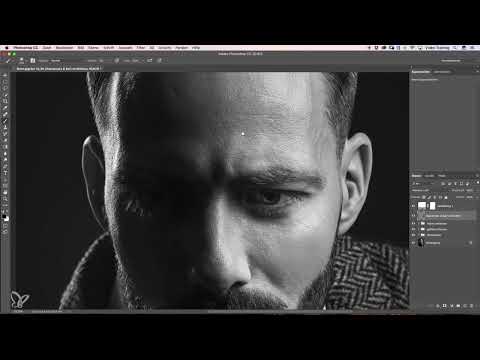
The video is only loaded from YouTube when you play it – data (including your IP address) is then transmitted to YouTube/Google. More in the privacy policy
In this tutorial, I'll show you how to work with an auxiliary layer, low opacity, and soft transitions. You'll learn how to thicken the hairline, preserve highlights, and fill in the beard. In the end, you'll be able to apply the technique to your own projects.
Key Takeaways
- Always work on a separate auxiliary layer so you can make corrections at any time.
- Use black paint with low opacity, around 4 percent, and build up the darkness layer by layer.
- Leave highlights bright. If you darken them, you lose depth and vitality in the image.
- Make sure there are soft transitions to the facial skin. Hard edges immediately give away the editing.
- Add individual hairs to the beard with the dodge-and-burn tool instead of working on large areas.
Step-by-Step Guide
Step 1: Analyze the hairline and create an auxiliary layer
First, zoom in on the hairline and look at the areas where the hair appears thin or light. Then create an auxiliary layer over your image. There you work without changing the original material, and you can undo or reduce any change later.

Step 2: Darken light areas with black paint
Choose black paint and paint over the light areas in the hairline. You should deliberately keep the opacity low, in the example it's about 4 percent. This way you build up the darkness slowly, and you can go over it again if needed instead of overdoing it right away. After a few strokes, you'll see how the areas increasingly blend into the surrounding hair.
Step 3: Combine the technique with eyelash thickening
The techniques can be combined well. You may know from an earlier tutorial how to thicken eyelashes by painting in individual hairs. You can also apply this approach to the hairline. However, it is considerably more time-consuming and often barely changes the result, since hardly anyone looks at the hairline up close. Therefore, use this step only for conspicuous gaps.
Step 4: Shape the transition from the highlight to the hairline
The transition between the bright highlight and the hairline is especially important. Here you should build up the darkness more strongly so that an even gradient is created. Make sure no steps become visible. A clean gradient ensures that the hair looks natural and not painted on.
Step 5: Fill large gaps with individual strokes
In some places, such as at the front of the hairline, the gap is so large that simply darkening is not enough. There, add individual dark strokes that suggest the hair structure. These strokes should vary in length and be slightly angled so that the result doesn't look artificial.
Step 6: Preserve highlights and selectively brighten them
Here lies a common mistake: you paint over the highlights with black because they are bright. But be sure to leave them alone, because they give the image depth. If you darken them too much, the hairline looks dull. Instead, emphasize the highlights slightly with a touch of white. After that, the editing is hardly noticeable, and no one can tell that you darkened anything.
Step 7: Create soft transitions to the facial skin
Pay special attention to soft transitions at the edge of the hairline. A hard edge against the forehead or face is the most common giveaway of editing. Therefore, gently fade out the darkness until it blends with the facial skin. Work with a soft brush tip and change the direction of your strokes so that the gradient stays even.

Step 8: Before-and-after comparison and finishing touches
After a few editing steps, switch the auxiliary layer on and off to check the difference. This lets you see whether the gaps actually look closed. In this example, the color hardly needed to be corrected because the auxiliary layer did not alter the original colors. Then thicken individual spots again that still stand out to you in the comparison. Only when the hairline looks even all around are you done.
Step 9: Check the Beard for Existing Density
With the beard, you start with an assessment of what's there. If the beard is already dense, you only need to do a little work. Then concentrate on the gaps that are actually noticeable, and add small dark spots there. Often a few strokes are enough.

Step 10: Shape the Beard Edge Cleanly
With the beard edge, make sure it ends evenly. On some models, the beard doesn't end at the same height, and then the edge looks untidy. In these places, use a fine brush to draw a clear but natural line. Proceed carefully and avoid contours that are too sharp.
Step 11: Rework Gaps with Low Opacity
Go over the gaps in the beard with a low opacity and work your way forward step by step. Try not to hit the hairs that are already dark, as they would otherwise become excessively dark. If necessary, you can slightly increase the opacity on problem areas. Make sure that you treat the gaps evenly overall.
Step 12: Fill Individual Beard Gaps with Dodge-and-Burn Hairs
In very patchy areas such as the cheeks or the chin, it's worth redrawing individual hairs with the Dodge and Burn tool. Make short, slightly curved strokes in the direction in which the rest of the beard hairs grow. If you ignore the direction, the beard looks artificial.
Step 13: Soften Dark Spots and Adapt Them to the Surroundings
Sometimes dark spots that stand out too strongly appear while filling in. Soften them by going over them with low opacity. In light areas, you adjust the darkness to match the remaining beard hairs. Pay particular attention to the spot where the beard transitions to the lip, because hard transitions are quickly visible there.
Step 14: Finish the Beard at the Top and Bottom
Finally, go over the upper beard area and the transition to the lip once more. Where the beard is still patchy, carefully add more strokes. In the end, you check the overall picture and remove anything that looks artificial. Then the editing is complete, and you can view the before-and-after comparison in color.

Summary – Dodge and Burn: Thickening the Hairline and Filling in the Beard Step by Step
With Dodge and Burn, gaps in the hairline and in the beard can be closed inconspicuously. The key is that you work on an auxiliary layer with low opacity, retain highlights, and create soft transitions. With the beard, a few targeted strokes are often enough, while on the hairline you need a bit more patience. If you follow these principles, the result looks natural and the editing remains invisible.
FAQ
Do I absolutely have to work with an auxiliary layer?An auxiliary layer is not mandatory, but strongly recommended. You don't alter the original image and can adjust or undo any change at any time.
Why should the opacity be so low?With low opacity, you build up the darkness slowly. This way you avoid harsh spots and can control the effect step by step.
Should I completely darken the highlights in the hairline?No. Highlights give the hair depth and vitality. If you darken them, the hairline looks dull. Rather, lightly emphasize them with white.
How do I tell whether the transition to the skin is too harsh?Switch the auxiliary layer on and off and look at the area from a distance. If an edge is visible, fade the darkness out more softly.
Can I also apply the eyelash technique to the hairline?Yes, that's possible. However, it is very time-consuming and often barely changes the result. Use it only for particularly noticeable gaps.
What do I need to pay particular attention to with the beard?Pay attention to the growth direction of the hairs, a clean beard edge, and soft transitions to the lip and the cheek.
Why is the before-and-after comparison important?The comparison shows you whether the gaps actually look closed. Often it's only then that small spots you should rework become noticeable.


