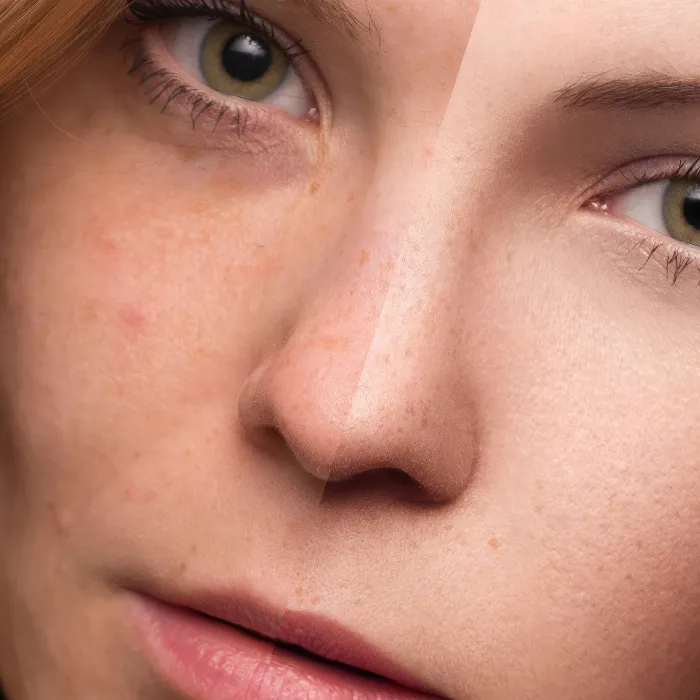
The Dodge and Burn is a proven technique in image editing that allows you to selectively lighten or darken images. The method I would like to introduce to you here uses a gray layer to make precise adjustments to the brightness of your image. This approach gives you control and flexibility, enabling you to achieve the best results. Let's dive into the details right away.
Main insights
- We work with the Dodge-and-Burn technique on a gray layer.
- The "Soft Light" mode allows for natural results.
- Using a brush tool with low opacity allows for precise adjustments.
- Frequent switching between black and white to make darkening and lightening adjustments is easy.
- Using a soft brush tip improves the final result.
Step-by-step Guide
1. Creating the Gray Layer
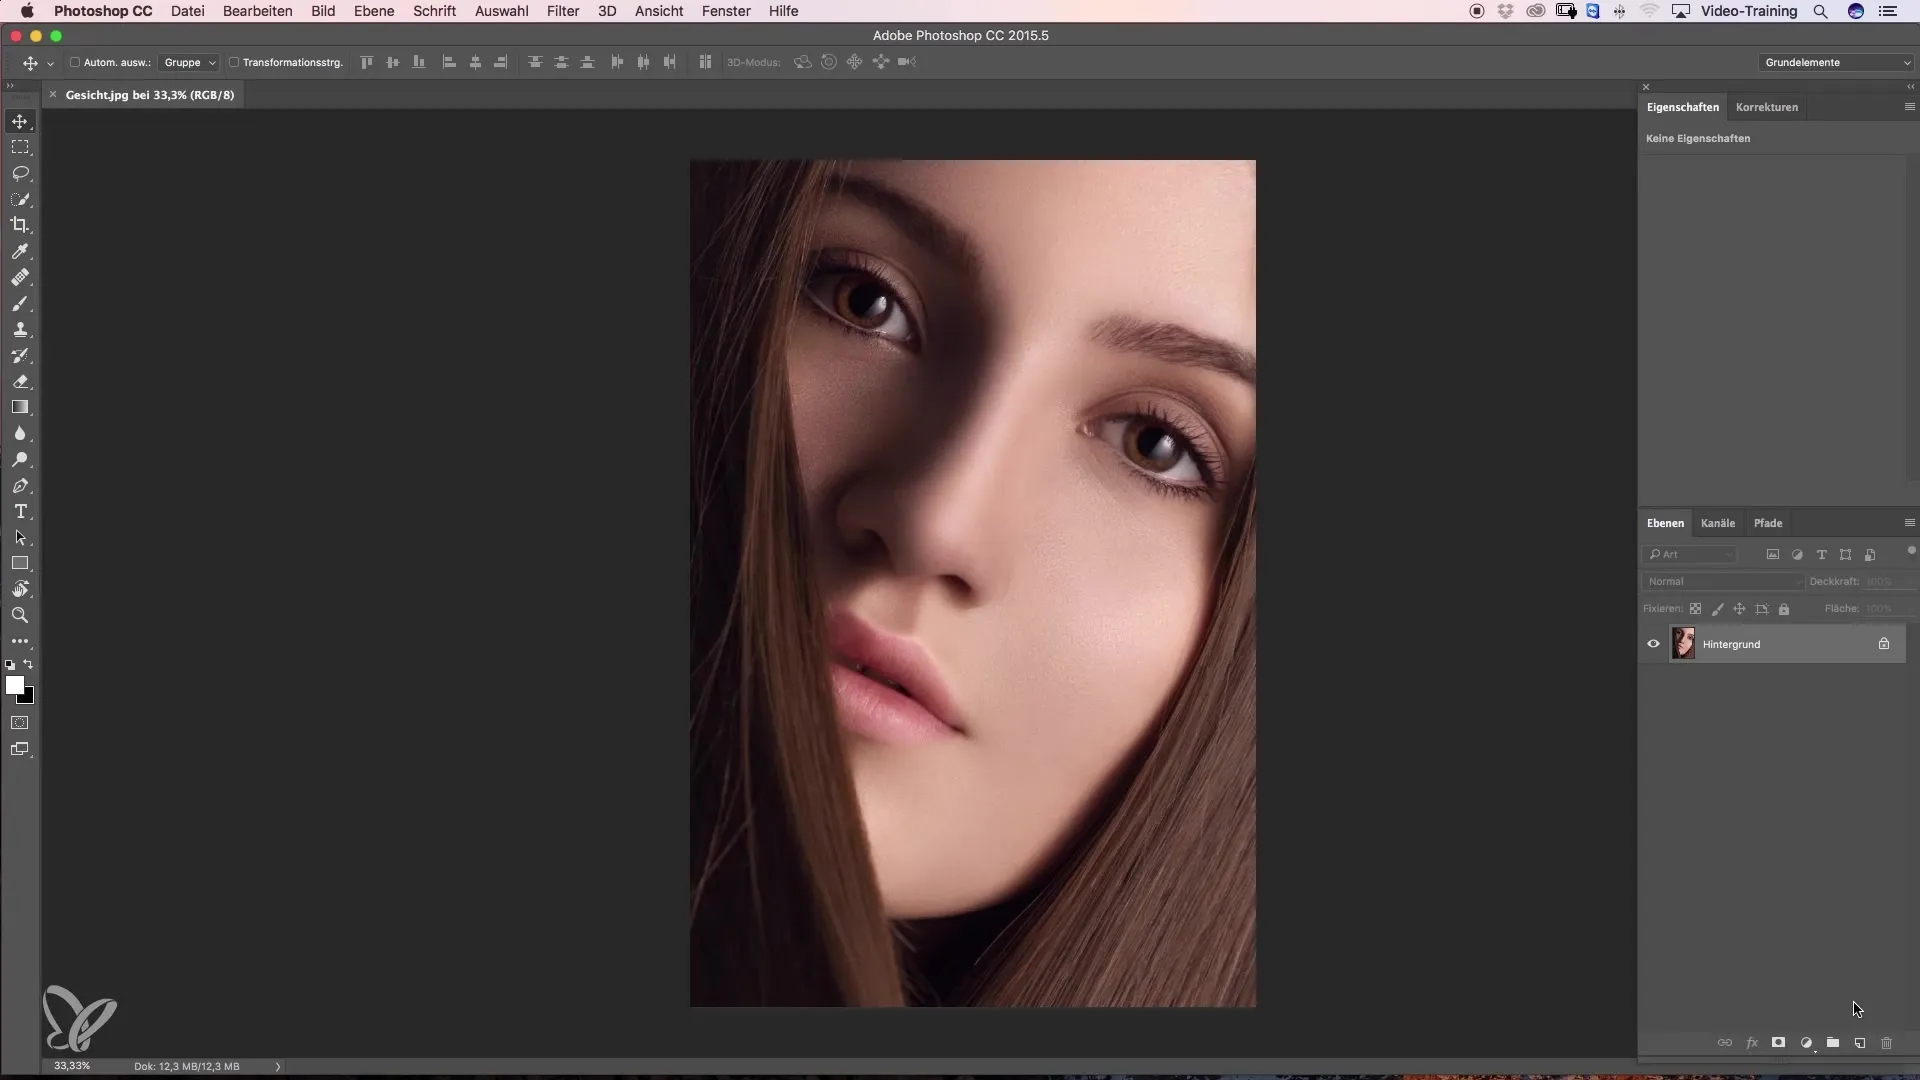
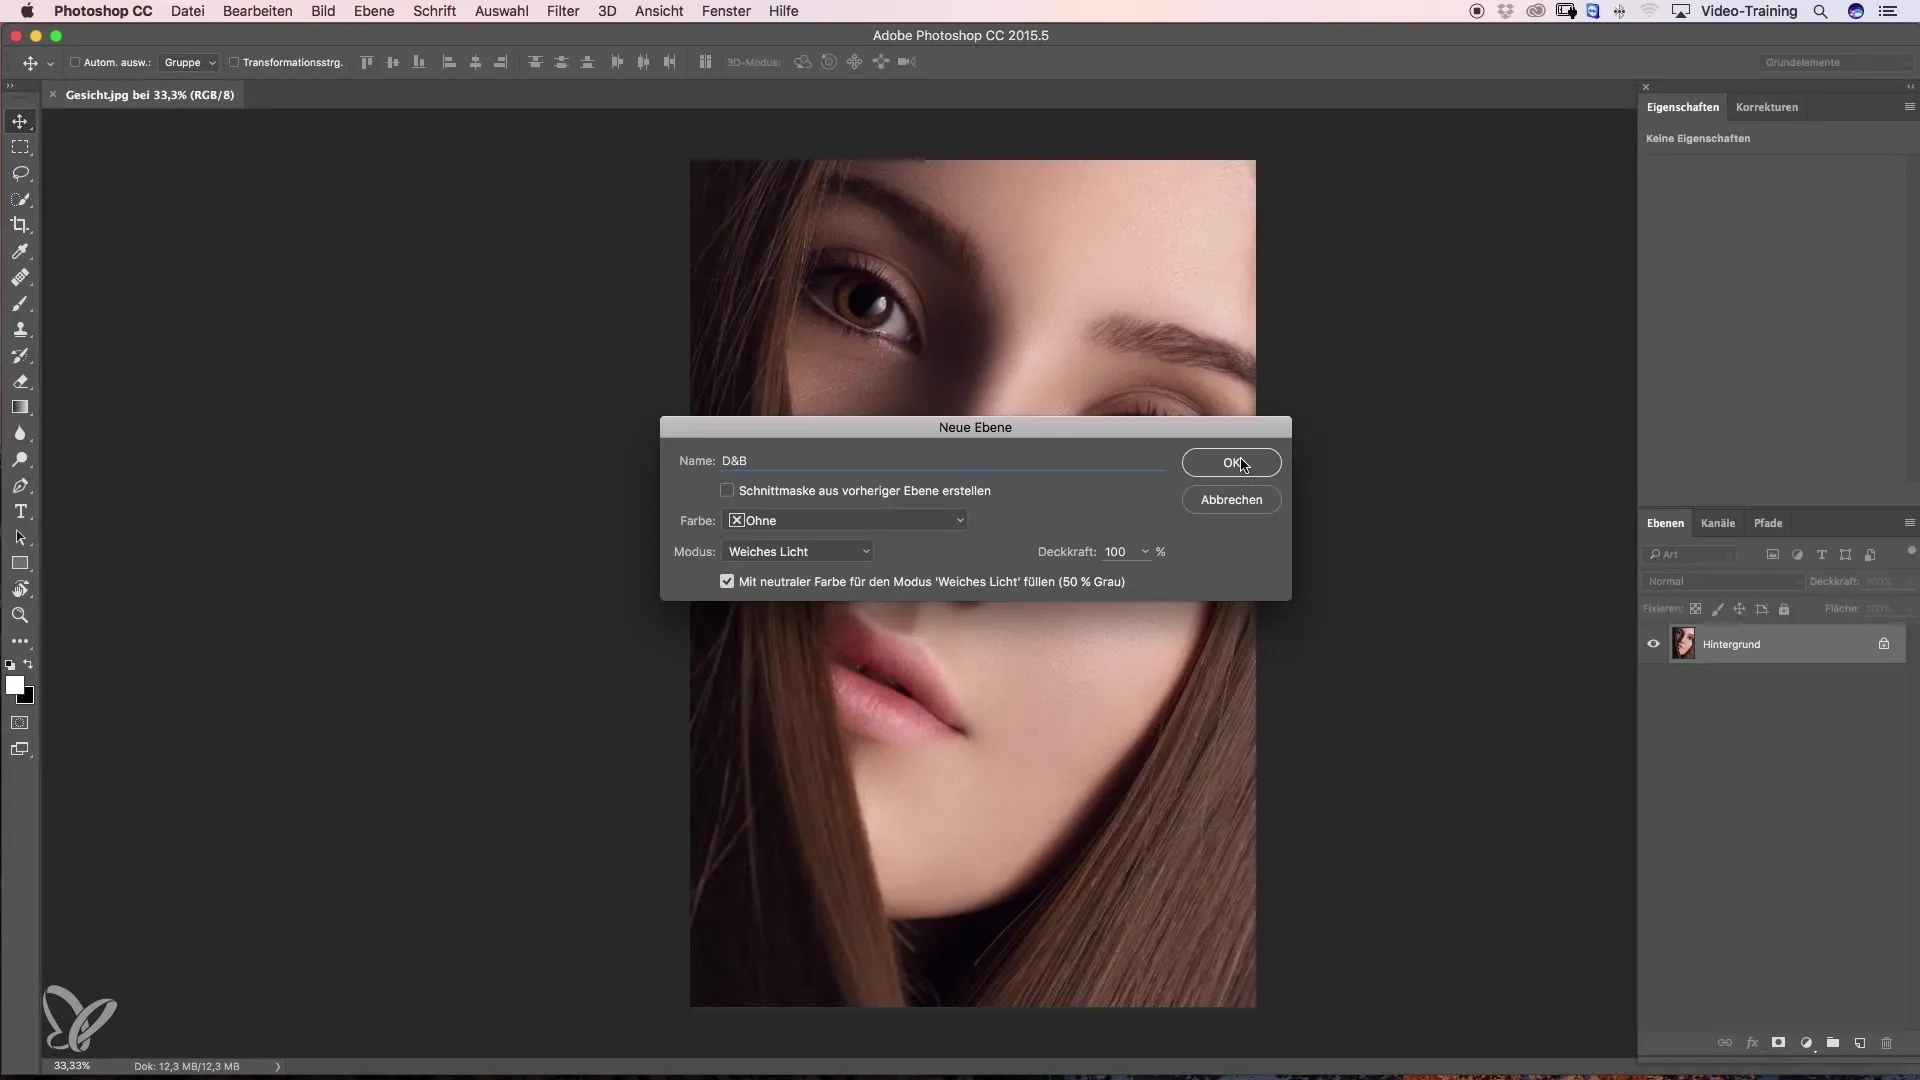
First, you create a gray layer. To do this, go to the layer icon in your Photoshop document and hold down the Alt key. Simply name the new layer, for example, "Dodge & Burn". Make sure the mode is set to "Soft Light".
This gray layer is filled with 50% gray. This allows you to see previous edits and simplifies correction work. Once you have completed these steps, confirm the settings by clicking "OK".
2. Color Change for Working
After you have created your gray layer, you can now switch between black and white to edit dark and light areas. Just press the X key on your keyboard to toggle the foreground color between black and white. This makes the workflow extremely fast and efficient.
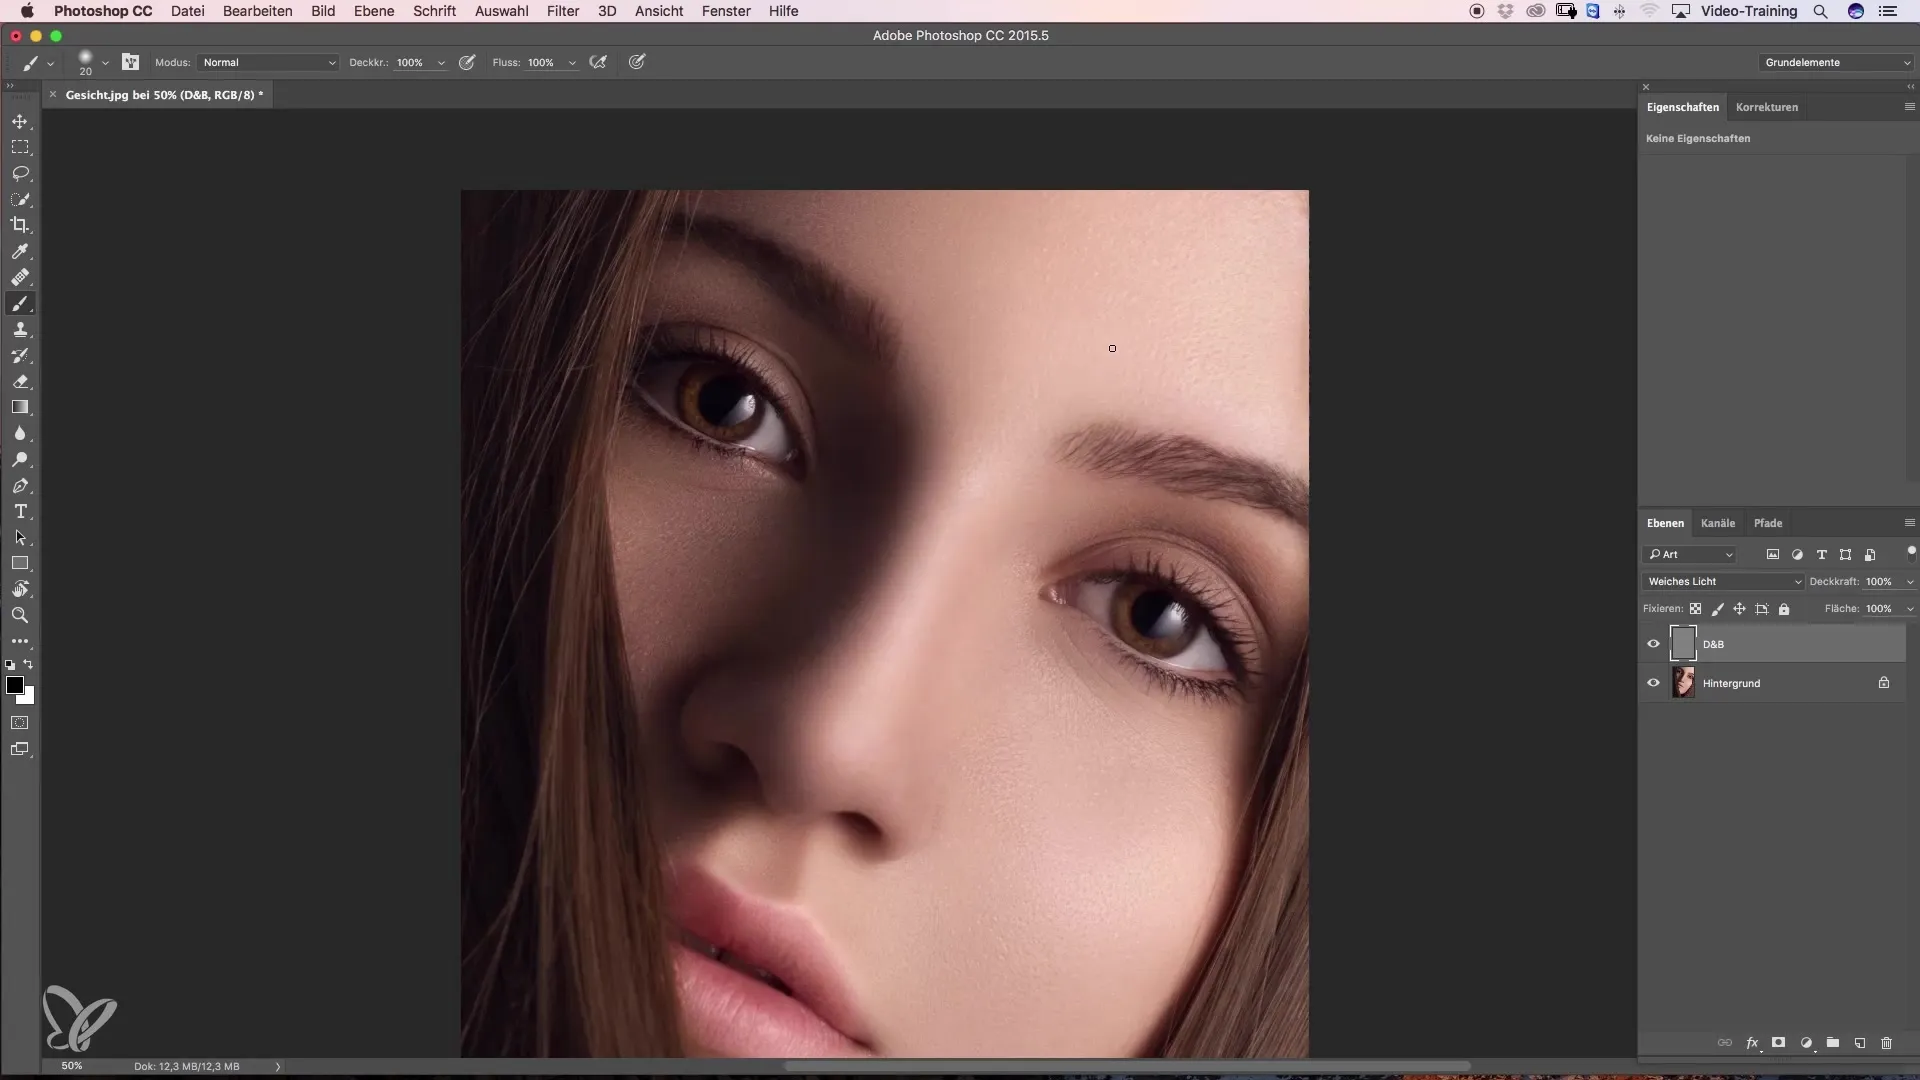
If you want to change the colors, you can still be creative and choose, for example, a shade of red. Then press the D key to quickly reset the foreground colors back to black and white. You now have all the necessary tools to improve your skills in image editing.
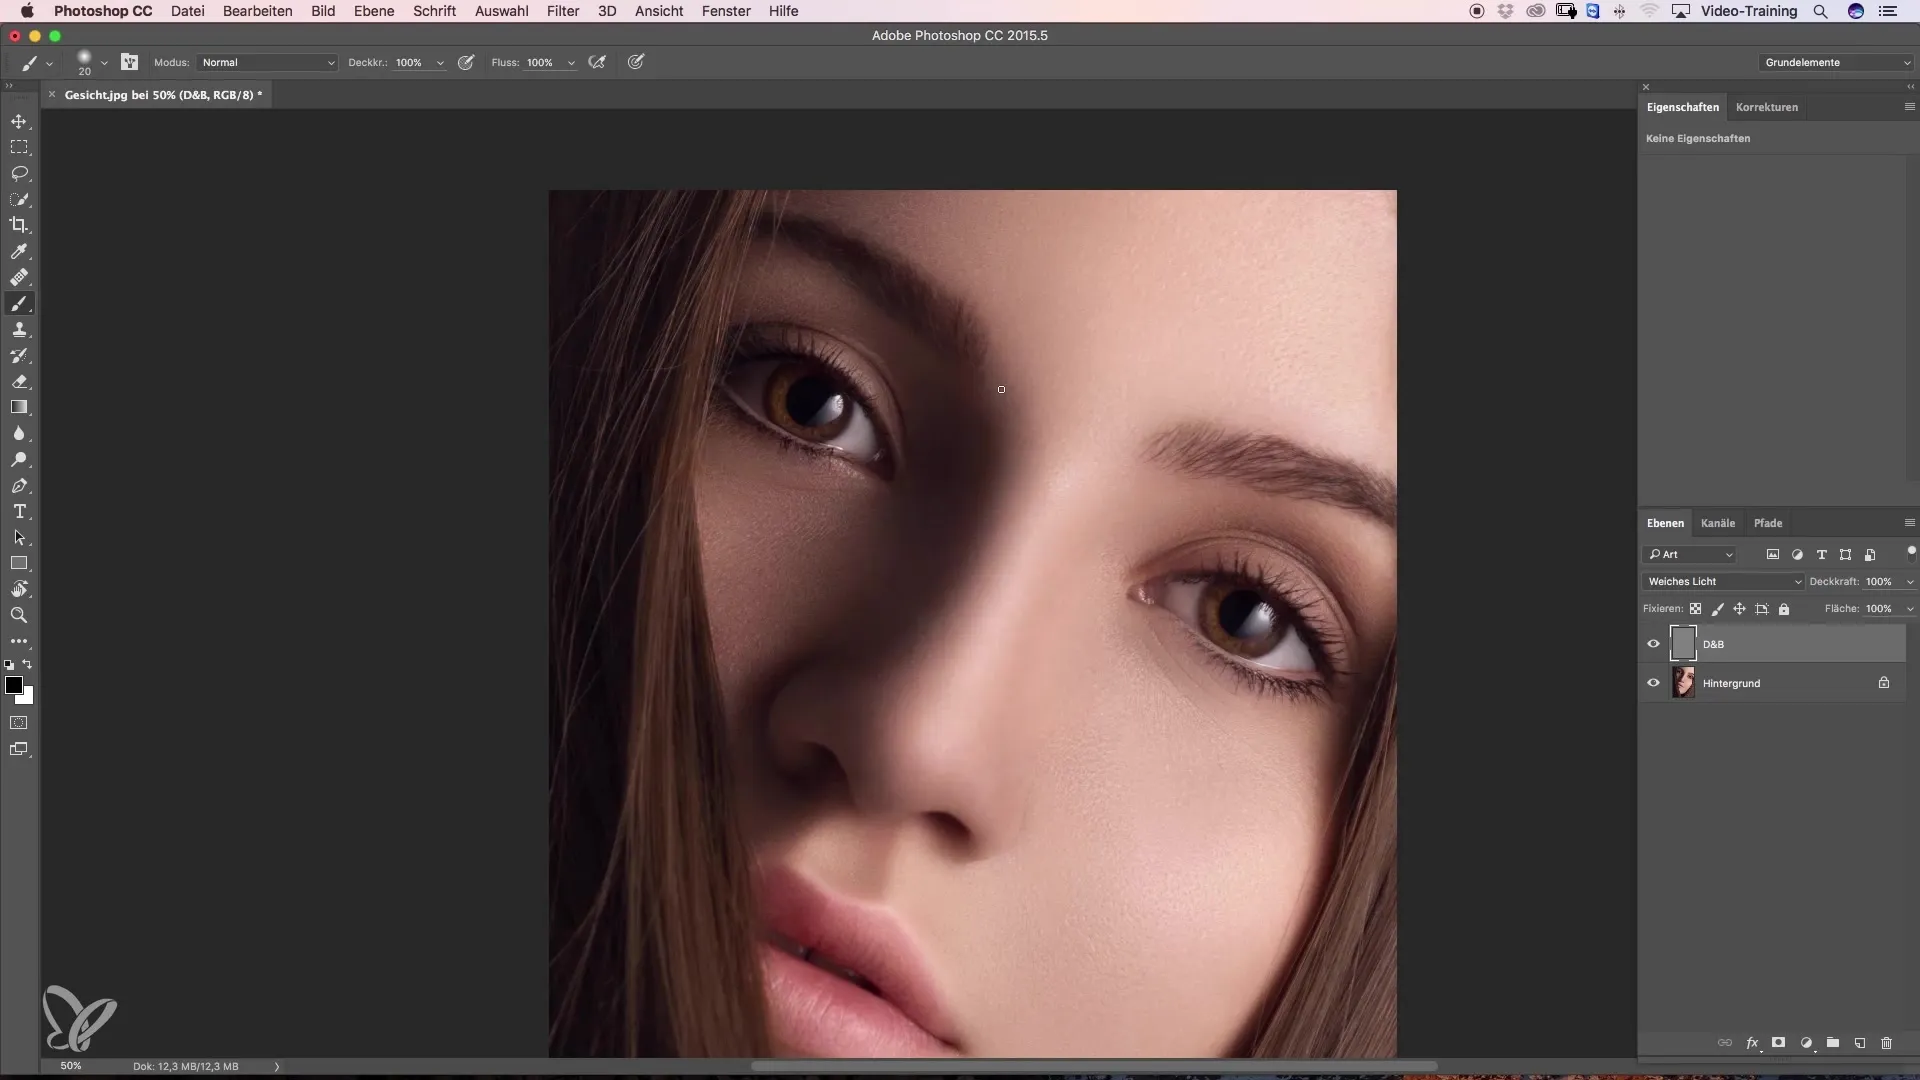
3. Working with Low Opacity
The key to a beautiful result lies in using a low opacity for your brush. It's best to start with 3 to 5%. This choice allows you to approach the image very slowly and achieve the desired results step by step. For example, you can remove small spots by simply painting over them with black. The image will not be edited with a hard line but will show a gentle darkening.
4. Lightening with White
As mentioned before, you can also work with white to add brightness. Simply paint with the white foreground color over the areas you wish to lighten. This method will help you optimize the image and create the desired look.
It is important that you always keep the brush tip soft. A soft brush tip allows you to achieve smooth transitions that look more natural than hard edges.
5. Precision in Editing
A clear advantage of this technique is the ability to work extremely precisely. You can adjust the brush size as needed and edit even the smallest details. For example, with a smaller brush tip, you can elegantly remove a small wrinkle. Here you can give your image the final touch to perfect the result.
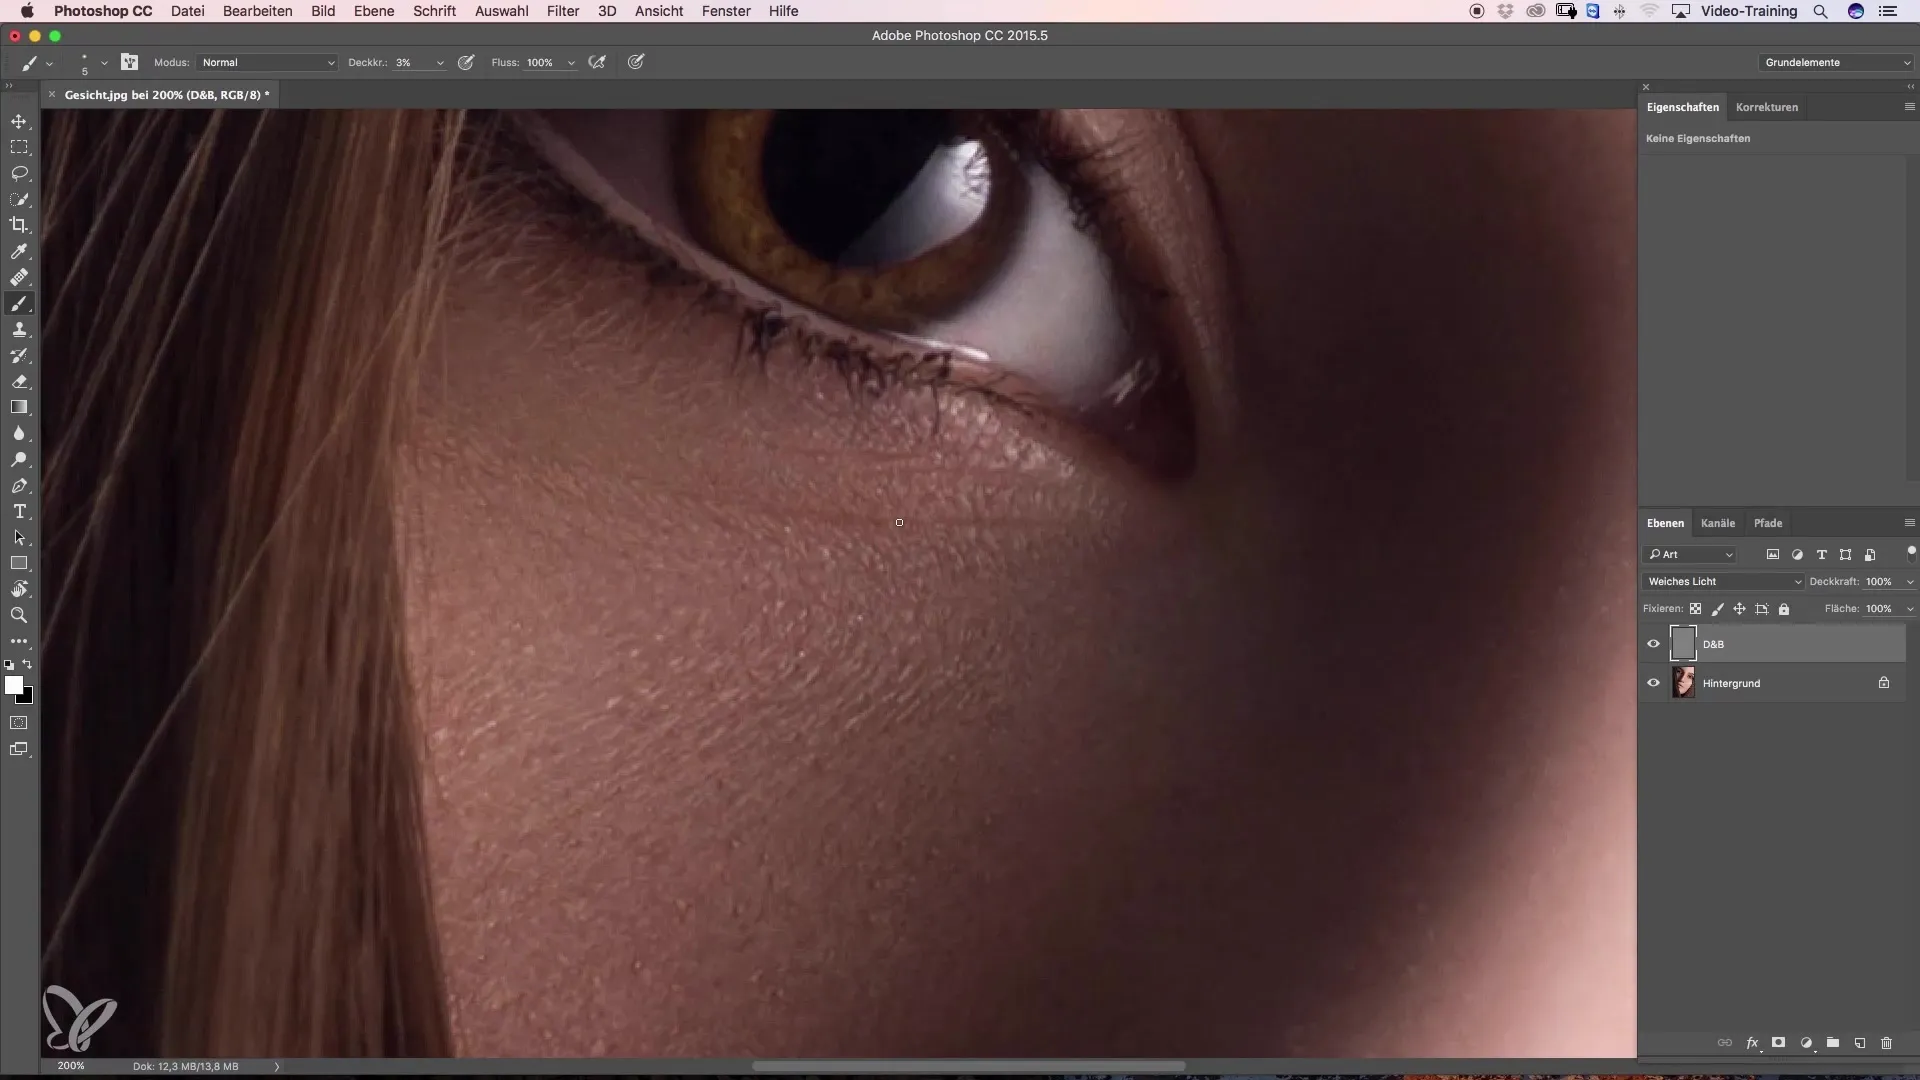
However, if you want to darken a larger area, you can increase the brush size and potentially raise the opacity to 10%. This makes darkening faster while still allowing for precise results.
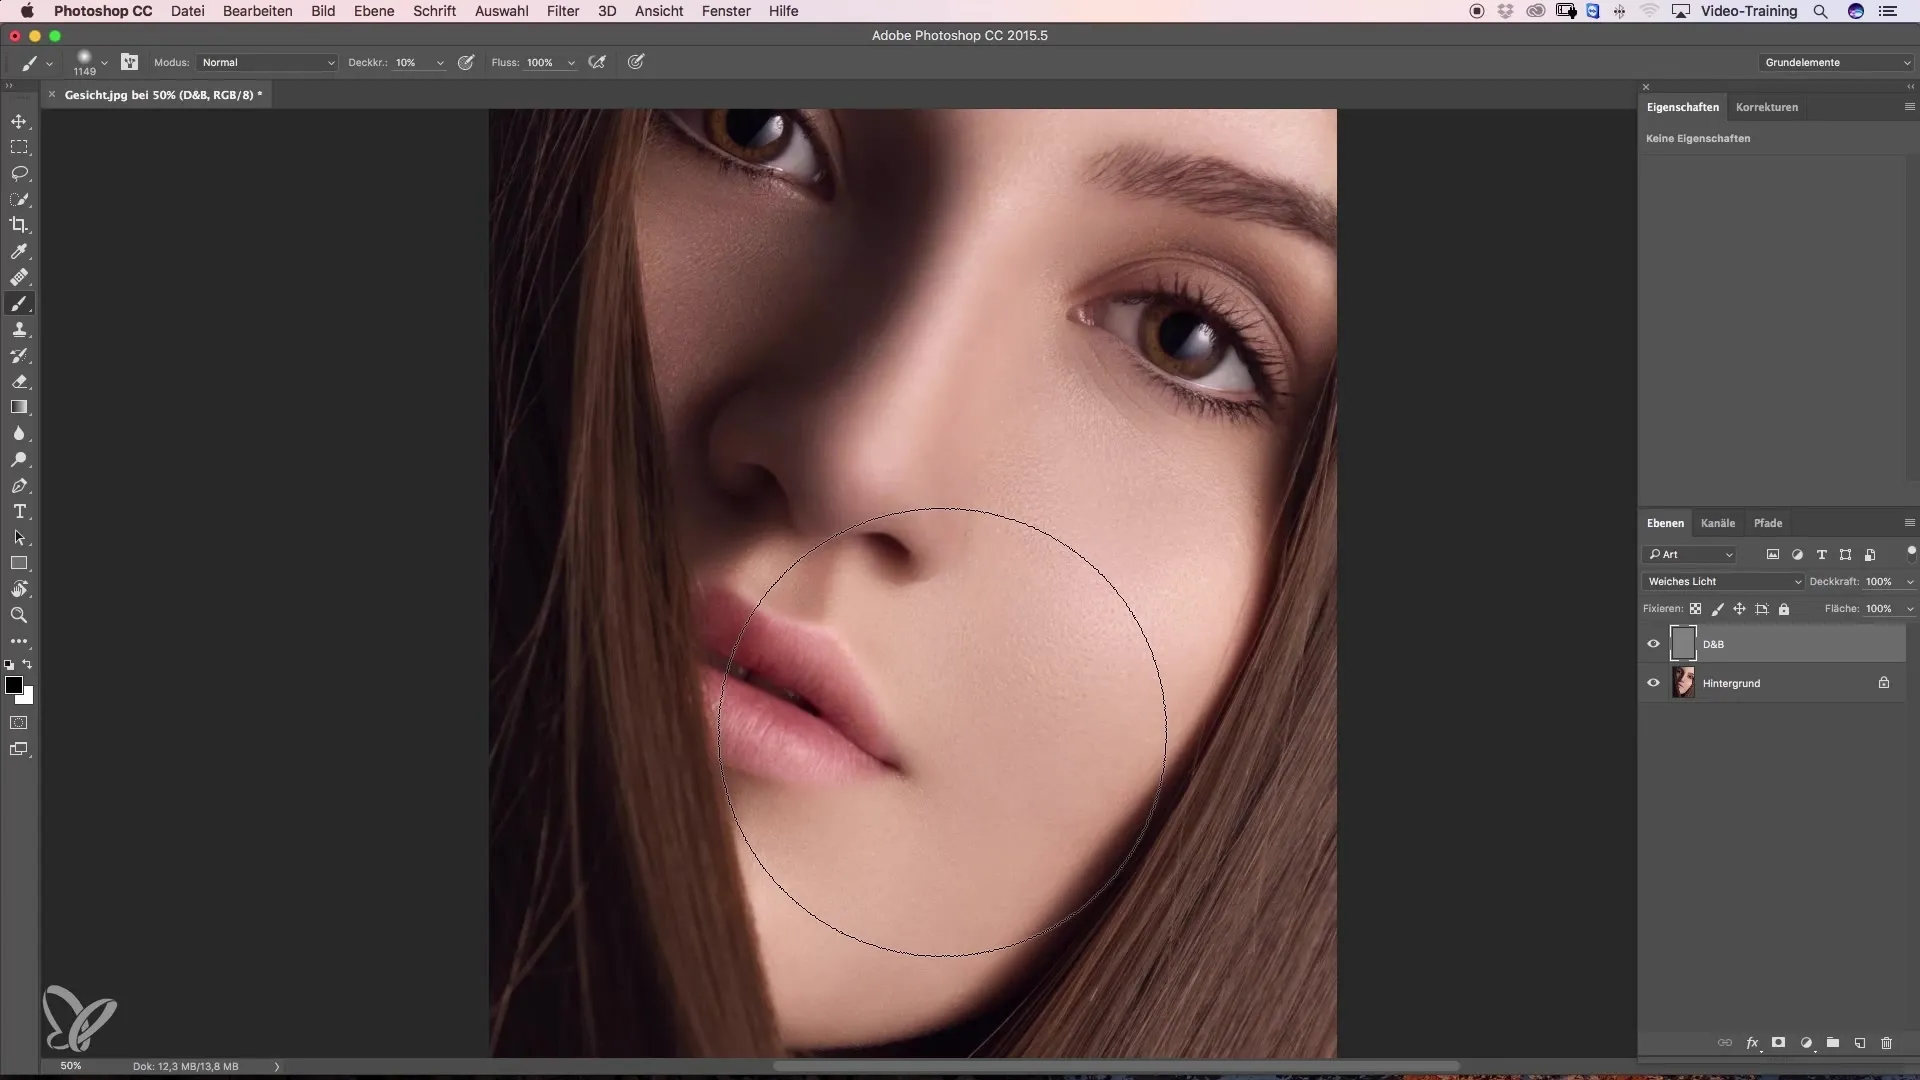
6. Efficiency of Dodge-and-Burn
The Dodge-and-Burn tool has become indispensable in media editing. The more you practice, the faster you will understand and apply the techniques. Don't be discouraged if it seems complicated at first. With targeted practice, you'll get better at applying the method and can quickly and efficiently implement this technique in your projects.
Summary – Dodge and Burn: Step-by-Step Guide
Working with the Dodge-and-Burn technique on a gray layer has many advantages. You learn how to lighten and darken precisely and in a controlled manner to achieve the best results in your image editing.
Frequently Asked Questions
What is the Dodge-and-Burn technique?The Dodge-and-Burn technique is a method for selectively lightening and darkening areas of an image.
Why should I use a gray layer?The gray layer gives you an overview of your changes and makes it easier to correct mistakes.
How can I change the brush size?You can adjust the brush size through the control settings or the brush tool options.
What opacity should I start with?Start with an opacity of 3 to 5% for more control over brightness adjustments.
How do I switch between black and white?Simply press the X key on your keyboard to switch between foreground colors.
