

An image often only comes alive when it receives a few deliberately placed disturbances. This is exactly what you will work on in this section of a Photoshop training: you add a lens flare, scatter fine dust over the scene, and then build a consistent color look. Finally, you carefully sharpen the result.
The video is only loaded from YouTube when you play it – data (including your IP address) is then transmitted to YouTube/Google. More in the privacy policy
The guide follows the flow of the video, which lasts about 24 minutes. In addition, you will learn why the individual steps work, so that you can apply the techniques to your own subjects later. Prior experience with layers, masks, and adjustment layers is helpful, but not required.
Key Takeaways
- The blend mode "Screen" hides black and makes lens flares usable without complex masking.
- A milky haze often appears because the background is not pure black. A Levels adjustment with the black eyedropper in a clipping mask solves the problem.
- Dust is created with a hard brush whose scattering and size dynamics you adjust. Afterwards, you soften the particles and reduce the opacity.
- The color look consists of several layers: Color Lookup, Gradient Map, Camera Raw, and Graduated Filter. Each layer is given only as much effect as the image can handle.
- A High Pass with a small radius on Soft Light subtly sharpens edges without destroying the look.
Step-by-Step Guide
Incorporating the Lens Flare
First, load a lens flare image into your project. Many free collections show such light reflections on a black background, and that is precisely the crux: a black background would remain visible in the image as a dark rectangle. You therefore place the image as its own layer over your photo and deal with the background in the next step.

Making Black Transparent with the Blend Mode
Set the blend mode of the flare layer to "Screen". This mode ignores the black values and makes them appear transparent, while brighter areas remain visible. The brighter the flare, the more opaque it appears in the image. This is exactly why the light reflection sits so strongly on your photo without you having to cut it out laboriously.

Removing the Milky Haze with a Levels Adjustment
On close inspection, you will notice that the background of the flare is not pure black but a very dark gray. This creates a milky shimmer that cannot be removed completely with the blend mode alone. Therefore, create a Levels adjustment and place it in the clipping mask of the flare layer. Then select the black eyedropper and click on the dark gray area. Photoshop sets this value as the new black, and the haze disappears.

Transforming and Aligning the Lens Flare
Via "Edit" and "Transform", you enlarge the flare until the glow extends beyond the edge of the image. Set the center point of the transformation where the light source should be, and rotate the image until the reflection harmonizes with the lighting conditions in the photo. Make sure the flare does not look cut off at the edge, but runs naturally into the image.

Masking Out Distracting Color Spots
A blue shimmer at the edge of the flare quickly looks unsettling in the image. Add a layer mask to the layer and paint over the affected areas in black with a soft, round brush at 100% opacity. If you make a mistake, switch to white with the X key and bring the area back. This way you keep control without destroying the layer.

Creating a Dust Layer with the Brush
For the dust, you don't need a stock image. Create a new layer, choose white as the foreground color, and use a brush with a very hard edge. In the brush settings, increase the shape dynamics for the size so that the dots turn out in different sizes. With scattering, you distribute the particles randomly across the area. Feel free to set the scattering high, because you will trim the results down in the next step anyway.

Thinning Out Particles with the Eraser
Now you paint the dots. At first, there is usually too much dust, and it doesn't look like particles yet. So switch to the eraser, set it to hard as well, and work with a certain amount of scattering. Remove dots until only individual fragments remain. Feel free to be ruthless about it. In the end, only a few irregular particles should remain, which later, across several layers, together form a believable dust cloud.
Duplicating and Distributing Dust Layers
Duplicate the dust layer, transform it, rotate it slightly, and change the size. Then you merge the layers back into a single layer and repeat the process. Each copy gets a different rotation and size, so the result shows particles of different sizes. Position the dust layer so that it emphasizes the foreground and doesn't look evenly distributed across the subject, because it shouldn't turn into a snowfield.
Blurring the Dust and Adjusting the Opacity
In the next step, you apply the Gaussian Blur via "Filter" and "Blur Filter". The particles thereby lose their hard edges and look like dust in backlight. Then reduce the opacity of the layer, because otherwise the effect dominates the image. With a mask, you additionally remove individual dots that seem too extreme to you. For this, you again use a normal brush without scattering and size dynamics.

Securing the Layer Stack
When the distortions suit your taste, you group the layers in a folder and give it a meaningful name, such as "Image Distortions". This makes the structure clearer later on and allows you to hide the folder completely if needed.
Finding a Color Look with the Color Lookup Table
Now the actual color look begins. Create a "Color Lookup" adjustment layer and click through the preset looks. Many suggestions seem unsuitable at first glance, but some bring exactly the direction you are looking for. Take your time for this comparison. Pay particular attention to brightness, contrast, and color cast, because these three values determine the mood. If the highlights are too bright, you can reduce the opacity of the adjustment layer instead of immediately choosing a new preset.

Setting the Direction with Contrast and Desaturation
In the video, the selection ends up with a strongly desaturated look with strong shadows, reminiscent of a Batman-style comic. A Fuji-like filter also convinces in comparison. What matters is that you don't adopt the preset blindly. Reduce the opacity so that the light tones don't blow out, and deliberately leave the dark areas strong. This way the look stays characteristic without overloading the photo.


Adding a Gradient Map
Then you create an additional color mood via a gradient map. Set the layer to "Soft Light" and open the gradient settings. There you reduce the roughness and the smoothness to zero, set the color model to HSB, and click the randomize button. Each click delivers a new color combination. Save the variants you like and compare them until one of them harmonizes with your look. If a variant remains too blue or too pink, you can adjust the color of individual color stops afterward.

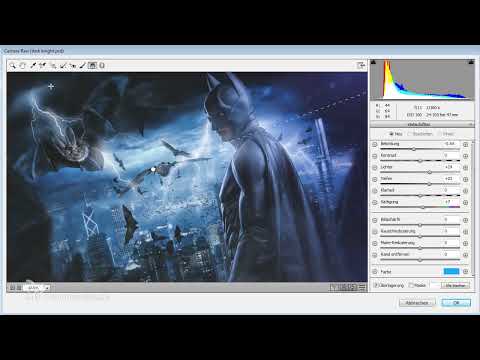
Fine-Tuning with Camera Raw and Graduated Filter
Now merge all layers and open the Camera Raw filter. There you work with a graduated filter, which you place purposefully over the image. Choose a color that fits the look, such as a violet tone in the shadow area. Adjust the exposure, saturation, and highlights only in small steps. A second graduated filter can add a yellow tone or a green cast. Check again and again that the highlights don't blow out and the shadows don't become too heavy. If a step doesn't work, you simply undo it. That's part of every edit.


Darken the corners with a radial gradient
To draw the eye to the center, you copy the layer and set a radial gradient in the Camera Raw filter that darkens the outer areas. Drag the gradient so that it covers the edge but leaves the main subject free. If the effect is too strong, reduce the opacity or draw the gradient again. Make sure that bright areas such as the flash retain their luminosity.

Refine the image crop
With the crop tool, you narrow the image section a little so that the action is more strongly centered. Rotate the image slightly if needed until the horizons are right. After cropping, there may be small flaws at the edge, for example missing pixels or leftover light. You fix these by copying image areas or reworking them with the healing brush. Afterwards, check the result as a whole, because the crop often changes the entire effect.


Sharpen the image with a high pass
Finally, you duplicate all layers into a new layer. Set the blend mode to "Soft Light" and apply the High Pass filter via "Filter", "Other". Choose a very small radius of about three pixels. Since you are working in Soft Light, you don't see a preview in the High Pass dialog, but the layer shows you the effect in the image. Hide it and show it again for comparison. The sharpening should hardly be noticeable. If you overdo it, unattractive edges appear, and your carefully built look seems overworked.

Check the finished image
When all the layers work together, you reduce everything to a single layer once more and view the result from a bit of a distance. Compare it with the original image from the camera. You will see how many small interventions together have shaped the mood.

Summary ??? Photoshop image look: lens flare, dust and color look step by step
You have seen how a credible atmosphere can be created with few means. The lens flare gains through the "Screen" blend mode and a clean tonal correction, the dust arises from a brush that is carefully configured and then thinned out. The color look develops step by step from Color Lookup, Gradient Map, Camera Raw and graduated filter, and the high pass finally provides subtle sharpness.
The most important idea from the video is being systematic. With every step, consider what you are changing right now and why. Work your way toward the image step by step, check the tonal values again and again, and invest practice. Then images emerge that look like more than a single filter could ever achieve.
FAQ
Question: Why does a milky haze remain visible after the "Screen" blend mode?Answer: The background of the lens flare is usually not pure black, but a very dark gray. A tonal correction in a clipping mask, where you click on this area with the black eyedropper, reliably removes the haze.
Question: Do I need a stock image for the dust?Answer: No. With a hard brush, Shape Dynamics enabled for size and a high scattering, particles can be drawn directly. Afterwards, you remove the excess with the eraser.
Question: Why do you blur the dust?Answer: The Gaussian Blur takes the hard edge off the dots and thus turns them into dust particles that float out of focus in the foreground. Afterwards, you reduce the opacity so that the effect stays subtle.
Question: How do I prevent the color look from appearing too strong?Answer: Reduce the opacity of the adjustment layers and work in small steps. Regularly check the bright and dark areas so that nothing blows out or gets crushed.
Question: How do I use the high pass correctly?Answer: Duplicate the image layer, set it to "Soft Light" and apply a high pass with a small radius, about three pixels. The sharpening should be barely visible in the result.
Question: How long does such an edit take?Answer: That depends heavily on the subject and the level of detail. In the video, an editing time of about 8 to 15 hours is mentioned, because many layers and fine adjustments come together.

