Photoshop is a powerful tool that offers you a variety of options to edit your images. One of the most effective means to give photos the desired mood is the Camera-RAW filter. In this tutorial, I will show you how you can achieve impressive color looks with this filter.
Key Insights
- The Camera-RAW filter has been integrated since Photoshop CC and allows for professional-level image editing.
- By duplicating layers, you can make adjustments at any time without affecting the original image.
- Split toning allows you to adjust the colors of the light and dark areas of the image independently.
- With gradient and radial filters, you can adjust specific areas of the image and create creative color gradients.
Step-by-Step Guide
First, you need to open the image you want to edit in Photoshop. Pay attention to the settings and options that the Camera-RAW filter offers you.
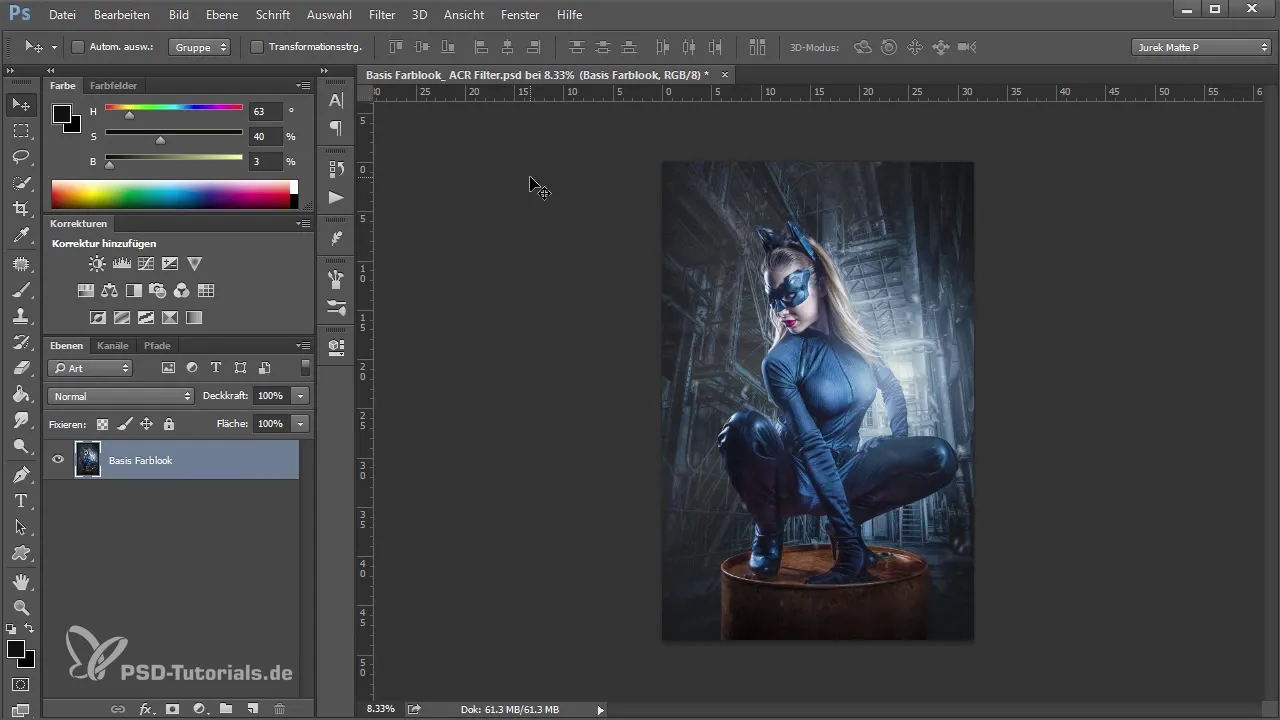
To ensure that you can work flexibly with the Camera-RAW filter, I recommend duplicating the background layer. You can do this by pressing "Control"+"J" or "Command"+"J" on the Mac. On this new layer, you will apply the color looks and edit the copy.
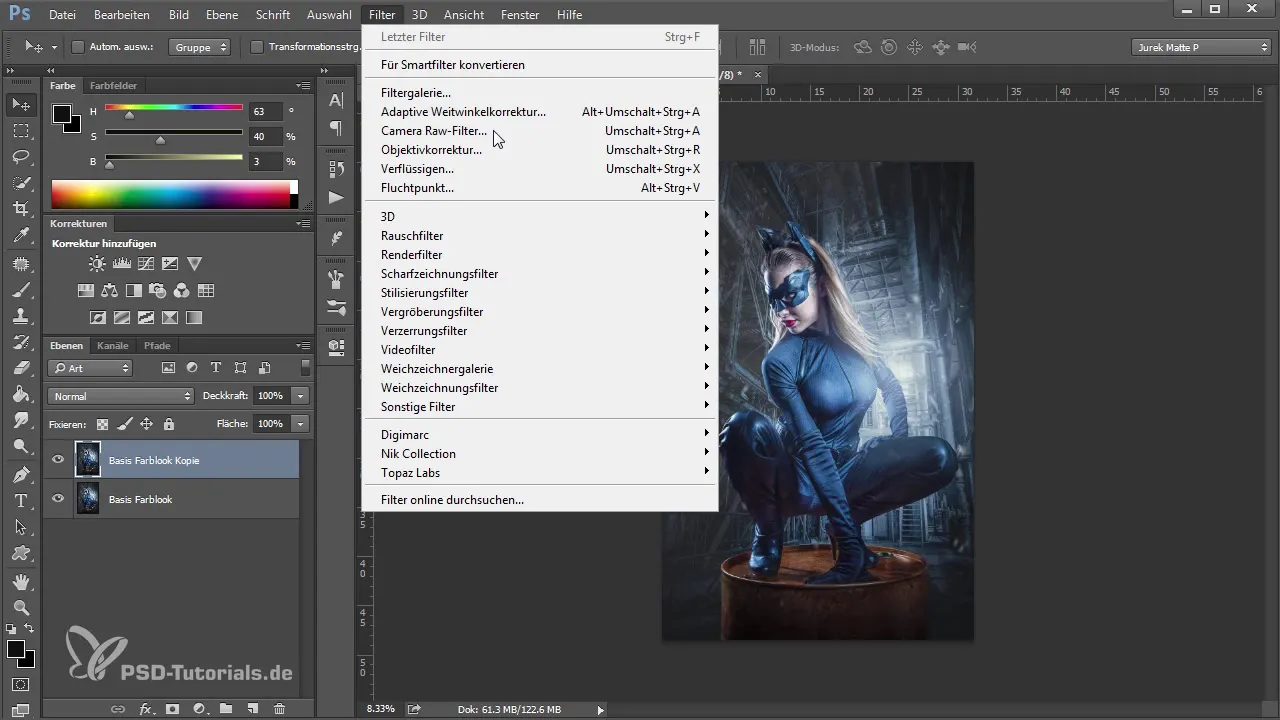
Now go to "Filter" and select the "Camera RAW Filter." After clicking, the Camera-RAW dialog will open. You will notice that the interface looks familiar if you have already worked with Camera RAW. Here you have access to all the tools that help you create the desired color looks.
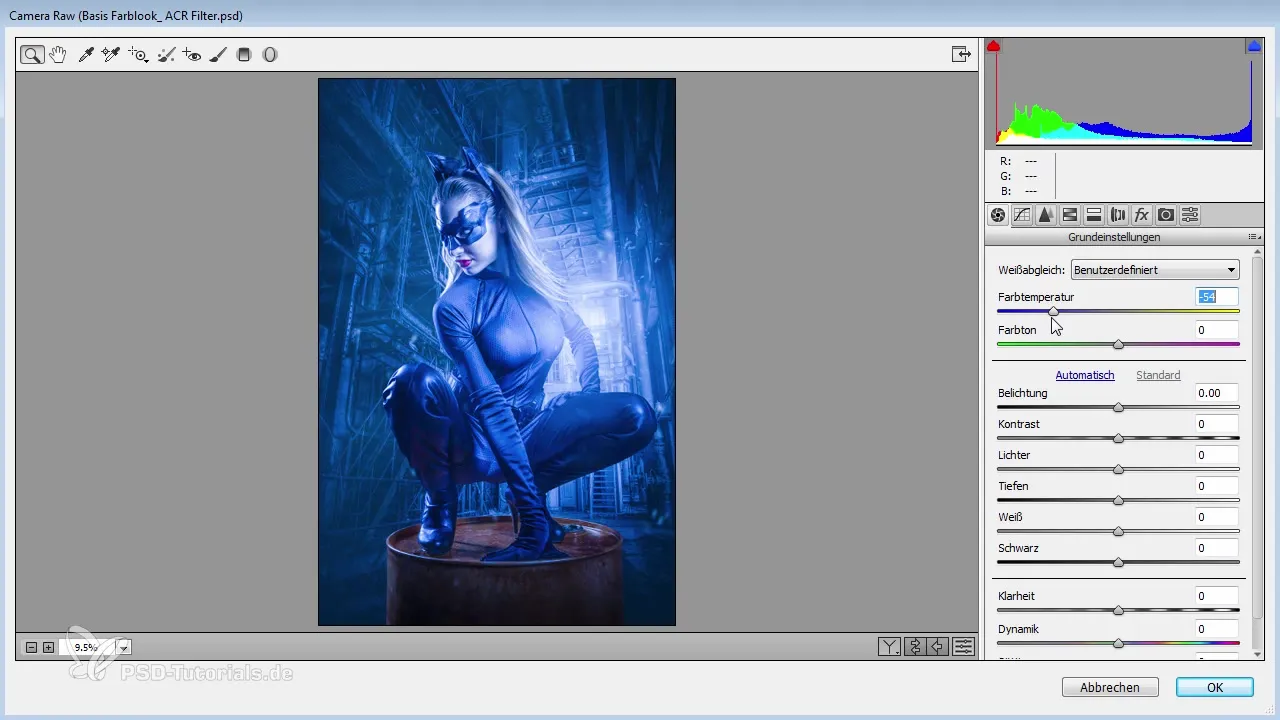
An effective tool is the adjustment panel for white balance. You can tint your image in different color hues by adjusting the temperature up or down. A cooler white balance creates bluish tones, while a warmer white balance produces reddish or yellowish color effects.
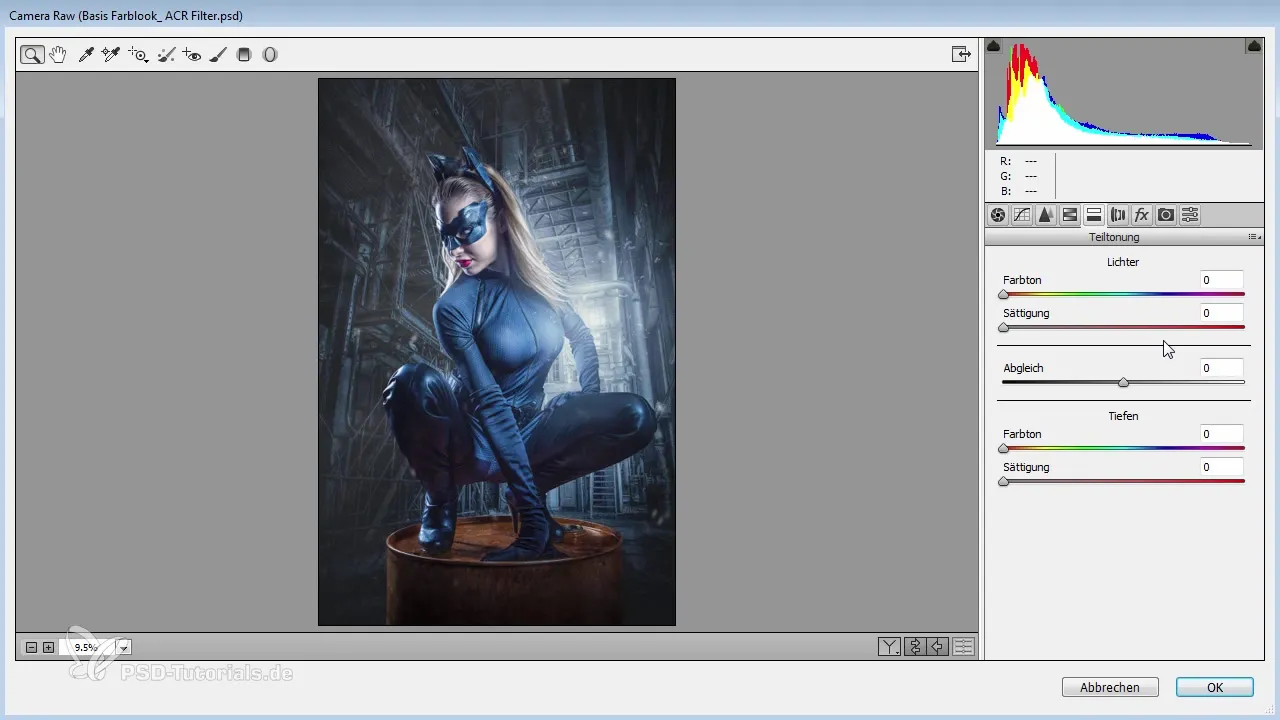
I recommend resetting the white balance initially to work with split toning. This feature gives you the possibility to color the light areas (highlights) and the dark areas (shadows) of the image independently. Start by increasing the saturation of the highlights and select a color from the palette to ideally create a soft red tone.
Then adjust the shadows as well. Here, maximize the saturation and notice how these colors manifest in the darker areas of the image. By playing with different saturations, you can achieve a superb combination of warm and cool colors.
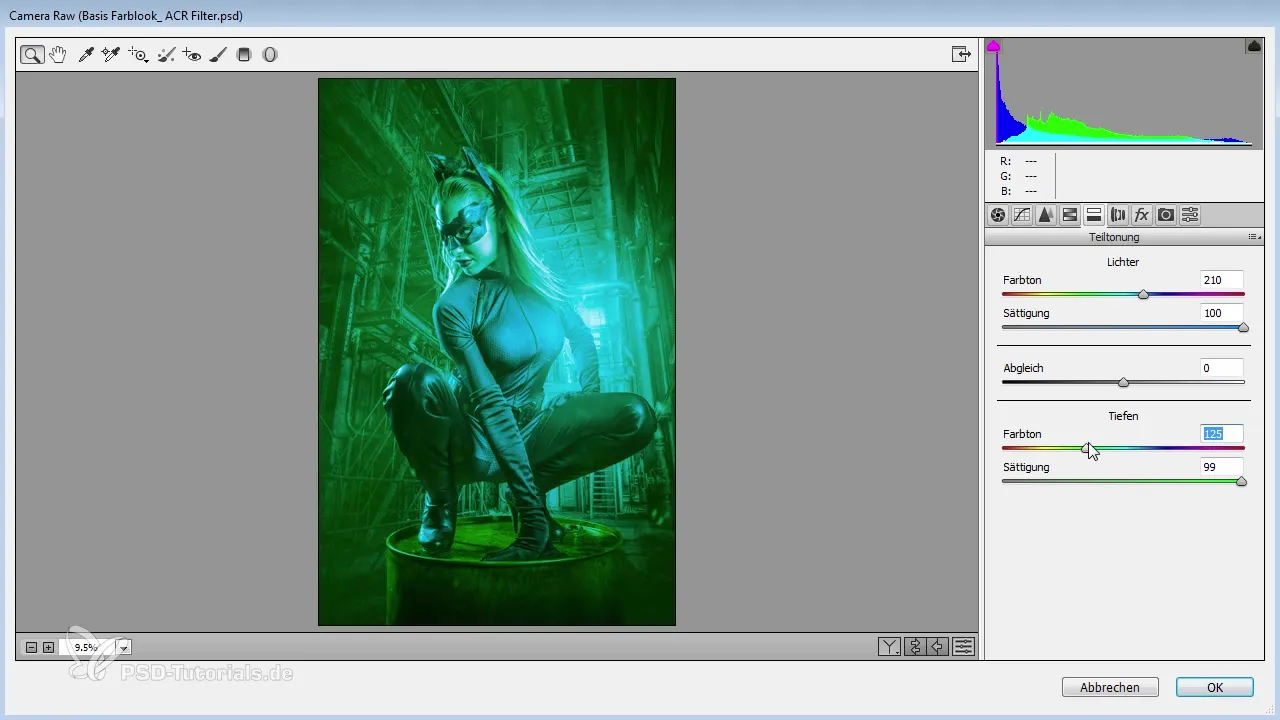
Another way to vary the color look is by using the balance slider. Experiment here with the values to achieve interesting effects. You can determine how the edges between light and dark tones are created in the image and thus influence the visual depth of the image.
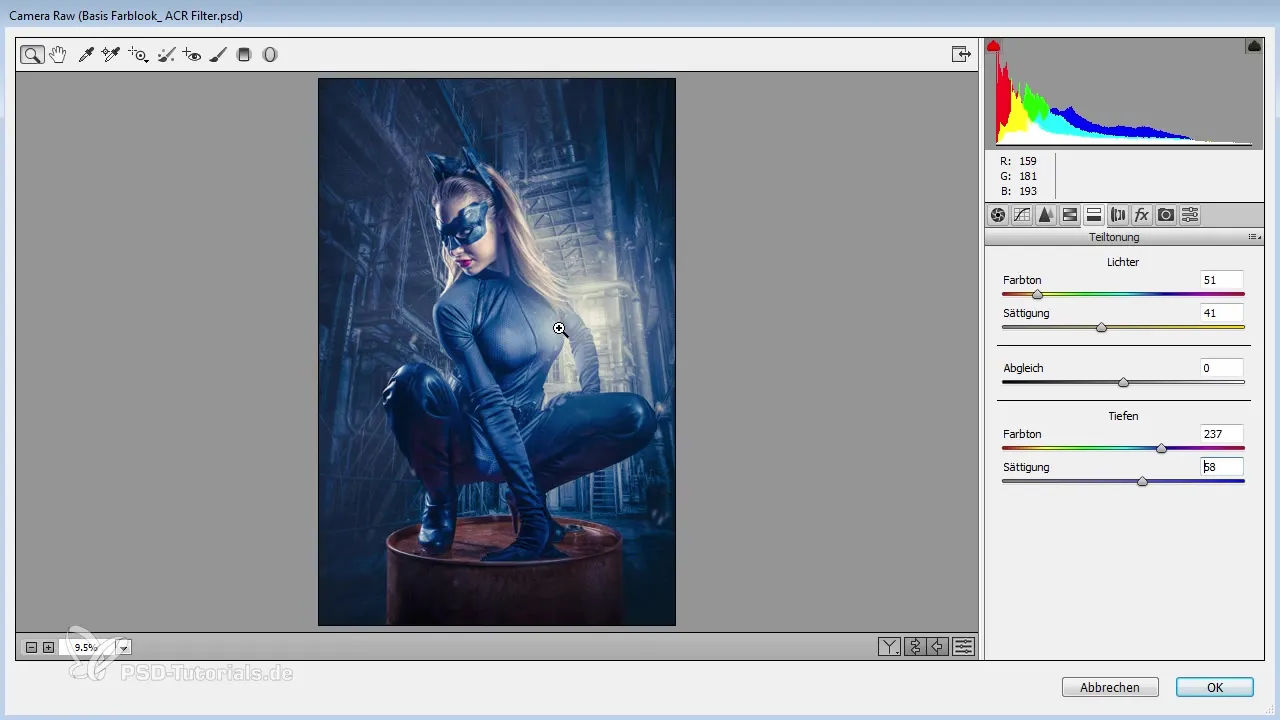
If you have found a satisfying color look, you can adjust the opacity of the layer. This allows you to adjust the strength of the changes so that the new look is harmoniously integrated into the image.
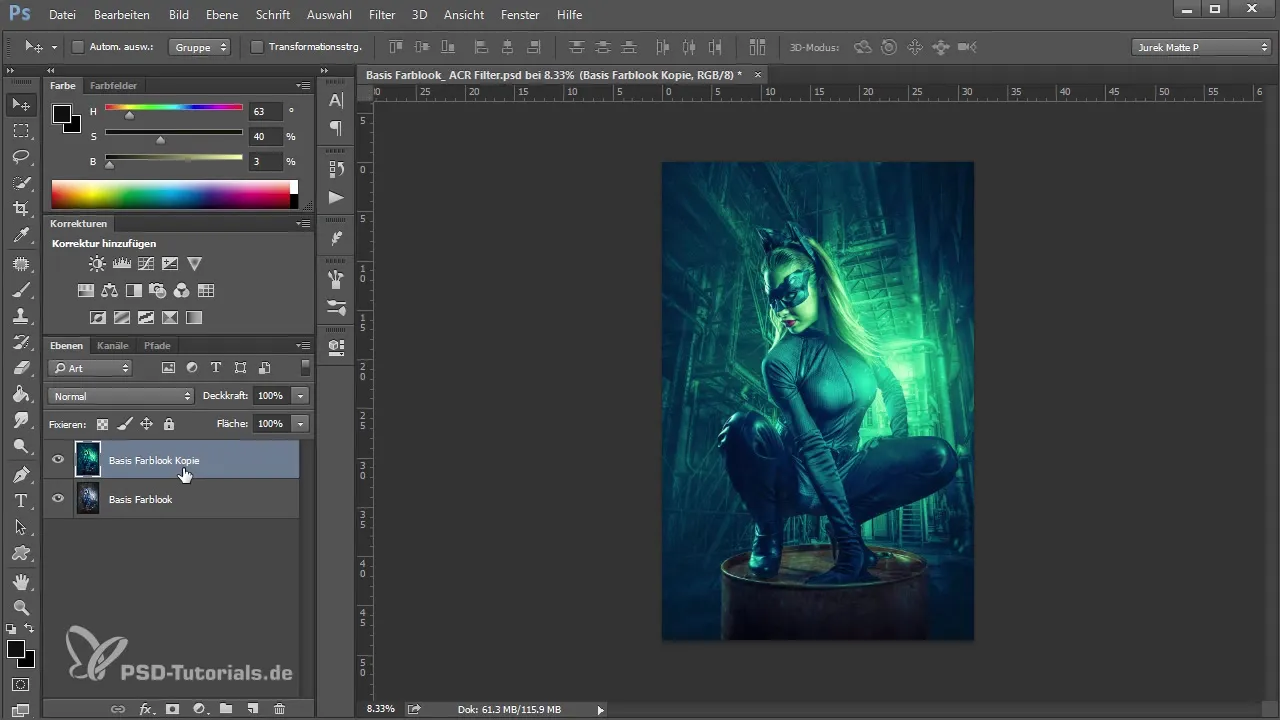
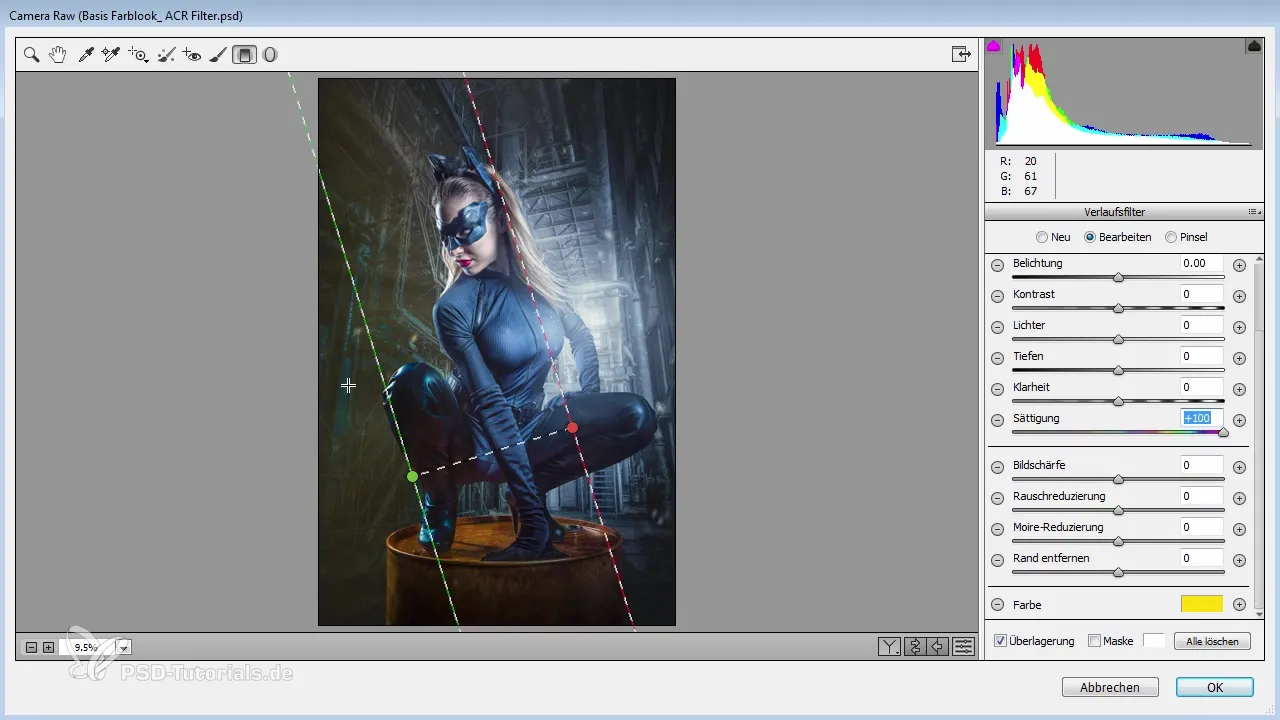
Now delete the edited layer and create a new copy to continue experimenting with a different technique. Open the Camera-RAW filter again and select the gradient filter. With it, you can apply color gradients specifically in the image to add color and intensity at certain points.
When using the gradient filter, you can adjust the color temperature as well as the exposure. Try different settings and use the option to select colors here as well to highlight specific areas of the image.
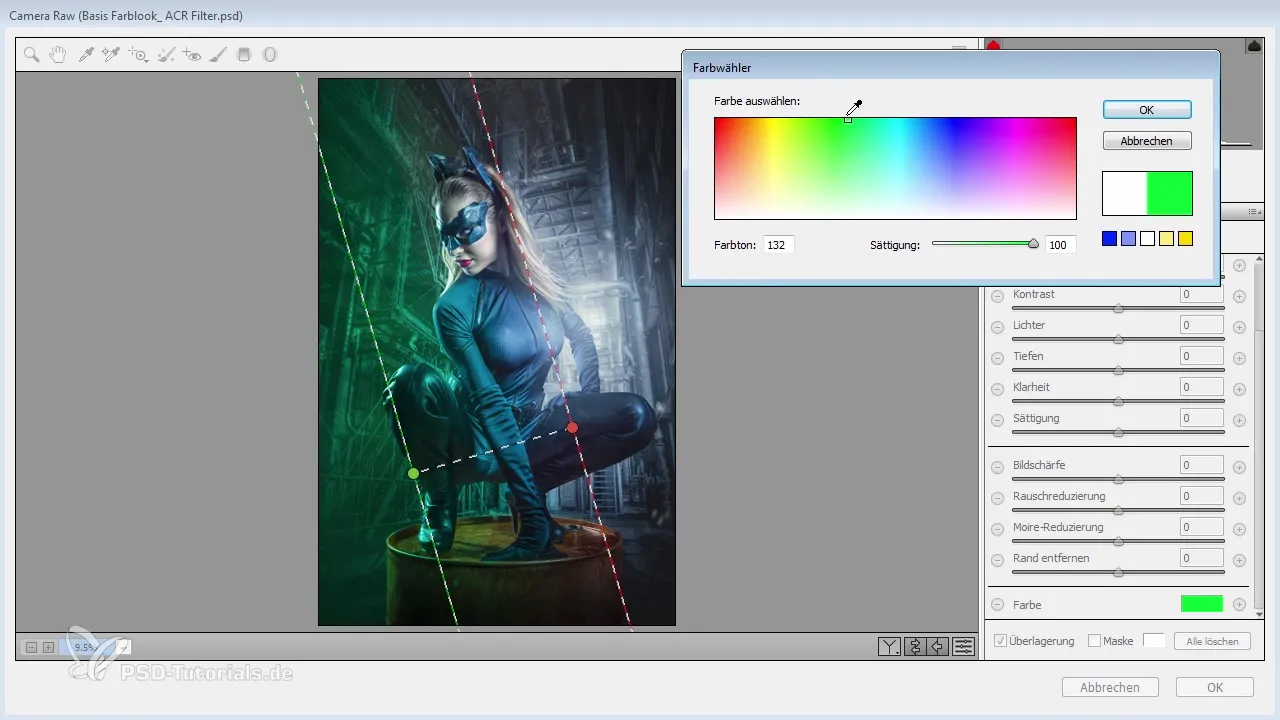
Additionally, you can experiment with the saturation of the colors used to achieve the desired effect. Reducing the saturation makes the colors appear less dominant, creating a more subtle look.
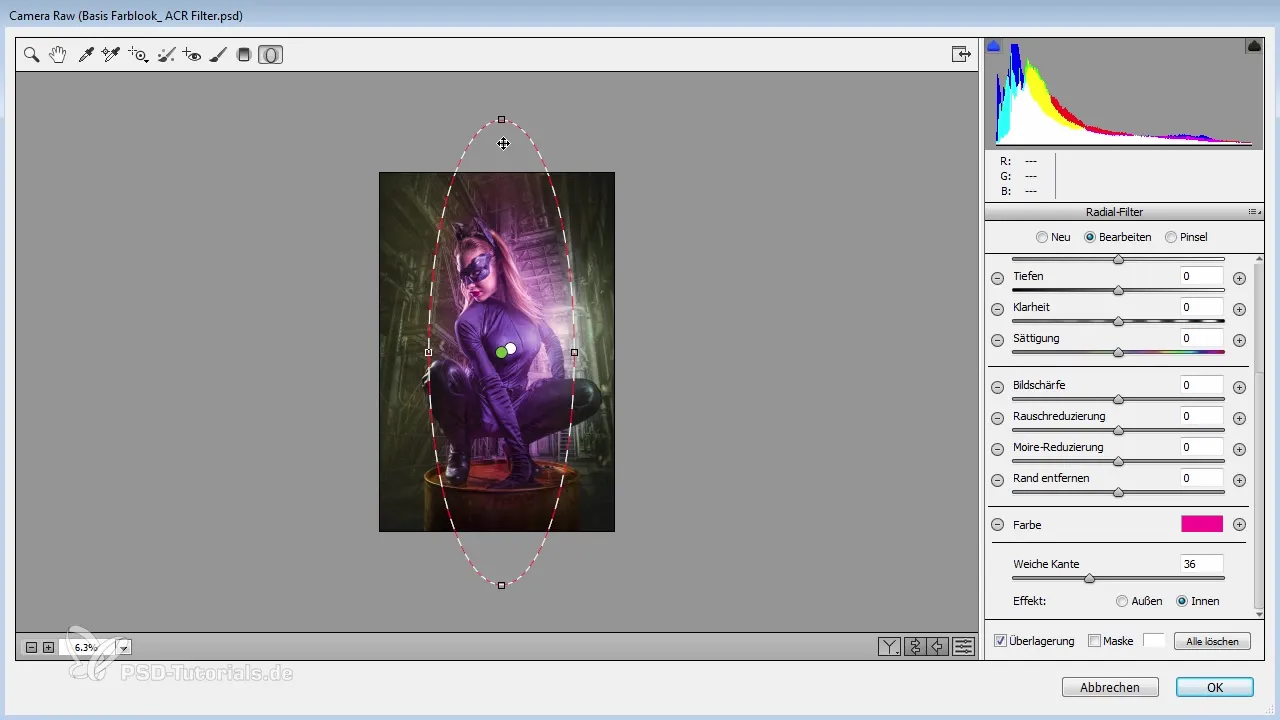
If you want to apply the radial gradient, select the corresponding filter and draw a circular gradient. This allows you to gently color or illuminate areas of the image. Here too, you can individually adjust the edge softness and other settings to create impressive effects.
By adding multiple color gradients, you can create complex and engaging color looks. Ensure that you adjust the opacity and saturation so that the result looks natural and maintains both artistic and technical quality.
In the end, it is important to always save your work as a copy. This way, you can always revert to the original image and make adjustments if necessary, without making irreversible changes.
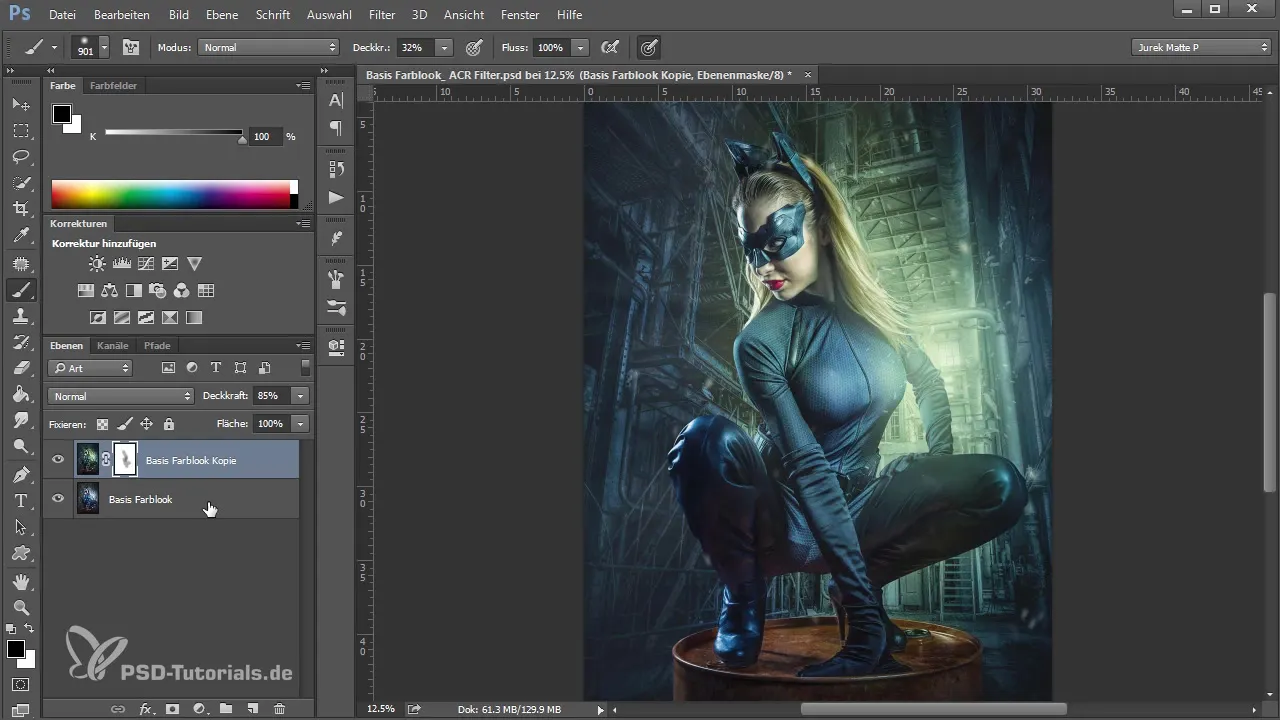
Summary – Creating Color Looks in Photoshop with the Camera-RAW Filter
With the Camera-RAW filter, you have numerous options available to create impressive color looks in your images. From split toning to gradient filters to radial adjustments – you can specifically design each part of the image and thus express your creative vision. Experiment with these techniques and find the perfect look for your images.
Frequently Asked Questions
How do I create a color look with the Camera-RAW filter?You can adjust colors for highlights and shadows using split toning and various filters such as gradient or radial filters.
What is the purpose of duplicating layers before applying the Camera-RAW filter?This way, you can make changes without altering the original image and return to it at any time.
How does split toning work in the Camera-RAW filter?With split toning, you can adjust the colors of the bright and dark areas of the image separately to achieve a unique look.
Can I use multiple filters at the same time?Yes, you can combine multiple filters, like the gradient or radial filter, to create complex color looks.
What do you recommend when working with saturation?Be careful not to increase the saturation too much to avoid an exaggerated effect. Reduce it if necessary for a subtler look.


