The art of image composition and editing requires a trained eye and the ability to recognize and optimize details. In this guide, we will analyze the images from the first shoot in detail and give you valuable tips on how to optimize the results in Photoshop. You will learn how to work with light, perspective, and image composition to get the best results from your photos.
Key Insights
- The proper lighting setup is crucial for the image effect.
- Perspective and image composition strongly influence the perception of the image.
- Post-processing in Adobe Camera Raw can significantly enhance image quality.
Step-by-Step Guide
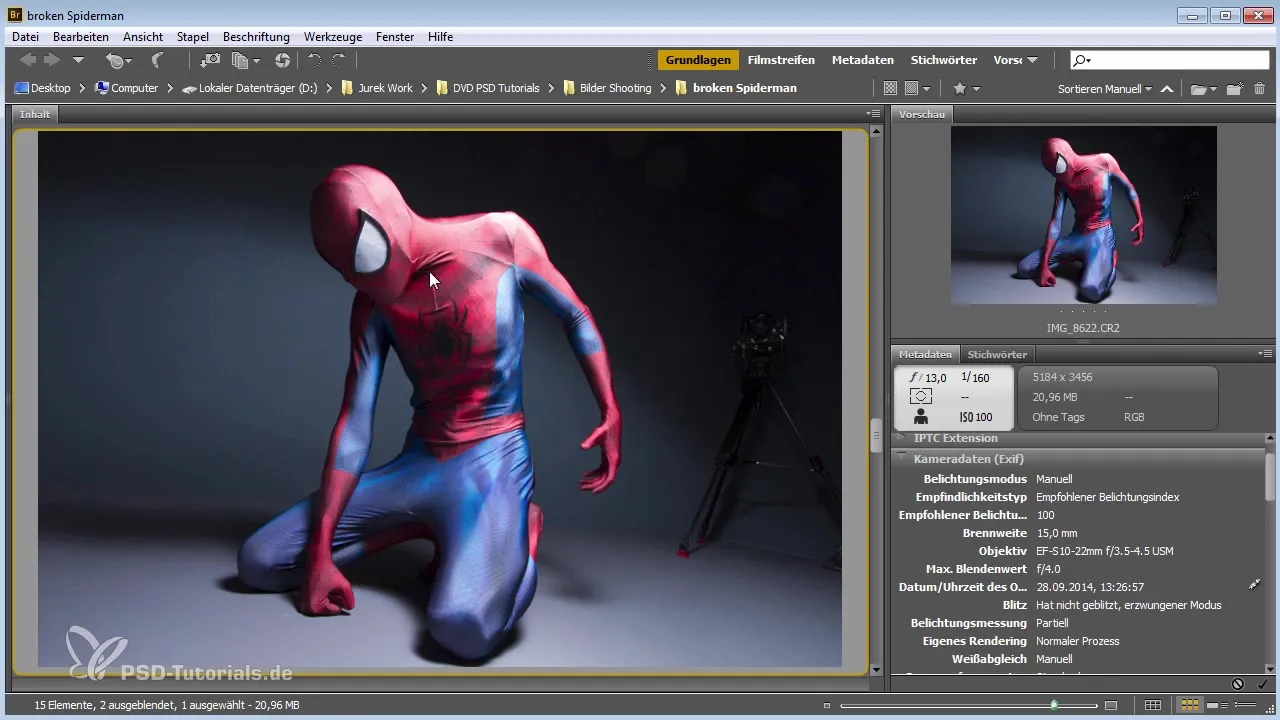
Start with the lighting capture of your first image. Here, the lighting setup is crucial. The use of rim lighting that illuminates the arm area gives your image a special drama. However, it is important to ensure that the image does not remain too dark. A basic understanding of exposure can help you design the image correctly.
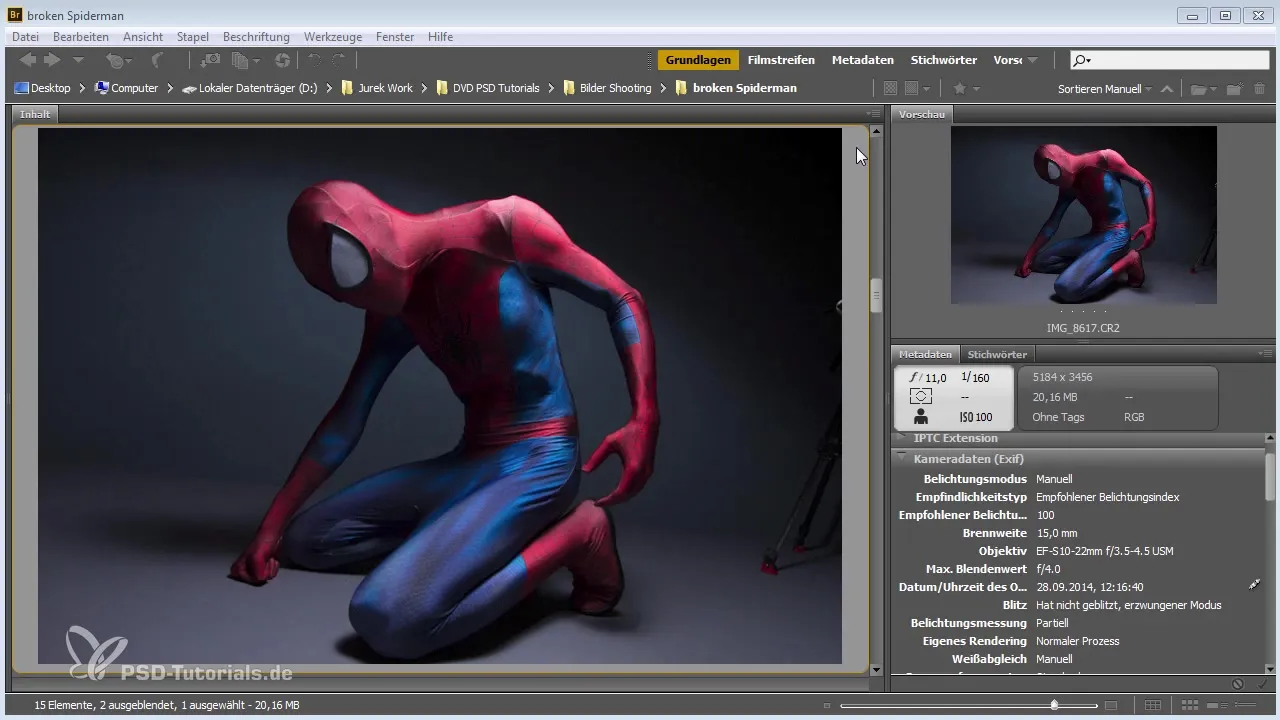
In the next step, we analyze the details of the shadows created by the platform above the model. Make sure that these shadows create the desired effects and do not diminish the overall impression of the image. If necessary, you can brighten the image in Adobe Camera Raw to lighten the shadow areas and make the image appear more harmonious.
Now let's address the model's posture. A good body posture is essential for the overall composition. Ensure that no disturbing overlaps between body parts are visible. In this case, the arm should not be stretched too far forward, as this distracts the viewer. Adjust the position to achieve a harmonious overall image.
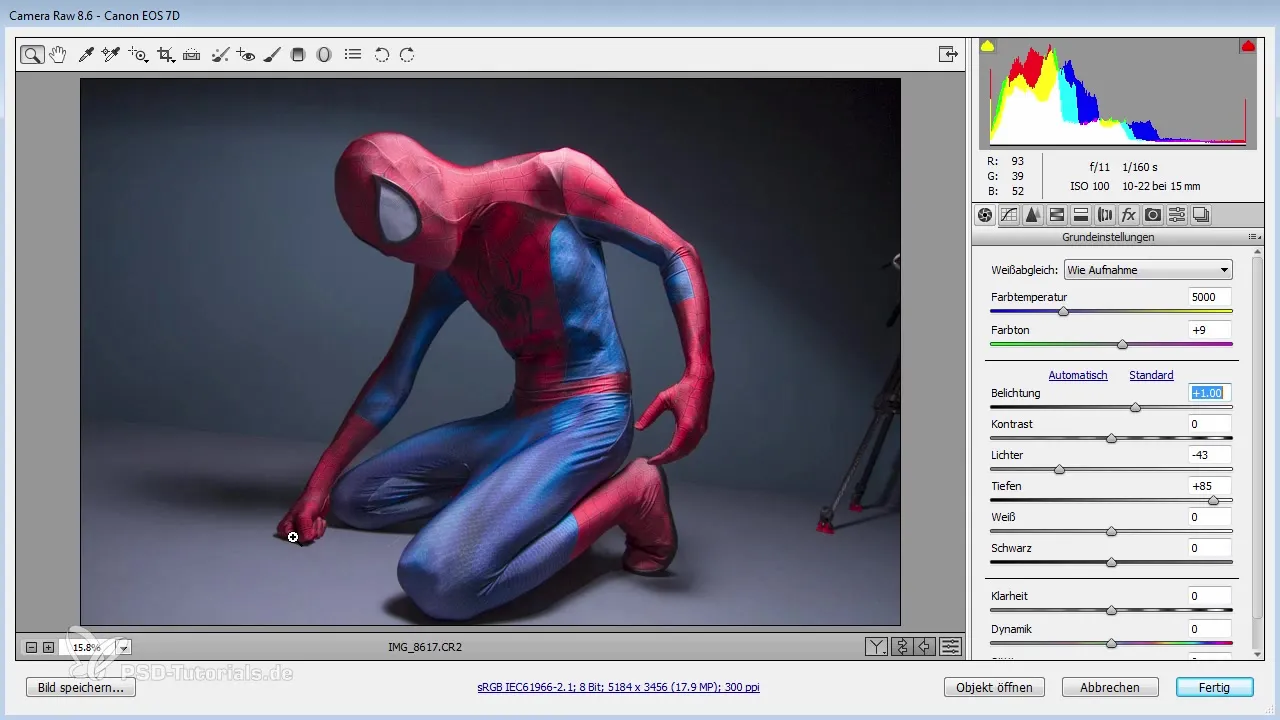
The second image shows that perspective is crucial. Here, the model's arm is closer to the body, which is an improvement. Note that the lighting here can still be optimized. If the image is too dark, it is advisable to correct the exposure in Adobe Camera Raw afterward. Brighten the highlights and deepen the shadows to achieve a balanced image.
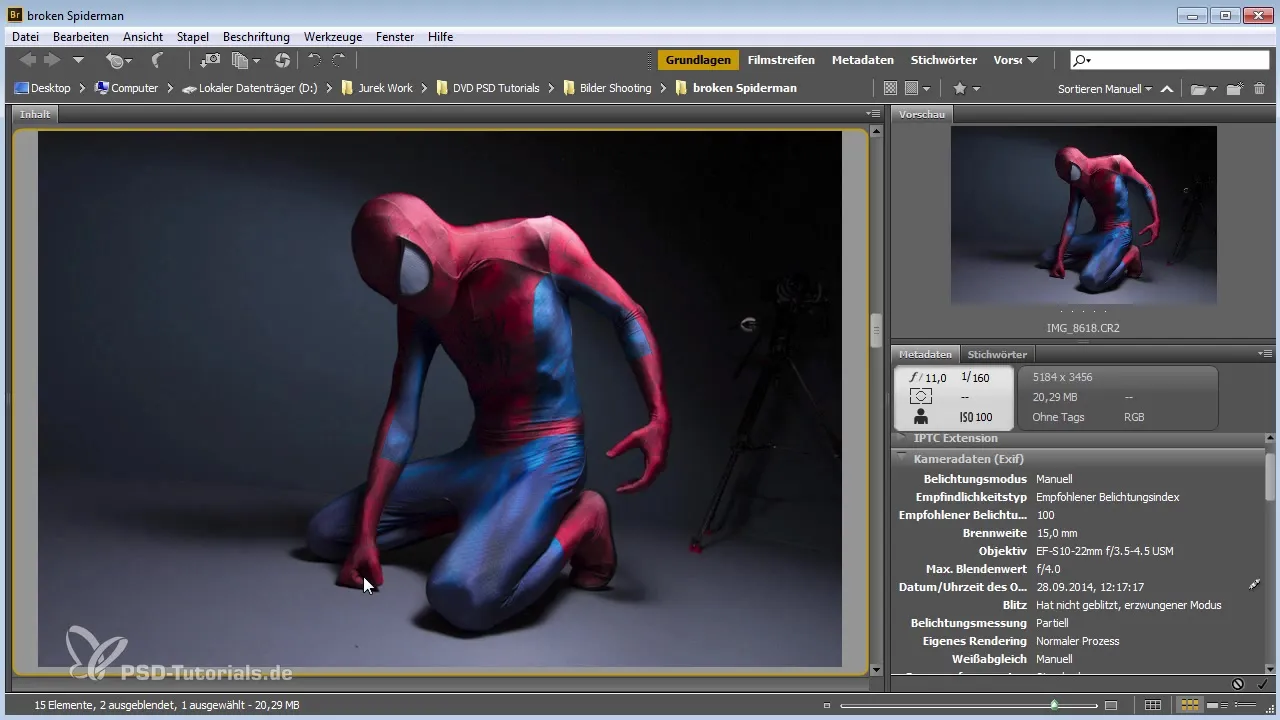
Now we come to the next images, where the perspective needs improvement. For example, if the leg appears too bulky, it might be sensible to take the shot from a higher angle. This will give you a flattering perspective that adds more dynamism to the image without overloading it.
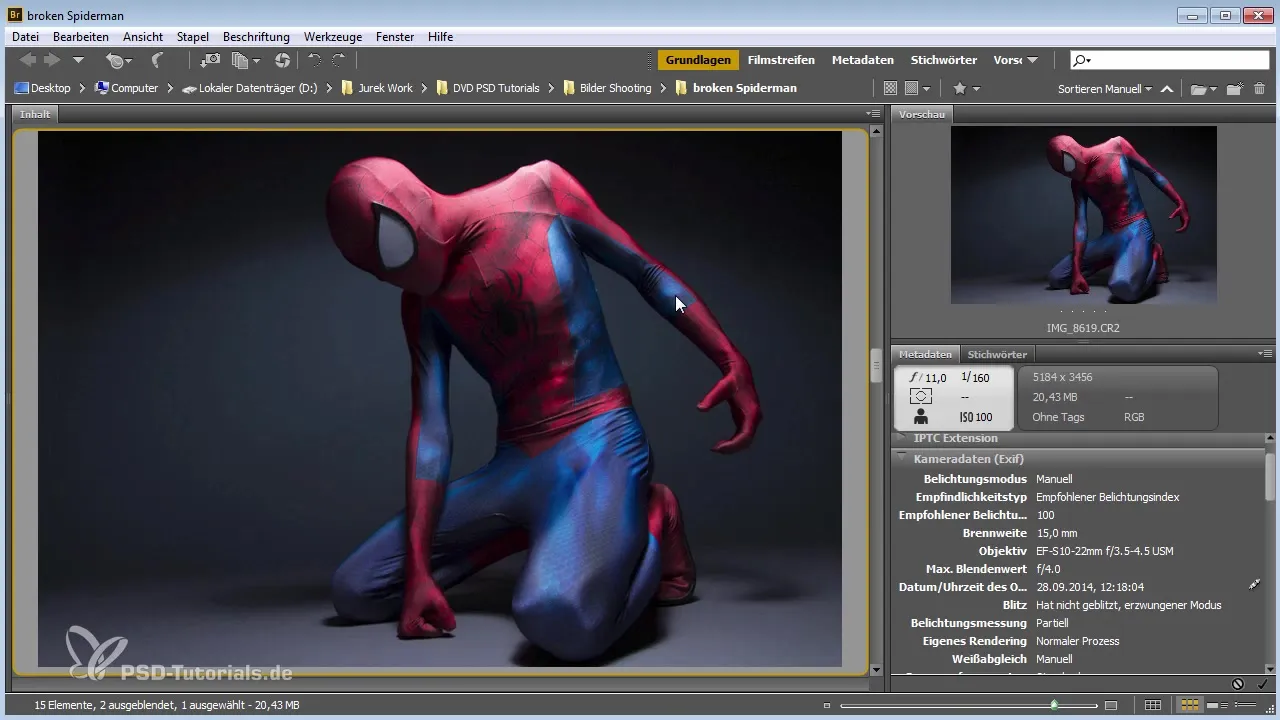
In one of the images, we have already positively influenced the exposure. When highlights are brightened, you can lighten the shadow areas, which improves the contrast for the viewer. You will notice that a small adjustment in exposure can have a significant impact on the overall effect of the image. Here, the hand position is also crucial for the image effect. It should not be too straight to create more tension.
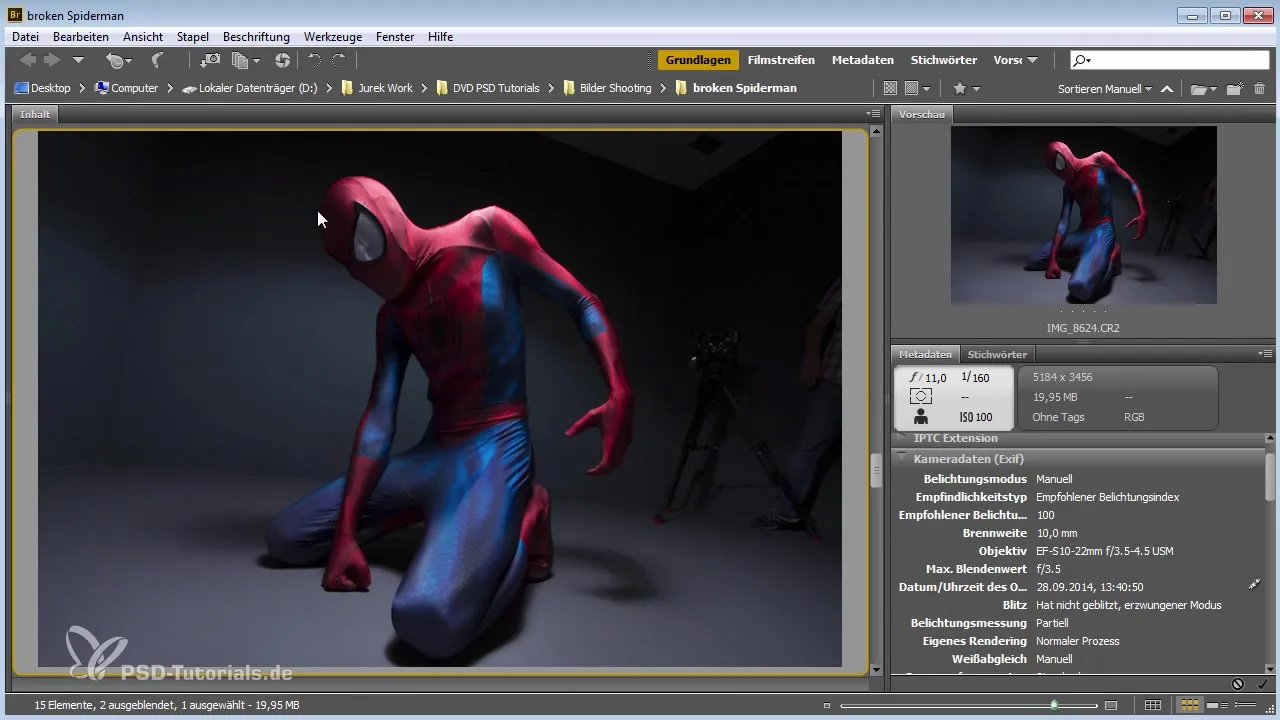
Next, you will try a focal length of 10 mm in another image. Here it becomes apparent that this focal length distorts the leg unfavorably. The goal should be to design the image so that it represents the body's proportions correctly and looks harmonious.
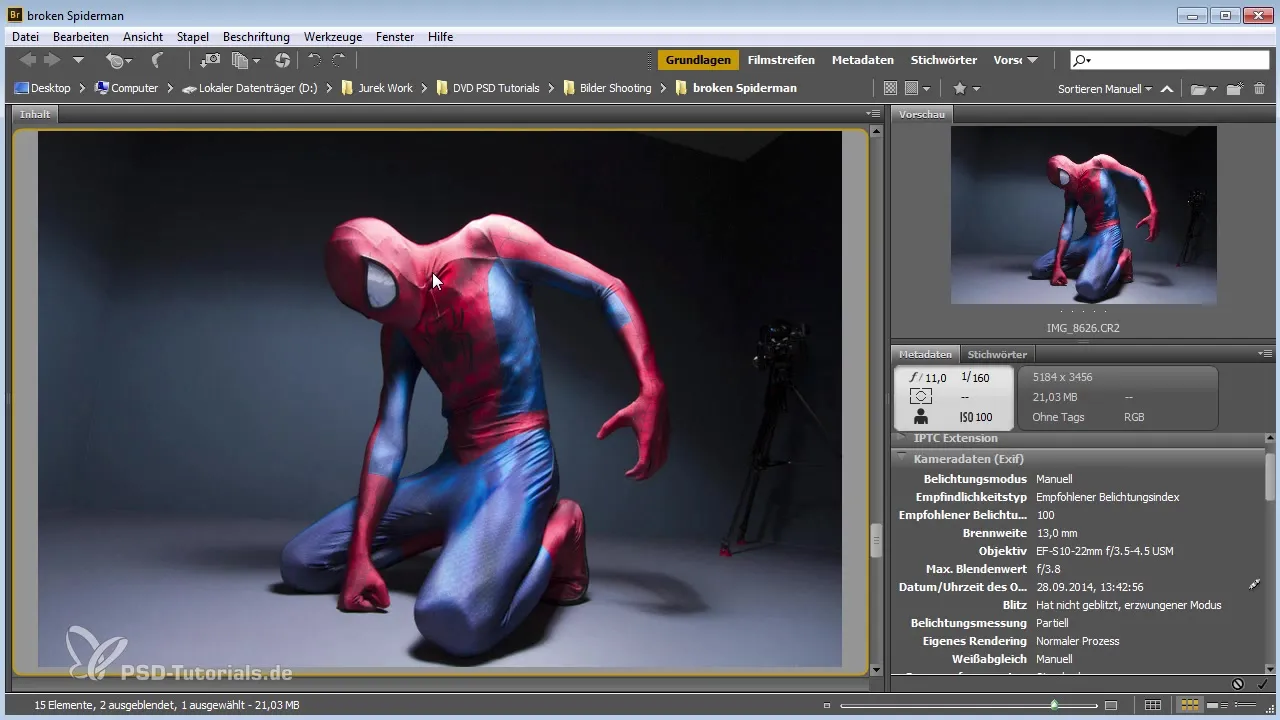
Another image shows a perfect body posture, even though the brightness of the image suffers slightly. Here it is important to work with the interplay of light. Ensure that shadows do not fall on the face and try to create some tension through body posture. Make another fine adjustment of the lighting conditions to keep the image bright and dynamic.
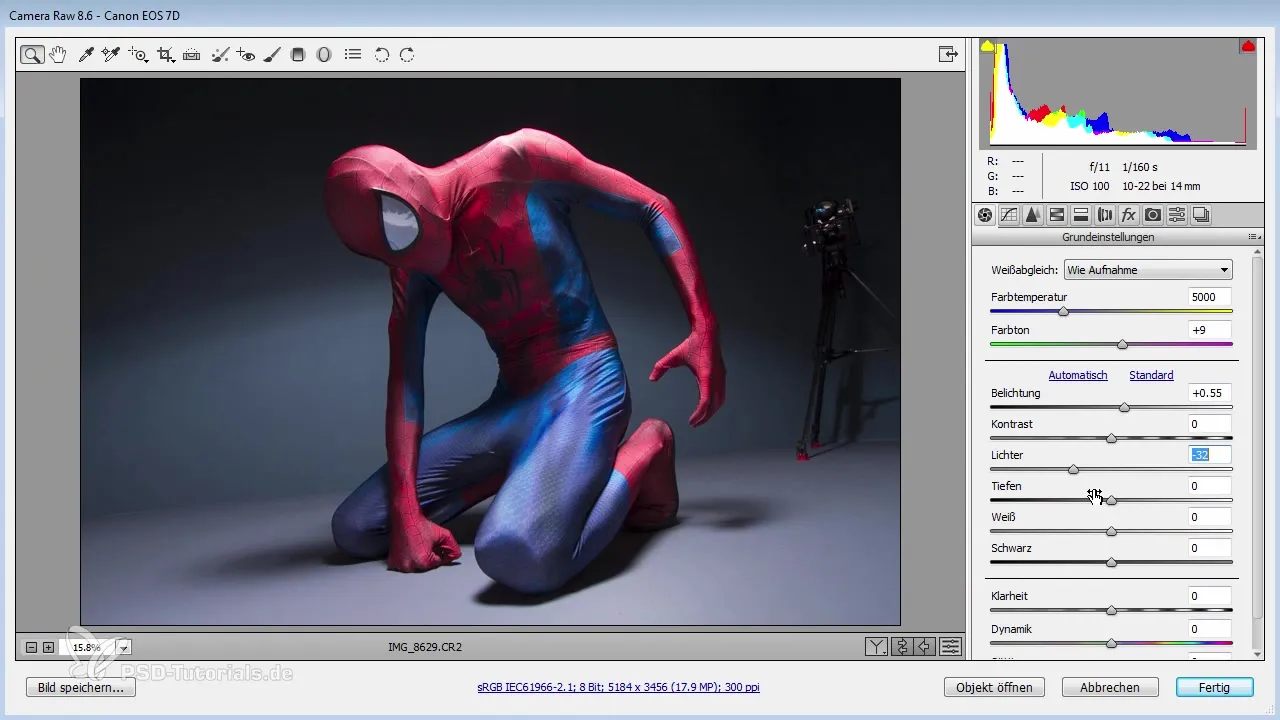
In the final image analysis, we test some settings in Adobe Camera Raw. Here, you should compare the preview before and after editing. Play with brightness and contrast to improve the appearance of the faces and the overall effect of the image. These adjustments will help you create an image that appears harmonious and impressive.
Summary - Guide to Image Analysis in Photoshop: Set 1
Throughout this guide, you have learned how to analyze various aspects of image composition in Photoshop and Adobe Camera Raw. From the proper handling of light and shadows to capturing perspective and ultimately optimizing through post-processing – all these elements contribute to creating aesthetically pleasing images. Use these insights to improve your images and further develop your skills in image editing.
Frequently Asked Questions
How can I adjust the exposure in Adobe Camera Raw?Use the sliders for highlights and shadows to fine-tune the exposure.
What is the best distance for portrait shots?A distance of 1 to 3 meters is often ideal to balance distance and perspective.
How can I avoid disturbing shadows?Ensure to use light from different angles to minimize unwanted shadows.
How much influence does the focal length have on the image?A focal length that is too short can lead to distortions that make the image appear unflattering.
What programs are recommended for post-processing?Adobe Camera Raw and Adobe Photoshop are the most common programs for image editing and optimization.


