
Image compositing and perspective in Photoshop: Batman-style artwork

- Learn how to create fantastic images in 13 hours of video training
- Everything included: from the idea to the shoot to the final composing
- Learn and skillfully apply Photoshop techniques for breathtaking artwork
- By digital artist Jurek Gralak - a master of his trade!
- Including the original recordings (photographs) for reworking the project
Experience Jurek Gralak's workflow in this tutorial and learn how to follow the Way of Art in Photoshop yourself.
53 Videos, 806 minutes
Image concept and shooting
The Way of Art in Photoshop: Image concept and shooting - Intro
Introduction to the training. The trainer, Jurek Gralak, introduces himself and gives a brief overview of the training content.
The Way of Art in Photoshop: Image concept and shooting - Inspiration
Our everyday lives are full of inspiration, we just have to learn to recognize it. The internet also offers many opportunities to find inspiration. In this video training, Jurek shows which platforms he uses.
The Way of Art in Photoshop: Image Concept and Shooting - Sketching Ideas
Sometimes it is useful to capture your ideas in a short sketch. This video training shows how you can easily capture your ideas using Photoshop.
The Way of Art in Photoshop: Image concept and shooting - photographing or snapping?
Taking the right photos is much more than just pressing the shutter button. This video training shows what you need to look out for and what mistakes Jurek has already made.
The Way of Art in Photoshop: Image concept and shooting - Equipment check
You don't always need the latest and greatest technology to take a good photo. Jurek shows what kind of equipment he uses and what you should focus on.
The Way of Art in Photoshop: Image concept and shooting - Shooting set 1 "one light" setup
In this video training, Jurek shows in his studio how he creates a dramatic scene with just one light source, which can then be perfectly integrated into a composing.
The Way of Art in Photoshop: Image Concept and Shooting - Set 1 Image Analysis
In this tutorial, the images taken in the first set are discussed and analyzed once again.
The Way of Art in Photoshop: Image Concept and Shooting - Set 2 Triple Setup
Lighting with 3 flashes is a lighting setup that Jurek uses very often, as it is perfect for composings. With the help of various light shapers, a very vivid light is created, which later fits perfectly into the intended scene.
The Way of Art in Photoshop: Image Concept and Shooting - Set 2 Image Analysis
In this video training, the images from the second set are discussed and analyzed again.
The Way of Art in Photoshop: Image Concept and Shooting - Set 3 Pincer Light
Tong light is ideal for dramatic looks. Two flashes are used here and a reflector is also used to brighten up areas that are too dark.
The Way of Art in Photoshop: Image Concept and Shooting - Set 3 Image Analysis
In this video training session, the images captured in set 3 are discussed and analyzed once again.
The Way of Art in Photoshop: Image concept and shooting - photographing or snapping?
12 min OpenThe Way of Art in Photoshop: Image concept and shooting - Shooting set 1 "one light" setup
14 min OpenThe techniques
The Way of Art in Photoshop: The Techniques - Image Selection
Choosing the right image from a shoot is sometimes not that easy. Here, Jurek shows how he goes about it and what criteria he pays attention to.
The Way of Art in Photoshop: The Techniques - RAW Development
RAW development is used to optimize the original image for later composing. In this video training, Jurek shows his workflow and what he pays attention to.
The Way of Art in Photoshop: The Techniques - Error Corrections
There are always a few little things to optimize in most pictures. In this video training, Jurek shows how he makes these corrections using a few tools and techniques.
The Way of Art in Photoshop: The Techniques - Shape Corrections - Part 1
You often have to make a few shape corrections to the model. In this tutorial, Jurek shows which techniques and options he uses for this.
The Way of Art in Photoshop: The Techniques - Shape Corrections - Part 2
You often have to make a few corrections to the model's shape. In this video training session, Jurek shows which techniques and options he uses for this.
The Way of Art in Photoshop: The Techniques - Gaining Details
Micro-contrasts make a picture look more graphic and are a first step towards making the picture look more uniform. Jurek shows various techniques that can be used to achieve such details.
The Way of Art in Photoshop: The Techniques - Clipping
Jurek attaches great importance to a clean cut-out. Jurek therefore usually works with the path. The procedure is explained in this video training. A second example is used to explain the new focus selection introduced in Photoshop CC.
The Way of Art in Photoshop: The Techniques - Using Brush Tips
The brush is probably the most widely used tool in Photoshop. The setting options are enormous. Jurek shows you how to use this tool correctly in this video training.
The Way of Art in Photoshop: The Techniques - Cloud Brushes
Photoshop offers us the possibility to create our own brush tips and work with them. Jurek shows here how you can create your own cloud brush with simple means.
The Way of Art in Photoshop: The Techniques - Rons brushes
At DAZ 3D you can buy really great brushes: the Rons Brushes. Jurek often works with these brushes, which in his opinion are probably the best brushes currently available on the market for composings.
The Way of Art in Photoshop: The Techniques - Preparing for the Color Look
In order to give the image a color look, the elements of the compositing must first be perfectly coordinated. In this video training, Jurek shows you what you need to consider here.
The Way of Art in Photoshop: The Techniques - Color look over a color area
A color look can be easily created with the color area adjustment layer. You can also use the brush to easily create a color look by applying different colors.
The Way of Art in Photoshop: The techniques - color look via gradient conversion
There are great ways to create a color look with the gradient and the gradient conversion. Jurek shows you how this works in this video training.
The Way of Art in Photoshop: The Techniques - Color Look via Camera Raw Filters
Another great way to create a color look is the Camera Raw filter. This filter offers various ways to add color to the image.
The Way of Art in Photoshop: The Techniques - Source Material for Backgrounds - Part 1
There are various ways to obtain source material for backgrounds. In this tutorial, Jurek shows which options he uses and where he sources background material.
The Way of Art in Photoshop: The Techniques - Source Material for Backgrounds - Part 2
There are various ways to obtain source material for backgrounds. In this video training, Jurek shows which options he uses and where he sources background material.
The Way of Art in Photoshop: The Techniques - Texture Overlay - Part 1
The first video on texture overlay: Texture overlay is a very important technique when creating composings. Using layer modes and textures, Jurek shows in this video training how this works and what to look out for.
The Way of Art in Photoshop: The Techniques - Texture Overlay - Part 2
Second part on texture overlay: Texture overlay is a very important technique when creating composings. Using layer modes and textures, Jurek shows in this video training how this works and what to look out for.
The Way of Art in Photoshop: The Techniques - Texture Overlay - Part 3
Texture overlay is a very important technique when creating composings. Using layer modes and textures, Jurek shows in this video training how this works and what to look out for.
The Way of Art in Photoshop: The Techniques - Merging Model and Background
After inserting the background, a few adjustments still need to be made so that the model doesn't look "inserted" into the picture. Jurek shows you a few tricks to make the model blend in with the background.
The Way of Art in Photoshop: The Techniques - Introduction to 3D with Photoshop
A lesser known area in Photoshop are the 3D functions. This video training briefly explains the 3D interface in Photoshop.
The Way of Art in Photoshop: The Techniques - Adding Ambient Light
Ambient light is an important function in the 3D area. This allows us to simply illuminate our object with the colors of the surroundings and thus integrate our 3D object perfectly into the image.
The Way of Art in Photoshop: The Techniques - Modeling with SketchUp Part 1
The 3D program SketchUp is the easiest way to model a 3D object. In this tutorial, Jurek shows you how to create an object using the software.
The Way of Art in Photoshop: The Techniques - Modeling with SketchUp Part 2
The 3D program SketchUp is the easiest way to model a 3D object. In this video training, Jurek shows you how to easily create an object using this software.
The Way of Art in Photoshop: The techniques - Integrating a 3D object into the image - Basic structure
In this chapter, Jurek uses SketchUp to create an object that is then integrated into an image using Photoshop. To do this, a background is created, the object is imported and all the necessary steps are shown to turn it into a great composing. Here Jurek starts with the basic composition.
The Way of Art in Photoshop: The techniques - Integrating a 3D object into the image - Textures
In this chapter, Jurek uses SketchUp to create an object that is then integrated into an image using Photoshop. To do this, a background is created, the object is imported and all the necessary steps are shown to turn it into a great composing. In this part, the 3D objects are enhanced with textures.
The Way of Art in Photoshop: The techniques - Integrating a 3D object into the image - Fog and figure
In this chapter, Jurek uses SketchUp to create an object that is then integrated into an image using Photoshop. To do this, a background is created, the object is imported and all the necessary steps are shown to make a great composing out of it. In this part, the fog is painted into the picture and the protagonist is inserted.
The Way of Art in Photoshop: The techniques - Integrating a 3D object into the image - The final look
In this chapter, Jurek uses SketchUp to create an object that is then integrated into an image using Photoshop. To do this, a background is created, the object is imported and all the necessary steps are shown to turn it into a great composing. Finally, Jurek creates the final look.
The Way of Art in Photoshop: The techniques - color look via gradient conversion
17 min OpenThe Way of Art in Photoshop: The Techniques - Color Look via Camera Raw Filters
16 min OpenThe Way of Art in Photoshop: The Techniques - Source Material for Backgrounds - Part 1
11 min OpenThe Way of Art in Photoshop: The Techniques - Source Material for Backgrounds - Part 2
17 min OpenThe Way of Art in Photoshop: The Techniques - Introduction to 3D with Photoshop
28 min OpenThe Way of Art in Photoshop: The techniques - Integrating a 3D object into the image - Basic structure
43 min OpenThe Way of Art in Photoshop: The techniques - Integrating a 3D object into the image - Textures
16 min OpenThe Way of Art in Photoshop: The techniques - Integrating a 3D object into the image - Fog and figure
18 min OpenThe Way of Art in Photoshop: The techniques - Integrating a 3D object into the image - The final look
20 min OpenFrom the idea to the finished image
The Way of Art in Photoshop: From the idea to the finished image - RAW development
This video training lays the foundation for the upcoming composing. First, the raw file is developed and optimized for the image.
The Way of Art in Photoshop: From the idea to the finished image - liquefying and retouching
The second step is to make small adjustments and retouching work on the model. This is explained in the following video training.
The Way of Art in Photoshop: From the idea to the finished image - The clipping process
In order to be able to insert the background in a later step, the model is first cut out. This is done here using a path.
The Way of Art in Photoshop: From the idea to the finished image - Preparing the background
In this video training we change our image section and prepare the gray background for the texture overlay. The second step is to optimize the background image for compositing.
The Way of Art in Photoshop: From the idea to the finished image - Inserting the background Part 1
In this tutorial, we will insert the background elements into the image and adjust them to the image. We will also add some atmosphere to the image and insert flashes.
The Way of Art in Photoshop: From the idea to the finished image - Inserting the background Part 2
In this video training we will insert the background elements into the image and adjust them to the image. We also add some atmosphere to the image and insert flashes.
The Way of Art in Photoshop: From the idea to the finished image - Creating the foreground
In this video tutorial, we'll add a few wisps of fog in the foreground to give us a little more depth and make the image a little more uniform. We also improve the lighting situation in the background.
The Way of Art in Photoshop: From the idea to the finished image - Bats in the background
In this video training, we look at how you can add bats to your picture using brush tips and stock images. As design elements, they add dynamism and depth to the image. This time we'll focus on the bats in the background.
The Way of Art in Photoshop: From the idea to the finished image - Bats in the center
In this video training, we look at how you can add bats to your picture using brush tips and stock images. As design elements, these add dynamism and depth to the image. This time we'll focus on the bats in the center.
The Way of Art in Photoshop: From the idea to the finished image - Bats in the foreground
In this video training, we look at how you can add bats to your picture using brush tips and stock images. As design elements, they add dynamism and depth to the image. This time we'll focus on the bats in the foreground.
The Way of Art in Photoshop: From the idea to the finished image - creating details and vignettes
Now all the layers are combined, details are created using plug-ins and a vignette is created using the Camera Raw filter. We also add some highlights to the person.
The Way of Art in Photoshop: From the idea to the finished picture - painting with light
In this video training we will now use the "dodge and burn" technique to work out the contrasts and adjust the lighting situation a little.
The Way of Art in Photoshop: From the idea to the finished image - The final look
In this video training, we will first add a few disturbances to the image in the form of lens flares and flying dust. Then we will create a color look and make final adjustments.
The Way of Art in Photoshop: From the idea to the finished image - Outro
The training is now over. Thank you very much for watching!
The Way of Art in Photoshop: From the idea to the finished image - RAW development
7 min OpenThe Way of Art in Photoshop: From the idea to the finished image - liquefying and retouching
10 min OpenThe Way of Art in Photoshop: From the idea to the finished image - The clipping process
13 min OpenThe Way of Art in Photoshop: From the idea to the finished image - Preparing the background
18 min OpenThe Way of Art in Photoshop: From the idea to the finished image - Inserting the background Part 1
10 min OpenThe Way of Art in Photoshop: From the idea to the finished image - Inserting the background Part 2
21 min OpenThe Way of Art in Photoshop: From the idea to the finished image - Creating the foreground
10 min OpenThe Way of Art in Photoshop: From the idea to the finished image - Bats in the background
16 min OpenThe Way of Art in Photoshop: From the idea to the finished image - Bats in the center
22 min OpenThe Way of Art in Photoshop: From the idea to the finished image - Bats in the foreground
17 min OpenThe Way of Art in Photoshop: From the idea to the finished image - creating details and vignettes
16 min OpenThe Way of Art in Photoshop: From the idea to the finished picture - painting with light
16 min OpenThe Way of Art in Photoshop: From the idea to the finished image - The final look
24 min OpenExamples of use
-
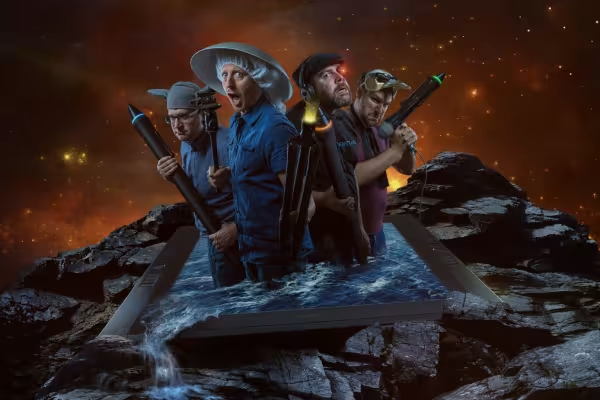 Example: Acquire knowledge that leads to results that even Hollywood would make eyes at.
 -
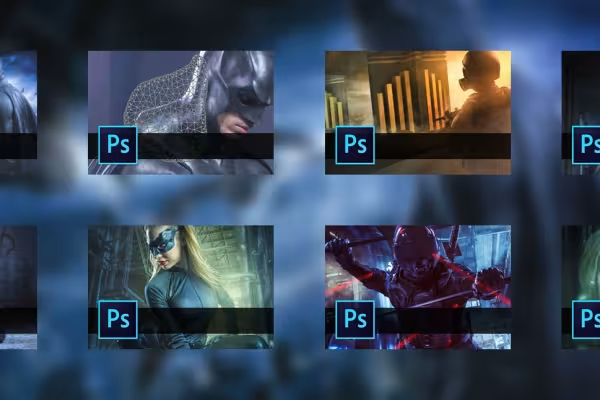 Examples: These fascinating images are created during the tutorial.
 -
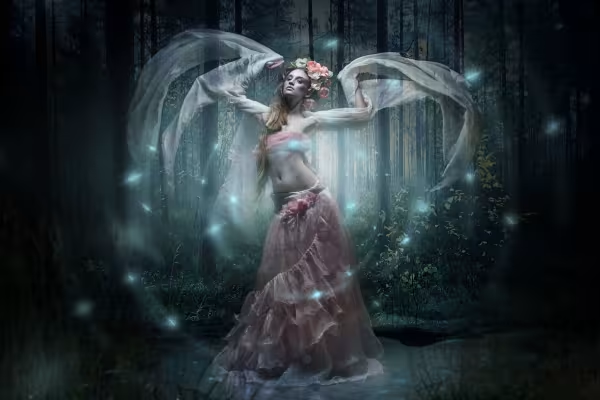 Example: Get the training if you also want to create such fascinating images.
You might also like

Full power, more inspirations, maximum WOW effect!

Save time with artificial intelligence

Photo editing & image composition

More style, more power, more templates!
Comment now „Image compositing and perspective in Photoshop: Batman-style artwork“