
A black-and-white image only looks convincing if skin, clothing, and background are cleanly separated from one another. That is exactly what this tutorial is about. It is based on Merle's personal method, which shows how you can turn a color photo into a high-contrast black-and-white image. Along the way, you will learn how to deliberately control the brightness of individual colors, using both the Black & White adjustment layer and the Camera Raw filter.
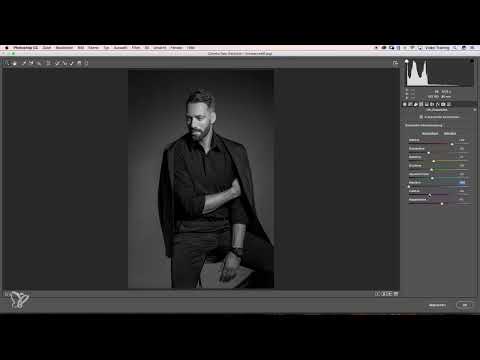
The video is only loaded from YouTube when you play it – data (including your IP address) is then transmitted to YouTube/Google. More in the privacy policy
The steps build on one another. At the end, you will have an edit that you can readjust at any time.
Key Takeaways
- A black-and-white image no longer contains color, only brightness information. However, these brightness values of the original colors can still be edited separately.
- The Black & White adjustment layer allows you to lighten or darken each hue individually.
- For a good black-and-white image, you need deep blacks, bright whites, and a clear contrast between skin, clothing, and background.
- The Camera Raw filter as a Smart Object allows you to do precise fine-tuning with the HSL grayscale sliders and remains editable afterward.
- White balance also affects a desaturated image and can significantly change the look of the picture.
Step-by-Step Guide
Step 1: Understand the Principle of Black and White
Before you get started, you should know what happens in a black-and-white image. It no longer contains color information, only brightness values. The advantage: the brightness of the individual hues remains different. A red can therefore be lighter or darker than a blue, and you can use precisely these differences. As you work, always keep in mind that you are not changing the colors themselves, but how bright they appear in the final image.

Step 2: Create the Black & White Adjustment Layer
Now create a Black & White adjustment layer. In Photoshop, you do this via the adjustment layer icon in the Layers panel, where you select the Black & White entry. Alternatively, you can use the keyboard shortcut Alt + Ctrl + Shift + B or, on a Mac, the corresponding combination of Command and Option. Right after creating it, you will see that numerous sliders appear even though the image is already gray. This is because you can still control each color via its brightness value.
Step 3: Use the Color Sliders to Control Brightness
Now move the individual color sliders left and right and observe how the image areas change. All tones that were originally red become lighter or darker, for example, as soon as you move the Red slider. In this way, you can, for instance, deliberately emphasize the skin tones without changing the entire image. Afterward, reset the sliders to their default values if you want to start over.

Step 4: Check the Automatic Conversion and Increase the Contrast
When you create the layer, Photoshop already suggests its own conversion. This serves as a starting point for you, but does not have to be the final solution. Pay particular attention to the contrast. A good black-and-white image needs deep blacks and fairly bright whites. You will notice that skin, clothing, and background are thereby delineated much more clearly from one another.
Step 5: Brighten the Skin Tones and Work Out the Contrasts
Next, raise the skin tones by pushing the relevant sliders to the right. You will see that it is mainly the somewhat darker skin tones that are affected. If you additionally pull the red range to the right, a subtle contrast emerges between the light and dark areas of the skin. This contrast gives the portrait depth and dimensionality.
Step 6: Darken the Distracting Hues
In the image, there are often slightly bluish or magenta tones present in the clothing. You should darken these so that they stand out from the bright face. To do this, pull the Blue slider to the left until the clothing looks calmer. You can also push the Magenta slider slightly to the left. Afterward, a clear contrast emerges between the background and the head. If this effect still seems too weak to you, strengthen it carefully until the balance feels right to you.

Step 7: Use the Camera Raw Filter as a Smart Object
For further fine-tuning, the Camera Raw filter is worthwhile. To do this, duplicate the layer with Command + J or Ctrl + J on Windows. Then convert the copy into a Smart Object. This way, you can undo or adjust all later changes at any time. Open the filter via the Filter menu and select the Camera Raw filter there. Photoshop needs a brief moment for the calculation. Bear in mind that this method requires additional storage space and makes the file larger. A powerful computer is therefore an advantage.
Step 8: Using the HSL Grayscale Slider
In the Camera Raw filter, you will find the HSL Grayscale section. Check the box there so that the image is displayed in grayscale. Additional sliders are then available to you, including the slider for orange tones. Orange plays a major role in skin color, which is why you can edit the skin particularly precisely with this slider. Move it until the skin looks natural and lively at the same time.

Step 9: Fine-Tuning the Tones for Clothing and Skin
Now it's about fine-tuning the remaining tones. Move the red tones slightly ahead of the orange tones so that the skin looks lighter. Pull the blue tones further to the left to darken the clothing. Purple tones are often present in clothing, so you should check them as well. You can reduce the magenta tones significantly if they are too dominant. Set all the sliders so that the result matches your personal taste.

Step 10: Adjusting the Basic Settings
In the Camera Raw filter, you can return to the basic settings at any time. Further refinements can be adjusted there. Increase the clarity if you want more texture in the image. Raise the overall exposure or the highlights to make the subject brighter. You can bring the shadows back up a little so that details in dark areas are preserved. Move the blacks slightly to the left to make the image look richer. You have a great many options in this area, so it's worth experimenting with the sliders.
Step 11: Using the White Balance for the Image's Impact
White balance isn't immediately intuitive with a desaturated image, since you don't expect any change at first. In fact, it does a lot for black-and-white images. The color temperature influences the tone of the grayscale image, so that it can look slightly warmer or cooler. Don't overdo it, because shifts that are too strong quickly look unnatural. With the lower slider, the tint, the image's impact can be controlled particularly finely. For images with a lot of magenta, this step is especially effective.

Step 12: Completing and Reviewing the Edit
Confirm your settings by clicking OK. Then briefly toggle the effect on and off to see the difference from the original. If you want to change something later, simply open the Camera Raw filter by double-clicking it in the Layers panel. You can increase the contrast further or, using the tone curve, pull the shadows slightly to the right to make the image softer. At the end, compare the result with the original image to check whether the desired effect has been achieved.


Summary – Black-and-White Conversion in Photoshop: Creating Portraits with a High-Contrast Look
Black-and-white conversion works best when you understand that you are controlling the brightness of individual colors. With the Black & White adjustment layer, you lay the foundation. With the color sliders, you bring skin, clothing, and background into position. The Camera Raw filter as a Smart Object allows you to do precise fine work and remains editable at any time. At the end, pay attention to clear contrast, deep blacks, and bright whites. Then your portrait looks lively and expressive.
FAQ
Why should I work with a Black & White adjustment layer?With it, you can control the brightness of each individual color without destroying the original image.
Do I absolutely need the Camera Raw filter for this method?No, the Black & White layer is enough for the basic look. However, the Camera Raw filter offers you additional fine controls, especially for skin tones.
What does the Smart Object do for the Camera Raw filter?It allows you to rework all settings at any time later by double-clicking.
Why does the file seem so large after the Camera Raw filter?The filter requires an additional layer and additional memory, which is why the file takes up more working memory.
How do I achieve better contrast between skin and clothing?Raise the skin tones and darken the blue and magenta tones of the clothing so that the areas separate more clearly from each other.
Can white balance actually do anything for a black-and-white image?Yes, it slightly changes the image's impact, for example through a warmer or cooler tone. However, don't overdo the shift.


