
A single stray hair is barely noticeable at first glance, but a whole ring of them at the hairline quickly draws the eye away from the actual subject. In this tutorial, you will remove exactly these fine distractions with a quick method based on an empty layer, the Clone Stamp, and a layer mask.
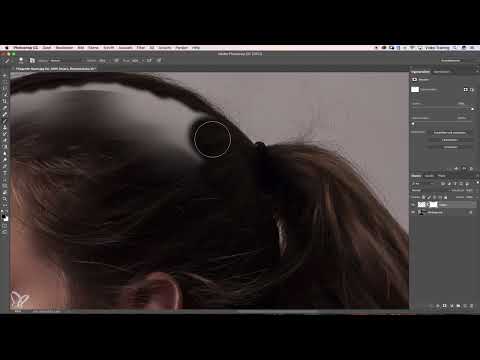
The video is only loaded from YouTube when you play it – data (including your IP address) is then transmitted to YouTube/Google. More in the privacy policy

Key Takeaways
- The technique is suitable for backgrounds without a strong gradient. With large differences in brightness, the corrections are immediately noticeable.
- You work on a separate, named layer. This way the original image remains untouched and you can go back at any time.
- With the Clone Stamp, you roughly repaint the hair edge, and the layer mask brings the details back.
- A helper layer with a dark color fill makes overlooked spots visible.
- You should match the brush hardness to the hardness of the real hair, otherwise the result looks artificial.
Preparation: Create an Empty Layer
First, create a new, empty layer above your image. Give it a clear name like "Hair". That sounds like a small thing, but it saves you a lot of searching later when you are working on several layers at the same time.

Pre-Drawing the Edge with the Clone Stamp
Select the Clone Stamp and use it to trace an edge along the hair on the empty layer. Use a very soft brush edge with 100% opacity. Place the stamp close to the spot where the fine hairs lie, and then paint in the direction of the hair flow. You will also catch some of the head in the process. That is not a problem at this stage, because you will correct it later.
It is important that you work along the hair and keep an eye on the differences in brightness. With a nearly uniform background, this works much better than with strong gradients. Change the sampling points regularly so that the result does not become blotchy.
Work your way along the edge piece by piece until you have covered the entire area. You do not have to be perfect, because the fine-tuning follows in the next steps.
Checking the Result from a Distance
After the pre-drawing, zoom out of the image a bit. From a distance, you can see much better where bright or dark spots still remain. At these spots, use the Clone Stamp to copy in slightly brighter pixels from the immediate surroundings, and correct the spot that way. Then you zoom in again and continue working.

Creating a Layer Mask and Bringing Back the Edge
Now create a layer mask on the "Hair" layer and zoom in closer to the edge. With the Brush tool, you now bring back the real hair edge. Choose a small brush tip with a hard edge for this. A value of about 3 in your settings is a good starting point, which you can adjust depending on the image size.
Trace along the hair edge until the fine hairs become visible again. It is not a problem if individual hairs reappear in the process. You will remove them again shortly. First, the goal is to cleanly remove the spots and mask out the white areas in the image again. This goes faster with a somewhat larger brush tip.


Helper Layer for Better Control
Some spots are hard to see on the original image. A helper layer helps here. To do this, place a color fill between the bottom image layer and your Hair layer. If your background is rather bright, choose a fairly dark color tone so that you can see the errors clearly. Confirm the color tone and mask out the overlooked spots directly, also in the lower area and at the edges.
When all areas are clean, you can delete the helper layer again. Now you can be sure that no more distracting spots remain.


Rotate the image for easier painting
Proper strokes are not always easy to draw, especially when the flow of the hair runs at an angle. Activate the Rotate tool with the R key. Click into the image and drag to rotate it in the desired direction. It is often easier for you if you can draw the strokes from left to right or from top to bottom. Rotate the image far enough that your movement becomes natural and even.

Tracing hair with white and black
Switch the foreground color to white. With a relatively hard brush edge and a small tip, you now paint over the hair edge on the mask. Try to match the hardness of the hair with your brush hardness. The edge should have approximately the same hardness as the real hair.
If you have painted beyond the target, switch to black with the X key and correct the spot. Switching between white and black is very quick with the X key. Take your time with this, because the fine work determines the overall impression. Make sure you achieve approximately the same hardness everywhere, otherwise the result will look strange in the end.


Work your way step by step around the entire head. Difficult areas are normal. The most important thing at first is a clean, hard edge. You will make it more realistic afterwards.

Before-and-after comparison and outlook
At the end, rotate the image back with the Escape key and zoom out completely. A direct comparison shows you how much the image has changed. The edge still looks quite hard in this state. Afterwards, in the next step, you can make it softer so that it looks more natural.


Summary – Retouching flyaway hair: layer, clone stamp, and mask working together
You create an empty, named layer, pre-draw the hair edge with the clone stamp, and correct spots from a distance. Then you bring the edge back with a layer mask and check with a dark auxiliary layer whether everything is clean. With the Rotate tool and switching between white and black, you refine the hair edge. The technique works best against backgrounds without a strong gradient.
FAQ
When is this method suitable for flyaway hair?The method works particularly well against backgrounds without a strong gradient, because with large differences in brightness the corrections quickly become visible.
Why should I work on a separate layer?A separate layer protects the original image, and you can adjust or undo your changes at any time.
What do I do if I can't see spots well?Create an auxiliary layer with a dark color fill between the background and the hair layer, then the spots become clearly visible.
How do I tell whether the edge looks realistic?The brush hardness should roughly match the hardness of the real hair. Compare the result regularly from a distance to check the effect.
Why does my hair edge look so hard?A hard edge is normal in the first step. You achieve a softer, more natural edge in a further editing step.


