The targeted directing of the viewer's gaze is an art that can breathe life into even the most mundane images. By skillfully playing with light and shadow, you can focus attention on the essentials and blur out distracting elements. In this guide, you will learn how to optimally use the radial filter in Camera Raw to enhance the effect of your portraits and deliberately control the gaze of the viewer.
Key Insights
- The radial filter allows you to brighten or darken specific areas of the image.
- By strategically using light and shadow, you direct attention to the eyes and face of the model.
- Soft edges are crucial for a natural result.
- Working with smart objects in Photoshop allows for flexible post-processing.
Step-by-Step Guide
To implement your edits optimally, follow these steps:
First, open your image in Camera Raw and make sure to select the radial filter. It is located in the top bar. Once you select it, a small cross cursor appears, allowing you to draw a circle. The focus is to position the circle so that it points to the eye or face of the model. The inside of the circle will be automatically brightened.
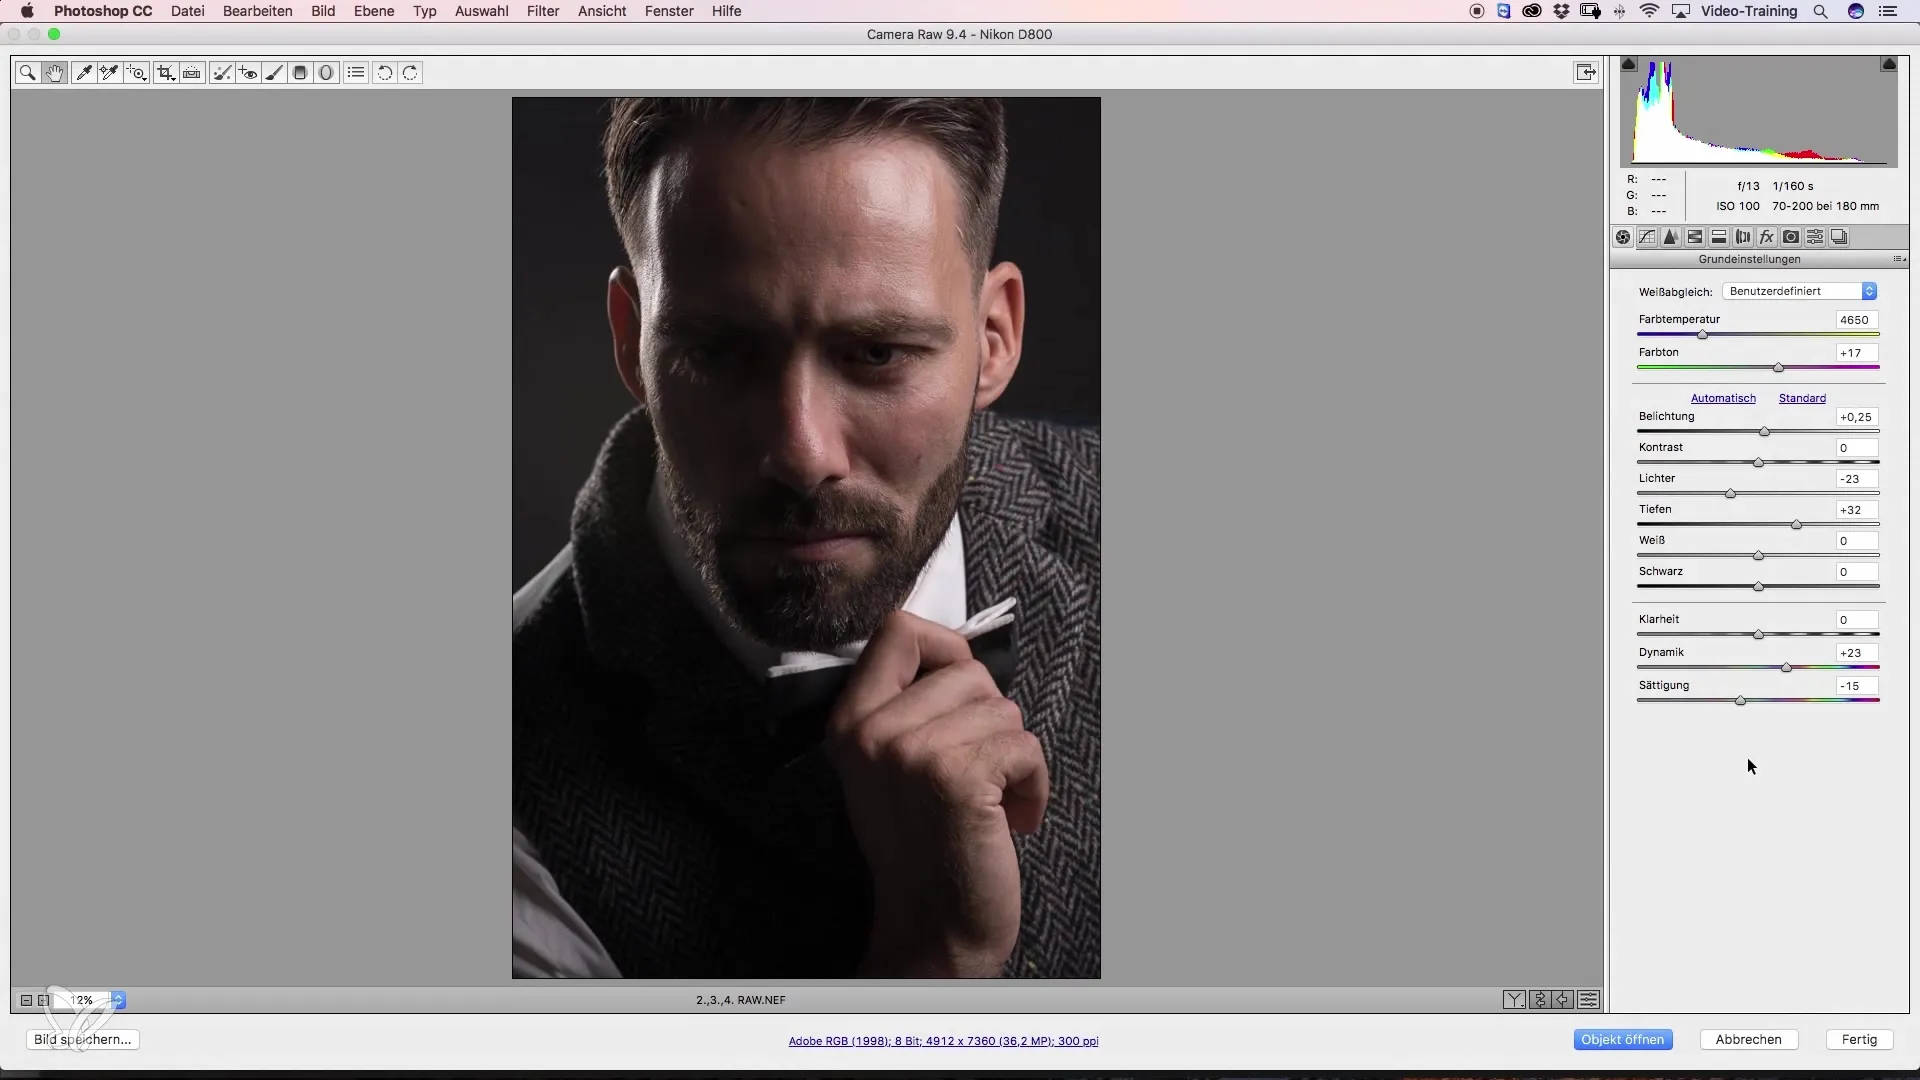
To ensure that the exposure of the circle is correct, check the settings on the right side. Is the exposure adjusted? You can resize the circle as you wish. Position it directly on the eye for maximum effect.
If you have distracting bright spots in the image, you can also selectively reduce these. Draw another radial filter over the areas you want to darken. Ensure that the filter affects the inner area and choose a soft edge to avoid unnatural transitions.
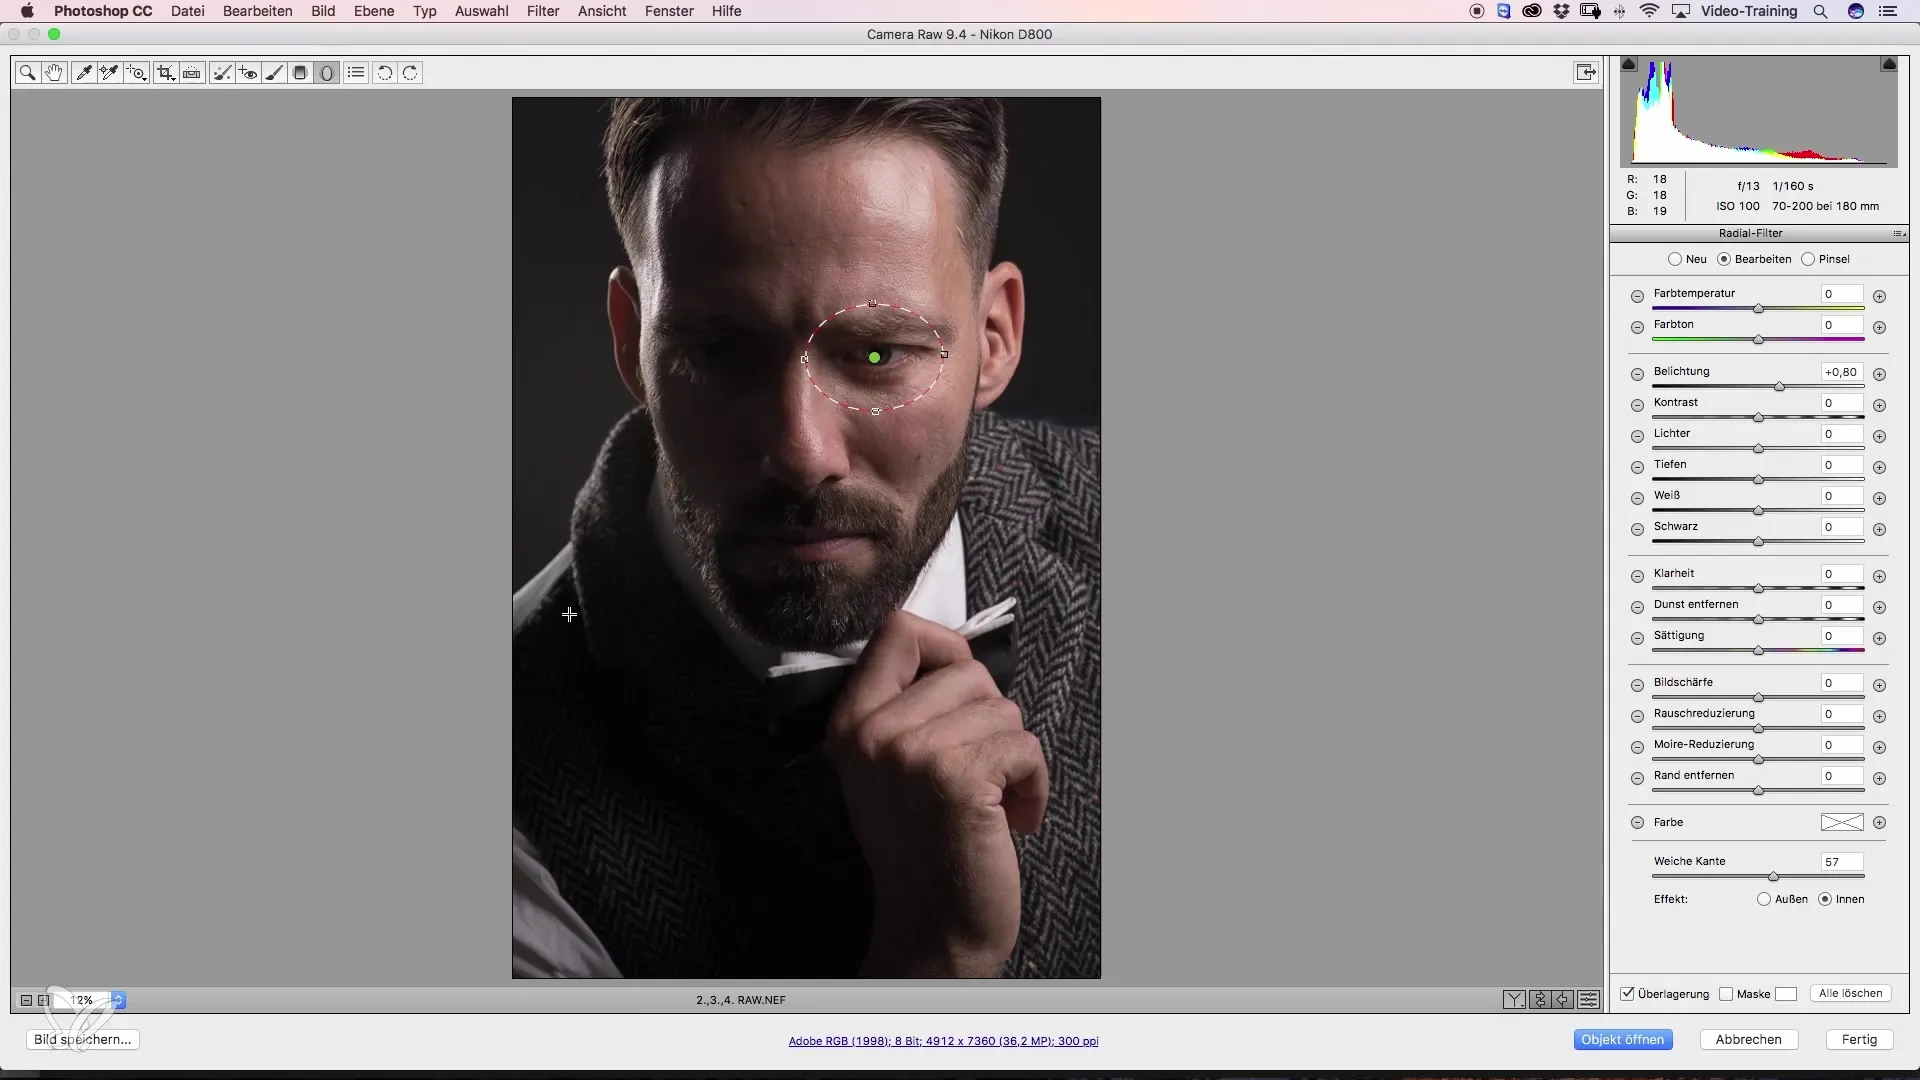
With a soft edge, the effect ensures that the transition is not abrupt but harmonious. Test it by briefly hiding the overlay. Here, you will quickly notice the difference between hard and soft edges: soft edges appear more natural.
Now apply the radial filter again to darken other bright spots or areas that distract from the gaze. Position the filter precisely where you want it and adjust the exposure. The goal is to further direct the gaze towards the face of the model.
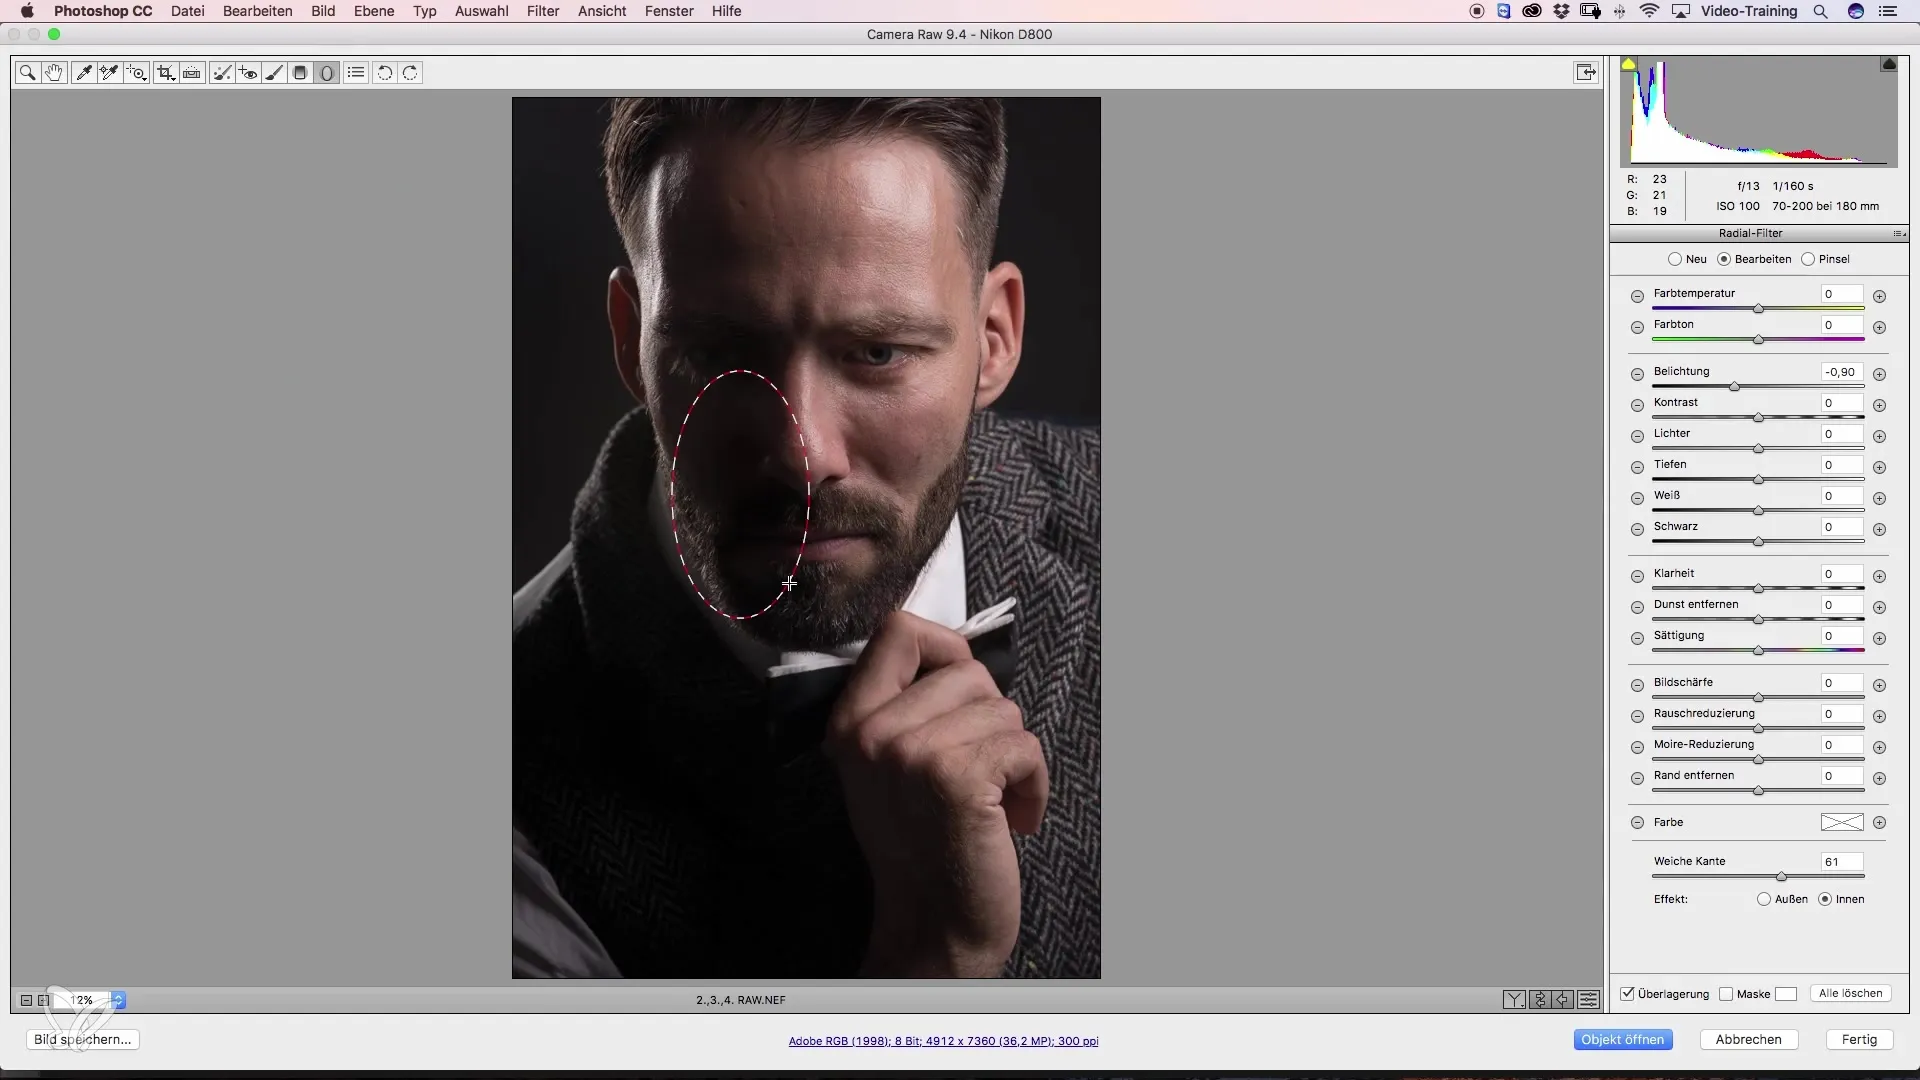
The next step is to brighten the upper area of the image again to achieve balance with the rest of the composition. For this, draw a new radial filter that gently works against the darker areas. It is important to keep an eye on the settings: reduce the highlights while maintaining a constant exposure.
If you want a final image with even lighting, also add a radial filter on the other side to create small light spots. All adjustments you make should ultimately lead the viewer's gaze to the key elements.
Before you open the image in Photoshop, make sure to activate the "Open as Smart Object" function by selecting the corresponding box. This allows you to change your editing at any time when you re-edit the image.
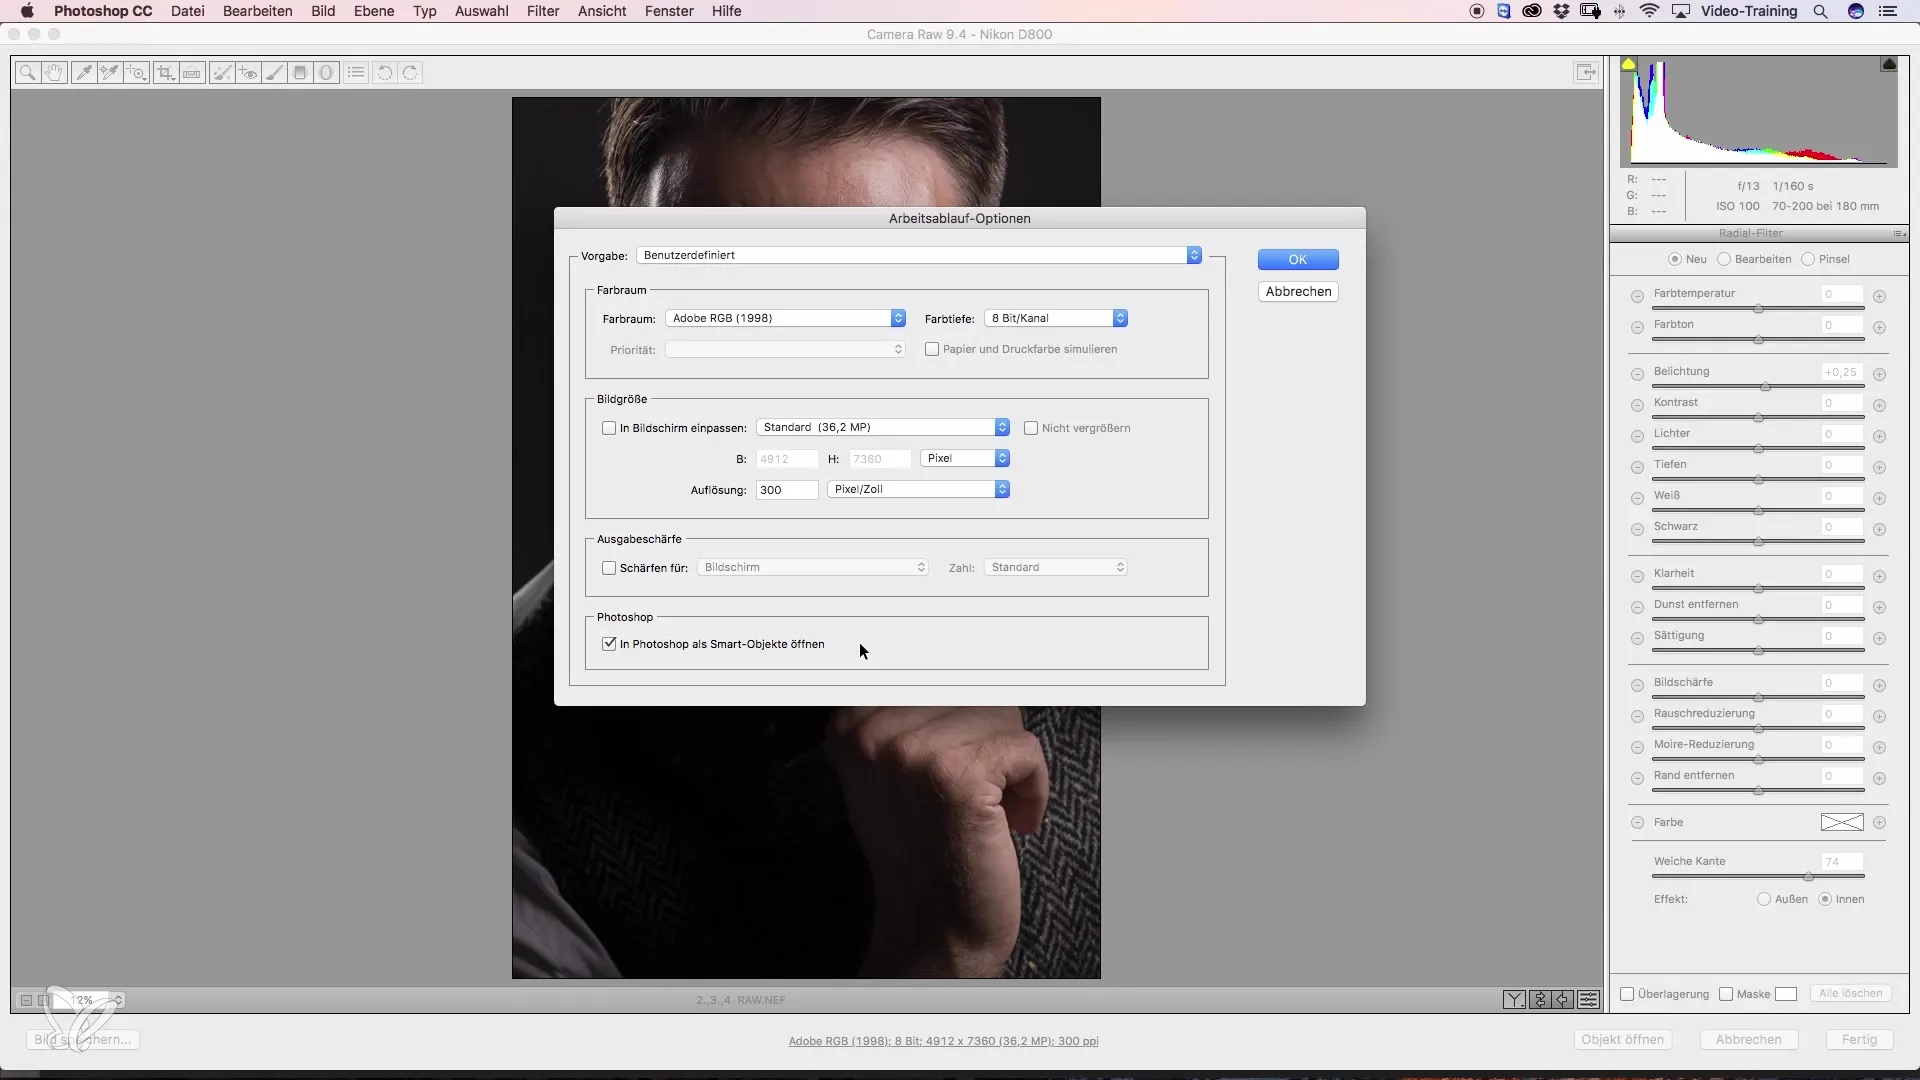
After completing these steps, you can continue to process the image in Photoshop. Note that you can now easily access all previously integrated Camera Raw filters to make changes.
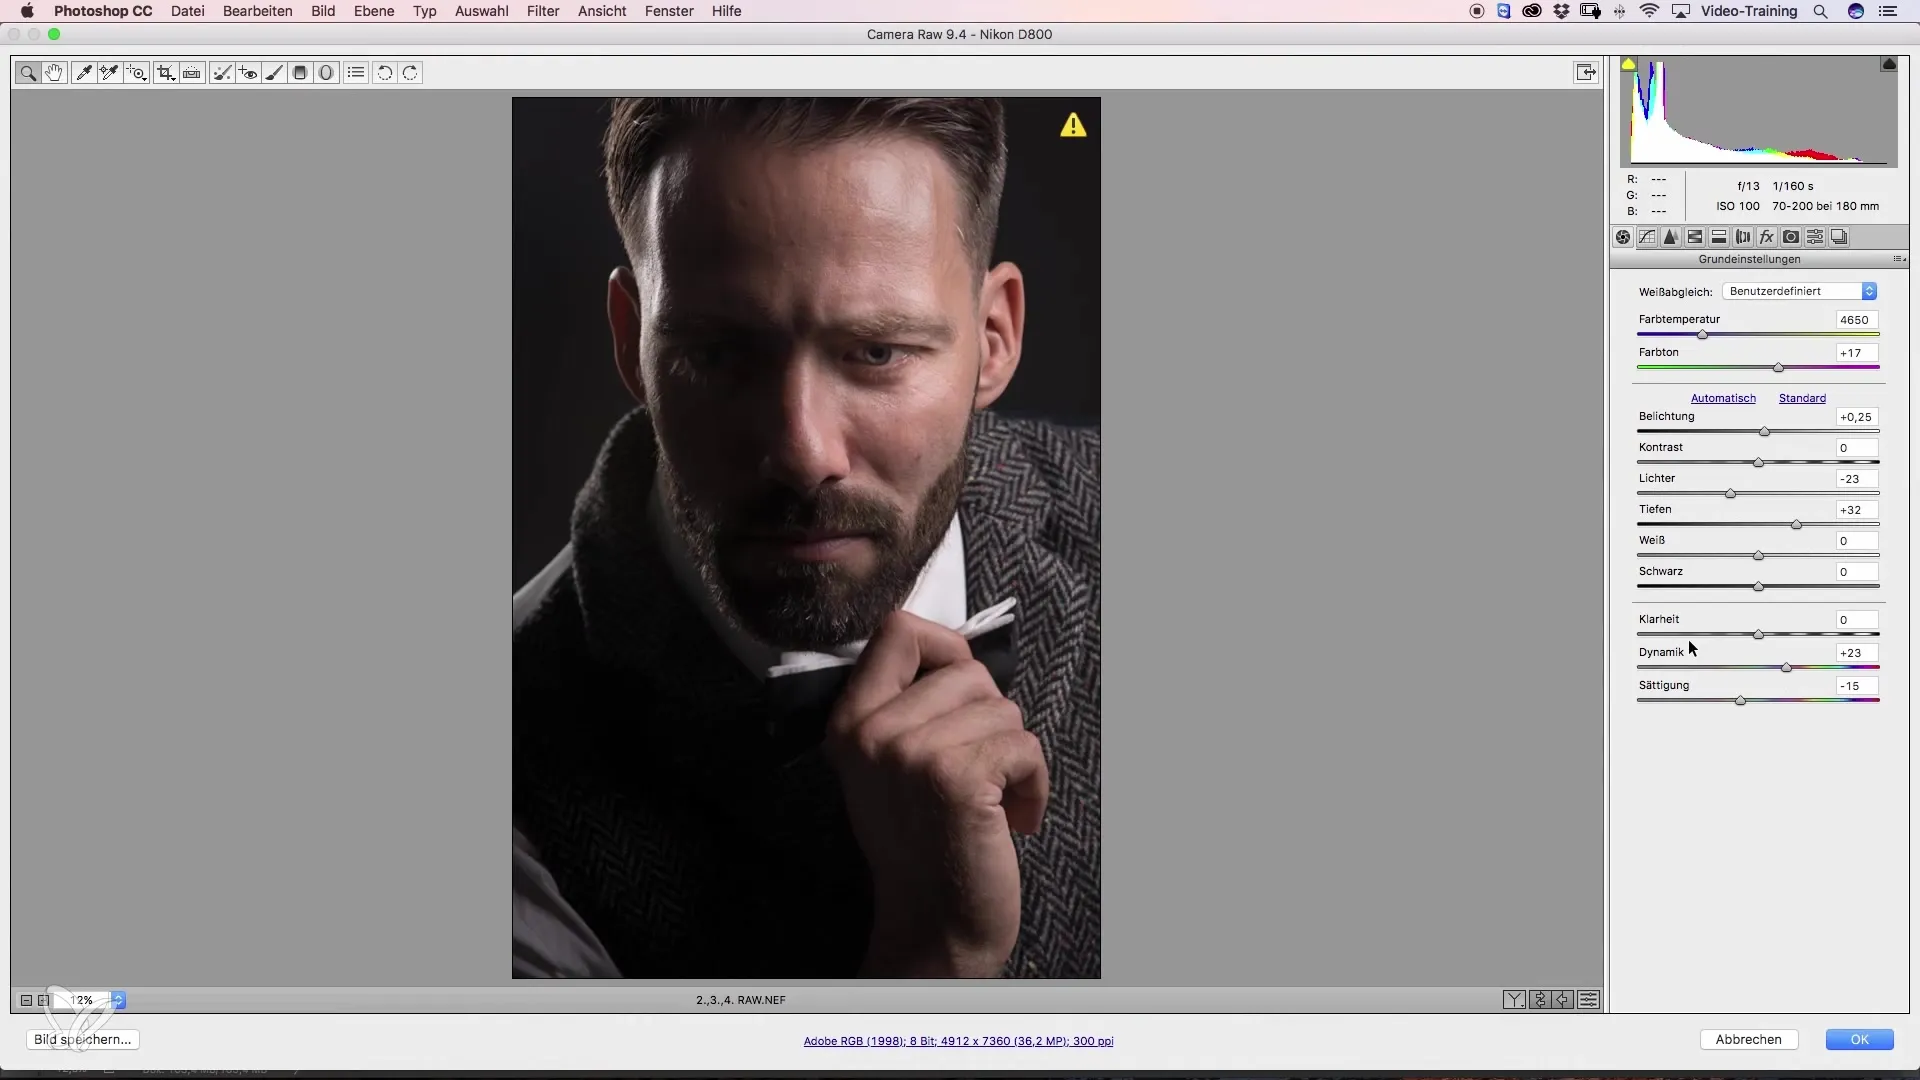
Summary – Directing Gaze with Camera Raw: Effective Techniques for Beauty Retouching
When editing portraits, proper lighting is key to directing the viewer's attention. By using the radial filter and making targeted light and shadow adjustments, you can significantly enhance your images. A particular focus on details, such as soft edges and working with smart objects, will enable you to make changes at any time later on. Try it out and discover how much more your image can tell when you deliberately guide the viewer's eye.
Frequently Asked Questions
How can I quickly activate the radial filter in Camera Raw?Simply click on the radial filter icon in the top bar of the Camera Raw window.
Can I adjust the radial filter edges?Yes, by enabling the soft edges option, the transition will be more natural.
Why should I open the image as a smart object in Photoshop?Creating a smart object allows you to make changes to the Camera Raw settings later at any time.
What should I do if the image has too many bright spots?Use radial filters to darken these areas, directing the gaze to the essentials.
How important is the highlight setting in the radial filter?The correct highlight setting is crucial as it helps control the overall exposure of the image and minimizes distractions.
