The Face Liquefaction is an important technique in digital image editing, especially in the field of beauty retouching. It allows you to gently modify facial features and optimize the portrait. In this tutorial, you will learn how to make targeted adjustments using the Liquify function in Photoshop to achieve natural and appealing results.
Key Insights
- The Liquify function in Photoshop allows for precise adjustments of facial features.
- Working with smart objects provides flexibility and undo functionality.
- Subtle adjustments often lead to the best results.
Step-by-Step Guide
Step 1: Create a New Layer
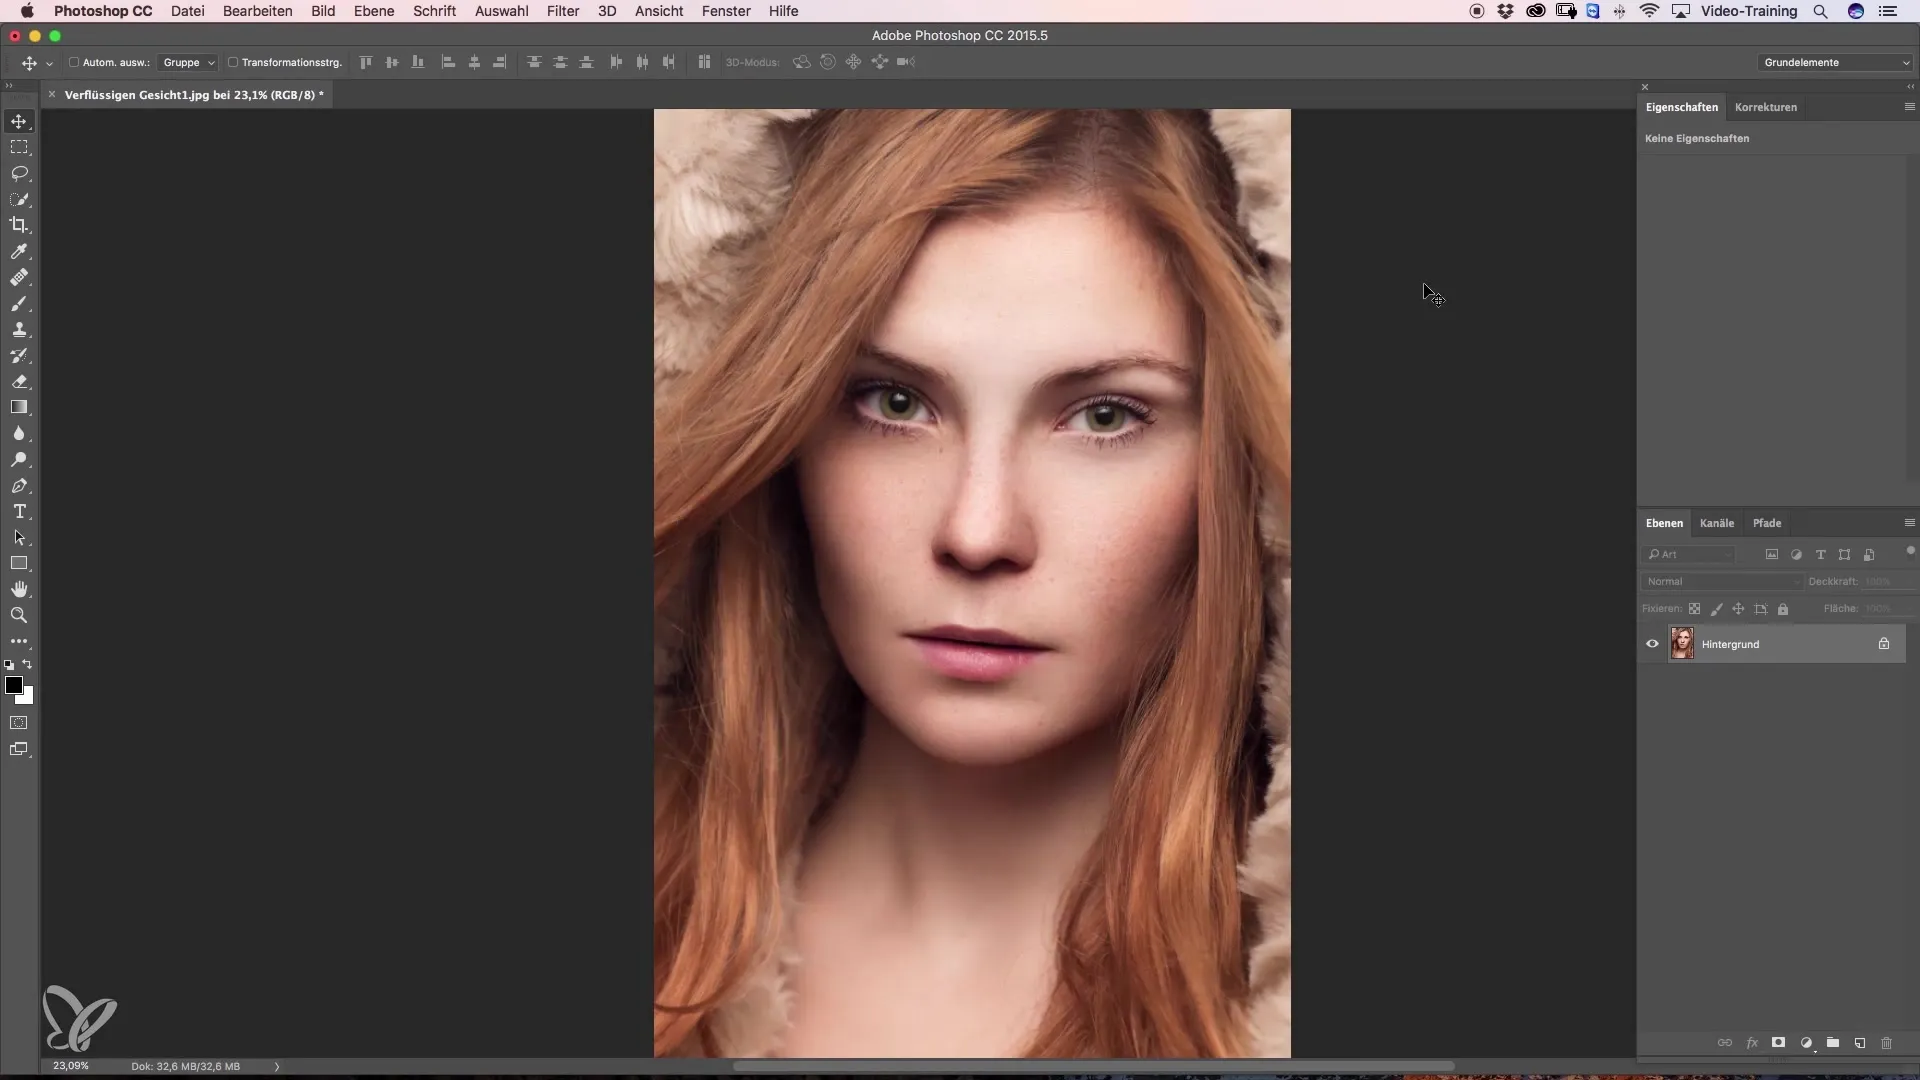
Start your project in Photoshop and create a new layer. This is very simple. Press the shortcut Command + J (Mac) or Ctrl + J (Windows) to duplicate the current layer. Rename the new layer to "Liquify" for easy identification.
Step 2: Convert Layer to a Smart Object
To fully utilize the flexibility of this technique, you should convert the new layer into a smart object. Click on "Layer" in the menu bar and select "Convert to Smart Object." This conversion allows you to make later adjustments at any time without losing the original image data.
Step 3: Apply the Liquify Filter
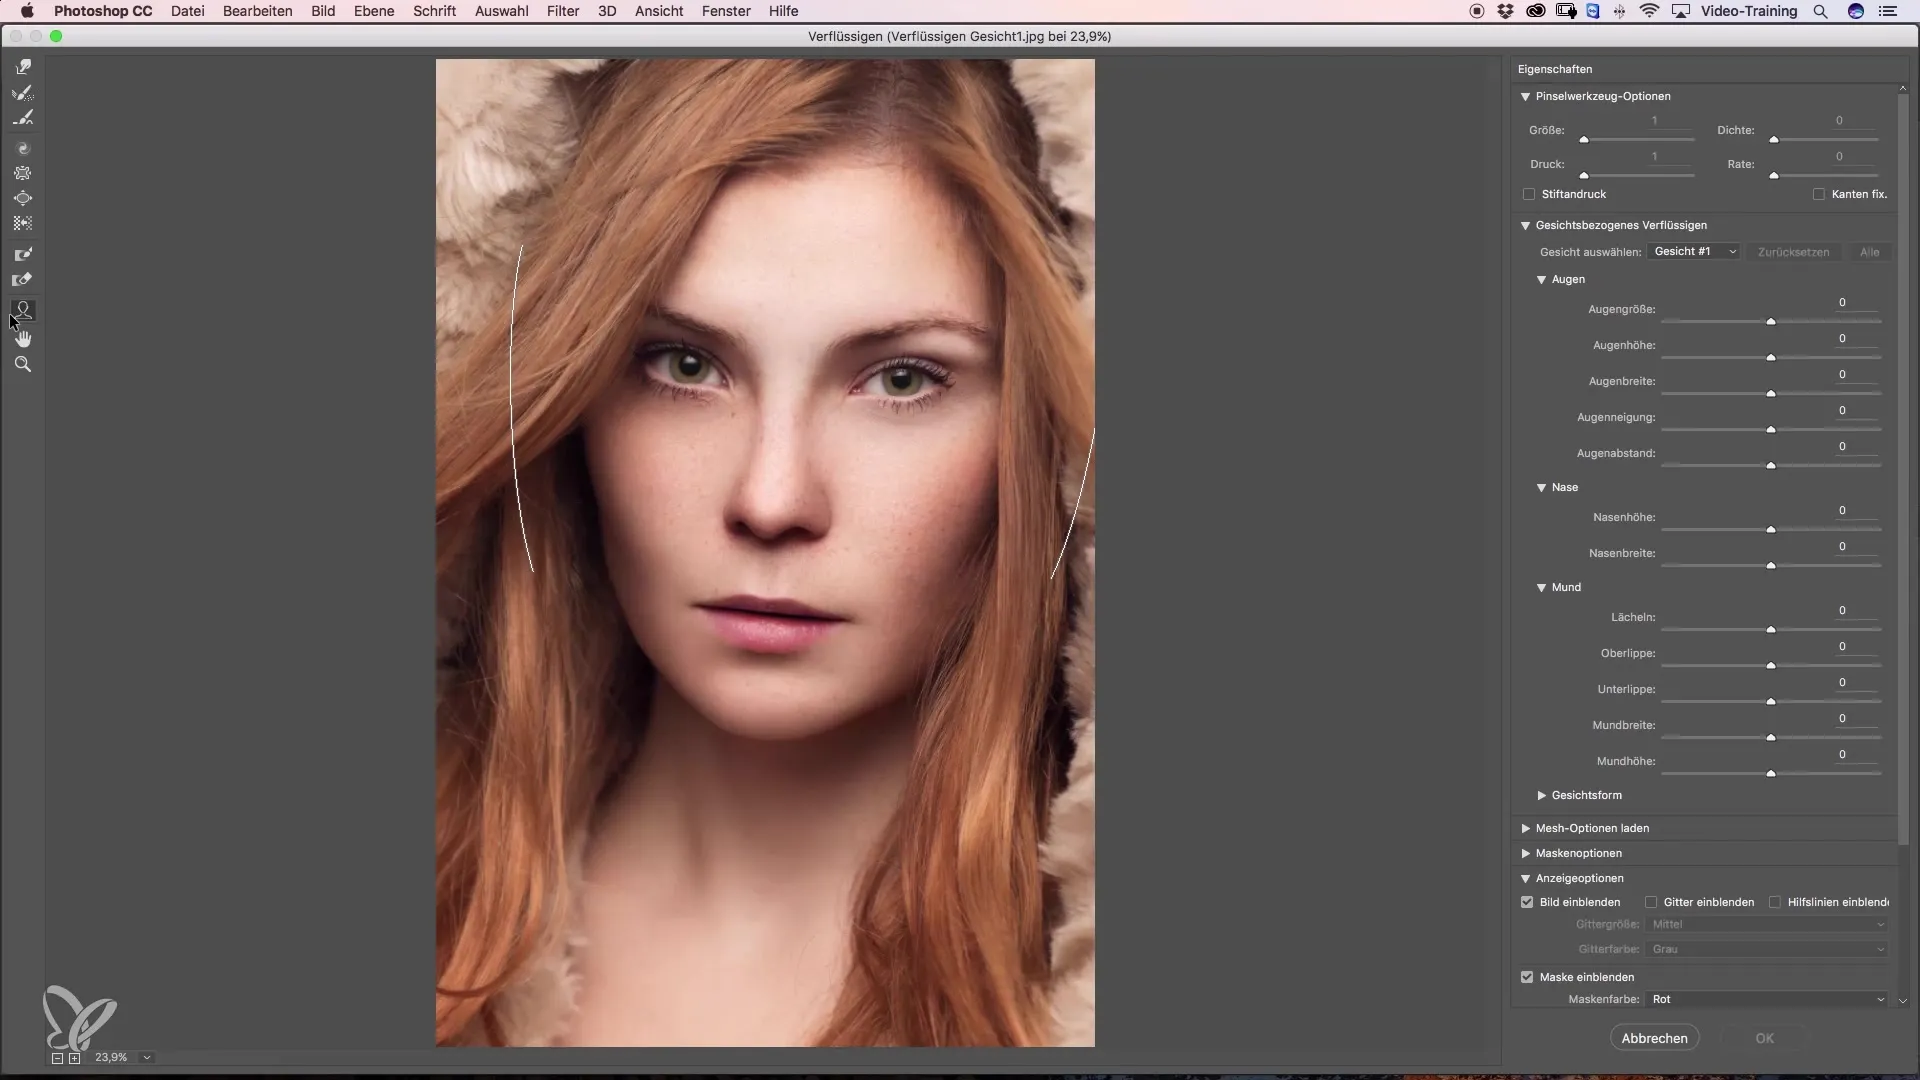
Open the filter dialog by clicking on "Filter" and then "Liquify." A new dialog window will open, where you will find the various tools and options. Here you will also see the special area for Face Liquefaction.
Step 4: Make Facial Adjustments
In the dialog box, there are special options for faces. You can adjust eye height, eye width, nose height, and mouth height, for example. Simply select the corresponding tool and drag the handles to make the desired changes.
Step 5: Precision with Sliders
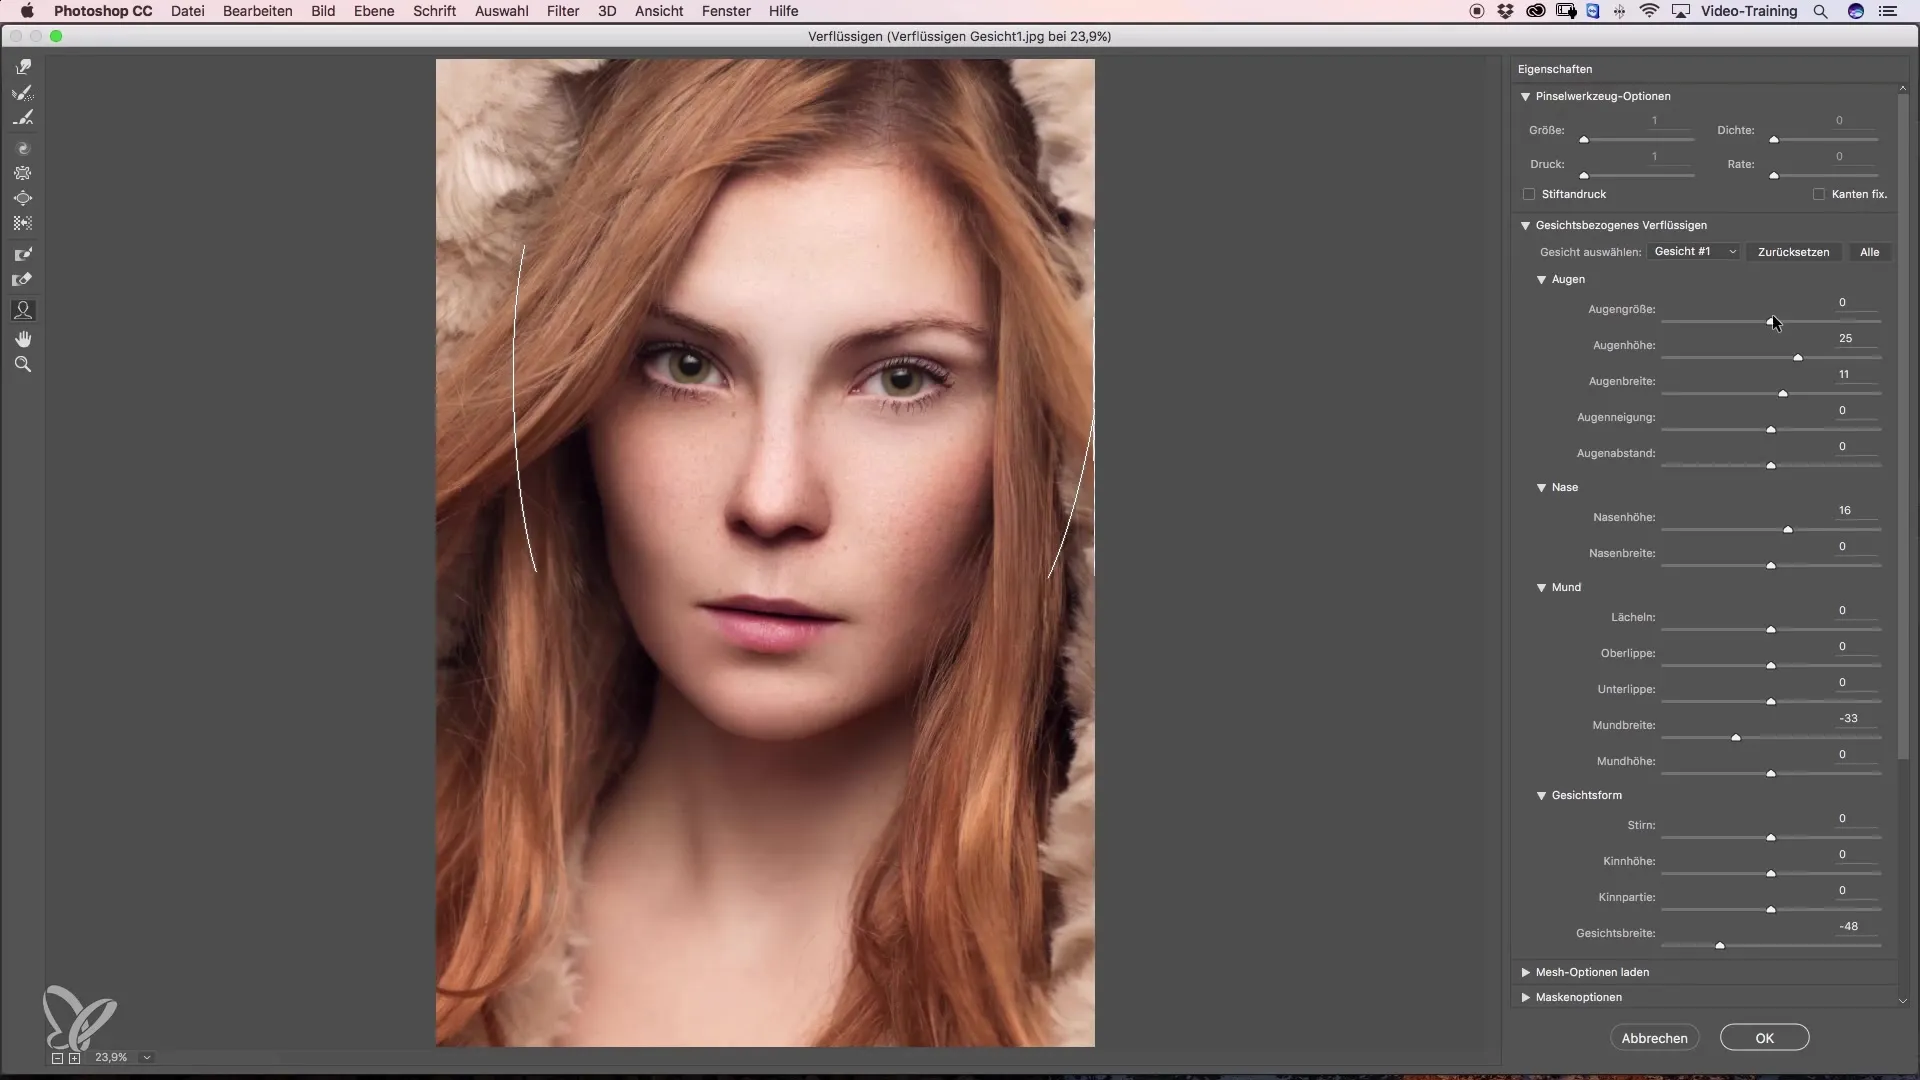
To make even more precise adjustments, use the sliders on the right side of the dialog window. Here you can set the eye size, eye tilt, and eye distance separately. Be sure to make subtle changes; too strong adjustments often look unnatural.
Step 6: Nose and Mouth Adjustments
Now let's move to the nose – here you can adjust the nose height, nose width, and overall appearance. For mouth adjustments, it is also important to proceed very carefully. You can adjust the upper lip or lower lip and create a subtle smile. Keep the changes subtle to maintain naturalness.
Step 7: Edit the Shape of the Face
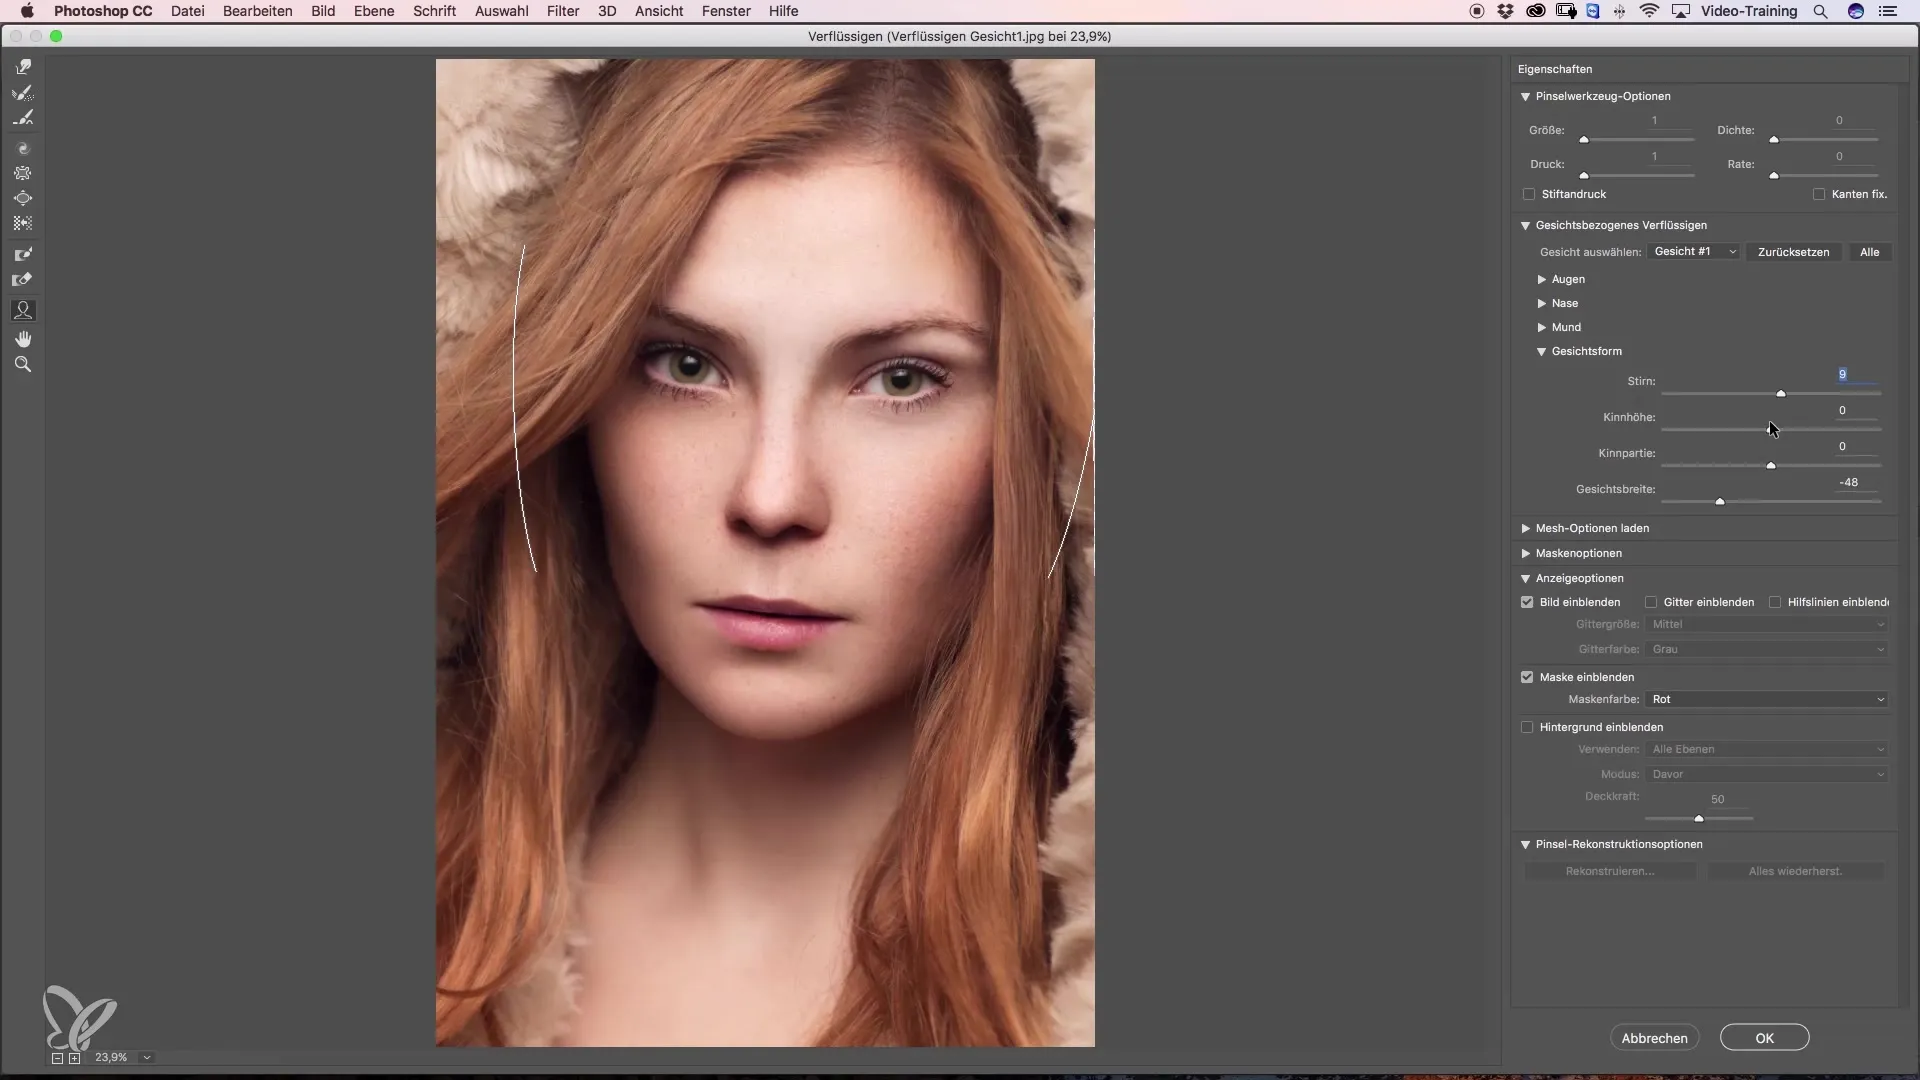
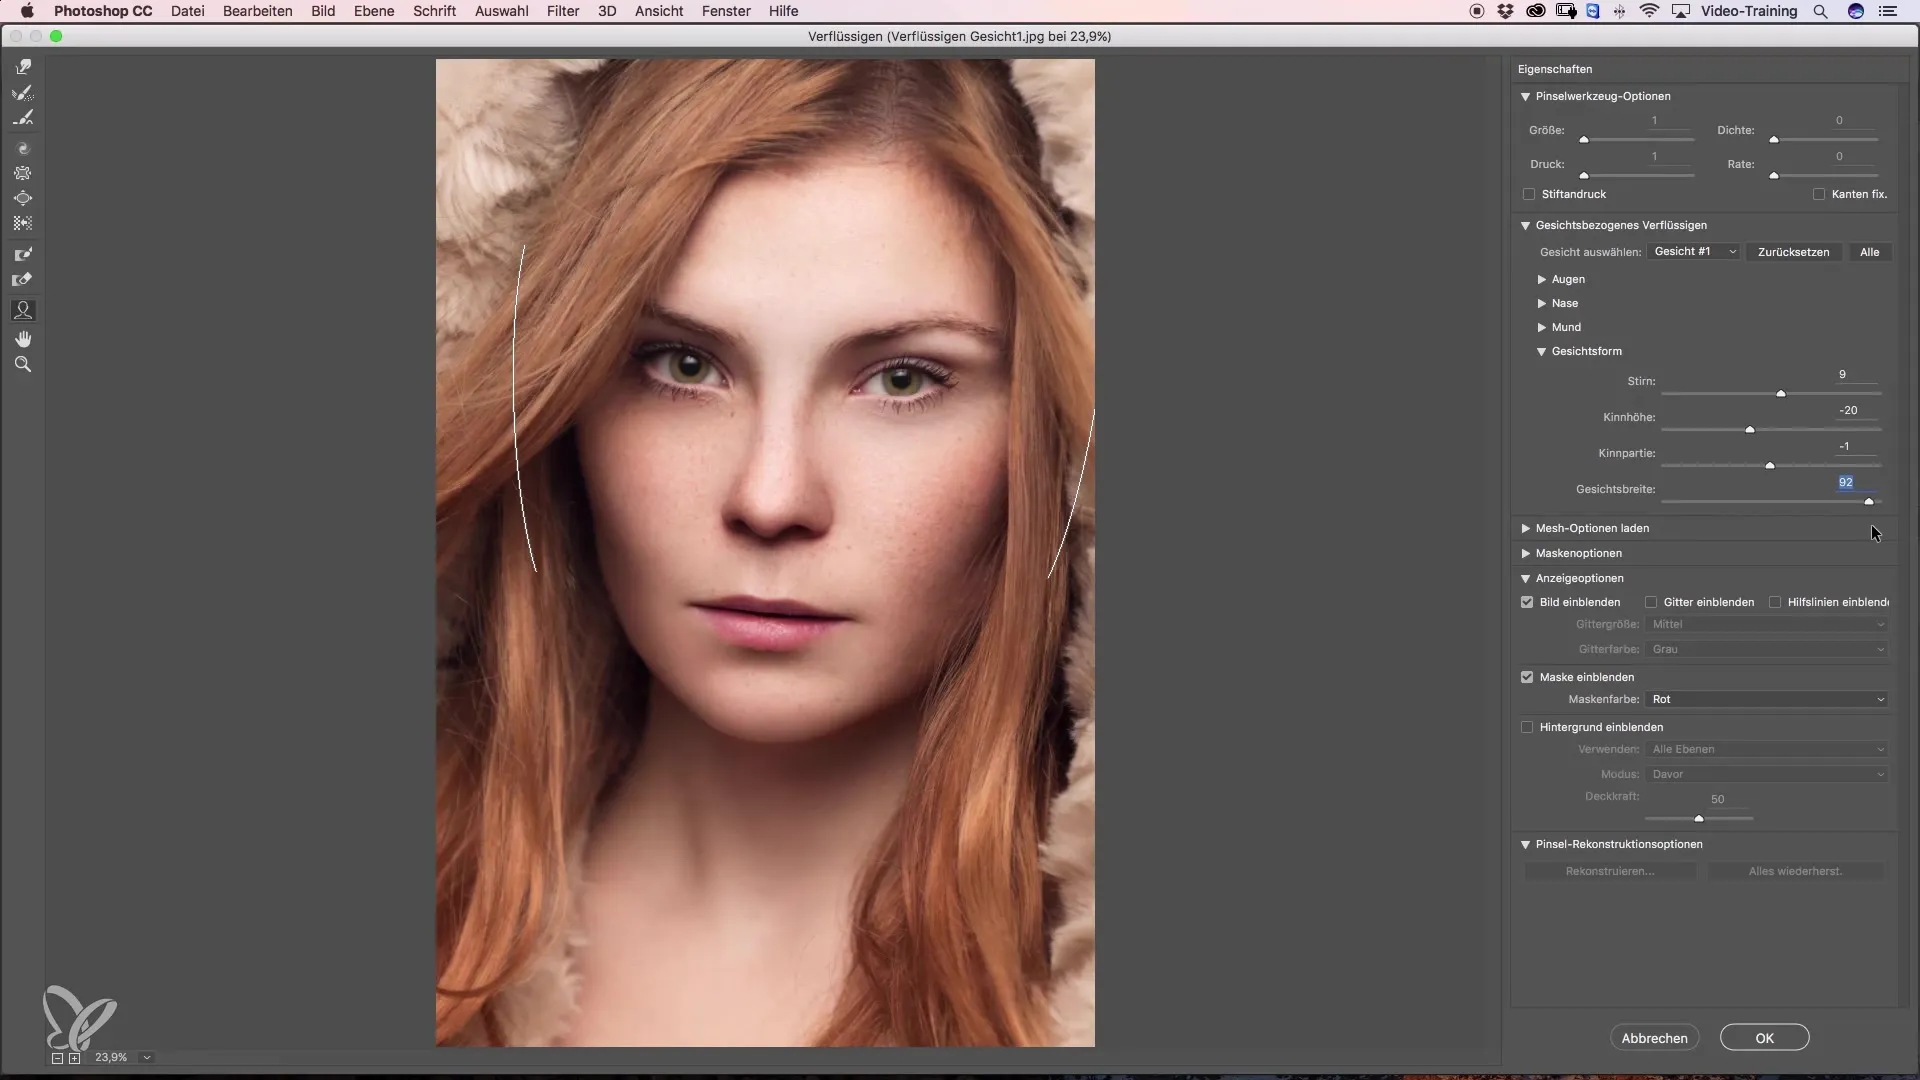
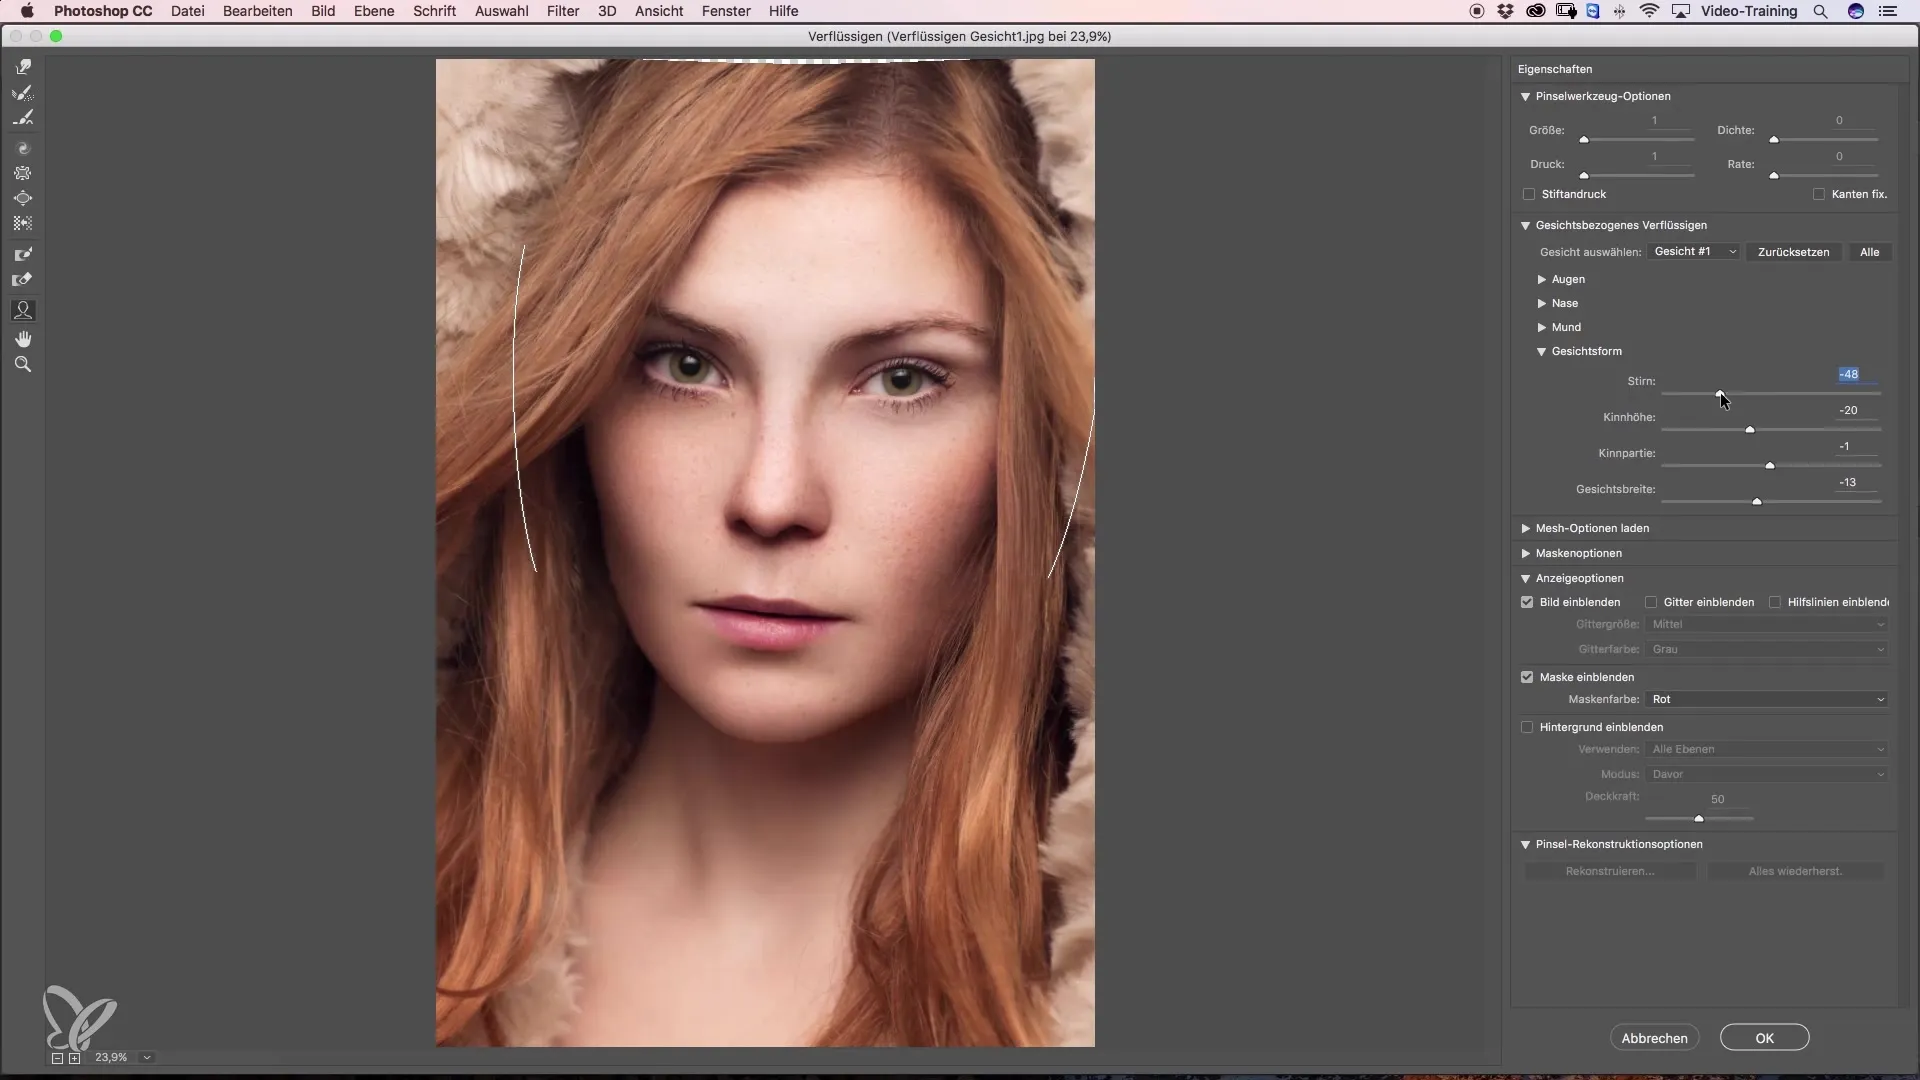
Another important element is the face shape. Here you can adjust forehead height, chin height, and face width. With these changes, you ensure that the face looks harmonious and appealing.
Step 8: Make Corrections
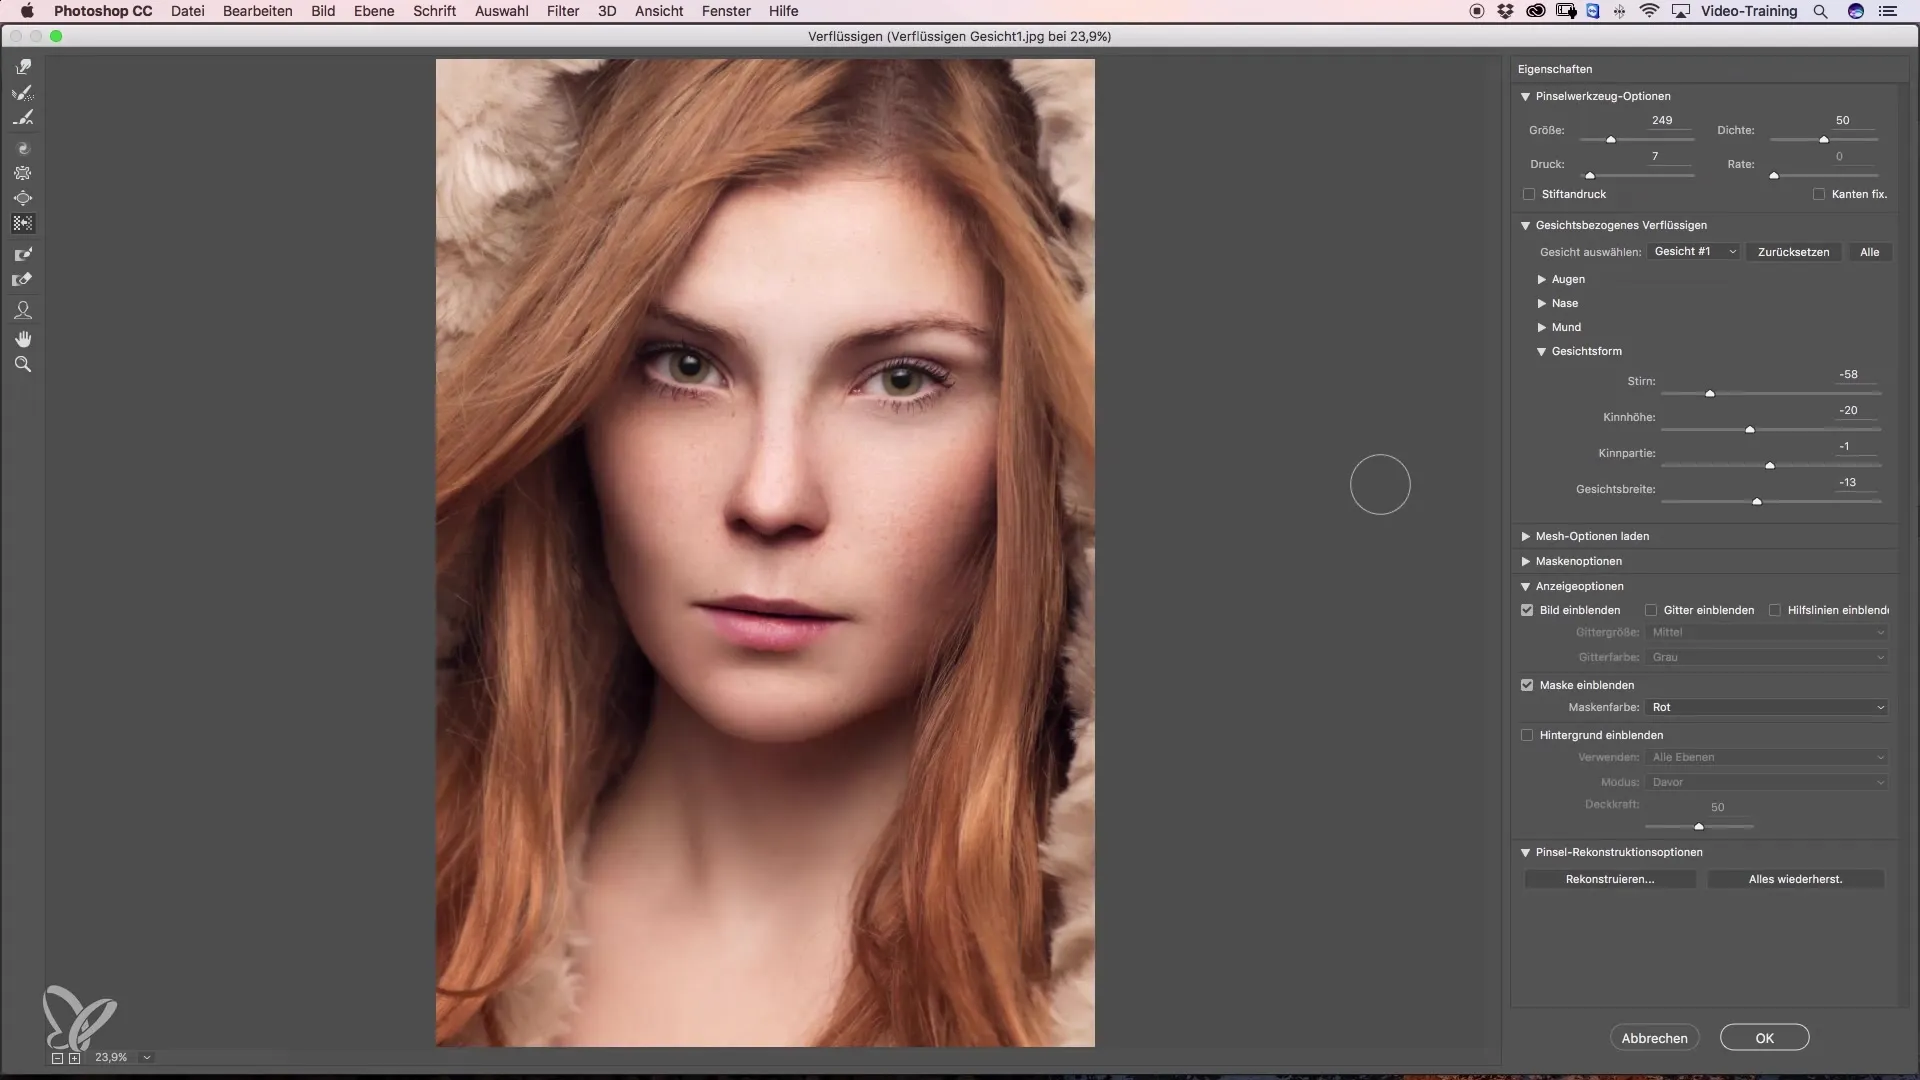
After you have made all the desired adjustments, you can return to the tools on the left side. With the Liquify tool or the Dodge tool, you can correct small inconsistencies. Be sure to choose a gentle touch to achieve a realistic result.
Step 9: Check Satisfaction and Save
Once you are satisfied with your editing, click “OK” to confirm the changes. Take a moment to view the before-and-after comparison and ensure that all adjustments harmonize well.
Step 10: Undo Changes
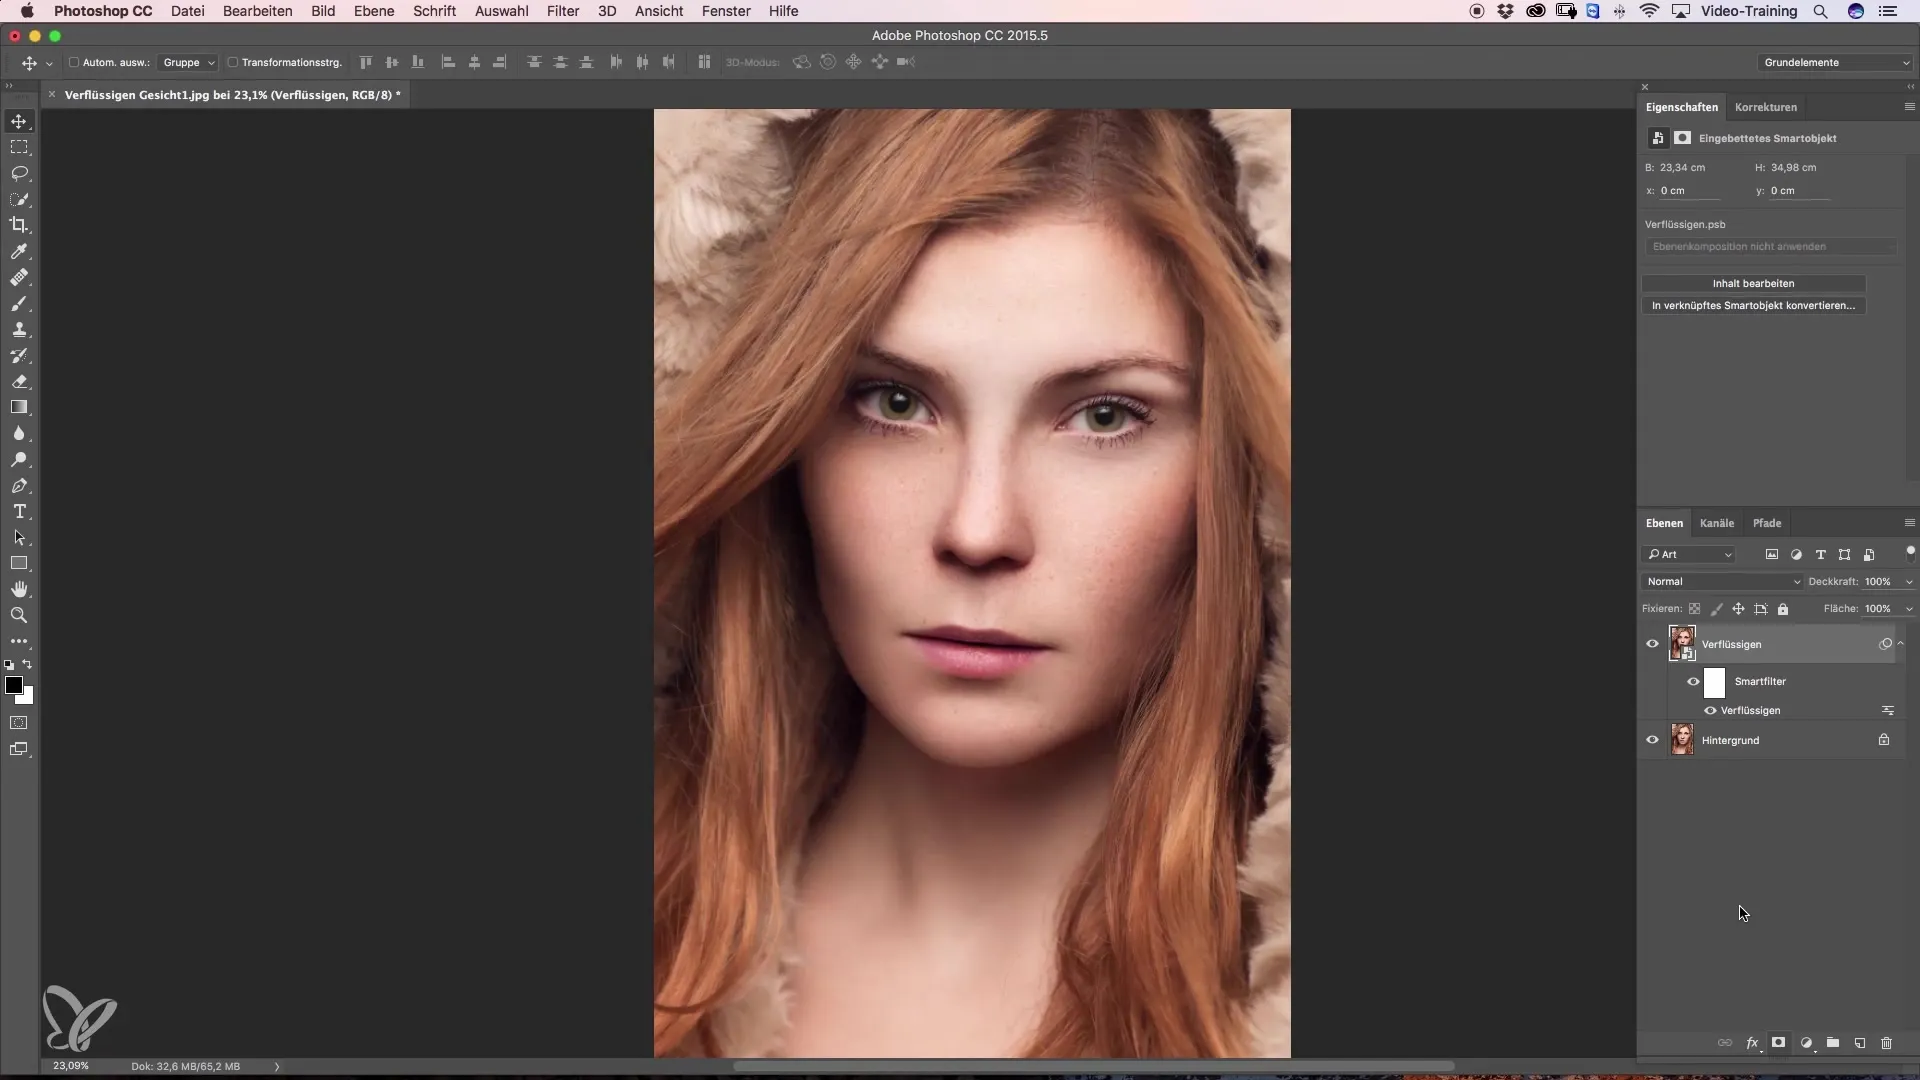
If you do not like a change, you can always call up the liquify filter again. Just double-click on the filter in the layers palette and make the desired adjustments. This way, you retain the flexibility to adjust and refine your work.
Summary - Face Liquefaction Made Easy – Step by Step to Perfect Retouching
In this tutorial, you have learned the basics of face liquefaction in Photoshop. From creating a new layer to applying the Liquify filter and exploring various adjustment options – you now know how to effectively retouch faces. Remember to work subtly and naturally to achieve the best results.
Frequently Asked Questions
How do I start face liquefaction in Photoshop?You start by creating a new layer and converting it to a smart object.
Can I undo my adjustments?Yes, you can open the liquify filter at any time and make changes to your adjustments.
How important is it to work subtly when liquefying?Subtle adjustments are crucial to achieving a natural result. Strong changes often look unnatural.
How can I ensure that I am satisfied with my work?Regularly view the before-and-after comparison to ensure that all adjustments look harmonious.
Are there special tools for eyes and mouth?Yes, in the liquify dialog you will find special options for adjusting eyes and mouth, which help you make precise changes.


