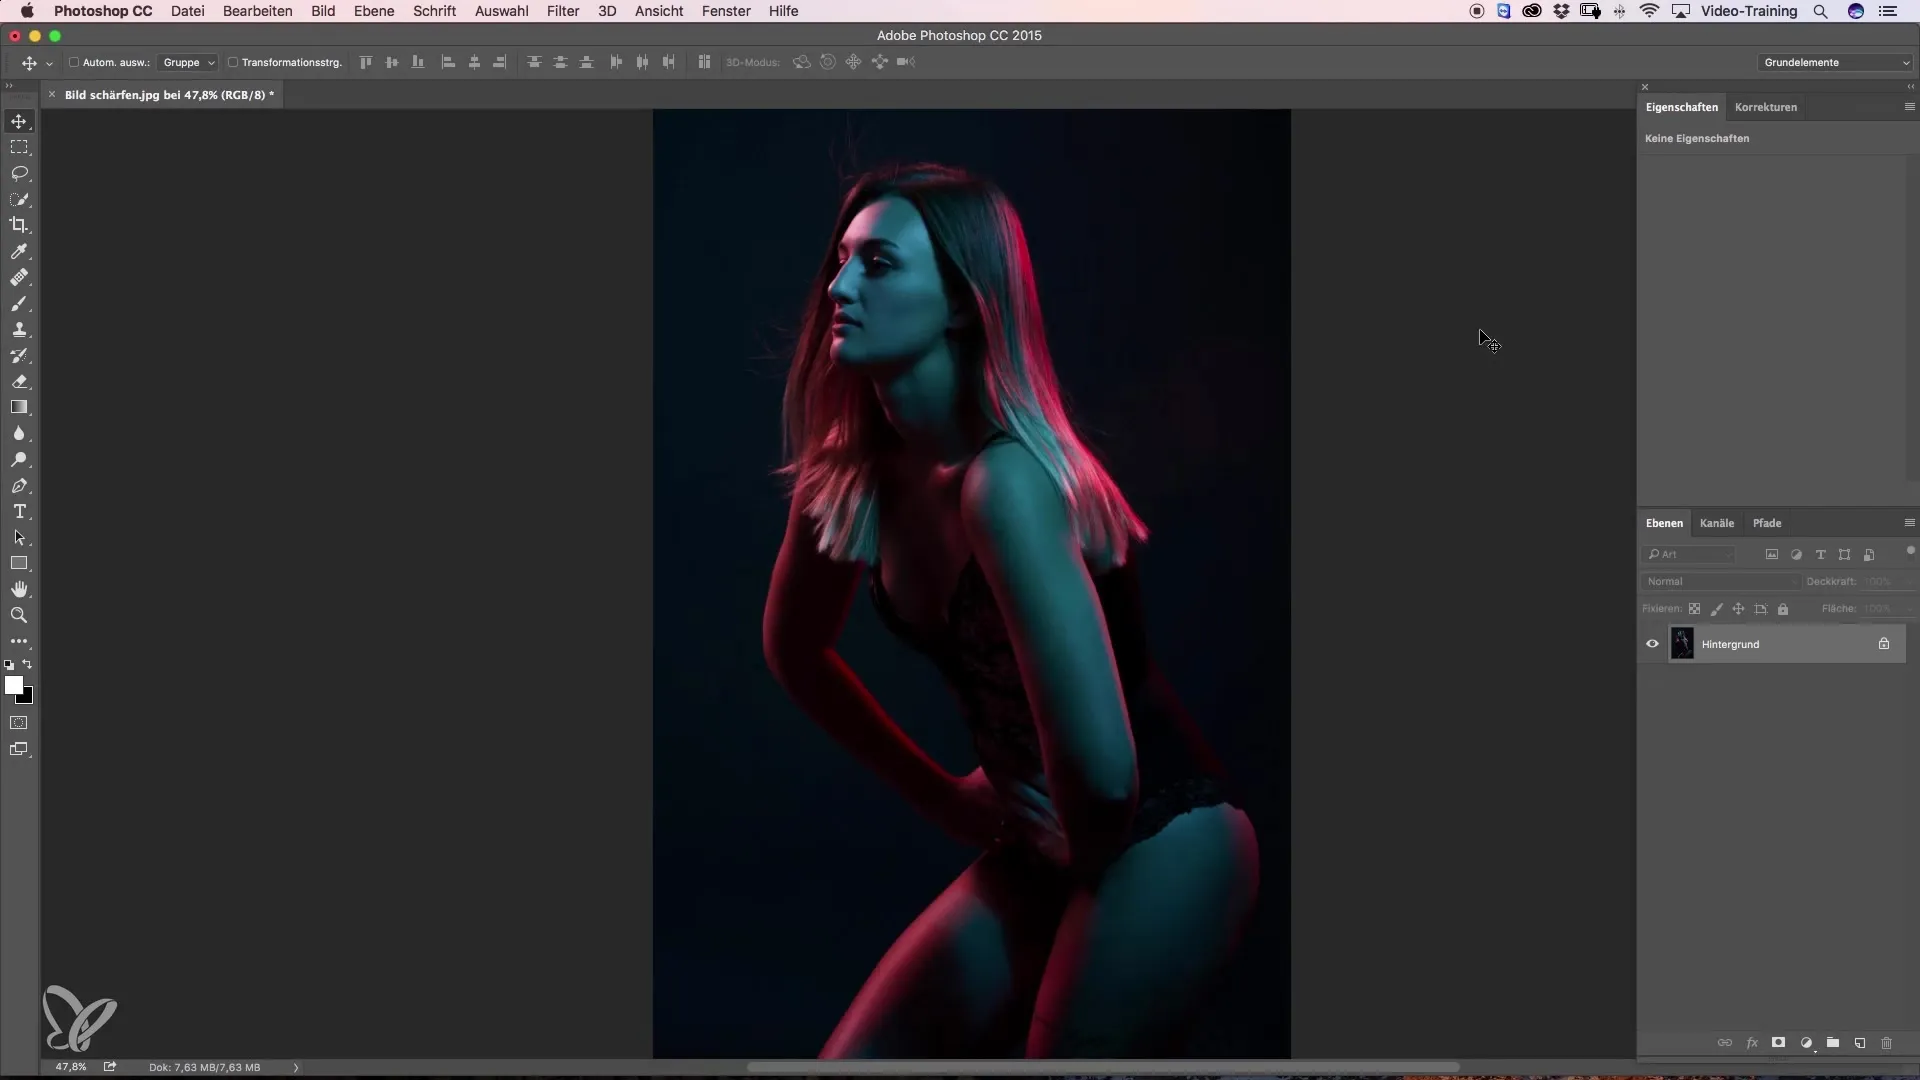
If you want to enhance your images with vibrant colors and intense highlights, you are exactly right here. In this guide, you will learn how to intensify colored highlights in brightness and saturation. Two effective methods will be presented that do not require tedious individual editing of the highlights. Let's get started right away.
Key Insights
- There are two main methods for intensifying colored highlights in images.
- Using adjustment layers allows for non-destructive editing.
- The Camera Raw Filter offers advanced control options for brightness and saturation.
Step-by-Step Guide
Step 1: First Method – Use Adjustment Layer
To apply the first method, open your image and click on the adjustment layer icon at the bottom of the panel. Then select "Hue/Saturation." Now, think about which color you want to enhance. In this case, we will focus on the reds.

Step 2: Select Reds
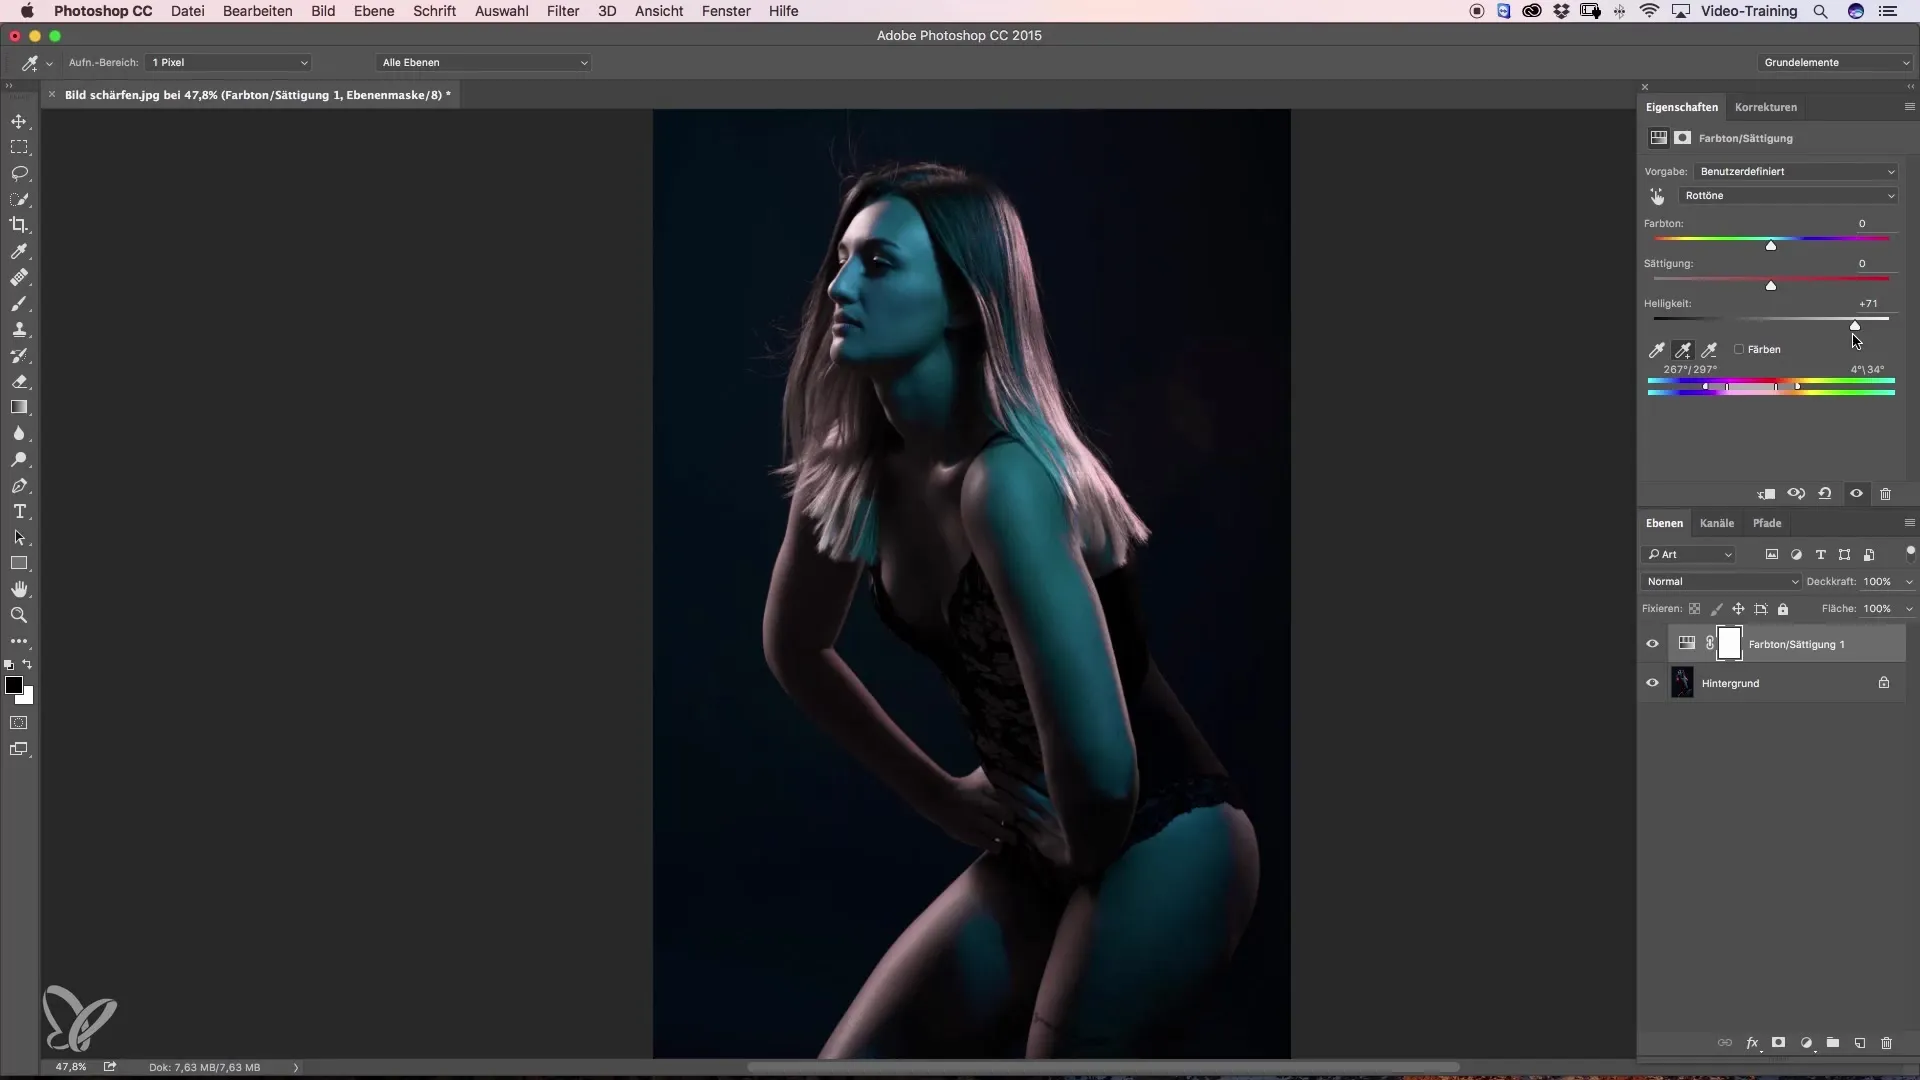
At the top of the Hue/Saturation dialog, you can click on the dropdown menu and select "Reds." Some eyedroppers will appear that allow you to select colors specifically.
Step 3: Select Base Tone
Use the first eyedropper to select a base tone of red that you want to highlight. With the second eyedropper, you can capture additional reds, for example, those that tend towards blue.
Step 4: Adjust Brightness and Saturation
Once you have selected your desired tones, you can increase the brightness by moving the brightness slider to the right. Note that the colors may appear desaturated. Therefore, saturation should also be adjusted.

Step 5: Check Visibility of Changes
Toggle the adjustment layer on and off to see the difference. You will notice that the colors are more vibrant and brighter than before.
Step 6: Second Method – Camera Raw Filter
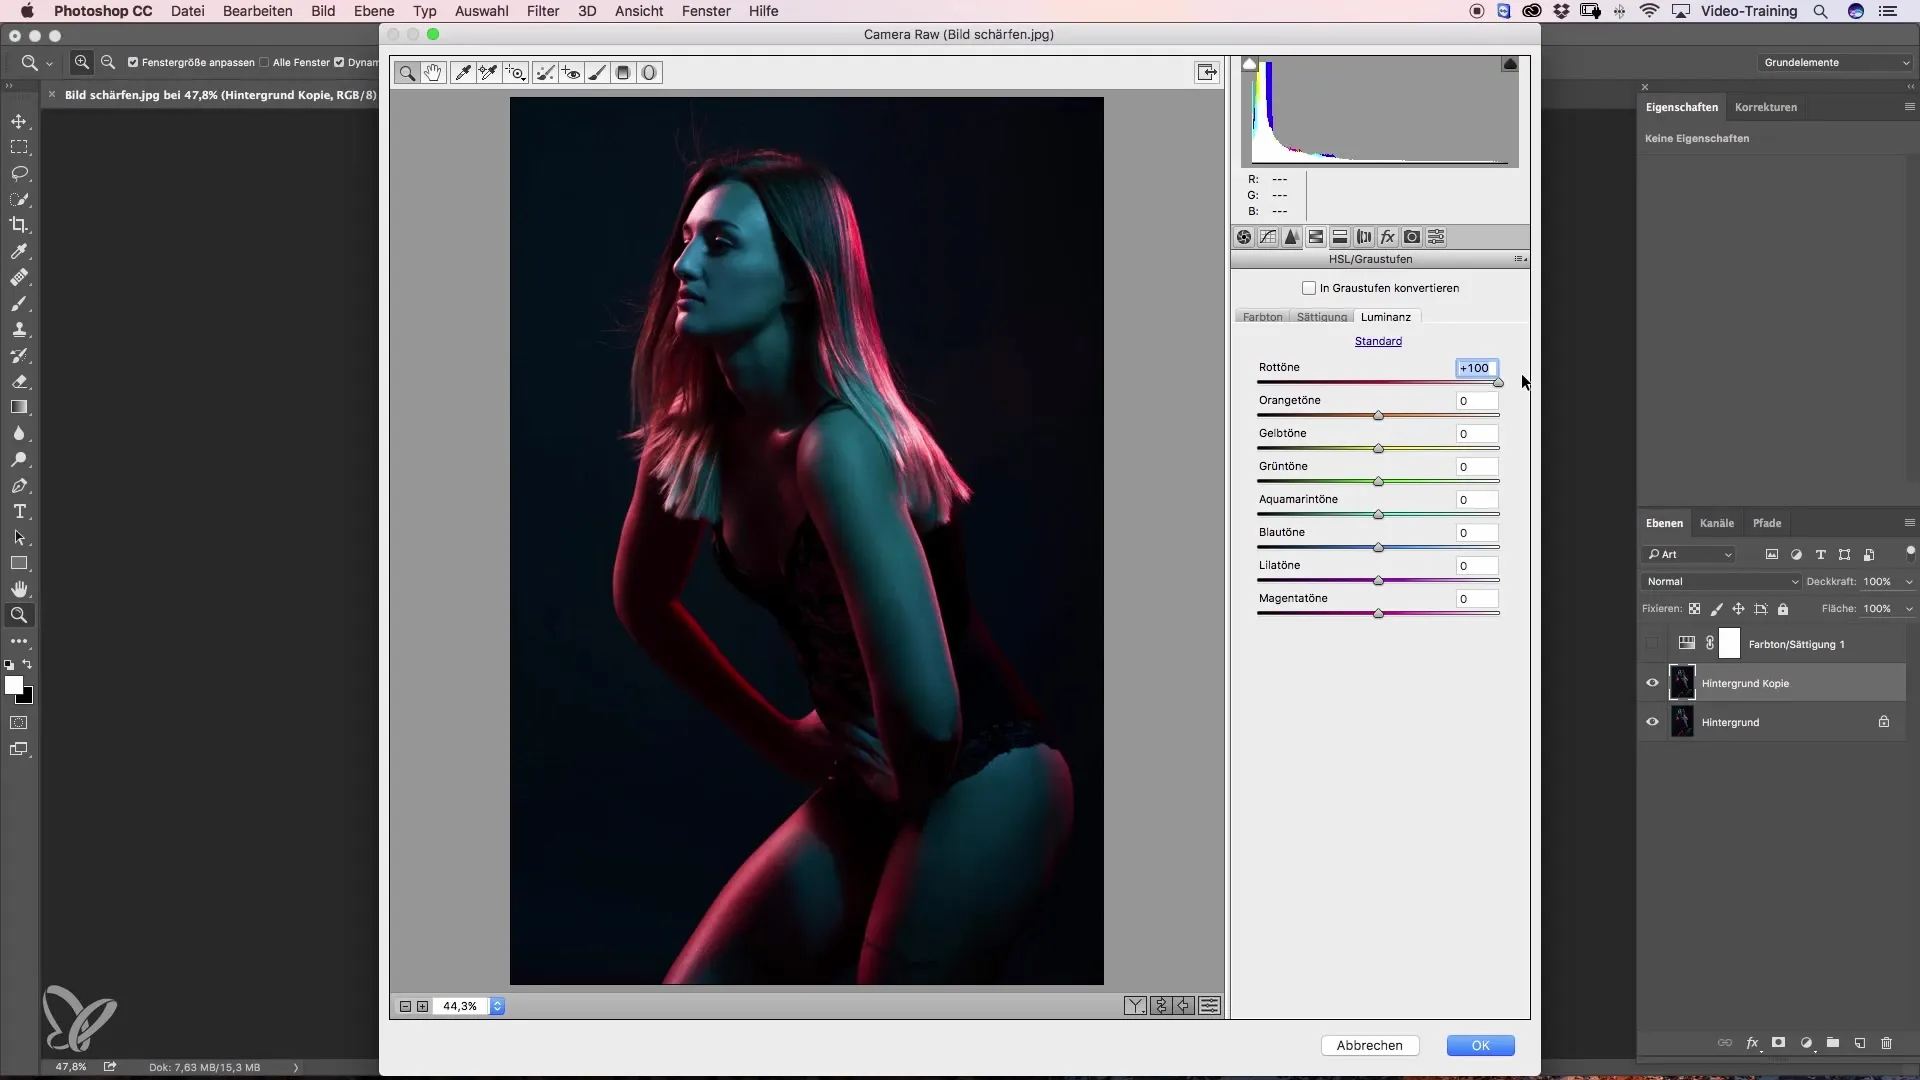
Now, let's move on to another method. Duplicate the layer by right-clicking on the layer and selecting "Duplicate Layer." Then open the Camera Raw Filter from the "Filter" menu and select "Camera Raw Filter."
Step 7: Find HSL Sliders
In the Camera Raw Filter, you will find the HSL sliders. Here you can specifically adjust the luminance and saturation of the reds. Move the red slider to the right to increase brightness.

Step 8: Adjust Other Colors
Check the magentas and oranges as well and move the corresponding sliders to achieve the desired settings.
Step 9: Confirm Changes
Click "OK" to confirm your adjustments. You can now make a direct before-and-after comparison.
Step 10: Final Adjustments and Masking
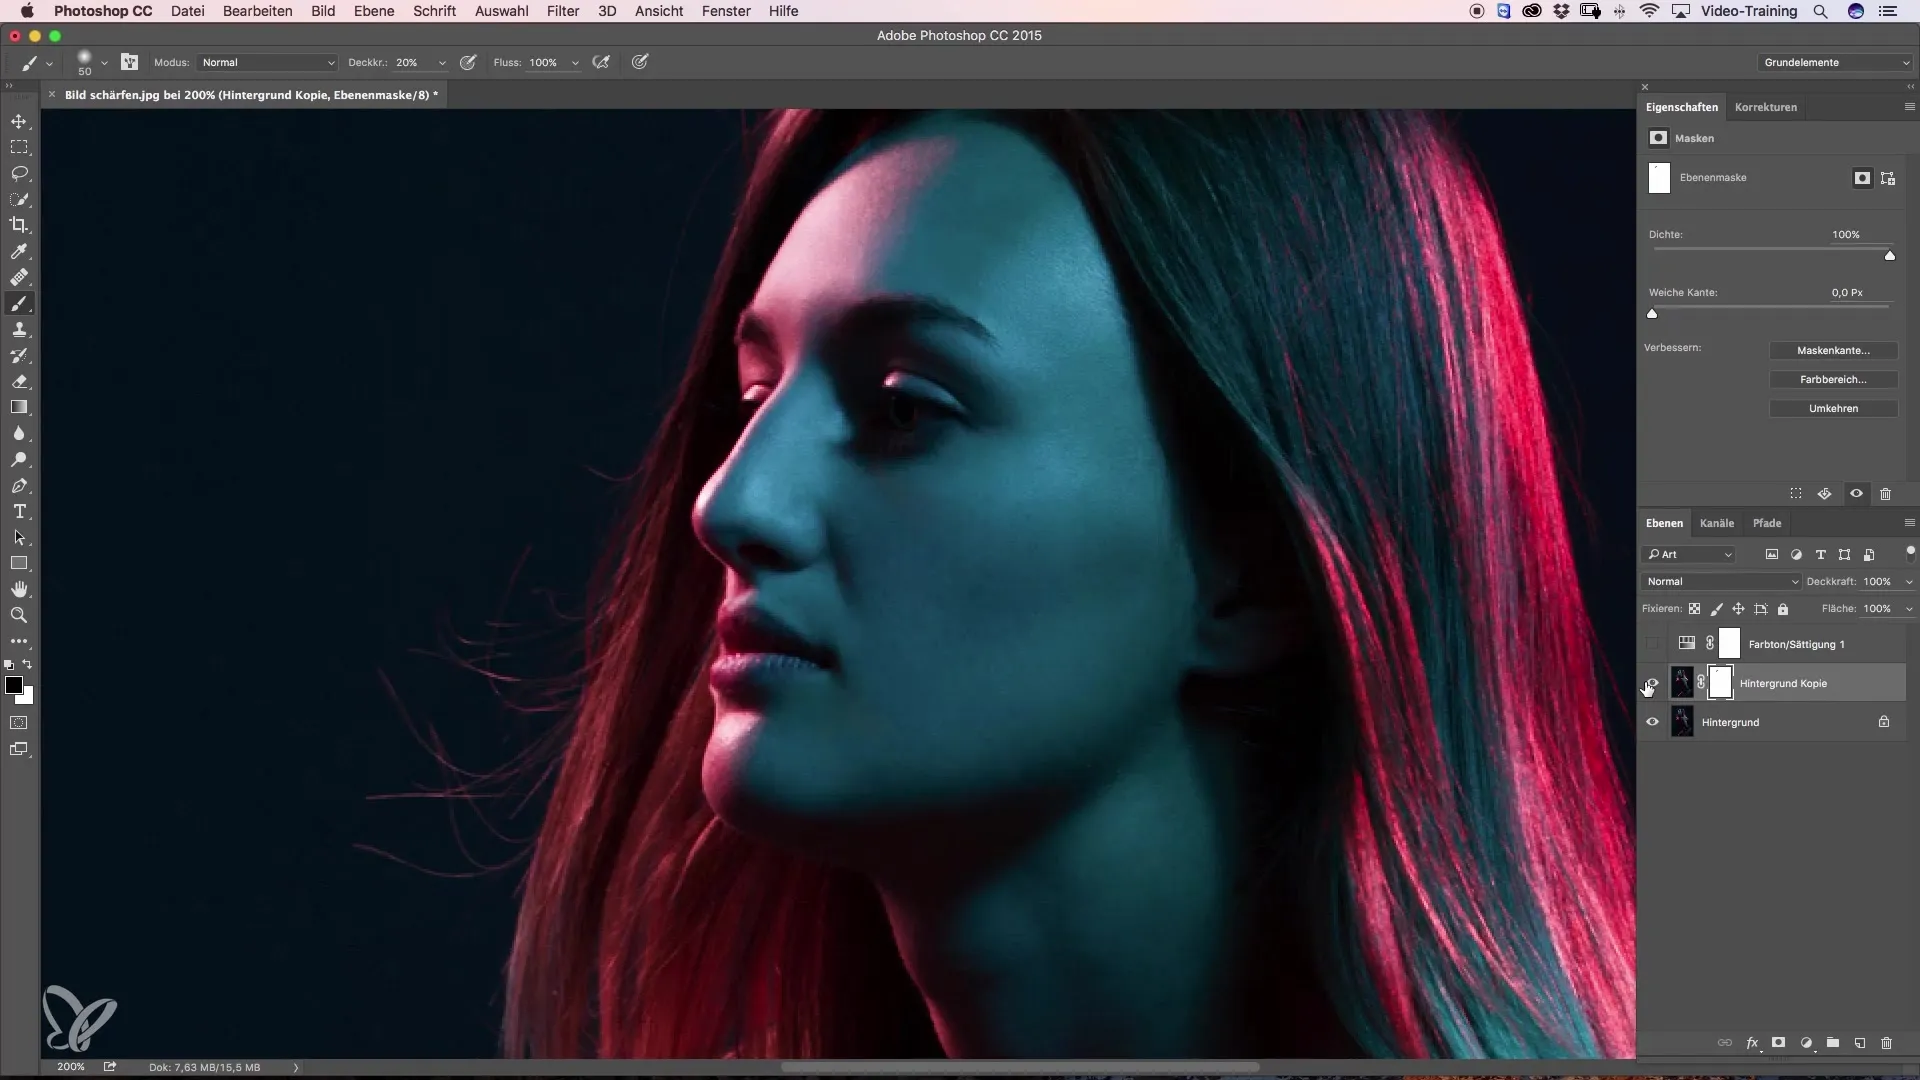
If you want to make a specific area, like the forehead, a bit more subtle, you can achieve this with a mask. Click on the mask icon, which creates a white mask. With black foreground color and a soft brush, you can carefully mask out areas.

Step 11: Save Changes
Before saving your image, make sure all adjustments meet your expectations. Note that using the Camera Raw Filter can double the file size as an additional layer is added.
Step 12: Evaluate Results
Finally, you can be proud of the more vibrant highlights in your image. Try out both methods and find out which one suits your workflow best.
Summary – Intensifying Colored Highlights
This guide has shown you how to intensify colored highlights using adjustment layers and the Camera Raw Filter. Experiment with these techniques to showcase your images optimally.
Frequently Asked Questions
What are the two methods for intensifying colored highlights?The first method involves using adjustment layers with Hue/Saturation, while the second method utilizes the Camera Raw Filter.
How can I adjust the brightness and saturation of reds?In the Hue/Saturation dialog, move the corresponding sliders to the right to intensify the reds.
What happens when I use the Camera Raw Filter?Using the Camera Raw Filter doubles the file size since an additional layer is created.
Why are the colors sometimes desaturated after an adjustment?This can happen if the brightness is increased too much. Here, you should also adjust the saturation.
Can I adjust the changes afterwards?Yes, since you are working with adjustment layers, you can make adjustments at any time without altering the original image.


